
You’re halfway through a project — maybe hanging a heavy shelf, mounting a TV bracket, or securing a metal frame to a brick wall. You have the 1/4-inch masonry screws in hand, your hammer drill ready, and then it hits you: what drill bit size do I actually need?
This is one of the most common questions in DIY and professional construction work. It may seem minor, but choosing the right drill bit size determines how strong your connection will be — too small, and the screw might break or crack the concrete; too large, and it won’t hold at all.
Understanding how masonry screws and drill bits work together is key to strong, safe installations. These screws don’t rely on anchors — instead, they cut threads directly into concrete, brick, or stone, forming a mechanical bond. That means the hole must be perfectly sized: tight enough for grip but just wide enough for the screw to fit.
In this complete guide, we’ll uncover the exact drill bit size for 1/4 masonry screws, step-by-step drilling instructions, and expert-level insights on preventing cracks, stripping, or loose fittings.
Whether you’re a contractor or a weekend DIYer, you’ll finish this article knowing exactly what bit to use, how deep to drill, and how to make your masonry work last.
Understanding Masonry Screws and How They Work
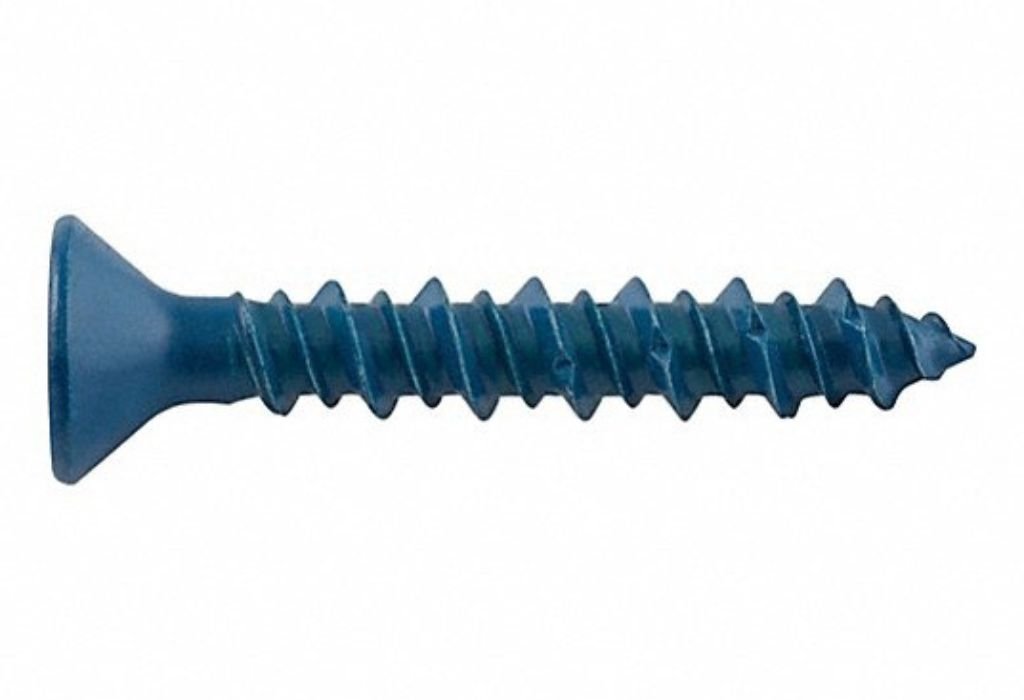
Masonry screws, also known as concrete or Tapcon screws, are hardened fasteners designed to anchor objects into dense materials like brick, block, or concrete. Unlike standard screws that rely on wall plugs or anchors, masonry screws cut their own threads directly into the hole.
They’re built for maximum holding power. The threads on these screws are high-pitch and sharp, allowing them to carve into the material as they’re driven in. Once in place, they hold firmly under vibration, weight, and stress — which is why they’re used in everything from shelving brackets to structural framing.
The strength of that hold depends entirely on the accuracy of the hole. If it’s too small, the screw may snap under torque; if it’s too large, it won’t grip properly. This is why each screw diameter requires a specific bit size.
For a 1/4-inch masonry screw, the typical bit is 3/16-inch — slightly smaller to ensure that tight, cutting fit. It’s this precision that separates a solid, lasting anchor from one that fails over time.
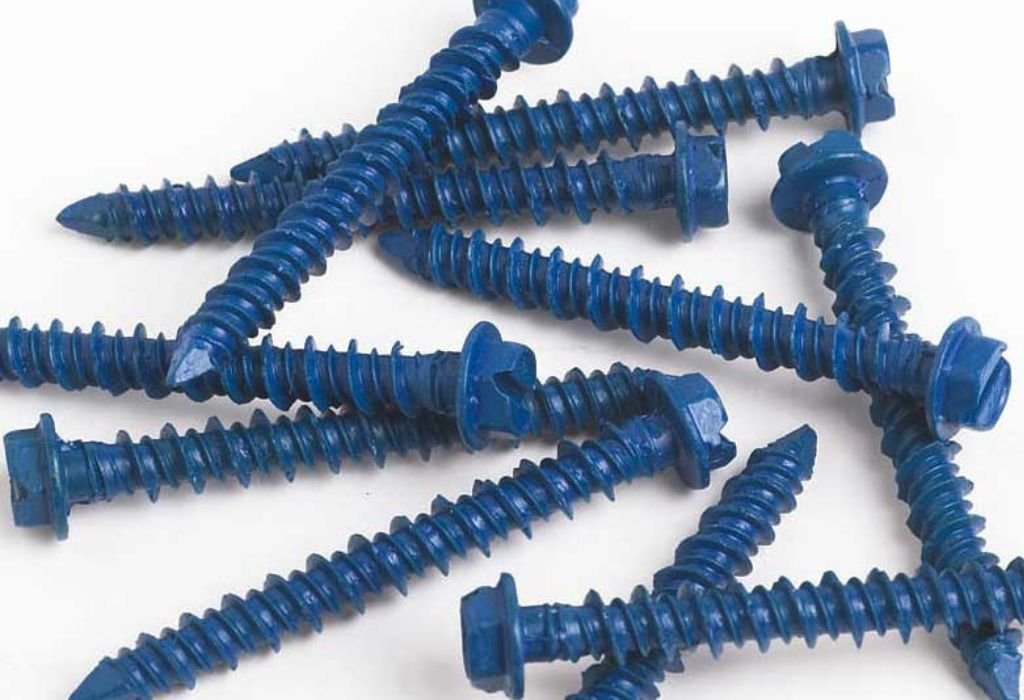
Masonry screws are used everywhere: concrete walls, brick façades, outdoor fences, or metal studs on cement floors. Their versatility makes them one of the most trusted fasteners in modern construction — as long as they’re paired with the correct drill bit.
What are masonry screws made of?
They’re made from hardened steel and often coated with blue zinc or stainless steel for corrosion resistance.
Can masonry screws be used outdoors?
Yes, especially stainless or blue-coated versions designed for weather resistance.
Do masonry screws need anchors?
No. Their threads cut directly into the material, forming their own anchor.
Can I reuse the same hole after removing a screw?
No, the original threads weaken once removed. Always drill a new hole for best strength.
What tools are needed to install masonry screws?
A hammer drill with a carbide-tipped masonry bit is essential for clean, precise holes.
What Size Drill Bit Do You Need for a 1/4 Masonry Screw?
Here’s the short answer:
For a 1/4-inch masonry screw, you’ll need a 3/16-inch carbide-tipped masonry drill bit.
This slight difference — 1/16 inch — is what ensures the screw bites tightly into the material. A perfect hole creates just enough resistance for the screw threads to carve securely into concrete or brick without slipping or cracking.
If you were to use a 1/4-inch drill bit for a 1/4-inch screw, the hole would be too loose, and the threads wouldn’t engage properly. On the other hand, going too small can cause binding, breaking, or stripping.
Different materials may need minor adjustments:
- Concrete: Use the standard 3/16-inch bit.
- Brick or Block: If softer, you can use a slightly larger bit (around 13/64-inch) to prevent splitting.
- Stone: Stick to 3/16-inch, and drill slower with cooling breaks.
Here’s a quick reference chart you can use:
| Screw Diameter | Drill Bit Size | Material Type |
| 3/16 in. | 5/32 in. bit | Concrete, brick |
| 1/4 in. | 3/16 in. bit | Concrete, stone |
| 5/16 in. | 1/4 in. bit | Heavy-duty anchor work |
Using the correct bit size isn’t just about fit — it’s about holding power, longevity, and safety.
Can I use a 1/4-inch bit for a 1/4-inch screw?
No. The screw will spin loosely, reducing holding strength significantly.
Does the drill bit size change for different materials?
Yes. Softer materials like brick may need a slightly larger hole.
How deep should I drill?
Drill at least 1/4 inch deeper than the screw’s length to allow room for dust clearance.
Can I use the same bit for multiple holes?
Yes, as long as it stays sharp and undamaged. Dull bits can overheat and create rough holes.
Why must the hole be smaller than the screw?
So the threads can cut tightly into the masonry and create strong mechanical grip.
Step-by-Step Guide: Drilling the Hole for a 1/4 Masonry Screw
- Mark your spot: Use a pencil or marker to mark the exact drilling point. Accuracy here ensures a clean finish.
- Choose your drill: Use a hammer drill equipped with a 3/16-inch carbide-tipped bit. This tool provides the necessary impact for hard materials.
- Position your drill correctly: Hold it at a perfect 90° angle to avoid slanted or oversized holes.
- Drill gradually: Start at a slower speed to create a small guide, then increase speed once the bit is stable.
- Control the depth: Drill roughly 1/4 inch deeper than the screw’s length to allow dust to settle.
- Clean the hole: Use a blower, vacuum, or brush to clear all dust before inserting the screw.
- Insert the screw: Drive it in slowly with steady torque until flush — avoid over-tightening to prevent stripping.
This simple yet precise process ensures your 1/4 masonry screw holds securely in concrete or brick. Clean holes, correct depth, and patience equal perfect results.
Can I use a regular drill instead of a hammer drill?
Only for soft materials like mortar or brick. Concrete requires hammer mode for proper drilling.
Do I need to cool the bit while drilling?
Yes, pause between holes or use light misting to prevent overheating.
How do I know when I’ve drilled deep enough?
Use tape on your bit as a depth marker to stay consistent.
Should I clean the hole before inserting the screw?
Always — leftover dust weakens the grip between screw threads and concrete.
Can I use an impact driver to install the screw?
Yes, but set it to medium torque to avoid breaking the screw.
Common Mistakes When Choosing or Using Drill Bits
Even experienced builders make small drilling errors that cause big problems later. Knowing what to avoid will save you time and materials.
The most common mistake is using a bit that matches the screw diameter. It might seem logical, but it leaves the hole too wide, resulting in loose, unstable screws. Another common error is drilling too shallow, which prevents the screw from seating properly and reduces holding power.
Using worn-out or non-carbide bits on concrete is another issue. They dull quickly, overheat, and produce rough, oversized holes. Drilling too fast or applying excessive pressure can also crack bricks or damage the screw threads.
Lastly, many people forget to clear out debris from the hole before inserting the screw. This dust acts like a cushion, preventing the screw from fully gripping the surface.
Avoiding these mistakes ensures every screw holds tightly and lasts for years — just like the professionals do it.
Why is my screw loose after installation?
You likely used the wrong drill bit size or didn’t clear dust from the hole.
Can I reuse holes for new screws?
No, once the threads are stripped, the holding strength is gone. Drill a new hole instead.
Why does my bit smoke while drilling?
You’re drilling too fast or not allowing enough cooling time.
How do I fix a hole that’s too big?
Use a larger screw size or fill the hole with epoxy before re-drilling.
Why did my screw crack the brick?
You applied too much torque or drilled too close to the edge.
Tips from Professionals for Perfect Masonry Screw Installation
Professional installers always follow a few golden rules to get flawless results every time.
First, they use only carbide-tipped or diamond bits — these stay sharp longer and resist the friction of concrete. Second, they let the drill do the work; forcing the bit increases heat and damage risk.
They also mark depth with tape or use a depth stop to ensure consistency across all holes. Inconsistent depth is one of the most common amateur mistakes.
Pros also check for rebar or embedded wire before drilling — hitting metal can destroy bits instantly. And they always test one pilot hole before drilling multiple — this confirms the bit and screw size match perfectly.
Finally, cleanup is part of the process. Professionals blow or vacuum every hole before inserting screws. A clean hole means maximum holding power. These habits might seem small, but in construction, the smallest details often make the biggest difference.
Do professionals always use hammer drills?
Yes, for concrete and stone, it’s essential for efficiency and precision.
Can I drill all holes first, then insert screws later?
Yes, but make sure holes stay clean and free of dust.
How do I know if I’ve hit rebar?
You’ll feel strong resistance and hear a metallic ping — stop immediately.
Should I pre-drill pilot holes in brick?
Yes, it prevents cracking and makes screw installation smoother.
Why use depth markers on the bit?
It ensures uniform hole depth and professional consistency.
Safety and Maintenance Tips
Safety comes first in any drilling project. Always start by wearing safety glasses, gloves, and ear protection. Masonry drilling produces dust and flying chips that can cause serious eye or skin injuries.
Before drilling, ensure your workspace is stable and clutter-free. Keep both hands on the drill and stand with a balanced stance to control torque.
To prolong your tools, take regular breaks to cool the drill and bit — overheating dulls even carbide tips. Clean your bits after use by brushing off dust and storing them upright in a dry toolbox to prevent rust.
If a bit shows cracks, wobbling, or blunt tips, replace it immediately. Working with damaged bits is unsafe and leads to poor-quality holes.
And finally, remember that precision is safer than speed — in masonry drilling, rushing always costs more time in the end.
Do I really need a dust mask?
Yes, concrete dust contains silica, which is harmful if inhaled.
Can I use oil or lubricant while drilling?
No oil — use light water misting only for cooling.
How do I know if my bit is overheating?
You’ll see smoke or discoloration on the tip — stop and cool immediately.
Can broken bits be repaired?
No, once chipped or cracked, replace them.
What’s the safest way to store bits?
Keep them in a labeled case, upright, and away from moisture.
Conclusion
In the world of construction and DIY, precision isn’t just about getting the job done — it’s about ensuring that what you build lasts. Something as small as choosing the right drill bit size for a 1/4 masonry screw can decide whether your installation holds firm for years or fails within days.
A 3/16-inch carbide-tipped masonry bit is the perfect match for 1/4-inch screws — small enough to give the screw strong grip, yet wide enough for clean thread cutting. This one simple rule separates professional-grade results from weak or unstable anchors.
When you drill with accuracy, every turn of the screw reinforces the integrity of your work. Whether you’re fixing shelves in your home or securing steel brackets in a large structure, remember that real craftsmanship lies in the details — in measuring twice, drilling once, and choosing your tools with purpose.
In the end, masonry drilling isn’t just about power — it’s about control, precision, and respect for the material you’re working with. The right bit transforms effort into excellence and turns an ordinary screw into the foundation of strength.

I’m John F. Nicholas, the founder, lead writer, and drill enthusiast behind 101drill.com. With years of hands-on experience in power tools and DIY projects, I created this platform to share practical knowledge, expert tips, and real-world insights to help others master the art of drilling.