
If you’ve ever been in the middle of a project and realized you only have a masonry drill bit on hand, you’ve probably wondered if it can work on wood. It’s a common question among DIYers and homeowners who love fixing things without running to the hardware store.
At first glance, a masonry drill bit looks strong enough to handle anything. Its tough, carbide-tipped head gives the impression that it can drill through wood just as easily as concrete or brick.
However, what seems like a good idea often leads to unexpected results. Wood reacts differently than masonry, and using the wrong bit can cause smoke, splinters, and uneven holes.
According to a 2024 DIY Tool Report, nearly 45% of beginners damage their wooden projects because they use the wrong drill bit. That means almost half of hobbyists experience cracked surfaces or burnt marks simply by guessing which bit to use.
Masonry drill bits are built to grind, not slice. While that grinding action works beautifully on stone or concrete, it tears through the fibers of wood and leaves rough, frayed holes behind.
Still, in some situations, you can make it work — especially when precision doesn’t matter or when you only need a temporary hole. By adjusting your speed, pressure, and drill settings, it’s possible to get acceptable results without causing serious damage.
In this complete guide, we’ll uncover the truth behind whether you can use a masonry drill bit on wood. You’ll learn how they differ from wood bits, when it’s okay to try, what mistakes to avoid, and the safest way to drill if you have no other option.
By the end, you’ll know exactly when a masonry bit works — and when to put it down for something better.
Understanding What a Masonry Drill Bit Is
A masonry drill bit is specifically designed to handle hard, brittle materials such as concrete, stone, or brick. Its structure is built for endurance and impact rather than sharp cutting precision.
The tip of the bit is made from tungsten carbide, one of the hardest materials used in drill manufacturing. This allows it to grind through dense surfaces by pulverizing material rather than slicing through it.
The spiral flutes along the shaft of the bit serve an important purpose. They help carry out dust and debris from the hole during drilling, keeping the workspace cleaner and preventing the bit from overheating.
When used with a hammer drill, the bit doesn’t just rotate — it also moves in and out rapidly. This hammering motion allows it to break up masonry surfaces efficiently.
However, the same mechanism that makes it so effective on concrete makes it a poor match for softer materials like wood. The blunt, heavy-duty tip tends to crush rather than cut, creating rough and splintered holes.
Understanding how a masonry drill bit works helps you see why it’s not suitable for delicate wood fibers. While it’s incredibly durable, it sacrifices finesse for power.
Knowing these differences is the first step in deciding when and how to use this bit safely across various materials.
How Masonry Drill Bits Differ from Wood Drill Bits
At a glance, all drill bits may look similar, but their purpose and design are completely different. A masonry drill bit and a wood drill bit are built for opposite drilling methods.
A wood bit has a sharp, pointed tip that cuts smoothly into wood fibers. It’s designed to slice through grain cleanly without causing splinters or burns.
Masonry bits, on the other hand, rely on blunt force and abrasion. Their carbide tips crush rather than cut, making them ideal for stone and concrete but harsh on soft materials.
Wood bits often have spurs on their sides that guide the drill into the wood, ensuring straight and accurate holes. Masonry bits lack these spurs, so they can wobble or wander when used on softer surfaces.
When you compare their flutes, you’ll also notice a difference in shape. Wood bit flutes are wider to clear large wood shavings, while masonry bit flutes are narrow, designed for fine dust.
If you use a masonry bit on wood, it doesn’t remove material efficiently. Instead, the friction builds heat, and that heat can burn or discolor the wood.
Simply put, the design differences explain why masonry bits struggle on wood. They’re engineered for crushing stone, not for precision drilling in soft surfaces.
Can You Use a Masonry Drill Bit on Wood?
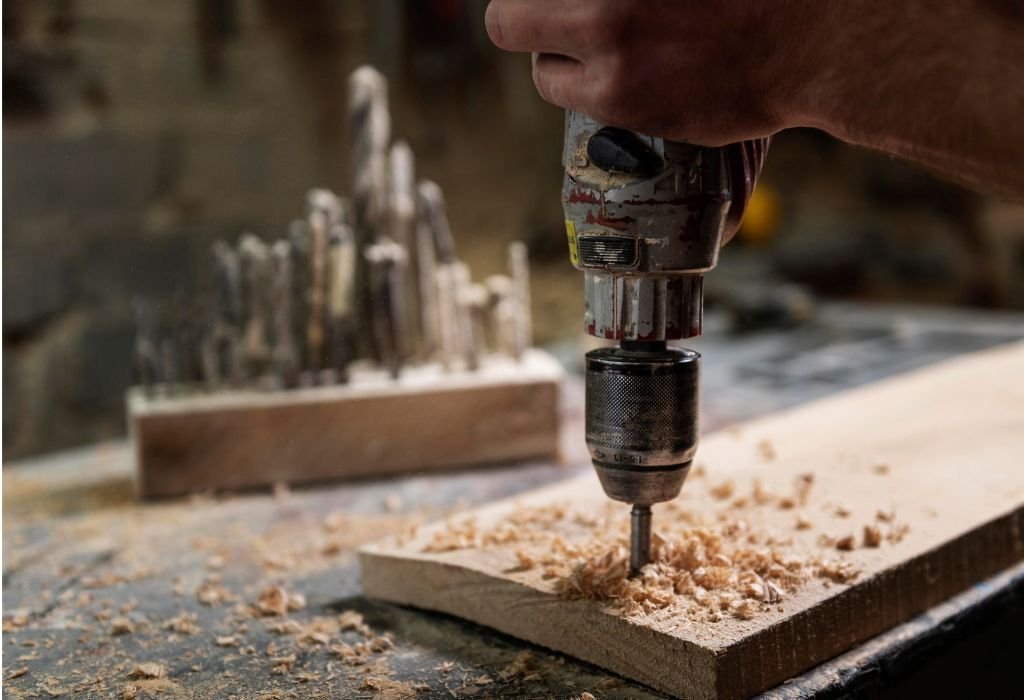
Technically, yes — a masonry drill bit can be used on wood, but it’s not the ideal choice. It will drill a hole, but the result is often messy and uneven.
Because the tip isn’t sharp enough to slice, it tends to tear wood fibers apart. This leads to splintered edges and rough holes that are unsuitable for fine woodworking.
If you only need a temporary or rough hole, such as for routing a cable or mounting a bracket, it can get the job done. However, you must drill at a slow speed and avoid hammer mode completely.
When precision matters, like when drilling pilot holes for screws or building furniture, it’s best to use a proper wood bit. A brad-point or spade bit will give you smoother, more accurate results.
The other issue is heat. Masonry bits create high friction when used on wood, leading to burnt edges or even smoke. Over time, this can also dull your bit faster than normal.
Experts agree that it’s better to match the bit to the material. You’ll get faster drilling, longer tool life, and cleaner holes by using the right equipment for the right job.
So yes, you can use a masonry bit on wood — but only when you must, and never for precision projects.
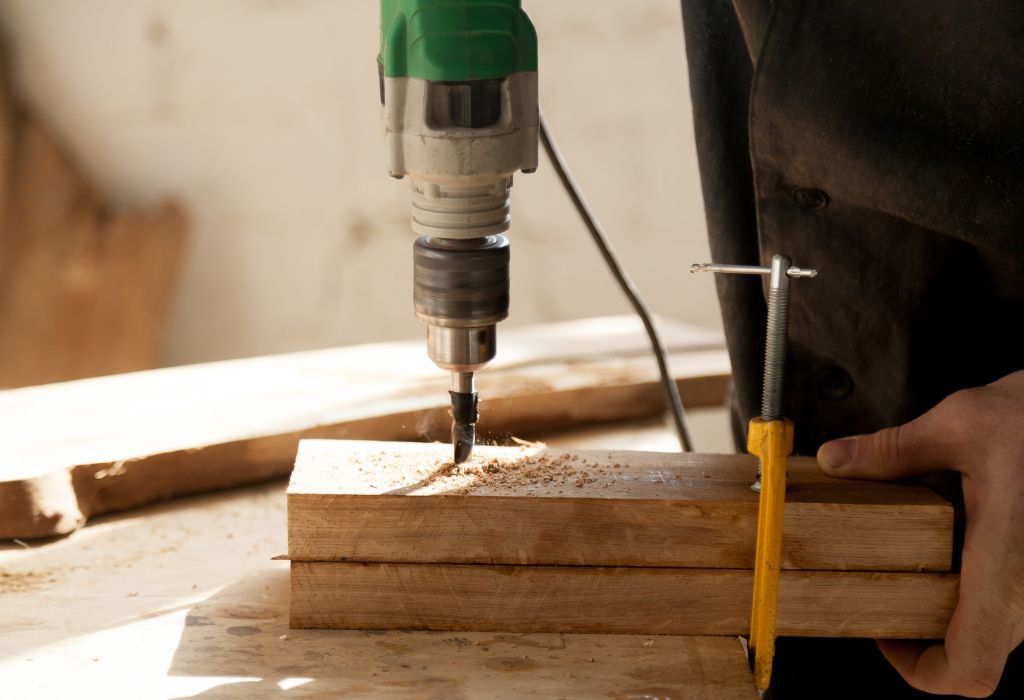
Step-by-Step Guide: If You Must Drill Wood with a Masonry Bit
Sometimes you have no choice but to work with what you have. If that’s the case, follow these careful steps to avoid damaging your wood.
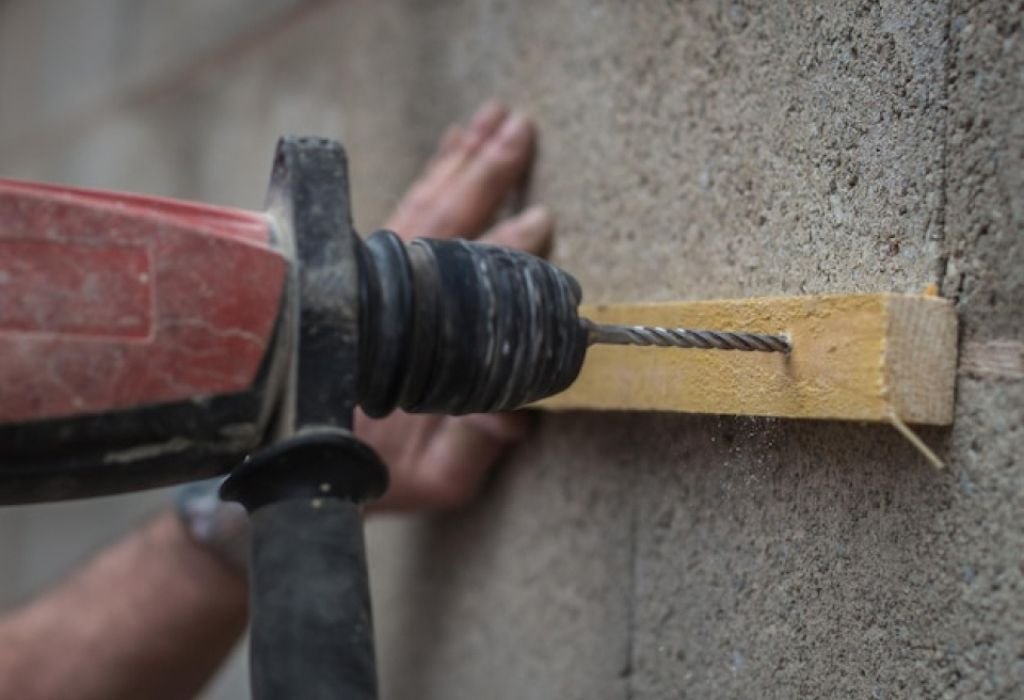
First, ensure your drill is set to rotary mode only. Hammer mode should always be off when working with wood, as it can shatter or split the surface instantly.
Mark the drilling spot with a pencil, and place masking tape over it. The tape helps minimize splintering as the bit enters the surface.
Start drilling at a low speed to help the bit grip and stay steady. Avoid pushing too hard; let the bit grind its way through naturally.
Every few seconds, pause to clear the dust from the flutes. This prevents overheating and gives you better control.
If you see smoke or smell burning, stop immediately. Allow both the bit and the wood to cool before continuing.
Once the hole is complete, gently remove the bit while it’s still rotating slightly. Clean up the hole edges with sandpaper or a small file for a smoother finish.
Even though this process works in emergencies, it’s slower and riskier. Use it only when no other bit is available.
Risks of Using a Masonry Bit on Wood
Using a masonry bit on wood carries several risks that can affect both your tool and your project. The most obvious issue is splintering, where the blunt tip tears the surface fibers instead of cutting them cleanly.
This results in holes that look rough, uneven, or oversized. For visible work, such as furniture or cabinetry, that damage can ruin the entire piece.
Another problem is overheating. The friction caused by the grinding tip generates a lot of heat, which can burn or darken the wood. In some cases, it can even leave a smoky odor.
If you push too hard, the bit can get stuck or seize, causing strain on your drill motor. This not only shortens your tool’s life but also risks breaking the bit or injuring your wrist.
Continuous use of masonry bits on wood also dulls their carbide tips. Once the tip loses its sharp edge, it becomes less effective for masonry work later.
Accuracy is another concern. Since masonry bits aren’t guided by a sharp point, they often wander when starting holes. This can throw off your alignment or make screws sit unevenly.
While none of these issues are catastrophic for a single hole, repeated misuse can cause lasting damage. That’s why proper bit selection is always worth the extra time.
When It’s Better to Use a Wood Drill Bit Instead
Wood drill bits are designed specifically for clean, precise holes. If your project requires accuracy or aesthetic quality, switching to the right bit is essential.
The brad-point bit is ideal for most general woodworking tasks. It has a sharp center tip that helps position the hole accurately and side spurs that slice through wood fibers neatly.
For larger holes, a spade bit or Forstner bit works best. They remove material efficiently and produce flat-bottomed holes without burning.
If you’re working with thick wood, an auger bit is a good choice. Its screw tip pulls the bit into the wood, allowing deep, straight holes with minimal effort.
These bits are designed to reduce friction and clear chips quickly. That’s why they stay cool and cut faster than masonry bits ever could.
Using the right drill bit doesn’t just improve the result — it protects your tools, saves time, and makes your work look professional.
So even though a masonry bit can handle wood in a pinch, investing in a proper wood bit set is a smart long-term decision.
What to Do If You’ve Already Damaged the Wood Surface
If your first attempt with a masonry bit left splinters or burn marks, don’t panic. Most surface damage can be repaired easily with a few simple steps.
Start by sanding the affected area gently. Use medium-grit sandpaper to smooth out rough edges, then finish with fine grit for a clean surface.
For deeper gouges or torn fibers, mix wood glue with sawdust from the same material. Apply it to the damaged spot and let it dry completely before sanding again.
If the hole burned or darkened, use a round file to remove the scorched layer. Lightly ream the inside until you reach clean wood again.
For visible surfaces, you can apply a touch of wood filler and paint or stain to match the surrounding finish.
Next time, clamp your wood securely and use masking tape to prevent splinters. Always test the drill on scrap wood before working on your actual project.
Learning from mistakes is part of the DIY process. A little care goes a long way in achieving professional-quality results.
Expert Tips for Using Drill Bits Efficiently
Keep all your drill bits clean and sharp after each project. Residue buildup can dull tips faster and reduce drilling performance.
Use the correct drill speed for each material. Slower speeds work best for hard materials, while wood requires faster rotation for smoother cuts.
Avoid mixing drill modes — hammer mode for masonry, rotary for wood, and low-torque for metal. Each setting is engineered for specific impact and speed.
Store your bits in a dry, organized case to prevent rust and tip damage. Label them clearly so you don’t confuse wood and masonry bits later.
If you notice excessive vibration or slow cutting, stop immediately. These are signs that your bit is dull or misaligned.
Investing in a quality bit set may seem expensive at first, but it pays off in precision, speed, and longer lifespan. Proper care makes every bit last for years.
FAQs About Masonry Drill Bits and Wood Drilling
Can a masonry bit drill through plywood?
Yes, but it leaves splinters and rough holes. Use masking tape and a slow speed for cleaner results.
Will a masonry bit ruin my wood?
If used with hammer mode or too much pressure, it can burn, tear, or splinter the surface.
Is it safe to use a hammer drill on wood?
No, hammer mode should always be off when drilling into wood. Use the standard rotation setting instead.
Can I use one drill for both wood and concrete?
Yes, but use separate drill bits for each material. Always switch to the correct bit before changing surfaces.
What happens if I use the wrong bit?
You risk damaging both the surface and the bit itself. The result is slower work and poor hole quality.
Conclusion
A masonry drill bit can technically drill into wood, but that doesn’t mean it should. It’s like using a hammer to paint a wall — possible, but far from perfect.
The blunt, grinding design of masonry bits makes them great for concrete and brick but harsh on delicate wood fibers. They cause splintering, overheating, and uneven holes that can ruin your finish.
Using the correct bit for each material ensures cleaner holes, faster drilling, and longer-lasting tools. It also keeps your projects looking professional and safe.
Think of drill bits as specialists: each one is designed for a purpose. Masonry bits are for crushing stone; wood bits are for slicing cleanly through grain.
Next time you pick up your drill, take a moment to check the bit before starting. That small decision will save your tools, your project, and your patience.
With the right bit, every hole you drill becomes a clean, confident step toward a perfect build.

I’m John F. Nicholas, the founder, lead writer, and drill enthusiast behind 101drill.com. With years of hands-on experience in power tools and DIY projects, I created this platform to share practical knowledge, expert tips, and real-world insights to help others master the art of drilling.