
You stand in front of a fresh bathroom wall, wooden towel rack in hand, drill at the ready. It looks simple—just two brackets and a few screws—but one wrong move could send it crashing down in days. The tiles, the anchors, the alignment, everything needs to be perfect.
Installing a wooden towel rack isn’t only about style. It’s about making sure it stays firm, straight, and able to bear daily use. Every towel you hang adds weight and stress that weak anchors can’t handle.
Many people rush through this task and end up with wobbly or uneven results. A strong, secure installation requires patience and precision. It’s a balance between craftsmanship and practicality.
The secret lies in drill anchors—the unsung heroes that grip the wall and keep your rack stable. They hold fast even when moisture and temperature changes test the bond. Once you master using them correctly, you’ll never fear a loose towel bar again.
This guide will take you through every detail: preparing your wall, choosing the right anchors, drilling with care, and mounting like a pro.
Understanding Why Drill Anchors Matter
Drill anchors are the foundation of stability for wall-mounted fixtures. Unlike simple screws, anchors distribute weight evenly inside the wall. They expand, grip, and lock into place, ensuring your towel rack won’t tear loose.
Bathroom environments present unique challenges—moisture, humidity, and constant movement. Wood expands and contracts, while screws can loosen over time. Anchors prevent these shifts from compromising strength.
Different walls require different anchors. Drywall, plaster, and tile each have their own ideal types. Using the wrong kind could cause early failure even if the drilling was perfect.
Anchors also protect your tiles or wall paint from cracking under stress. Instead of pulling directly on the surface, they transfer pressure deeper inside. That’s why professionals never skip them, no matter how light the fixture.
When you understand how anchors work, you approach every installation with more confidence. They turn fragile walls into secure foundations capable of supporting real weight.
Do all towel racks need drill anchors?
If you’re mounting on drywall, plaster, or tile, yes. Anchors are essential to prevent screws from slipping out. Only solid wood walls can hold screws directly without anchors.
Are plastic anchors strong enough for wooden racks?
Quality nylon anchors handle moderate weight well. For heavier racks, use metal or toggle anchors. Always check weight ratings before installation.
Can I reuse old wall anchors?
No, once removed, anchors lose grip. Use new ones each time for safety. Old anchors can spin or fail under tension.
Will anchors damage my tiles?
Not if installed properly. Use a masonry bit and apply gentle pressure. Anchors expand behind the tile, not on its surface.
How do I choose between metal and plastic anchors?
Metal anchors are stronger and ideal for humid areas. Plastic anchors are cheaper and easier to handle for light fixtures. Match anchor type to both load and wall material.
Gathering Tools and Materials
Before you start drilling, gather all necessary tools and supplies. Having everything within reach prevents rushing mid-task. It ensures each step happens smoothly and safely.
You’ll need a drill with variable speed control, masonry and wood bits, anchors, screws, and a screwdriver. A level, measuring tape, and pencil help with accurate placement. Keep a vacuum or brush nearby for dust cleanup.
If mounting on tile, use masking tape over the drill marks. This prevents the bit from slipping and scratching the surface. A towel or rag under the work area catches debris and makes cleanup easier.
Safety gear is equally important. Wear protective glasses, and use ear protection if drilling through dense material. Gloves protect your hands from sharp bits or hot screws.
A little preparation saves time later. Double-check you have anchors that fit your screws and wall thickness. The correct combination is the difference between a sturdy mount and a shaky one.
Can I use any household drill?
Yes, but variable speed control helps prevent cracking tiles. For masonry or tile, use hammer drill mode carefully. Slow speed ensures smooth progress.
Should I use special bits for ceramic tiles?
Absolutely. Carbide-tipped or diamond bits handle hard surfaces without slipping. Regular bits dull quickly and risk breaking tiles.
Can I drill through paint or wallpaper?
Yes, but remove loose or bubbled areas first. Drilling through weak material reduces adhesion. Clean surfaces improve anchor grip.
What screw length should I use?
Choose screws long enough to reach through the rack, wall, and anchor by at least half an inch. Longer screws increase holding strength.
Do I need wall plugs and anchors both?
They’re often the same thing. “Wall plug” refers to the insert itself, while “anchor” includes the whole mechanism that holds the screw in place.
Marking and Measuring for Perfect Placement
Precision is what separates professional results from guesswork. Measure carefully before drilling a single hole. Start by marking where the towel rack should go in relation to nearby fixtures.
Most towel racks look best between 48 and 52 inches above the floor. However, adjust this height based on your wall space and user comfort. Keep it centered horizontally so it aligns with mirrors or vanities.
Use a pencil to mark screw hole locations through the rack’s mounting brackets. Double-check both sides are perfectly level using a spirit level. Even slight misalignment shows instantly once the rack is installed.
Step back and visualize the placement before drilling. Make sure it clears doors, switches, and light fixtures. Adjust if necessary before committing to holes.
Once you’re satisfied, cover each mark with masking tape. The tape prevents drill bits from wandering and gives your anchors better precision. Take your time—this stage determines the entire outcome.
What if my wall isn’t perfectly straight?
Adjust rack alignment to visual level rather than following wall unevenness. Our eyes notice crooked lines more than structural inconsistencies. Use a level to maintain clean symmetry.
Can I mark using the rack directly?
Yes, but hold it firmly to avoid slipping. It’s often easier with a second person. Pencil marks are best because they’re removable.
How much spacing should there be between holes?
Use the bracket holes as your guide. Standard towel racks have 18 to 24 inches between mounting points. Never guess—always measure the actual product.
Do I need a template for marking?
Some racks include paper templates. If not, make one using cardboard. Templates save time and ensure perfect alignment.
What’s the best lighting for marking?
Natural light or a bright overhead lamp works best. Shadows can distort markings. Good lighting ensures pinpoint accuracy.
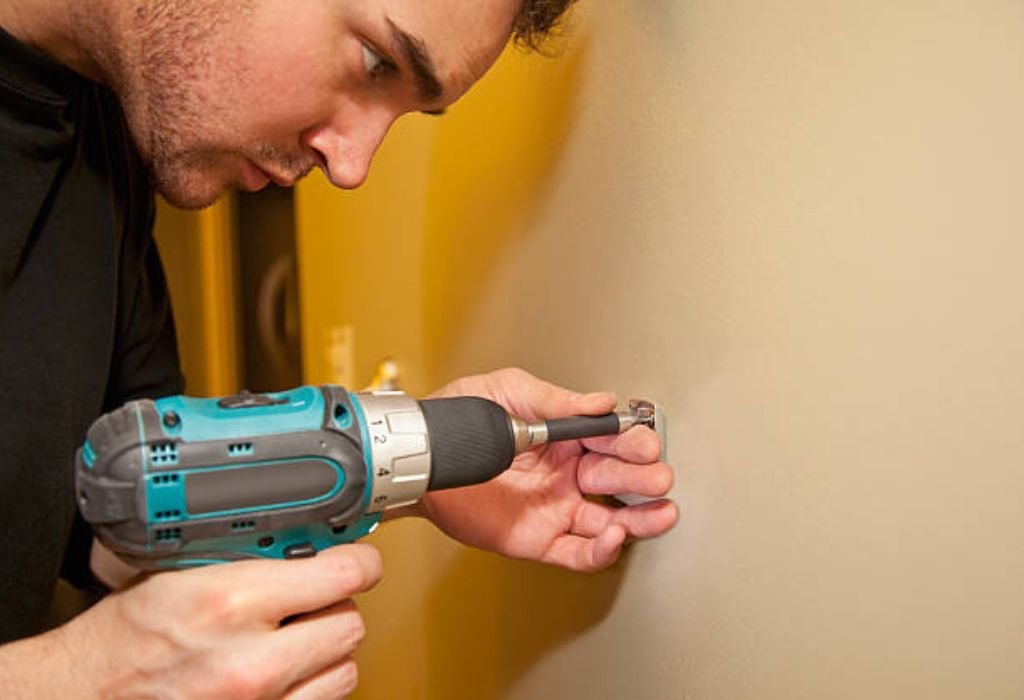
Drilling the Holes Safely and Accurately
Now comes the step that defines strength—the drilling itself. Set your drill to the appropriate mode and ensure the correct bit size for your anchor. The bit should match the anchor diameter precisely.
Start drilling at low speed to create a shallow guide. Once the bit catches, increase speed slightly while maintaining steady pressure. Keep the drill perpendicular to the wall at all times.
Avoid forcing the bit. Let it cut naturally through tile, plaster, or drywall. Too much pressure risks cracks or uneven holes. Pull out occasionally to clear dust for a cleaner cut.
After drilling to the desired depth, remove debris from the hole with a vacuum or blower. Dust can prevent the anchor from seating properly. Clean holes are the foundation of a tight fit.
Once finished, test-fit each anchor before final installation. It should slide in snugly but not loosely. If it spins freely, the hole may be too large—choose a thicker anchor.
Can I use hammer mode on tile?
Only once past the glaze layer. Begin on standard drill mode until you penetrate the tile, then switch if needed. This prevents cracking or chipping.
How deep should I drill for anchors?
Slightly deeper than the anchor’s length. This ensures full insertion and space for dust. A depth stop or tape marker on the bit helps maintain control.
What if the drill bit overheats?
Stop and let it cool. Overheating dulls the tip and risks tile damage. Dipping it briefly in water between holes helps maintain temperature.
Can I repair a hole drilled too wide?
Yes, insert a larger anchor or fill the hole with epoxy before re-drilling. Once cured, it will hold securely. Avoid leaving oversized holes empty.
Should I drill all holes before inserting anchors?
Yes, mark and drill all first to maintain symmetry. Anchors inserted early can block access or shift alignment during later drilling.
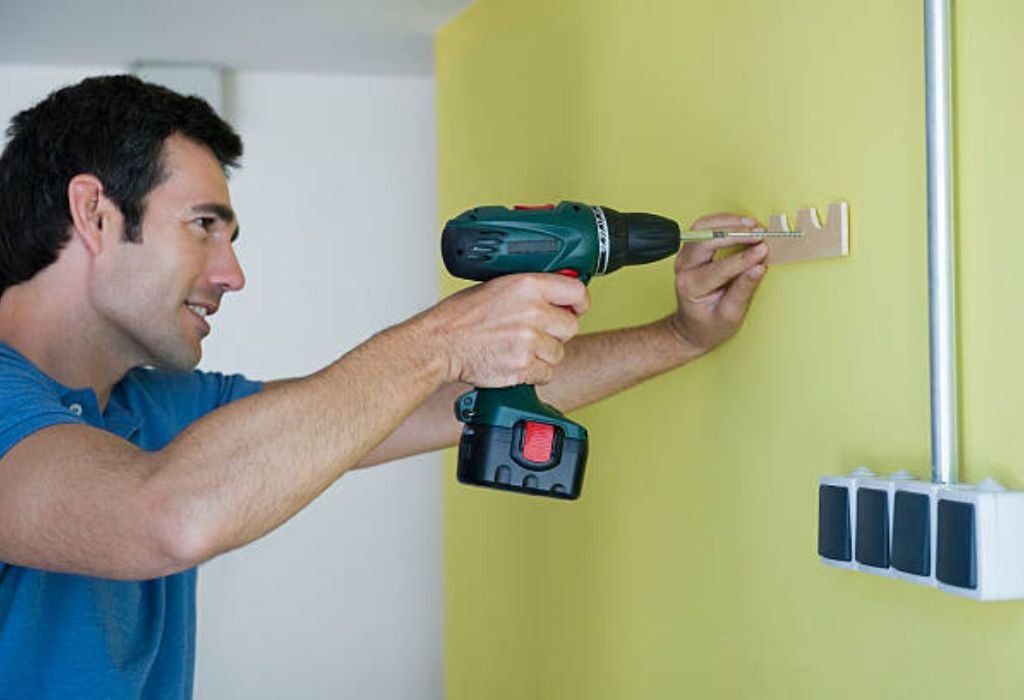
Inserting the Anchors and Mounting the Rack
After the holes are ready, gently tap anchors into place. Use a rubber mallet to avoid damaging tile or plaster. The anchor should sit flush with the surface without wobbling.
Align the wooden towel rack’s brackets with the anchor holes. Insert screws through the rack and tighten them by hand first. This ensures alignment before using the drill for final tightening.
Once all screws are positioned, use the drill at low torque to secure them fully. Stop once the rack feels firm and level. Over-tightening can strip the anchor or crack tile.
After installation, test by pulling gently on the rack. It should feel solid without movement. If it shifts, recheck the anchor placement or replace weaker ones with heavier-duty versions.
Finish by wiping the surface clean. Polished hardware and tight brackets give a professional appearance. Your towel rack is now strong enough for daily use.
Can I install anchors without a mallet?
Yes, use the handle of a screwdriver or a block of wood. Never hammer directly on the anchor; even light metal taps can crack tiles.
Should I use washers under screws?
Optional but recommended. Washers spread pressure evenly and prevent wooden racks from denting under screw heads.
How tight should screws be?
Firm but not forced. When resistance increases sharply, stop. Over-tightening can twist or shear anchor threads.
Why does my rack tilt slightly after tightening?
Anchors may not be seated evenly. Loosen screws slightly, adjust, and retighten gradually. Always recheck alignment with a level.
Can I use adhesive along with anchors?
Yes, a small amount of construction adhesive between bracket and wall increases bond strength. It also seals against moisture.
Choosing the Right Wall Type for Secure Mounting
Not every wall is created equal, and identifying yours is the first step toward success. The type of wall you’re drilling into determines the kind of anchors, bits, and screws required. Using the wrong combination leads to instability or damage over time.
Drywall, for example, is lightweight and easy to penetrate but requires expansion anchors to hold weight securely.
Concrete and brick walls, on the other hand, demand masonry bits and heavy-duty anchors to ensure long-lasting support. Tile surfaces need extra caution to avoid cracking the glaze layer during drilling.
If you’re unsure of your wall type, test it by lightly tapping the surface. A hollow sound means drywall, while a solid, dull tone indicates concrete or brick underneath. Always verify before selecting tools.
Knowing your wall composition helps you avoid unnecessary effort. Using the correct anchor type ensures your towel rack remains sturdy, even with frequent use. This preparation guarantees peace of mind every time you hang a towel.
The better you understand the wall’s behavior, the more confident your installation process becomes. Preparation is everything when it comes to lasting performance.
Selecting the Best Anchors for Wooden Towel Racks
Anchors come in many forms—plastic, metal, toggle, and sleeve varieties—and each one serves a unique purpose.
The right anchor doesn’t just hold the screw; it supports the structure through constant stress and humidity. Your choice depends entirely on wall material and expected load.
For drywall installations, plastic expansion anchors work well for light racks. Metal toggle bolts handle heavier loads, especially if multiple towels will hang from the rack. For concrete or tile walls, sleeve or wedge anchors provide unmatched durability.
Anchor length also matters. Short anchors hold less weight, while longer ones dig deeper for better grip. Always ensure the anchor’s length exceeds half the screw’s total length for maximum support.
Moisture resistance is equally important in bathrooms. Nylon or zinc-coated metal anchors resist corrosion better than plain steel. This protection prevents rust and loosening over time.
By matching anchor type, length, and material to your project, you guarantee both strength and longevity. Proper selection ensures your wooden towel rack remains firm and safe for years.
Are plastic anchors suitable for all bathroom walls?
Not always. Use them only for drywall or plaster. For concrete or tile, choose metal or masonry-specific anchors for proper hold.
Can toggle bolts damage drywall?
Only if over-tightened. Tighten just until the rack feels firm. Overtightening compresses drywall and weakens grip.
Do anchors expand automatically?
Yes, most expand as the screw tightens. The spreading pressure locks them securely behind the wall surface.
What if my anchor spins inside the hole?
That means the hole is slightly oversized. Apply a bit of adhesive or switch to a larger anchor to restore grip.
Can I mix metal and plastic anchors in the same rack?
Ideally, use the same type for balance. Mixing materials creates uneven load distribution and potential loosening.
Avoiding Common Tile Drilling Mistakes
Drilling through tile is often the most intimidating part of this process. Tiles can chip, crack, or shatter with even minor errors in pressure or speed. Mastering the right technique makes the difference between a flawless installation and a costly repair.
Always mark your holes carefully and cover them with masking tape before drilling. The tape adds friction, helping the drill bit stay centered. Start slow to break through the tile’s glaze without slipping.
Avoid using hammer mode at the beginning. Hammer action can fracture brittle ceramic surfaces instantly. Once you penetrate the tile, you can switch to a slightly higher speed or hammer setting if needed for concrete beneath.
Keep the drill bit cool at all times. Dipping it in water or misting with a spray bottle prevents heat buildup that leads to cracks. Heat weakens both tile and bit simultaneously.
Finish by clearing debris and inspecting edges for small chips. If they appear, use clear sealant to prevent water from seeping behind the tile. Patience is the secret to flawless drilling every time.
Can I drill into glass tiles the same way?
No, glass requires diamond-tipped bits and even slower speed. Apply steady, light pressure to avoid sudden fractures.
What if I crack a tile while drilling?
Replace it before mounting. Continuing with a cracked tile risks moisture leaks and structural damage over time.
Is lubrication necessary when drilling tiles?
Yes, a small amount of water cools both bit and tile. It reduces friction and prevents microfractures.
Can I fill minor chips around drill holes?
Yes, use tile repair epoxy or clear silicone sealant. Once dry, it becomes invisible and waterproof.
Should I use hammer mode for porcelain tiles?
Never. Porcelain is denser and more brittle than ceramic. Slow, steady drilling ensures clean penetration without breakage.
Enhancing Style and Functionality with Wooden Racks
Wooden towel racks are not just functional; they bring warmth and personality to bathrooms. Unlike metal or plastic alternatives, wood adds organic beauty that complements both modern and classic designs. Choosing the right finish transforms an ordinary rack into a centerpiece.
For rustic interiors, unfinished or lightly stained wood blends beautifully with neutral tiles. In contemporary settings, darker stains or matte varnishes contrast well with sleek surfaces. Custom finishes even allow color matching to cabinets or mirror frames.
Beyond aesthetics, functionality matters. Multi-bar wooden racks maximize drying space, while single-bar models keep things minimal and elegant. Foldable or extendable designs offer flexibility in smaller bathrooms.
To protect against moisture, sealing the wood is critical. Use marine-grade varnish or polyurethane for long-lasting defense. Reapply once or twice yearly for continued protection.
Adding hooks or shelves beneath the rack increases storage efficiency. These small enhancements create a spa-like atmosphere while maintaining practicality.
Can I use untreated wood for towel racks?
Only in dry areas. Untreated wood absorbs moisture quickly, leading to warping and mold growth. Always apply sealant before installation.
Is bamboo a good option for towel racks?
Yes, bamboo is naturally moisture-resistant and strong. It’s an eco-friendly choice ideal for humid environments.
How often should I refinish my wooden rack?
Once every 12 to 18 months, depending on humidity. Regular refinishing maintains appearance and prevents rot.
What kind of polish works best for wooden racks?
Beeswax-based or silicone-free wood polishes maintain natural shine. Avoid oil-based products in damp spaces.
Can wooden racks support heavy bath towels?
Yes, if mounted securely with proper anchors. Hardwood racks like oak or teak offer exceptional strength and stability.
Repairing and Replacing Towel Racks Over Time
Even with perfect installation, wear and tear occur after years of use. Regular maintenance ensures safety and keeps your bathroom looking polished. Recognizing signs of stress early prevents costly replacements later.
Loose brackets or slight wobbling mean anchors are loosening. Tighten screws gently to restore stability. If the issue persists, remove and replace the anchors completely for a renewed hold.
Rust stains or discoloration around screws indicate moisture intrusion. Remove affected hardware, clean the area, and reseal using waterproof adhesive or caulk. Preventing water damage extends the wood’s lifespan.
If the wood surface dulls or feels rough, lightly sand it and apply a fresh coat of protective finish. Regular refinishing revives color and smoothness. Wooden fixtures reward consistent care with years of reliability.
In some cases, upgrading to stronger or decorative hardware refreshes the entire bathroom’s look. Simple details like new brackets or screws make old racks feel brand new again.
Can I replace anchors without enlarging holes?
Yes, use slightly thicker anchors of the same length. If holes are too damaged, fill with epoxy and re-drill once hardened.
Why do my screws loosen over time?
Expansion and contraction from temperature changes cause gradual shifting. Retightening annually prevents loosening and ensures long-term stability.
How do I remove anchors cleanly?
Screw into them slightly and pull gently with pliers. For recessed anchors, twist counterclockwise with a screwdriver until they pop free.
Is refinishing safe on wall-mounted racks?
Yes, cover nearby walls to protect from splatter. Use quick-drying finishes to minimize downtime.
Can I recycle old wooden racks?
Absolutely. Reuse parts for small DIY shelves or hooks. Sand and stain them for creative repurposing projects.
Maximizing Safety During Installation
Safety often gets overlooked when handling small household projects. Yet even a simple towel rack installation involves sharp tools, dust, and potential hazards. Protecting yourself ensures every task ends smoothly.
Start by wearing eye protection to block flying debris from drilling. Dust particles from tile or plaster can irritate eyes quickly. Always use gloves for a firm grip and to avoid contact with sharp edges.
Check electrical wiring locations before drilling. Use a stud finder with live-wire detection to ensure you’re not puncturing a hidden conduit. Striking a wire could cause shock or short circuits.
Secure your ladder or stool if working on high walls. Unsteady footing leads to accidents more often than faulty tools. Keep both hands steady when handling drills.
Work slowly, pausing between holes to let tools cool. Overheating bits or rushing movements increases the chance of slips. Patience and caution ensure precise results and prevent injuries.
Should I turn off bathroom power before drilling?
Yes, especially if unsure about wiring paths. It eliminates the risk of accidental shock. Safety first in any drilling operation.
Can drills overheat easily in tile work?
Yes, friction generates heat rapidly. Take breaks, use water cooling, and never force progress. Proper cooling prevents tool burnout.
What shoes are best for bathroom projects?
Closed, non-slip footwear is ideal. Bathrooms can be slippery, and protective shoes prevent falls or stubbed toes.
Should I work alone on installations?
Having a helper improves accuracy and safety. One person can steady the rack or manage tools while the other drills.
Can I drill with wet hands?
Never. Moisture increases electrical risk. Always dry your hands and the drill completely before operating.
Finishing Touches and Long-Term Maintenance
Once your towel rack is up, focus on finishing and upkeep. Apply a thin bead of silicone around anchor points if they’re exposed. This seals moisture out, extending both anchor and wood life.
Wipe the wooden surface with a damp cloth to remove dust or adhesive residue. Avoid soaking it—too much moisture warps natural wood over time. A light polish maintains its warmth and shine.
Regularly inspect screws and brackets every few months. Bathroom humidity can gradually loosen them. Tighten as needed to preserve strength and stability.
If your rack is above a heater or vent, check more frequently. Constant temperature changes cause slight expansion that weakens fastenings. Keeping the area dry ensures long-term reliability.
Small preventive steps make all the difference. A properly installed wooden towel rack can last for decades with minimal maintenance.
Can wooden racks handle wet towels daily?
Yes, if properly sealed. Applying wood finish or varnish protects against moisture absorption. Reapply annually for maximum lifespan.
Is it safe to install on freshly painted walls?
Wait at least 48 hours after painting. Fresh paint softens under pressure and reduces adhesive grip. Let it cure before mounting.
How do I clean screws that rust over time?
Replace them with stainless steel or brass screws. These resist corrosion in humid conditions. Always dry the area after showers.
Can I move the rack later?
Yes, fill old holes with spackle or wall putty before repainting. Use fresh anchors for the new position. Never reuse old ones.
Why does my rack make creaking sounds?
Slight movement between wood and screw can cause it. Tighten gradually, or apply wax under brackets to reduce friction noise.
Conclusion
Installing a wooden towel rack with drill anchors combines artistry and engineering. Every detail—from drilling straight holes to securing anchors evenly—decides whether it lasts a year or a lifetime.
Anchors may be hidden, but they carry the weight of your craftsmanship. Their quiet strength keeps everything balanced, safe, and elegant.
Patience and precision always reward you with flawless results. Measure twice, drill once, and tighten just enough for perfection. When done correctly, your towel rack becomes a permanent part of your bathroom’s character.
Every time you hang a towel, you’ll feel that subtle pride of work well done—a small everyday success born from accuracy and care.

I’m John F. Nicholas, the founder, lead writer, and drill enthusiast behind 101drill.com. With years of hands-on experience in power tools and DIY projects, I created this platform to share practical knowledge, expert tips, and real-world insights to help others master the art of drilling.