
You finish building a beautiful wooden frame or shelf and proudly lift it to the wall. The color looks perfect, the finish shines, but when you hang it, something’s off — it tilts or slips slightly out of alignment. You take it down and realize the hole on the back isn’t centered or deep enough.
This small but frustrating issue happens to beginners and pros alike. Drilling a hanging hole in wood may sound simple, but getting it perfectly aligned, clean, and balanced takes skill.
The size, depth, and placement of the hole decide whether your piece hangs straight or leans awkwardly.
A hanging hole that’s too wide loosens easily, while one too shallow won’t grip the screw head. Sometimes the wrong bit type or drilling angle even splits the wood near the edge. That’s why understanding the right technique saves both your project and your patience.
According to woodworking experts, over 60% of wall-mounted projects fail to align correctly due to poor hole positioning. Learning the method once ensures that every clock, signboard, or frame you hang looks level and professional.
This detailed guide will walk you through every step — from selecting tools and marking placement to drilling and finishing — so your hanging holes turn out perfect every time.
Understanding Hanging Holes and Their Purpose
A hanging hole is a small recessed opening drilled into the back of a wooden piece to allow it to hang securely on a wall screw or nail.
Unlike simple through-holes, these are usually tapered or keyhole-shaped for stability. They let the item sit flush against the wall without protruding hardware.
You’ll find hanging holes on clocks, cutting boards, picture frames, wall shelves, plaques, and tool organizers. Each design uses a slightly different hole type depending on weight and balance. Understanding these variations helps you pick the best one for your project.
Light objects can use a simple round hole. Heavy or valuable pieces often need keyhole slots or metal hanging plates for added safety. Matching the hole design to the object’s weight prevents slipping and damage.
The wood type also matters. Softwoods are easier to drill but may wear over time around the hole edges. Hardwoods hold shape longer but require sharper bits and slower speeds.
The goal is always the same — a clean, centered hole that grips the screw head firmly and keeps the item perfectly level.
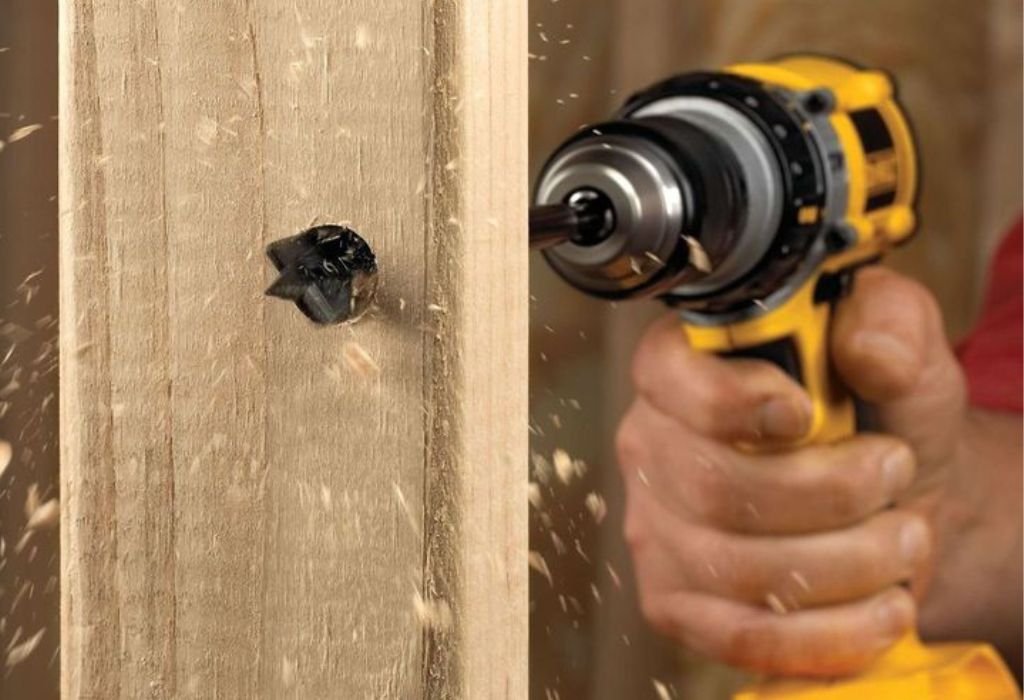
Choosing the Right Drill and Bit for Hanging Holes
The best drill for this job is one with variable speed control and good balance. Cordless models offer flexibility, while corded ones provide consistent power for deep holes or hardwoods. Choose whichever suits your workspace and comfort.
For the bit, selection depends on the hole type. For simple round hanging holes, use brad-point bits for clean entry and minimal wandering. For recessed keyhole slots, a keyhole router bit or Forstner bit paired with a straight bit works best.
Brad-point bits have a sharp center tip that anchors instantly, preventing slipping on polished or finished wood. Forstner bits create flat-bottomed recesses ideal for hanging hardware or screw heads.
Avoid spade bits for this task unless the back will not be visible, as they leave rough surfaces. If you must use them, lower the drill speed and support the back with scrap wood.
Always inspect your bits for sharpness and damage before starting. A dull bit burns the wood surface and causes irregular holes that compromise alignment.
Marking and Measuring the Hole Position
Accurate marking is the foundation of a perfectly centered hanging hole. Begin by measuring the total width and height of your piece. Use a ruler or tape measure to locate the exact horizontal center. Mark this with a pencil line.
For most wall-mounted objects, place the hole slightly below the top edge — around 15–25 mm — to maintain balance and avoid cracking the thinner edge area. If the piece is heavy, use two evenly spaced holes to distribute weight.
Draw light cross-lines at your chosen positions. These will guide your drilling alignment. A small indentation made with an awl or nail punch helps the bit grip instantly.
If you’re creating a keyhole-style recess, mark the vertical length of the slot clearly. The narrow top section holds the screw head, while the wider lower part allows easy mounting.
Double-check measurements before drilling. Even a few millimeters off-center can make your wall piece tilt noticeably. Accuracy at this stage saves you time and rework later.
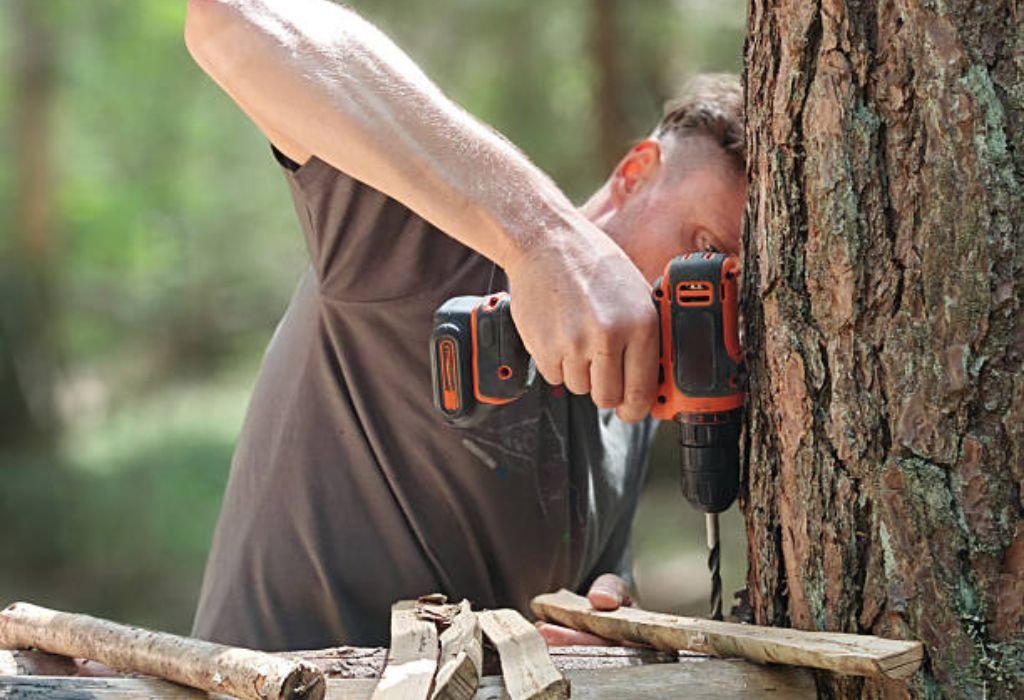
Preparing the Wood for Drilling
Before you begin drilling, secure the wooden piece firmly on a flat workbench. Use clamps with soft padding or cloth underneath to prevent marring the surface. Stability is crucial for maintaining straight, vibration-free drilling.
Clean the surface of dust or finish residue. Any slick layer can make the bit slip, especially on varnished or painted wood. Wipe the area with a dry cloth.
If your project involves a finished back, cover the spot with masking tape before marking. This reduces splintering and helps you see pencil lines more clearly.
Choose a backing board to place underneath if you’re drilling completely through. It supports the wood fibers at the exit point and prevents tear-out.
Finally, adjust the drill torque to a medium setting. Too much torque digs aggressively, while too little causes hesitation and uneven holes. Preparing properly ensures the cleanest, most professional results.
Step-by-Step Process for Drilling Hanging Holes
- Mark the Spot: Confirm your measurements and lightly punch a small guide dent at the center.
- Choose the Bit: Select a brad-point or Forstner bit depending on whether you’re making a shallow recess or full-depth hole.
- Align the Drill: Hold the drill perpendicular to the surface. Check from the side and top to maintain perfect alignment.
- Start Slowly: Begin drilling at low speed so the tip bites into the surface cleanly. Gradually increase speed once stable.
- Maintain Pressure: Apply steady, light pressure. Let the drill cut naturally without forcing.
- Control Depth: For simple holes, stop once the bit penetrates about 5–7 mm. For keyholes, drill deeper to create a recess for the screw head.
- Clean the Hole: Withdraw the bit slowly, clear dust, and inspect the shape.
Repeat the process for additional holes if needed. Consistency in spacing and depth ensures balanced hanging later.
Creating Keyhole-Style Hanging Holes
A keyhole slot allows a wood piece to slide onto a screw head and lock securely. It’s perfect for picture frames, clocks, or plaques that must sit flush against the wall.
To make one, start by drilling a round recess using a Forstner bit. This larger circle becomes the bottom of the slot where the screw head rests. Stop drilling once you reach 5–6 mm depth.
Next, switch to a smaller straight bit or router attachment to cut a short, narrow channel upward from the circle. This channel lets the screw neck slide in and hold the piece tight.
Work slowly and keep both the recess and channel aligned vertically. Misalignment makes hanging difficult later.
After cutting, sand the edges lightly to remove any ridges or fibers. The screw should slide smoothly but fit snugly without wobbling.
Keyhole slots add professionalism and convenience — they hide hardware completely while ensuring a secure mount.
How to Drill Through-Holes for Hanging with Rope or Wire
Some projects, such as wooden signs or boards, hang from rope or metal wire rather than screws. In these cases, through-holes near the top edge work perfectly.
Measure equal distances from each side, ensuring both holes align horizontally. Symmetry keeps the hanging piece level.
Use a brad-point or twist bit slightly larger than the rope or wire diameter. For example, if using a 6 mm cord, choose a 7 mm bit for smooth passage.
Place scrap wood behind the board before drilling to prevent splintering at the exit point. Drill slowly and withdraw the bit halfway through to clear debris.
After drilling, sand both sides of the holes to remove rough edges that could fray the rope. You can also apply a small coat of varnish or wax for a polished finish.
If your design is decorative, consider drilling the holes at a slight outward angle so the rope hangs naturally without rubbing against the wood surface.
These simple details transform a plain board into a stylish hanging display that’s both durable and eye-catching.
Preventing Splintering and Cracks Near Edges
Hanging holes are often close to the top edge of the wood, making the area prone to cracks. Preventing this damage requires both careful technique and proper support.
Never drill closer than 12–15 mm from the edge unless the piece is thick and sturdy. Too close, and the pressure can split the grain.
Use sharp, clean bits and moderate drill speed. Dull bits tear the fibers instead of cutting them, which leads to splintering.
Apply masking tape over the drilling spot to hold the fibers together during entry. For delicate veneers or laminated boards, tape both sides.
If you must drill near an edge, support the back with another block of wood pressed tightly against it. This counters splitting force.
Finally, avoid drilling at high torque in hard woods. Instead, let the bit cut gradually. Clean holes protect the structure and maintain strength around the hanging area.
Sanding and Finishing Hanging Holes
After drilling, rough fibers or small ridges often remain around the hole. Use fine-grit sandpaper (180–220) to smooth the surface without enlarging the hole. Work in gentle circular motions.
For recessed or keyhole slots, wrap sandpaper around a pencil or dowel for easier access. Focus on the entry and exit edges where splinters are most visible.
Vacuum or brush away sawdust before applying any finish. Dust trapped inside holes can mix with paint or varnish and cause uneven texture.
If the piece is visible on both sides, apply a small amount of wood sealer or finish inside the hole for consistency. This also prevents moisture absorption that could warp the wood over time.
For projects using ropes or wires, apply a thin layer of wax or mineral oil inside the hole. It reduces friction and protects the fibers from wear.
A well-finished hanging hole doesn’t just look neat — it extends the life and stability of your wall-mounted piece.
Advanced Tips for Centering and Alignment
Perfect alignment separates professional work from guesswork. To ensure flawless centering, measure the width and height of your piece and divide each by two. Mark the midpoint precisely with a fine pencil.
If drilling multiple holes, use a marking gauge or template to keep spacing consistent. Templates are especially useful for production work or sets of identical pieces.
When aligning two holes for rope hanging, measure not only the distance from each edge but also the distance from the top. Both holes must match exactly to avoid tilting.
For long boards or uneven surfaces, use a level to confirm markings are parallel. Even small deviations appear noticeable when hung.
Before drilling, place the piece against the wall and visually confirm how it will hang. This simple preview helps you catch mistakes early.
Marking and alignment take only a few minutes but determine how professional your finished project looks.
Common Mistakes When Drilling Hanging Holes
The most common mistake is drilling too close to the edge. This weakens the area and causes cracks under load. Always leave a safe margin.
Another frequent issue is using an oversized bit. Holes that are too wide lead to wobbling and misalignment on the wall. Match bit size precisely to screw or rope diameter.
Drilling too fast also causes trouble. High RPM burns the wood surface, leaving blackened edges. Slow, steady drilling keeps holes clean and smooth.
Failing to support the backside results in tear-out. Always use a backing board to protect the finish, especially for decorative pieces.
Inconsistent hole depth or spacing causes crooked hanging. Measure twice and use a depth stop or tape marker to stay uniform.
Avoid these mistakes, and your hanging holes will look sharp and professional every time.
FAQ: Expert Fixes and Secrets for Perfect Hanging Holes
Why does my hanging hole end up off-center?
You probably skipped measuring or started drilling without a center punch. Always mark the midpoint clearly before drilling.
What’s the best bit for making hanging holes?
For simple holes, brad-point bits are best. For recessed or keyhole types, use Forstner bits or keyhole router bits.
How deep should I drill for a wall-mount screw?
Around 5–7 mm deep for the recess, enough for the screw head to sit securely without breaking through the front.
Can I drill hanging holes after finishing the wood?
Yes, but cover the area with masking tape to avoid chipping the finish. Drill slowly with a sharp bit.
How do I fix a hanging hole that’s too large?
Fill it with a wood dowel glued in place. Once dry, sand it flush and re-drill at the correct size.
Can I use metal bits for wood hanging holes?
You can, but results are rough. Wood bits cut cleaner and reduce splintering, especially near edges.
What’s the easiest way to drill multiple identical holes?
Use a drilling jig or template. It maintains uniform spacing and depth across all pieces.
Conclusion
Drilling a hanging hole in wood isn’t just about making a space for a screw — it’s about ensuring balance, strength, and beauty in your finished piece. Every millimeter of placement and depth matters when your work is on display.
With the right bit, careful marking, and patient drilling, your holes will always align perfectly. Supporting the backside, controlling speed, and finishing cleanly turn an ordinary task into a sign of craftsmanship.
Remember to plan, measure, and test before committing to the drill. Those small steps guarantee that your wall-mounted projects — from frames to cutting boards — hang straight, secure, and elegant.
Woodworking rewards patience and precision. Master these techniques, and every hole you drill will hold not just your project, but your pride as well.

I’m John F. Nicholas, the founder, lead writer, and drill enthusiast behind 101drill.com. With years of hands-on experience in power tools and DIY projects, I created this platform to share practical knowledge, expert tips, and real-world insights to help others master the art of drilling.