
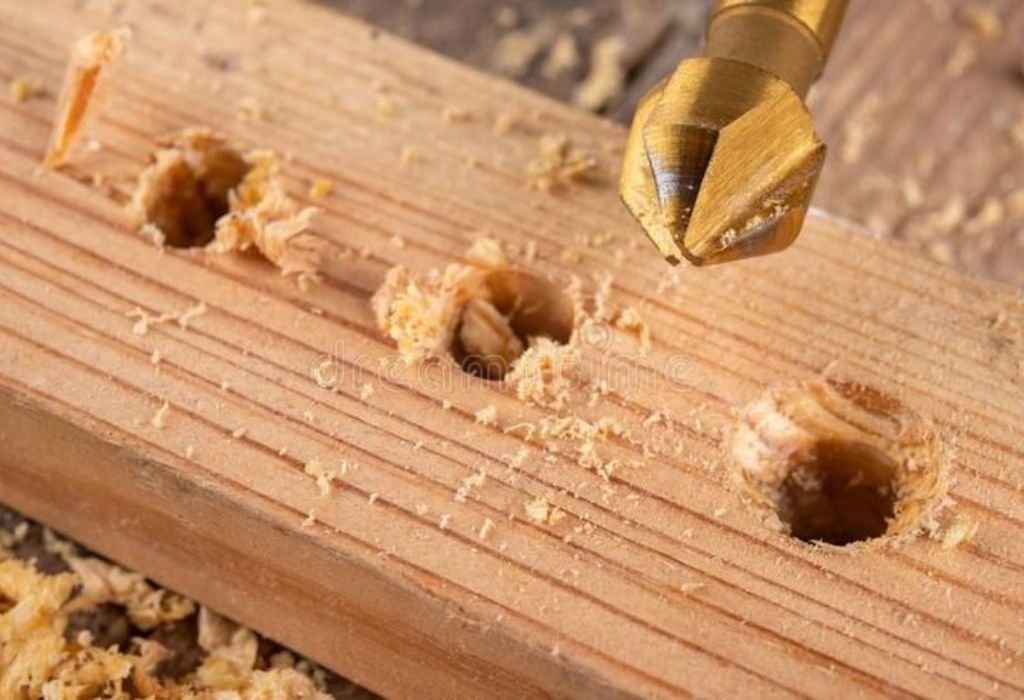
You’re in the middle of a DIY project and realize you need to make a hole in a piece of wood — but your drill is broken, the batteries are dead, or maybe you don’t even own one.
You look at the plank, think for a moment, and wonder, “Is it even possible without a drill?” The truth is yes, it’s absolutely possible, and there are several smart ways to do it.
Before the invention of power tools, craftsmen made holes in wood using nothing but hand tools, heat, and patience. Every carpenter in history drilled, burned, carved, or chiseled holes long before modern drills existed.
Understanding those old-school techniques not only saves you in emergencies but also helps you appreciate traditional woodworking skills.
These methods might take a bit more effort, but they produce surprisingly clean results. Whether you’re making a hole for hanging, inserting a rope, or fitting a dowel, you can still achieve professional results without electricity.
In this guide, you’ll learn multiple ways to make holes in wood using tools like nails, awls, knives, chisels, and even heated metal rods. Each method includes detailed steps, safety tips, and expert tricks for clean results.
Understanding the Type of Hole You Need
Before choosing your method, define what kind of hole you need. Is it a small pilot hole for a screw, a clean circular hole for decoration, or a large opening for rope or wires? Each purpose demands a slightly different approach and tool.
Small holes are the easiest to make by hand. You can pierce or carve them using pointed tools like an awl or nail. Larger holes, however, require more control and removal of wood, which takes more time and care.
The thickness of the wood also affects your choice. Thin panels can be punctured or burned easily, while thicker hardwoods need chiseling or boring.
Finally, consider the visibility of the hole. If it’s decorative or visible, focus on neatness. If it’s hidden inside a joint or back panel, function matters more than appearance.
Understanding these factors helps you select the best manual technique and avoid unnecessary damage to your wood.
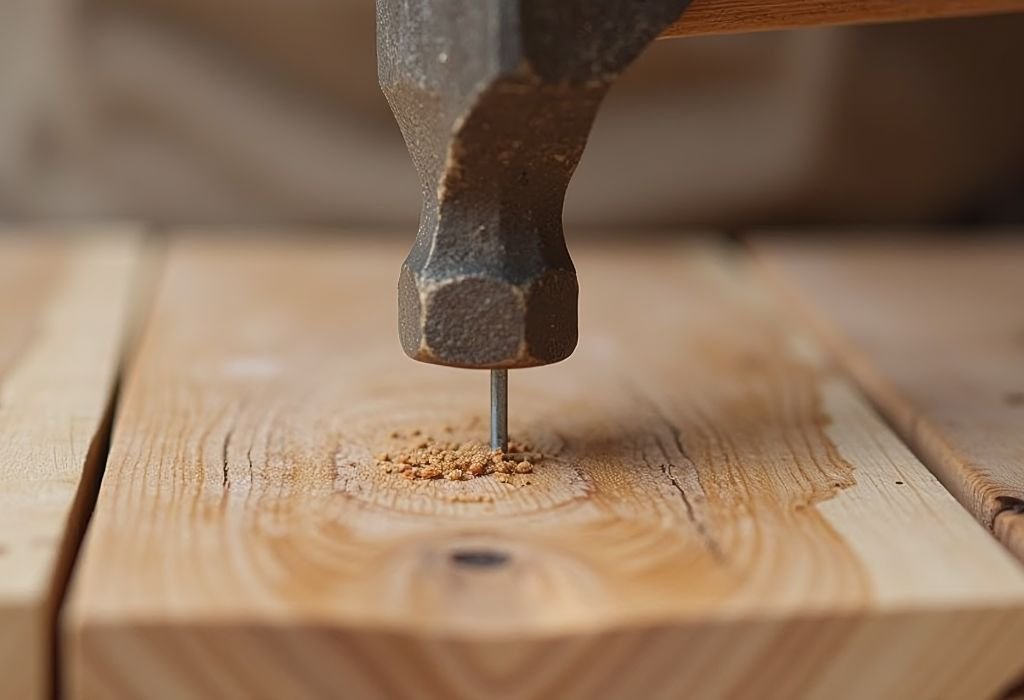
Using a Hammer and Nail to Start the Hole
One of the simplest ways to make a hole without a drill is by using a hammer and nail. This method works best for small pilot holes or starter holes for screws. It’s quick, effective, and uses tools you probably already have.
Place the nail where you want the hole, ensuring the point is perfectly aligned with your mark. Tap lightly with the hammer to embed the tip into the surface. This small dent helps you guide the nail accurately without slipping.
Once secure, drive the nail deeper with controlled strikes. Don’t hammer too hard or the wood may split, especially if working near an edge.
When the nail has penetrated fully, twist and pull it out using the hammer’s claw. The resulting hole will be small, clean, and ideal for screws, strings, or thin wire.
For slightly larger holes, repeat the process with a thicker nail or reinsert the same nail and rotate it gently to widen the opening. The result may not be perfectly circular, but it’s fast and practical for lightweight tasks.
Making Holes with an Awl or Screwdriver
An awl is a traditional woodworking tool designed for piercing and marking. It looks like an ice pick with a sharp steel tip and works perfectly for small, controlled holes. If you don’t have one, a flat-head or Phillips screwdriver can substitute effectively.
Place the awl tip on your mark and apply firm downward pressure while twisting it slowly. The spiral motion helps the point carve fibers apart rather than splitting them. Continue twisting until you reach your desired depth.
For larger openings, widen the hole gradually by rocking the tool side to side. Take your time; forcing it may crack the wood.
If using a screwdriver, heat the tip slightly over a lighter or candle flame to soften the wood fibers. Insert it while twisting gently. The heat helps burn and separate fibers for smoother entry.
This method takes patience but provides precise control, ideal for softwoods or thin boards. Awls are especially useful when you need accurate pilot holes for screws or nails.
Cutting a Hole Using a Knife or Carving Tool
A sharp utility knife or carving blade can make clean holes in soft or medium woods. This method is excellent for decorative projects, lightweight panels, or adjustments when drilling isn’t possible.
Start by marking your hole’s outline clearly using a pencil or stencil. If it’s circular, trace a coin or washer for accuracy. Score along the line with light knife strokes, gradually deepening each pass instead of cutting all at once.
Once the outline is set, insert the knife tip inside and slice small wedges toward the center. Continue until you’ve removed the inner portion completely. Use controlled movements to prevent slips.
For larger holes, you can also use a wood carving gouge or chisel to remove material. Small chisel taps with a hammer help clear chips efficiently.
Finally, sand the edges lightly to smooth them out. Knife-cut holes are neat and visually pleasing, especially when patience and precision are applied.
Using a Heated Metal Rod or Screwdriver
Heat is a surprisingly effective way to create holes in wood when you have no cutting tools. All you need is a metal rod, nail, or screwdriver and a heat source such as a gas stove or torch.
Hold the metal piece with pliers or tongs and heat the tip until it glows red or becomes visibly hot. Once ready, press it gently against the marked spot on your wood. The hot metal will burn through the fibers, creating a small, round hole.
Move slowly, letting the heat do the work. Don’t push too hard, as this may scorch surrounding areas or deform the hole.
After piercing through, clean the edges with sandpaper to remove blackened residue. The result is a smooth, rounded hole ideal for ropes, cords, or hooks.
This technique works best for dry wood. Avoid painted or chemically treated surfaces, as burning can release fumes. Always perform the process in a well-ventilated area for safety.
Carving a Hole with a Chisel and Mallet
When precision matters and the wood is thick, the chisel-and-mallet method is the best manual option. It allows you to carve clean, professional holes of any shape or size without power tools.
Start by outlining your desired hole shape with a pencil. For circular or rectangular holes, mark the boundaries carefully. Use a sharp chisel for clean cuts and ensure it’s the right width for your project.
Place the chisel tip along your marked line at a slight angle. Tap the handle gently with a mallet to cut into the surface. Work around the outline first to define the edges before removing the center portion.
After establishing the boundary, position the chisel vertically and continue tapping to remove small wood chips. Take shallow cuts for better control.
For through-holes, flip the board once you’re halfway and repeat the process from the other side to prevent splintering.
Finish by smoothing the edges with sandpaper. This traditional woodworking method takes time but delivers excellent accuracy and quality results.
Making a Hole Using a Hand Drill or Brace
If you don’t have an electric drill but can access a hand brace or egg-beater-style hand drill, this is the most efficient manual tool available. These classic devices work using human power and a simple turning mechanism.
Insert a bit into the chuck and tighten it firmly. Position the tip on your mark and hold the brace steady with one hand while rotating the handle with the other. The spiral motion drives the bit through the wood slowly but cleanly.
Use consistent speed and pressure. Pushing too hard can bend the bit or crack the surface. The trick is to let the cutting edge do the work gradually.
For deeper holes, back the bit out occasionally to remove sawdust and reduce friction. This keeps the bit cooler and ensures smoother drilling.
Despite being manual, braces create surprisingly accurate holes and offer more control than electric drills in delicate projects. They’re quiet, durable, and perfect for traditional woodworking enthusiasts.
Burning a Hole with a Candle and Metal Object
If you don’t have a heat gun or stove, even a candle can do the trick for small holes. Choose a thick metal object such as a nail, skewer, or old screwdriver.
Light the candle and heat the metal in the flame for about a minute. Once hot, carefully press it against your marked spot on the wood. Rotate slowly to let the heat burn evenly.
Repeat heating and pressing if the hole doesn’t go through at once. Never rush; gradual burning prevents scorch marks spreading too wide.
After you’ve made the hole, sand the area with fine-grit paper to remove soot and smooth the edges. The smell of burnt wood fades quickly with ventilation.
This method works best on softwoods like pine or cedar. Hardwoods take longer but can still be burned through with persistence and steady heating.
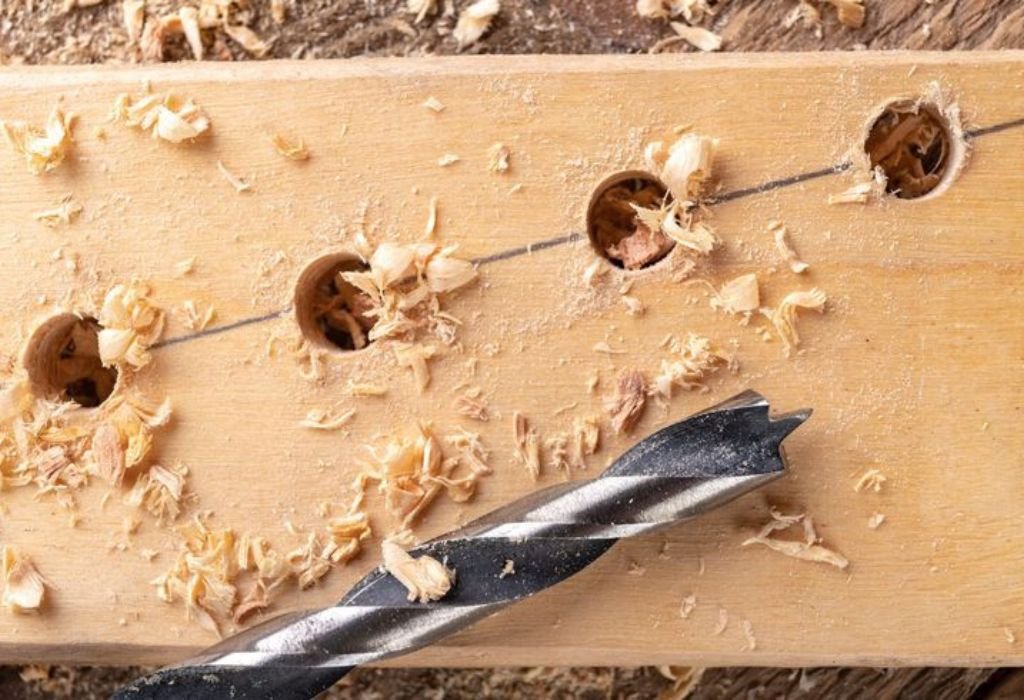
Making Holes Using a Drill Bit by Hand
Sometimes, you have drill bits but no drill. Fortunately, you can still use them by hand. All you need is a drill bit and pliers or a bit holder.
Grip the smooth end of the bit firmly and position the tip at your mark. Begin twisting the bit manually while applying gentle downward pressure. The sharp edges will slowly bite into the wood and carve out material.
This method works best for small-diameter bits and softwoods. For thicker boards, patience is key — take breaks and clear the chips often.
If holding the bit by hand feels uncomfortable, insert it into a socket wrench handle or a wooden dowel drilled halfway as a makeshift handle. This gives better torque and grip.
Although slower than a powered drill, the result is clean and precise when done steadily. It’s a clever technique for quick, low-tool woodworking situations.
Sanding, Smoothing, and Cleaning the Hole
Regardless of how you make the hole, finishing it properly ensures durability and appearance. Use medium-grit sandpaper (around 120–150) to remove rough fibers, then switch to fine grit (220) for smoothness.
Wrap the sandpaper around a pencil, dowel, or even your finger to reach inside small holes easily. Move in circular motions to polish evenly.
Clean the hole with a dry brush or vacuum to remove dust and char residue. If you burned the hole, wipe it with a damp cloth before finishing.
For visible projects, apply a bit of wood finish, oil, or wax around the hole edges. This enhances color, seals pores, and protects against moisture.
Smooth, sealed holes not only look better but also prevent splinters and wear from cords, screws, or fasteners.
Safety Precautions for Manual Hole-Making
Working without a drill means using more physical force and sharper tools. Always wear safety glasses to protect your eyes from chips or sparks if using heat.
Use gloves only when handling hot metal, not while cutting, as fabric can snag on blades. Keep your fingers away from the cutting path and always work on a stable surface.
Never overheat metal tools to the point of glowing inside confined spaces. Work in a ventilated area to avoid inhaling smoke from burning wood.
When using chisels or knives, make shallow cuts instead of forcing deep ones. If the blade slips, it should move away from your body.
Finally, clamp your wood firmly before beginning. A steady piece ensures cleaner cuts and prevents injury from slipping tools.
Safety isn’t optional — it’s what keeps your DIY creativity enjoyable and accident-free.
How to Use a Screw and Pliers to Create a Hole
If you don’t have a drill but have screws and pliers, you already have what you need to make a clean hole. This method combines twisting force and cutting edges from the screw’s threads to carve into the wood. It works perfectly for small to medium holes in softwood.
Start by choosing a sharp-pointed screw — drywall screws or wood screws are ideal. Place the tip on your marked spot and twist it clockwise while applying steady pressure. The screw’s thread bites into the surface and removes small fibers as it advances.
Once you’ve reached the desired depth, unscrew it slowly. You’ll be left with a smooth pilot hole that’s ideal for starting nails, hooks, or other hardware.
If you need to enlarge the hole slightly, grip the screw with pliers and rotate it back and forth. This motion widens the channel gradually without cracking the wood.
This method is surprisingly efficient when working on small projects or repairs, and it requires no special equipment — just patience and a firm grip.
How to Create Holes Using a Handheld File or Reamer
Files and reamers are underrated tools for creating or enlarging holes. A round file, often called a rat-tail file, is particularly useful when you need a smooth, circular opening. This approach is perfect for precision work like furniture adjustments or custom fits.
Start by making a small starter hole using a nail, awl, or screwdriver tip. Insert the narrow end of the file into the hole and begin twisting it in a circular motion while pushing gently. The rough surface of the file grinds away fibers evenly.
Continue rotating until you reach the desired diameter. Check the size frequently by fitting the screw or dowel you plan to insert.
Reamers work similarly but have sharper flutes that cut faster. They’re ideal when you need to maintain roundness in thick wood.
Always move slowly and evenly. Too much pressure can cause uneven widening or rough edges. The result, when done right, is a perfectly shaped hole without splinters or cracks.
How to Make Decorative Holes Using a Hand Saw and Chisel
For artistic woodworking or rustic furniture, you can make larger decorative holes using a hand saw and chisel. This method works when you want oval or rectangular cutouts for handles, light fixtures, or design accents.
Begin by drawing the exact shape of your hole on the wood surface. Use a fine-toothed hand saw to make small cuts along the perimeter, stopping just before reaching the corners. These guide cuts help prevent splintering.
Next, take a sharp chisel and start removing small chips of wood between the cuts. Work from the center outward, tapping gently with a mallet to control depth.
Flip the board halfway through to repeat the process from the other side if it’s thick. This prevents tearing at the edges and ensures symmetry.
Once the opening is complete, file or sand the edges to smooth them. Decorative holes created this way add charm and function without the need for power tools.
This method might take time, but it gives you complete control and creative flexibility — something drills often can’t provide.
How to Use a Corkscrew or Ice Pick as a Manual Drill
Household items like corkscrews or ice picks can serve as effective improvised drills. Their spiral and pointed designs allow you to pierce wood fibers while controlling the hole’s shape and size.
Start by marking your spot and positioning the corkscrew tip at the center. Twist it gently while pressing down until the first thread catches. Continue rotating steadily; the corkscrew will dig deeper, creating a small circular opening.
If the corkscrew has a large diameter, use only the first few turns to form a smaller pilot hole. For deeper holes, pull it out occasionally to remove shavings and check progress.
An ice pick works similarly but produces finer, cleaner holes. Twist it while applying consistent pressure, allowing the tip to pierce slowly without splitting the grain.
Both methods work best on soft or medium woods. They’re ideal for emergencies or small DIY projects when no other tools are available.
How to Make Large Holes Using a Hand Auger
When you need a large, deep hole and don’t have a drill, a hand auger is your best manual option. It’s a traditional tool with a spiral bit and a cross handle, used long before power drills existed.
Place the auger’s tip on your mark and start turning the handle evenly. The cutting edge bites into the wood and pulls chips upward with each rotation. You’ll feel steady resistance that decreases as the auger clears material.
Keep your movements rhythmic — one full turn followed by a slight back twist helps eject debris. Continue until you reach the desired depth.
Hand augers are perfect for thick beams, furniture legs, and outdoor woodwork where precise holes are needed for bolts or pegs.
When finished, remove the auger gently to avoid widening the hole. Clean out any remaining dust or chips, and you’ll have a perfectly round, deep hole made purely by hand power.
The auger remains a timeless example of how human strength and precision can match technology when used correctly.
FAQ: Clever Questions About Making Holes Without a Drill
Can I make a hole in wood without power tools?
Yes, you can use nails, awls, chisels, knives, or heat methods to create holes safely.
What’s the easiest method for small holes?
Using a hammer and nail or a sharp awl gives the fastest results with minimal tools.
How do I make a big hole without a drill?
Try carving with a chisel or burning through using a heated metal rod. Work slowly for precision.
Will burning a hole weaken the wood?
Slightly, but not much if done carefully. Always sand and clean charred edges afterward.
Can I use a screwdriver as a drill?
Yes. Twist it into the wood manually or heat it slightly to soften the fibers.
How do I avoid cracking near the edge?
Keep holes at least 15 mm from edges and use gradual pressure instead of force.
What if I need a perfectly round hole?
Use a Forstner bit or round file by hand. Rotate consistently to maintain symmetry.
Conclusion
Making a hole in wood without a drill might sound challenging, but with patience and creativity, it becomes an exercise in craftsmanship. The secret lies in understanding your material, using the tools you have, and working slowly.
From simple nails to chisels and heated metal, each method connects you to centuries of traditional woodworking. It teaches precision, patience, and respect for the craft.
The next time your drill isn’t around, you won’t stop your project — you’ll simply reach for your hammer, chisel, or awl and get to work. With these techniques, your skill replaces electricity, and every hole you make becomes proof of true hands-on mastery.

I’m John F. Nicholas, the founder, lead writer, and drill enthusiast behind 101drill.com. With years of hands-on experience in power tools and DIY projects, I created this platform to share practical knowledge, expert tips, and real-world insights to help others master the art of drilling.