
Have you ever tried to hang a shelf or picture frame on a concrete wall only to end up with cracks and frustration? Many DIY enthusiasts face this struggle when using the wrong tools for tough materials like brick, stone, or cement.
Masonry surfaces are hard, dense, and unforgiving, which makes them challenging for beginners. Ordinary drill bits simply can’t cut through, leading to damaged walls or burnt-out drills.
A masonry drill bit is designed specifically for this kind of job. It has a carbide-tipped head that can crush through concrete without dulling easily, and spiral grooves that push out the dust as you drill.
Using this bit properly doesn’t require superhuman strength — it’s about understanding the tool and letting it do the work for you. Once you master the right drilling technique, even the toughest walls will feel manageable.
According to a 2024 DIY survey, more than 60% of homeowners use the wrong bit type when drilling, causing uneven holes and structural cracks. Learning the right approach saves not just effort, but also the integrity of your wall.
In this complete guide, we’ll cover everything from what a masonry drill bit is and how it works, to safety, maintenance, and common mistakes to avoid.
By the end, you’ll be confident enough to drill clean, precise holes in concrete or brick — without damaging your walls or dulling your tools.
Understanding What a Masonry Drill Bit Is
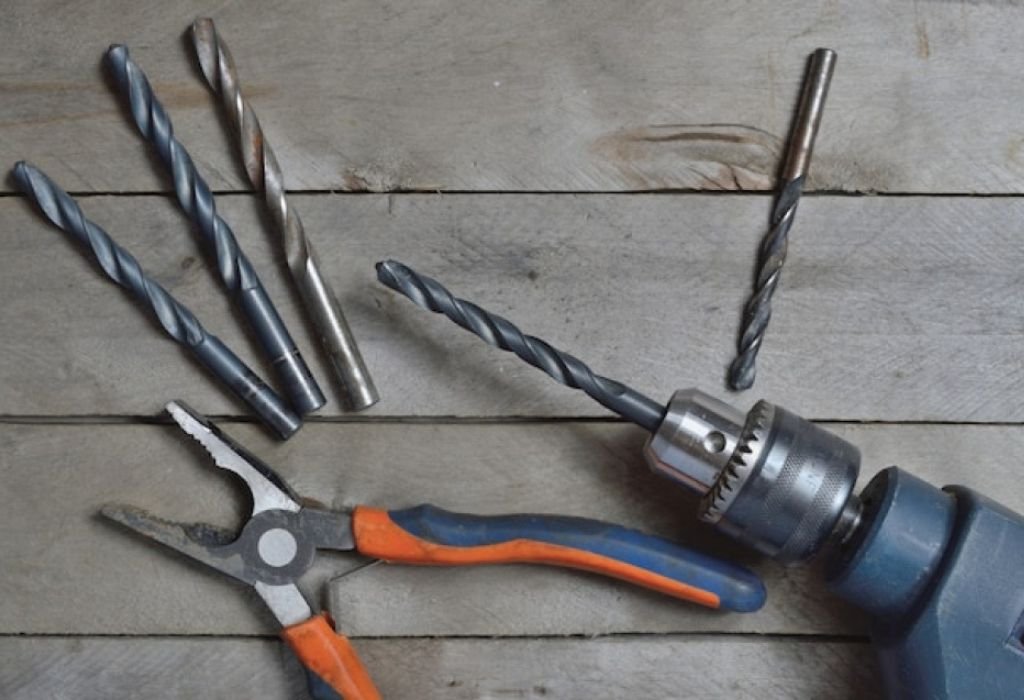
A masonry drill bit is not your typical drill accessory; it’s built for endurance and impact. The main difference lies in its carbide tip, which can handle the hardness of brick and concrete without wearing down quickly.
This tip doesn’t cut in the traditional sense. Instead, it pulverizes the material through rapid hammering motion, which breaks down stone or cement into fine dust.
The fluted spiral grooves along the bit’s shaft help carry this dust out of the hole, preventing jams and overheating. This keeps the drilling smooth and extends the bit’s life.
Most masonry bits have a tungsten carbide or tungsten-tipped point, which can withstand extremely high temperatures. These materials are harder than steel, making them perfect for impact drilling.
You’ll also notice different shank types: SDS, hex, and straight shanks. SDS bits are preferred for heavy-duty hammer drills because they lock securely and transmit impact efficiently.
Masonry drill bits come in sizes from 4mm to over 25mm, allowing flexibility for small screws or large anchors. Using the right size ensures stable mounting and prevents hole slippage.
Because masonry bits rely on percussion instead of sharpness, they need to be paired with a hammer drill or rotary hammer. This tool delivers the vibration needed to crush concrete efficiently.
In short, a masonry drill bit combines toughness, design, and vibration control to make drilling hard surfaces possible. Choosing the right one is the first step toward professional-quality results.
Tools and Materials You’ll Need Before Drilling
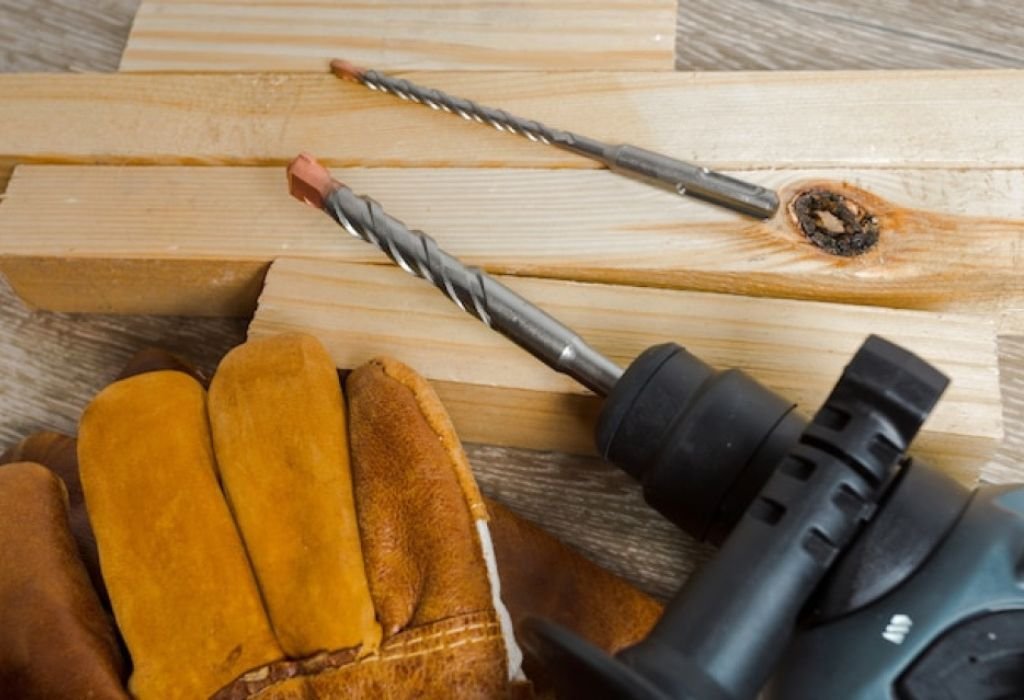
Preparation makes all the difference when drilling into tough materials. The first thing you’ll need is a hammer drill or rotary hammer, as regular drills don’t provide the impact power necessary for masonry.
Select the correct masonry bit size based on the screw, anchor, or plug you’ll be using. A mismatch here can cause loose fittings or wall cracks later.
Safety gear is essential. Always wear safety goggles, gloves, ear protection, and a dust mask. Drilling concrete produces fine silica dust that can irritate your lungs and eyes.
Use a marker or pencil to mark the drilling point accurately. If you need consistent hole depth, wrap a piece of masking tape around the bit to indicate how deep to go.
A vacuum or brush should be on standby to remove debris as you drill. Dust buildup can cause friction, slow down the bit, and make the hole uneven.
Ensure your workspace is clean and well-lit. If drilling outdoors, check that power cords are away from wet surfaces and sharp edges.
Have an extension cord, spirit level, and steady surface ready. These small details make a big difference in both accuracy and safety.
Finally, double-check your drill’s battery or plug connection before you begin. A power interruption mid-way can lead to stuck bits or incomplete holes. Proper preparation ensures smoother drilling and protects your equipment.
Step-by-Step Guide on How to Use a Masonry Drill Bit
Start by marking the spot where you’ll drill. Accuracy matters — once a hole is made in concrete, there’s no easy fix.
Insert the masonry bit into your drill’s chuck and tighten it firmly. Make sure the bit is straight and doesn’t wobble when you pull the trigger.
Set your drill to hammer mode. This function adds a pounding motion that helps the carbide tip crush through tough materials.
Hold the drill at a 90-degree angle to the surface, and start drilling at a slow speed to create a small indentation. This helps stabilize the bit and prevents slipping.
As the bit starts to grip, increase the speed gradually while applying gentle pressure. Let the hammer action do most of the work — avoid pushing too hard.
Every few seconds, pull the bit out slightly to clear away dust and prevent clogging. This helps the bit stay cool and maintains consistent progress.
Once you reach your desired depth, stop the drill slowly while it’s still rotating lightly to remove loose debris. Then vacuum out the hole for a clean finish.
If you’re drilling multiple holes, take short breaks to prevent overheating. Consistency and patience are key to smooth, accurate results.
Common Mistakes to Avoid When Drilling Masonry
Many DIYers make simple mistakes that ruin their project results. One of the biggest is using a standard drill instead of a hammer drill — it lacks the impact power needed for hard surfaces.
Another common issue is skipping safety gear. Dust from masonry drilling can irritate your lungs and eyes, while vibration can strain your hands.
Applying too much pressure can crack the wall or damage the bit. Always let the tool do the work — forcing it only overheats and dulls the tip.
Continuous drilling without pauses causes bit overheating, which reduces cutting efficiency. Always drill in short bursts and allow cooling time between holes.
Using a worn-out bit leads to uneven holes and excess vibration. Check your bits regularly and replace them when they lose sharpness.
Avoid drilling near edges or corners, as this weakens the structure and can cause chunks to break off. Keep at least 2 inches of space from any edge.
Finally, many people forget to clear dust while drilling. Dust buildup increases friction and can trap the bit mid-way. Clean holes are stronger, smoother, and safer to anchor.
Avoiding these small but costly errors ensures your project goes smoothly and your walls stay intact.
Safety Tips and Best Practices
Safety should always be your top priority when drilling into masonry. These materials create fine dust, flying debris, and high vibration, all of which can pose risks if not handled correctly.
Always wear safety goggles to protect your eyes from flying chips and dust. A dust mask or respirator prevents inhalation of silica particles that can harm your lungs.
Gloves with a good grip reduce vibration and help you maintain control over the drill. However, avoid loose-fitting gloves that could get caught in the spinning bit.
Before starting, inspect your drill and bit for cracks, rust, or wear. Damaged tools can break under pressure, creating dangerous projectiles.
Ensure that your drill speed and hammer setting are appropriate for the bit size. Excessive speed can cause overheating, while too low power can make drilling inefficient.
Always secure your footing and hold the drill with both hands. Maintaining a balanced stance helps absorb vibration and prevents sudden slips.
Avoid drilling too close to electrical wiring or plumbing. Use a stud finder or wall scanner to locate hidden wires or pipes before drilling.
If your bit starts smoking, stop immediately and let it cool down. Overheating can ruin the bit’s carbide tip and even damage your drill motor.
After drilling, unplug your drill before changing bits or cleaning. This simple step prevents accidental start-ups that can cause injury.
Finally, never drill continuously for too long. Take short breaks, cool your tools, and clear the dust. Safe, controlled drilling leads to precise holes and longer tool life — the hallmark of a professional job.
Maintenance and Care for Masonry Drill Bits
Proper maintenance ensures your masonry drill bits last longer and perform efficiently. After each use, always clean the bit thoroughly to remove dust and debris from the flutes and tip.
Use a small brush or compressed air to clear stubborn residue. Concrete dust can harden if left unchecked, making the bit dull and less effective over time.
Never wash your bits directly with water. Moisture can lead to rusting, especially on the steel shaft and joints.
Instead, wipe them clean with a dry cloth, then apply a thin coat of light machine oil. This creates a protective layer that prevents corrosion and keeps the bit spinning smoothly.
Inspect your bits regularly for wear or cracks at the carbide tip. If you notice the tip flattening or chipping, it’s a sign the bit needs replacement or professional sharpening.
Storing bits properly is equally important. Keep them in a dry, padded case or drill organizer to prevent them from knocking against each other and dulling the tips.
Avoid exposing your drill bits to humidity or extreme temperatures. A consistent, dry environment helps maintain the metal’s integrity.
If you use your bits frequently, consider rotating between multiple sets. Alternating them distributes wear evenly and extends the life of each bit.
Remember, a well-maintained masonry bit not only cuts cleaner holes but also reduces strain on your drill motor. Proper care saves both money and time, ensuring that every project starts with a sharp, reliable tool.
Applications — Where Masonry Bits Are Most Useful
Masonry drill bits are essential wherever strength and durability matter. They’re designed to handle the toughest materials used in modern construction and home improvement.
You’ll most often use masonry bits for drilling into concrete walls and floors. This is necessary when installing shelves, curtain rods, electrical boxes, or mounting brackets that require strong anchors.
They’re equally useful for brick walls, which are common in older homes and outdoor structures. Masonry bits allow you to make clean holes without cracking or chipping the bricks.
If you’re working with stone or mortar, a slower drilling speed and steady pressure produce precise results. These bits can easily penetrate dense natural stones like granite or limestone with the right hammer drill.
Outdoor projects such as fence posts, garden trellises, and exterior lighting also rely on masonry bits. The combination of power and accuracy ensures that fixtures stay secure in all weather conditions.
Professionals use them for anchor bolts, rebar installations, and heavy-duty framing in construction sites. The carbide tip provides the endurance needed for repeated drilling in reinforced concrete.
DIY enthusiasts can use masonry bits for tasks like mounting wall art, installing hose reels, or hanging outdoor décor. With proper technique, even delicate walls can be drilled safely.
In short, masonry drill bits excel anywhere you need to create stable holes in dense surfaces. Whether it’s a small home project or a commercial build, these bits deliver strength, reliability, and consistency.
FAQs About Masonry Drill Bits
What speed should I use when drilling into masonry?
Use a low to medium speed, around 1,000–1,500 RPM for most projects. Let the hammer action do the work rather than forcing the bit faster.
Can I use a masonry drill bit on wood or metal?
No, masonry bits are designed for hard materials like stone and concrete. Using them on softer materials will cause rough holes and possible damage.
Do I need a hammer drill for masonry bits?
Yes, a hammer drill or rotary hammer is essential. These drills provide the impact force required to break down tough surfaces efficiently.
Why does my masonry bit smoke while drilling?
Smoke usually means overheating caused by excessive speed or pressure. Pause, cool the bit, and remove dust to restore normal operation.
How do I know if my masonry bit is dull?
If drilling takes longer than usual or the hole edges look rough, your bit is likely dull. Replace or sharpen it to maintain performance.
What’s the best way to clean my masonry bits?
Brush off concrete dust immediately after use. Wipe with a dry cloth and apply a thin layer of oil for protection.
Can masonry bits drill through tiles or marble?
Yes, but only at slow speeds and without hammer action initially. Once the bit grips, switch to hammer mode carefully to avoid cracking.
How deep can I drill with a masonry bit?
It depends on bit length and material thickness. Most standard bits reach up to 6 inches deep, but longer SDS bits can go further.
How often should I replace masonry bits?
Replace them when tips dull or flutes wear down. A sharp bit ensures cleaner holes, faster work, and longer drill motor life.
Conclusion
Using a masonry drill bit correctly turns an ordinary drill into a precision power tool. Once you understand the right bit type, speed, and pressure, drilling into concrete or brick becomes simple and stress-free.
The key is letting the hammer action and carbide tip do the work. Forcing the drill never helps — steady pressure, proper cooling, and patience always lead to cleaner holes and smoother finishes.
Safety should always come first. Wearing protective gear and keeping your workspace organized can prevent accidents and extend your tool’s lifespan.
Clean and maintain your bits after every project. A well-kept masonry bit not only performs better but also saves you from buying replacements too often.
Always double-check your setup before drilling — from the wall material to the anchor type and bit size. A few seconds of preparation can save you hours of rework.
Remember, every wall tells a different story. Old bricks, dense concrete, or soft mortar all react differently, so adapt your speed and technique for each material.
With consistent care and smart drilling habits, you’ll master the skill quickly. Whether it’s for hanging décor, mounting heavy equipment, or professional construction, you’ll achieve accurate and lasting results.
So the next time you face a solid wall that seems impossible to drill through, take your hammer drill, attach a masonry bit, and follow these steps. You’ll feel the confidence of a pro as your drill glides effortlessly through stone and concrete.
That’s the secret — knowledge, technique, and the right bit make all the difference. With practice, you’ll not just drill holes — you’ll build precision, safety, and craftsmanship into every project.

I’m John F. Nicholas, the founder, lead writer, and drill enthusiast behind 101drill.com. With years of hands-on experience in power tools and DIY projects, I created this platform to share practical knowledge, expert tips, and real-world insights to help others master the art of drilling.