
Polishing metal may seem complicated at first, especially when trying to achieve a mirror like finish without expensive tools.
Many people think they need professional equipment to make metal shine, but a simple handheld drill can do the job effectively. When used with the right attachments and techniques, a drill becomes a powerful polishing tool.
Imagine holding an old metal part that has lost its shine over years of use, covered in scratches, dull patches, and oxidation.
You may consider replacing it, but polishing can restore its original beauty. With just a drill, polishing pads, and compound, the metal surface can look brand new again.
Metal polishing is a gradual process that transforms rough or dull surfaces into reflective ones. The drill provides the speed, while polishing compounds remove scratches and oxidation. When combined properly, the results can be impressive.
Using a drill also makes polishing faster compared to manual methods. Beginners often feel more confident because the tool does most of the work. With the right steps, even difficult metals like stainless steel or aluminum become smooth and shiny.
This guide explains everything you need to polish metal using a drill, from preparation to final finishing. Each step is explained clearly with simple instructions anyone can follow. Whether polishing car parts, tools, ornaments, or hardware, this method works effectively.
By the end of this guide, you will know how to choose polishing pads, apply compound, remove oxidation, shape the shine, and protect the surface.
You will also understand safety tips and common mistakes to avoid for the best results. With patience and proper technique, you can polish metal like a professional using only a drill.
How the Drill Polishing Process Works
A drill is effective for polishing because it creates continuous rotation that helps spread compound evenly. The spinning motion removes surface imperfections and creates a smooth finish. The faster the rotation, the quicker the polishing effect.
Polishing compound works by removing thin layers of metal. Each pass removes small scratches and oxidation. As layers disappear, the metal becomes brighter and smoother.
Polishing pads come in different materials like wool, foam, or microfiber. Each type affects how deep or gentle the polishing process is. Wool cuts more aggressively, while foam provides a softer touch.
The drill’s speed helps control how much friction is applied. High speeds remove scratches faster, while low speeds create finer finishes. Proper speed control is important for preventing damage.
Metal polishing requires stages, starting from heavy cutting to finishing. The first stage removes imperfections, and later stages enhance shine. Skipping stages leads to uneven or cloudy results.
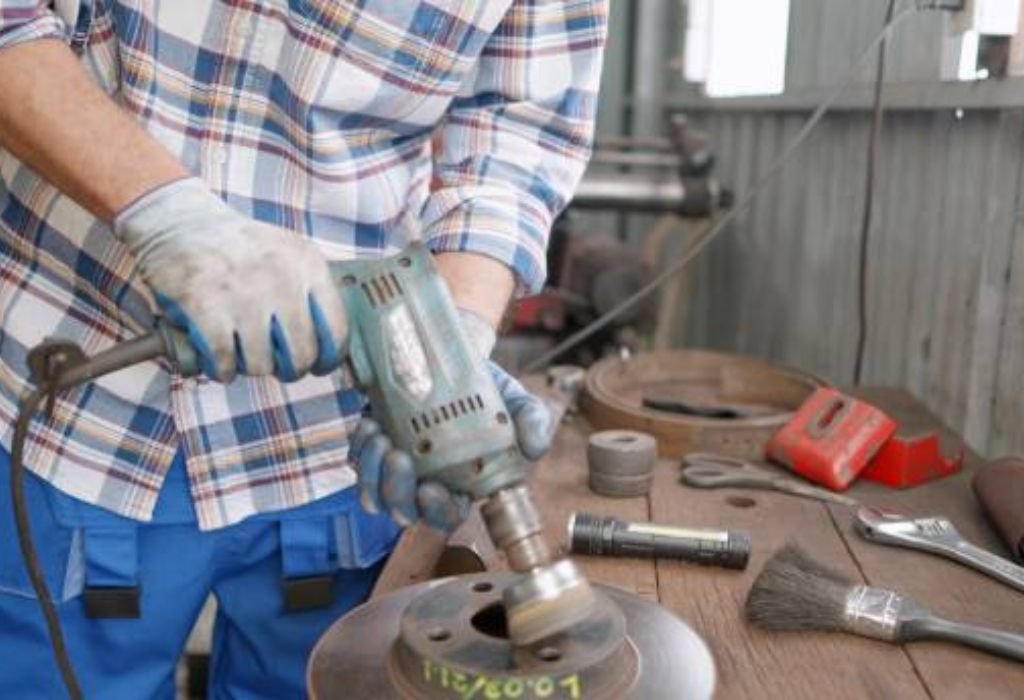
A drill provides mobility, allowing you to polish small or detailed areas effectively. This makes it useful for automotive parts, DIY projects, tools, and hardware. The drill adapts to different surfaces with various attachments.
Understanding how rotation, compound, and pressure work together helps achieve the best results. Once you learn the technique, polishing becomes easier and more predictable. Consistency is the key to a mirror like shine.
Tools and Materials Needed to Polish Metal With a Drill
A handheld drill is the most important tool for this process. Corded drills provide steady power, while cordless drills offer more mobility. Both work well for polishing.
You will need polishing pads that attach to your drill. These pads come in different sizes and materials depending on the metal you are polishing. Most pads attach using a drill arbor or backing plate.
Polishing compounds are essential for removing scratches and oxidation. Heavy cutting compounds remove deep imperfections, while fine compounds create a final shine. Metal polish creams can be used for finishing.
Sandpaper is sometimes needed before polishing. Grits like 600, 1000, or 1500 help remove existing scratches. Wet sanding provides smoother results.
Microfiber cloths help wipe away compound and polish. They are gentle and remove residue effectively. Using clean cloths prevents streaks and marks.
Masking tape can protect areas you do not want to polish. This helps avoid accidental scratches. Tape provides clean boundaries around the work area.
Safety equipment like gloves and safety glasses protect your hands and eyes. Metal particles and compound dust can be irritating. Proper safety gear ensures comfortable polishing.
Preparing the Metal Surface Before Polishing
Start by cleaning the metal thoroughly to remove dirt and grease. Use a degreaser or mild soap and water for washing. Dry the metal completely before moving to the next step.
Inspect the metal for scratches, dents, or oxidation. Deep scratches need sanding before polishing. Light scratches can be polished directly.
If sanding is required, start with a medium grit sandpaper. Sand evenly across the surface to remove imperfections. Use water while sanding to create a smoother finish.
After sanding, switch to a finer grit for smoothing. Each finer grit removes marks left by the previous grit. This creates an even surface ready for polishing.
Wipe the metal clean to remove dust and residue. A microfiber cloth works best for this. Clean surfaces polish faster and more evenly.
Apply masking tape to protect areas you do not want polished. This is helpful around edges or joints. Polishing pads can damage adjacent surfaces if not protected.
After preparation, examine the metal under good lighting. Look for scratches or uneven marks. Only begin polishing when the surface looks uniform.
Do I have to sand metal before polishing?
Only if there are deep scratches or heavy oxidation.
Can I polish stainless steel with a drill?
Yes, stainless steel responds well to drill polishing.
Do polishing pads wear out?
Yes, they wear down over time and should be replaced.
Can I use household metal polish with a drill?
Yes, but professional compounds give better results.
Is it safe to polish indoors?
Yes, but ensure good ventilation to avoid dust buildup.
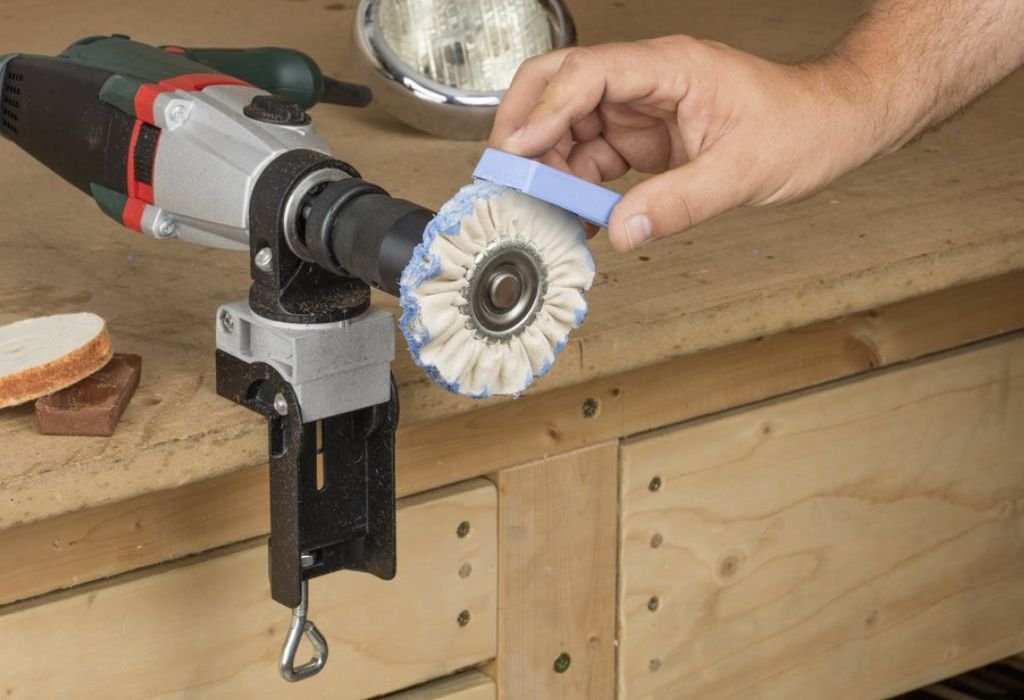
How to Attach Polishing Pads to the Drill Properly
Most polishing pads come with a drill arbor or backing plate. This attachment fits into the drill chuck securely. Tighten the chuck so the pad does not wobble.
Choose the correct pad size for your project. Smaller pads are good for detailed areas, while larger pads work faster on big surfaces. Match the pad to the job.
Attach the pad by placing the arbor into the drill. Make sure the pad is centered and aligned. A misaligned pad creates uneven polishing.
Check the rotation direction of the drill. Most drill pads work in either direction, but consistent rotation creates smoother results. Test the drill at low speed first.
Ensure the pad is clean and free of old compound. Dirty pads create scratches. Clean pads produce better shine.
If using a polishing wheel, attach it using the included adaptor. Larger wheels need stronger drills for proper rotation. Refer to the manufacturer instructions.
Secure the drill with a firm grip. Polishing pads can pull the drill slightly during rotation. Steady hands provide better control.
Step by Step Polishing Method Using a Drill
Begin by applying polishing compound to the pad or directly onto the metal. Spread the compound evenly before turning on the drill. This prevents splattering.
Start polishing at a low speed to spread compound. Move the drill in overlapping motions to create uniform coverage. Do not hold the drill in one spot for too long.
Increase the speed gradually as the metal begins to shine. Higher speed removes oxidation more quickly. Maintain constant movement to avoid heat buildup.
Use medium pressure while polishing. Too much pressure slows the pad and damages the surface. Too little pressure creates uneven polishing.
Check the surface frequently to monitor progress. Wipe off excess compound to see the shine level. If scratches remain, continue polishing.
Apply more compound as needed. Polishing is a gradual process that requires multiple passes. Reapplying compound helps deepen the shine.
Finish by wiping the metal clean with a microfiber cloth. Inspect for remaining dull areas or streaks. Repeat polishing if necessary.
Should I polish at high speed?
Medium to high speed works best, but avoid maximum speed for safety.
Can polishing burn the metal surface?
Yes, staying in one spot too long creates heat marks.
How long should polishing take?
Depending on metal condition, it can take minutes to hours.
How much compound should I use?
Start with a small amount and reapply as needed.
Is circular motion better?
Yes, overlapping circular motion creates the smoothest finish.
Choosing the Right Polishing Compounds for Best Results
Heavy cutting compound removes deep oxidized layers. This compound is good for old or heavily scratched metal. It prepares the surface for finer polishing.
Medium compound removes moderate scratches and dullness. It creates a smoother surface after heavy cutting. Most projects use medium compound as the main polishing stage.
Fine compound creates the final shine. It removes micro scratches left by earlier stages. Fine compound is essential for mirror finishing.
Metal polish creams improve the shine even more. These creams are used after fine compound. They enhance reflectivity and smoothness.
Different metals require different compounds. Aluminum responds well to fine polish, while steel benefits from stronger compounds. Choosing the right compound improves results.
Colored buffing compounds also exist. Each color corresponds to a specific strength. Match the color to the polishing stage.
Always store compounds in airtight containers. Dry compound loses effectiveness. Proper storage ensures consistency.
Finishing Techniques for a Mirror Like Shine
After basic polishing, add a finishing cream to increase shine. Use a soft foam pad for finishing. Foam pads leave fewer marks.
Polish the metal at a lower drill speed for fine finishing. Lower speed reduces friction and increases clarity. This creates a smooth reflective finish.
Wipe the surface and check reflections. A clear reflection means the finishing stage is successful. Dull areas need more fine polishing.
Use a microfiber cloth to buff the metal by hand. Manual buffing enhances gloss. The cloth removes small compound residues.
Polish edges and corners carefully. These areas require lighter pressure. Over polishing edges can cause uneven shine.
Apply metal sealant to protect the finish. Sealant prevents oxidation and moisture damage. It also helps the shine last longer.
Repeat light polishing in the future to maintain the shine. Once the metal is polished properly, maintenance becomes easy. Occasional buffing restores full brightness.
Can I get a mirror finish with a drill?
Yes, with fine compounds and patience.
Do I need different pads for each stage?
Yes, separate pads prevent mixing compounds.
How do I polish corners?
Use smaller pads or polish by hand.
Does polishing remove rust?
Only light rust. Heavy rust needs sanding.
How long does the shine last?
With protection, it can last months.
Safety Tips When Polishing Metal With a Drill
Always wear safety glasses during polishing. Compound and metal dust can fly toward your eyes. Eye protection reduces injury risks.
Wear gloves to protect your hands from sharp edges. Metal surfaces often have burrs or rough spots. Gloves provide better grip and safety.
Keep the drill speed under control. Excessive speed leads to loss of control. Stable speed ensures smooth results.
Avoid polishing near flammable objects. Compound dust and friction produce heat. Work in a safe environment.
Secure the metal piece when possible. A moving object is dangerous during drilling. Use clamps to hold the metal steady.
Keep the power cord or battery in good condition. Damaged cords are hazardous. Inspect tools regularly.
Do not press the drill too hard. Heavy pressure damages the motor. Light to medium pressure is enough.
Final Mistakes to Avoid for Best Metal Polishing Results
Do not mix compound types on the same pad. Mixing compounds reduces polishing quality. Use separate pads for each stage.
Do not polish dirty metal. Dirt scratches the surface. Always clean before polishing.
Do not skip sanding if scratches are deep. Polishing alone cannot remove deep marks. Proper preparation ensures better shine.
Do not use worn out pads. Old pads create haze and streaks. Replace pads when needed.
Do not rush the process. Polishing is gradual and requires patience. Slow and steady motions work best.
Do not use the highest drill speed. High speed causes heat buildup. Controlled speed delivers more consistent results.
Do not forget to seal the metal after polishing. Sealants protect shine and reduce oxidation. Maintaining the surface increases durability.
CONCLUSION
Polishing metal with a drill is a simple and effective method when done correctly. With the right pads, compounds, and techniques, a dull metal surface can turn into a mirror like finish. Even beginners can achieve professional results with practice.
Understanding how the drill, compound, and motion work together helps avoid mistakes. Proper preparation and systematic polishing stages create the best outcome. Each stage builds on the previous one to enhance shine and remove imperfections.
Using the safety and finishing methods outlined in this guide ensures long lasting results. With regular maintenance, the polished surface remains bright and reflective. Polishing metal with a drill saves time and money while delivering impressive results.

I’m John F. Nicholas, the founder, lead writer, and drill enthusiast behind 101drill.com. With years of hands-on experience in power tools and DIY projects, I created this platform to share practical knowledge, expert tips, and real-world insights to help others master the art of drilling.