
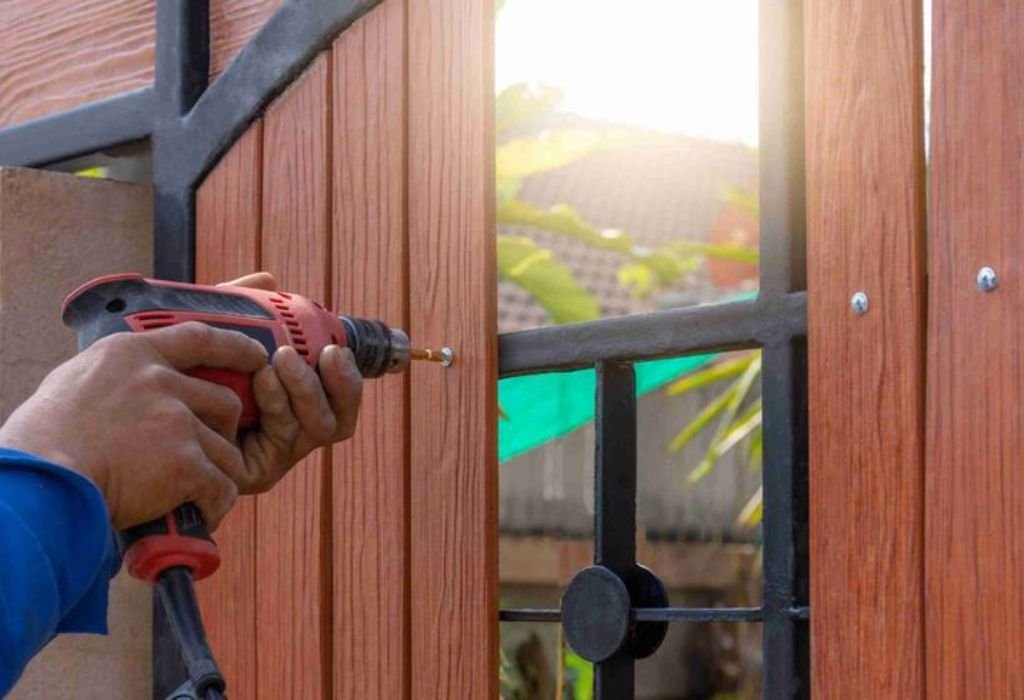
If you have ever needed to attach something to a metal surface but realized you did not have a drill, you probably felt stuck. Many people face this situation when working on small home projects, repairs or quick fixes where buying or borrowing a drill takes too much time.
The idea of screwing into metal without a drill sounds impossible at first, especially because metal is harder and less forgiving than wood or plastic. But with the right tools and correct method, it becomes surprisingly achievable.
You might remember a moment when you had to mount a bracket, attach a hinge or fix a loose piece of metal, but you had no drill available. Maybe you were outdoors, working in a garage or dealing with a temporary situation.
At first, the metal surface feels intimidating, and the lack of power tools makes the task seem even more challenging. But the reality is that metal can be worked with manually if you understand a few basic principles.
Screwing into metal without a drill requires patience, a bit of creativity and the willingness to use simple hand tools. Techniques like using a punch, tapping screws, hammering a starting point or creating manual threads can help you complete the job safely.
The process may be slower than using a drill, but it gives you full control and prevents over drilling or stripping screws.
This guide explains everything you need to know about screwing into metal without a drill. Whether you are working with thin sheet metal, medium thickness or small brackets, you will find practical steps and safe techniques.
By the end, you will feel confident working with metal even without power tools, knowing exactly how to create holes, drive screws and achieve strong results.
Why Screwing Into Metal Without a Drill Requires Special Technique
Metal is a strong and dense material that resists penetration. Its surface does not compress easily like wood. This makes manual drilling more challenging.
When you try to force a screw directly into metal, it slips across the smooth surface. Slipping causes scratches and prevents proper threading. Technique becomes essential.
Metal requires a starting point to guide the screw. Without a starting indent, the screw has nothing to grip. The point simply skids across the metal.
Manual methods work best when you understand how metal reacts to pressure. Slow and controlled force prevents bending and cracking. This approach improves success.
Creating a small pilot mark before inserting the screw is important. The pilot mark stabilizes the screw. Stability reduces frustration.
Metal also heats quickly when friction occurs. Heating weakens screws and deforms the surface. Gentle movement prevents overheating.
Using the right type of screw is crucial when working without a drill. Self tapping screws are ideal. Their design helps create threads manually.
Understanding these challenges helps you choose the right method. The correct approach makes the task safer and more effective.
Tools You Can Use to Start a Hole in Metal Without a Drill
A center punch is one of the best tools for marking metal. It creates a small dent in the surface. This dent guides the screw tip.
If you do not have a punch, a simple nail can work. The nail acts as a pointed tool. Striking it lightly forms a starter indent.
A hammer is essential for creating initial marks in metal. Light taps are usually enough. Controlled tapping protects the metal.
A nail set or awl can also create starting points. These tools have pointed tips made for precise marking. They are effective on thin metal.
A screwdriver with a sharp point can help apply pressure to start the hole. Pushing firmly can carve a small guide. This guide improves screw placement.
Pliers may be needed to hold screws steady during insertion. They help control slipping. Better control makes the task easier.
A small file can be used to roughen the metal surface slightly. Rough surfaces improve grip. Smooth surfaces cause slipping.
These simple tools allow you to create entry points manually. With the right combination, drilling becomes unnecessary.
How to Create a Starter Indent in Metal Manually
Begin by placing your center punch or nail exactly where you want the screw. Hold the tool firmly and keep your hand steady. Steadiness ensures a clean mark.
Use a hammer to tap the punch gently. Start with light strikes before increasing power. Gradual tapping prevents cracking.
Check the indent after each tap. When you see a small visible dent, stop tapping. A small dent is enough for guiding a screw.
If the metal is thin, do not hit too hard. Too much force can dent or warp the metal. Gentle tapping maintains surface shape.
Use your screwdriver tip to press into the dent slightly. Pressing deepens the mark. This strengthens the screw’s starting position.
If you are working with curved surfaces, hold the punch firmly. Curves require more control. Stability prevents slipping.
Once the starter mark is created, clean away any loose material. Clean surfaces improve screw performance. Dust free areas increase grip.
Your starter indent is now ready for manual screwing. This small dent makes a huge difference. It turns a difficult job into a manageable task.
How to Use Self Tapping Screws to Cut Threads Into Metal
Self tapping screws are designed to cut their own threads. Their pointed end pierces metal easily. This makes them perfect for manual use.
Start by placing the screw tip directly in the starter indent. Make sure it sits firmly. Firm placement ensures smooth entry.
Turn the screwdriver slowly while applying downward pressure. The screw begins cutting into the metal. The groove created becomes the thread.
Maintain steady pressure but avoid forcing the screw. Too much pressure can strip the screw head. Smooth motion protects the metal.
After a few turns, the screw should grip the metal strongly. You will feel resistance. Resistance indicates thread formation.
Continue turning slowly, allowing the screw to cut deeper. Slow turning reduces friction heat. Heat can distort the hole.
If the screw becomes too tight, turn backward half a turn. Loosening clears metal shavings. Clear shavings improve cutting.
Once fully inserted, the screw will sit firmly in the metal. The threads it creates are strong. This makes self tapping screws ideal for drill free projects.
How to Use a Nail and Hammer to Penetrate Thin Metal Sheets
Thin metal sheets can be punctured using a nail. The nail creates an initial hole. This acts like a pilot hole for screws.
Place the nail tip on the metal surface where you want the hole. Hold it straight. Straight alignment ensures clean penetration.
Tap the nail lightly with the hammer until you see a mark. Increase force gradually. Gradual force prevents surface damage.
When the nail tip breaks through, remove it gently. A small hole will appear. This is your screw’s guiding hole.
Use a screwdriver to widen the hole slightly. Turning it within the hole enlarges the entry point. Enlarging ensures screw fit.
Thin metal often bends if force is too high. Support the underside with wood. Support prevents deformation.
If the hole edges are sharp, smooth them with a file. Sharp edges can cut. Filing improves safety.
This method is simple and effective when you do not have a drill. It works best for thin metal sheets. Perfect for small DIY tasks.
How to Use a Screwdriver to Drive Screws Into Metal Manually
Use a high quality screwdriver with a strong grip. Weak handles slip easily. Strong handles give better control.
Place the screwdriver tip into the screw head and hold it straight. Straight alignment prevents stripping. Stripping ruins the screw.
Apply firm downward pressure and begin turning slowly. Slow turning helps the screw bite into the metal. Biting is essential for threading.
Use both hands if needed. One hand turns while the other stabilizes. Stabilizing improves accuracy.
Take breaks during tightening to prevent fatigue. Manual screwing can be tiring. Resting reduces mistakes.
If turning becomes too difficult, reverse the screw slightly. Reversing clears metal shavings. Clearing shavings improves movement.
Continue turning until the screw sits flush with the metal. Flush seating ensures proper hold. Proper hold increases strength.
Manual threading takes patience but gives strong results. Without a drill, this method works reliably. Perfect for small projects.
How to Work With Thick Metal Without a Drill
Thick metal is harder to penetrate manually. The surface requires more force. Proper technique becomes critical.
Start by creating a deeper starter indent using a punch. Deep indents give stronger grip. Strong grip reduces slipping.
Use self drilling screws if available. These have built in drill points. Built in points improve penetration.
Turn the screw slowly and apply consistent pressure. Consistency helps cutting. Cutting must be controlled.
If the screw does not advance, heat may be building. Stop and let the metal cool. Cooling prevents deformation.
Use a small nail to create a tiny pilot hole. This gives the screw a path. Path creation reduces difficulty.
If the metal is extremely thick, avoid brute force. Excess force can break screws. Broken screws are hard to remove.
Patience and steady control are the keys. Thick metal requires time. Time ensures a proper hold.
Common Mistakes People Make When Screwing Into Metal Without Drills
Many beginners skip making a starter indent. Without a dent, the screw slips. Slipping causes scratches.
Using the wrong type of screw is another common mistake. Regular wood screws do not cut metal. They become damaged quickly.
Applying too much pressure can bend thin metal sheets. Bending weakens the material. It also ruins the appearance.
Using worn out screwdrivers leads to stripping. Stripped screws are difficult to remove. Quality tools prevent this.
People often try to rush the process. Rushing increases friction heat. Heat causes metal expansion.
Not supporting the metal from behind leads to dents. Support keeps the surface flat. Flat surfaces improve results.
Forgetting to clean metal shavings causes jamming. Shavings block threading. Cleaning prevents blockage.
Avoiding these mistakes improves accuracy and safety. Awareness creates better outcomes. Better outcomes improve confidence.
Safety Tips for Working With Metal Manually
Wear gloves to protect your hands from sharp edges. Metal surfaces can cut easily. Gloves reduce this risk.
Use safety goggles to shield your eyes from tiny metal shavings. Shavings can fly unexpectedly. Eye protection is essential.
Work slowly instead of applying sudden force. Sudden pressure can crack metal. Gentle pressure improves control.
Hold the tool handles securely. Slips occur when grips are weak. Secure grips reduce accidents.
Support thin metal from below when hammering. Support prevents bending. Bending weakens the structure.
Keep children away from the work area. Tools and metal can be dangerous. Safety requires focus.
Check screws and tools for damage before use. Damaged tools break easily. Breakage increases risk.
Follow each step carefully for a safe experience. Attention ensures safety. Safety ensures success.
Creative Uses for Screwing Into Metal Without Drills
You can attach brackets or small hinges to metal furniture. These projects often require small screws. Manual methods work well.
Hanging lightweight decorations on metal surfaces becomes easy. Metal signs, hooks or frames can be mounted smoothly. These tasks need minimal tools.
DIY craft projects often involve sheet metal. Screws can hold different pieces together. Creativity grows with simple techniques.
You can secure loose metal panels on sheds or garages. Manual screws tighten quickly. Stability improves instantly.
Metal license plates or signage can be attached without power tools. This is helpful in outdoor areas. Flexibility becomes a benefit.
Small repairs on appliances or metal boxes can be done without drills. Manual screwing fixes loose parts. Repairs become convenient.
Using screws without a drill helps in temporary fixtures too. Temporary fixes do not require permanent holes. Flexibility improves usefulness.
These creative applications show how versatile manual screwing can be. Practical methods expand possibilities. Simple tools achieve strong results.
Manual Metal Screwing FAQ Guide
Can you screw directly into metal without a drill?
Yes, using self tapping screws and a starter indent.
Do self tapping screws work on thick metal?
Yes, but progress will be slow.
Will hammering damage the metal?
Only if you hit too hard or without support.
Is it safe to start a hole with a nail?
Yes, for thin metal sheets.
Do I need a punch to make a dent?
A punch is ideal but a nail can work.
Can wood screws go into metal manually?
No, they cannot cut threads.
Why does the screw slip on metal?
Metal is smooth. You need a starter dent.
Do I need special screws?
Self tapping or self drilling screws work best.
Can I use oil when screwing into metal?
Yes, a little oil reduces friction.
Will metal warp while hammering?
Thin metal can warp without support.
Can I make a pilot hole without a drill?
Yes, using a nail and hammer.
Can I screw into stainless steel this way?
Only if it is thin. Thick stainless is difficult.
How do I avoid stripping screws?
Use proper screwdrivers and steady pressure.
Is manual screwing stronger?
It can be strong when done correctly.
Do I need protective gear?
Gloves and goggles are highly recommended.
Conclusion
Screwing into metal without a drill is completely possible when you use the right tools and patient technique.
By creating a starter indent, using self tapping screws and applying slow controlled pressure, you can drive screws into both thin and moderately thick metal surfaces safely. The process may take longer than using a drill, but it offers strong, reliable results for many everyday tasks.
Understanding how metal reacts to pressure makes the work easier and prevents damage. When you support the metal properly, control friction and avoid rushing, the screws hold firmly and cleanly.
These simple manual skills are valuable for quick repairs, small DIY projects and situations where power tools are unavailable.
With the right approach, you gain the confidence to work with metal anytime. Manual screwing techniques give you flexibility and control, proving that you do not always need a drill to get the job done.
Once you learn the method, the process becomes smooth, predictable and surprisingly effective.

I’m John F. Nicholas, the founder, lead writer, and drill enthusiast behind 101drill.com. With years of hands-on experience in power tools and DIY projects, I created this platform to share practical knowledge, expert tips, and real-world insights to help others master the art of drilling.