
Rafik was working on a simple shelf installation when he tried to change the drill bit on his cordless drill. The keyless chuck refused to open and he assumed the drill was broken even though it worked perfectly the day before.
After some research he realized that keyless chucks can jam due to dirt heat or incorrect handling and most situations can be fixed without replacing the tool.
Many new users are unsure how to properly open a keyless chuck because the mechanism works differently from older keyed designs.
The process relies on hand tightening and controlled rotation instead of using a separate metal key. Understanding how the system works prevents damage and makes bit changes faster and safer.
Learning how to open a keyless chuck helps avoid frustration during projects and protects the drill from unnecessary force.
With the right technique the chuck releases smoothly even if it feels stuck at first. Knowing the correct steps keeps the tool working efficiently through repeated use.
How a Keyless Chuck Opens and Closes
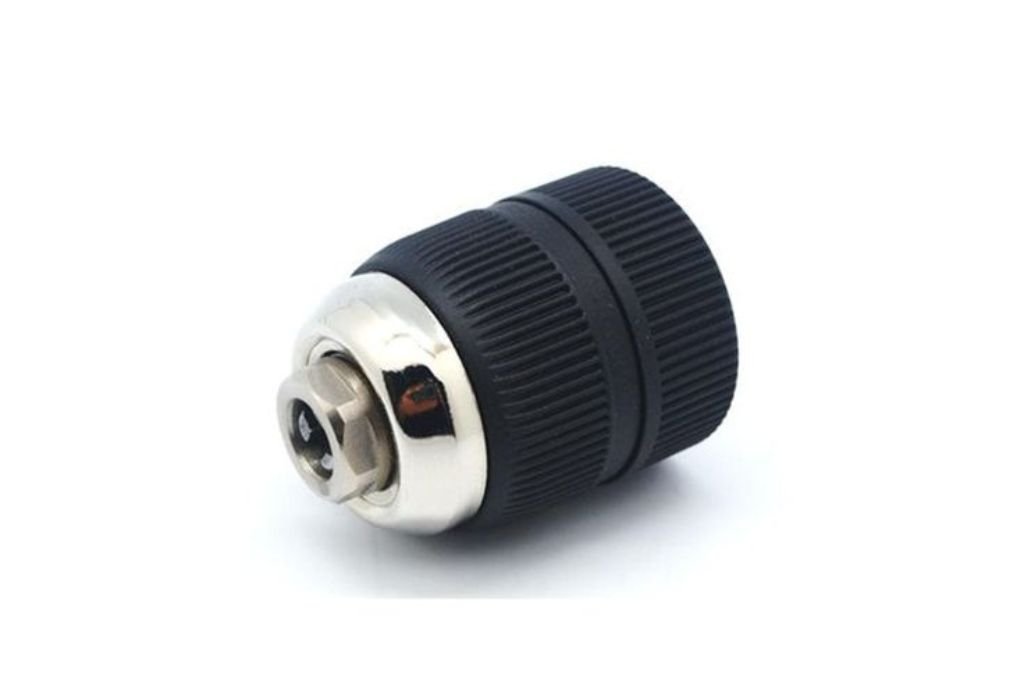
A keyless chuck opens when the user rotates the outer sleeve in the opposite direction of tightening. This rotation moves the internal jaws away from the center and creates enough space for the bit to be inserted or removed. The process does not require any external tools.
The chuck uses threaded movement to control jaw spacing. Turning the sleeve one way forces the jaws inward and clamps the bit securely. Turning it the other way reverses the motion and releases pressure.
Some drills include spindle lock which prevents the motor shaft from rotating during bit changes. This allows the user to open the chuck with one hand. Other models require holding the back section while turning the front.
The sleeve must be rotated fully until resistance stops. Partial rotation may not open the jaws enough for removal. Smooth steady movement prevents internal wear.
Users often confuse opening direction with drill rotation. The sleeve always controls the jaws regardless of trigger direction. Understanding this prevents forcing the chuck incorrectly.
Knowing how the mechanism works ensures safe operation. Proper handling reduces strain and keeps the chuck functioning reliably. This foundation helps avoid common mistakes during bit changes.
Step by Step Method to Open a Keyless Chuck
First ensure the drill is switched off and battery removed for safety. Holding a powered tool while adjusting the chuck increases accidental injury risk. Removing power keeps the procedure controlled.
Grip the chuck sleeve firmly with one hand. If the drill has spindle lock activate it to stop the shaft from turning. If not hold the rear part of the chuck with the other hand to stabilize it.
Rotate the front sleeve counterclockwise to loosen. Continue turning until the jaws retract visibly. Do not apply sudden force as steady motion works more effectively.
Remove the drill bit once the jaws have opened fully. If the bit feels stuck gently wiggle it while maintaining sleeve rotation. Avoid pulling aggressively which may damage the jaws.
Inspect the jaws for debris before inserting a new bit. Dust or shavings make opening harder over time. Cleaning improves smoothness during future adjustments.
Following this method ensures the chuck opens correctly every time. Practicing the technique builds confidence during bit changes. Consistent handling prevents accidental wear and tool damage.
How to Open a Stuck Keyless Chuck
A stuck chuck often occurs when debris blocks internal movement. Start by blowing compressed air into the opening to remove dust. This may free the jaws without further action.
If the chuck is stuck from heat expansion allow the drill to cool completely. Continuous drilling transfers heat into the mechanism. Cooling restores normal metal spacing and improves rotation.
For stubborn cases insert the short end of an L shaped hex key into the chuck. Tighten lightly and use the long end as a lever while rotating the sleeve. This provides extra grip without damaging components.
Never strike the chuck with a hammer to force it open. Impact can misalign the jaws permanently. Gentle controlled pressure prevents internal failure.
If rust is present apply a small amount of penetrating oil to the threads. Let it sit for several minutes before attempting rotation. Excess oil must be wiped away to prevent slipping.
Understanding how to free a stuck chuck prevents tool replacement. Most jams resolve with simple steps rather than heavy force. Careful handling ensures safe and long lasting operation.
How to Open a Keyless Chuck Without Spindle Lock
Some drills do not include a spindle lock button which makes opening slightly harder. Hold the back half of the chuck firmly with one hand. Use the other hand to rotate the front sleeve counterclockwise.
If the motor shaft slips while turning use lower gearing. Switching the drill into a slower speed setting increases resistance. This helps stabilize the chuck during rotation.
Wearing rubber grip gloves improves hand traction. Smooth metal surfaces are harder to turn during tightening or loosening. Grip support reduces strain and slipping.
Do not pull the trigger while opening the chuck. Using the motor to force the jaws open may cause injury. Manual rotation is always required for safety.
If the chuck remains difficult to turn check for debris or wear. Cleaning the threads may restore freedom of movement. Persistent stiffness may indicate internal damage.
Opening a keyless chuck without spindle lock requires controlled grip. Practicing the technique ensures reliable operation. Proper handling protects both user and tool.
How to Open a Keyless Chuck on a Cordless Drill
Cordless drills commonly use keyless chucks for quick bit changes. First remove the battery to prevent accidental spinning. Safety reduces risk during sleeve rotation.
Hold the drill body securely before loosening the sleeve. Cordless models are lighter and may move unexpectedly. Stabilizing prevents twisting or dropping.
Rotate the sleeve counterclockwise until the jaws separate fully. Cordless chucks usually open smoothly with minimal force. If not cooling or cleaning may be required.
Inspect the bit shank before removal. Bent or rusted bits may catch inside the jaws. Gently wiggling loosens contact without damaging surfaces.
After removing the bit check jaw spacing. Inserting the next bit requires enough clearance. Do not force the bit into partially open jaws.
Understanding cordless handling improves convenience. Keyless chucks work efficiently when maintained properly. This ensures fast and safe operation for frequent bit changes.
How to Open a Keyless Chuck on a Drill Press
Drill presses sometimes include heavy duty keyless chucks. First disconnect the power source completely. Stationary tools require strict safety procedure.
Hold the chuck firmly while rotating the sleeve. The drill press spindle does not lock like handheld drills. Use one hand to stabilize the chuck while loosening.
Large drill press chucks may require two handed operation. Turning from opposite sides increases leverage. Slow movement prevents sudden jerking.
If the chuck refuses to open check for hardened debris. Industrial drilling creates heavy metal filings that jam threads. Cleaning and lubrication may be necessary.
Avoid using wrenches unless recommended by manufacturer. Excess torque damages precision components. Only apply hand force for safe adjustment.
Opening a keyless chuck on a drill press requires patience. Following proper procedure protects accuracy and chuck alignment. This ensures continued reliable performance.
How to Insert and Remove a Bit Correctly
Open the chuck fully before inserting a bit. Partial opening causes uneven jaw contact. This increases slipping during use.
Insert the bit straight into the center. Tilting may damage the jaws and reduce stability. Proper alignment ensures stronger grip.
Tighten the sleeve by hand until movement stops. For dual sleeve designs hold the rear section still. Continue tightening until firm resistance is felt.
Test the grip by pulling the bit lightly. If it moves tighten again. Never begin drilling with a loose bit.
Remove the bit only after fully loosening the jaws. Forcing the bit out damages the internal surface. Smooth removal preserves lifespan.
Correct bit handling prevents accidents. Following proper steps ensures smooth and reliable performance. This improves both safety and drilling accuracy.
Why a Keyless Chuck Gets Hard to Open
Dust and debris accumulate from drilling activities. Fine particles settle inside the threads and block movement. Regular cleaning prevents stiffness.
Heat expansion increases tightness temporarily. Prolonged drilling causes metal components to expand. Cooling restores normal clearances.
Over tightening the chuck increases friction. Users may twist harder than necessary for security. Moderate tightening prevents future difficulty.
Worn jaws create uneven pressure. This reduces movement during opening attempts. Replacement restores smooth operation.
Rust forms when moisture enters the mechanism. Corrosion locks threads and prevents rotation. Protective storage reduces long term damage.
Understanding why difficulty occurs helps prevent recurrence. Proper care maintains ease of use. This ensures long lasting chuck performance.
How to Prevent a Keyless Chuck From Getting Stuck
Clean the chuck regularly after drilling. Removing debris improves rotation and tightening accuracy. Compressed air works well for fast cleaning.
Avoid exposing the drill to excess moisture. Store in a dry area to prevent rust formation. Protective cases reduce environmental damage.
Do not overtighten the chuck unnecessarily. Hand tightening until firm is sufficient. Excess force increases long term wear.
Allow cooling periods during continuous drilling. Heat accelerates metal expansion and seizing. Short breaks protect chuck function.
Use quality drill bits with proper shank finish. Smooth worn bits increase slippage and jaw stress. Better bit selection prevents stuck conditions.
Preventive care reduces maintenance problems. Simple habits keep the chuck working smoothly. This protects both the tool and the user.
When to Replace a Keyless Chuck Instead of Opening It
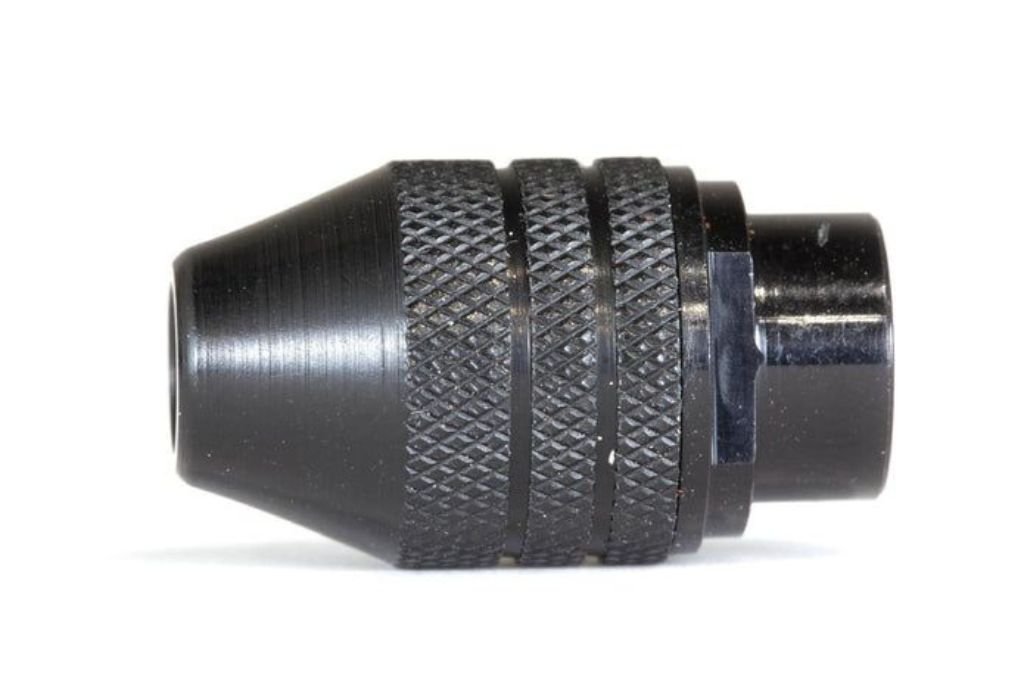
If the jaws fail to grip even after cleaning replacement may be required. Worn teeth cannot maintain pressure under rotation. Continued use becomes unsafe.
Cracked or damaged sleeves indicate structural failure. Visual inspection reveals splitting or denting. Replacement prevents sudden malfunction during drilling.
Persistent seizing after lubrication suggests internal wear. The threaded mechanism may no longer align properly. Repair is unlikely and replacement is more practical.
If bits wobble despite correct tightening the jaw surface is uneven. Drilling accuracy decreases and tool vibration increases. New chuck restores performance.
Rust that penetrates internal components cannot be reversed. Severe corrosion weakens the mechanism permanently. Installing a new chuck ensures safe operation.
Knowing when to replace prevents accidents. Timely action protects tool reliability. This ensures consistent and safe drilling performance.
Practical Questions About Bit Removal Techniques
How do I open a keyless chuck properly?
Rotate the front sleeve counterclockwise by hand until the jaws retract fully and release the bit.
Why is my keyless chuck not opening?
Debris heat or overtightening may jam the internal mechanism and prevent smooth rotation.
Can I use tools to force the chuck open?
No pliers or wrenches can damage the sleeve and internal threads so only hand force should be used.
What should I do if the chuck is stuck?
Clean the jaws allow cooling or use a hex key for gentle leverage without applying impact.
Does drill direction affect chuck opening?
No the sleeve controls the jaws independently of trigger rotation and must be turned manually.
Why does my chuck tighten itself during drilling?
Heat and vibration may increase friction which makes the sleeve harder to loosen afterward.
Can opening a keyless chuck damage the drill?
Only if excessive force is used since correct technique keeps both the chuck and drill safe.
How often should I clean the chuck?
Cleaning during regular tool maintenance or after heavy drilling prevents debris buildup.
Is it normal for a new chuck to feel stiff?
Yes new mechanisms loosen slightly with use but should still rotate smoothly by hand.
When should I replace a keyless chuck?
Replace it when jaws no longer grip properly or when internal damage prevents consistent tightening.
Conclusion
Opening a keyless chuck is a simple process when performed with the correct technique and understanding of how the mechanism works. Most chucks loosen by rotating the sleeve counterclockwise until the jaws retract and release the bit without needing external tools.
Learning the proper steps prevents frustration and protects the drill from damage during everyday use.
When a keyless chuck becomes stuck the issue usually comes from debris heat or overtightening rather than mechanical failure. Cleaning cooling and gentle leverage resolve most problems safely.
Replacing the chuck is only necessary when wear or damage affects gripping performance permanently.
Understanding how to open and maintain a keyless chuck improves safety efficiency and tool lifespan.
With proper handling users can change bits quickly and avoid common mistakes that lead to jamming or slipping. Following correct procedures ensures smooth reliable drilling across all types of projects.

I’m John F. Nicholas, the founder, lead writer, and drill enthusiast behind 101drill.com. With years of hands-on experience in power tools and DIY projects, I created this platform to share practical knowledge, expert tips, and real-world insights to help others master the art of drilling.