
Most people twist a keyless chuck and assume it is tight enough until the drill bit suddenly slips during drilling.
The noise, vibration, and unexpected loss of control often reveal that the chuck was never truly locked in the first place. What feels secure by hand can loosen quickly if the correct locking steps are not followed.
Keyless chucks are designed to tighten without a tool but they still rely on proper torque and technique to lock securely.
When the jaws close evenly and the internal mechanism resists backward rotation the bit stays firmly in place even under heavy drilling pressure. Without this locking action the bit can shift or fall out and create serious safety risks.
Understanding how to lock a keyless chuck properly prevents slippage, damaged bits, and wasted work.
With the right technique any user can secure the bit confidently whether using a cordless drill at home or working with tougher materials on the job. Learning these steps turns a simple twist into a reliable and safe drilling setup.
What Locking a Keyless Chuck Actually Means
Locking a keyless chuck means applying enough torque for the internal mechanism to resist loosening during drilling. The jaws must clamp the bit firmly so they cannot retract under vibration or rotational force. This goes beyond lightly tightening the sleeve by hand.
Many users misunderstand locking as simply closing the jaws until the bit holds. Without activating the self locking resistance the chuck may loosen as soon as drilling begins. Proper locking ensures the internal threads stay engaged securely.
Locking is different from a keyed chuck because no external tool increases tightening force. The keyless system depends entirely on hand applied torque and mechanical design. This makes technique essential for a secure grip.
Modern keyless chucks include features that help prevent accidental loosening. Some models use ratcheting to increase resistance while others rely on internal friction surfaces. Understanding these differences improves locking consistency.
Locking is necessary for all drilling tasks including light duty materials. Even small bits can slip if the chuck is not secured correctly. Proper locking keeps the drill bit centered stable and safe.
Knowing what locking actually means helps users avoid incorrect assumptions. When done correctly the bit stays secure without needing constant retightening. This improves both performance and safety.
How a Keyless Chuck Locks When Tightened Correctly
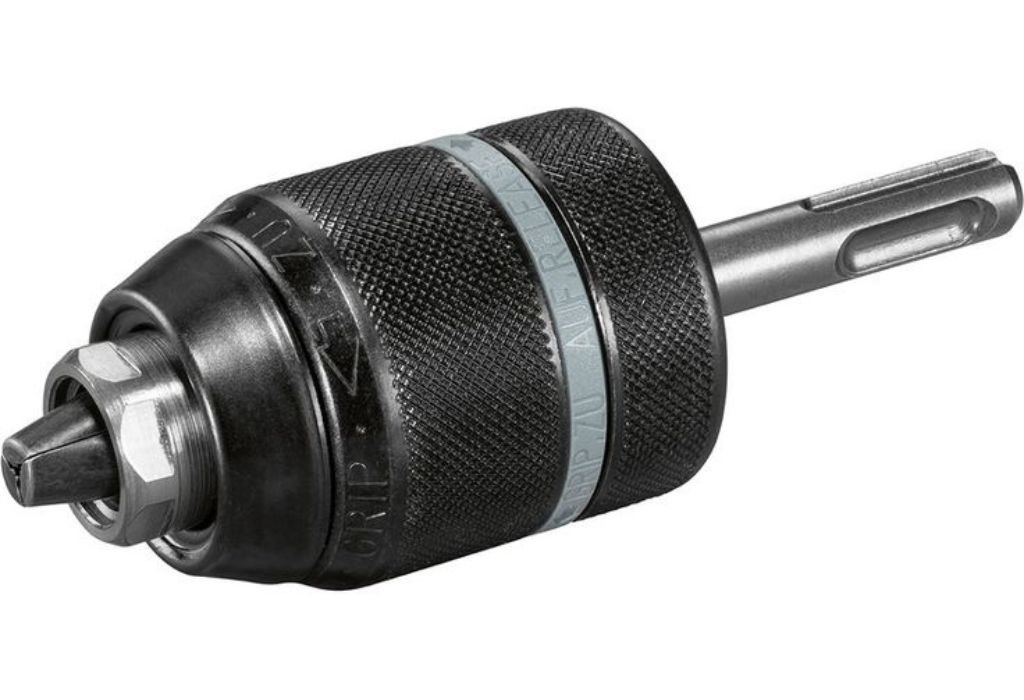
A keyless chuck locks through internal pressure created by rotating the sleeve firmly in the tightening direction. As the jaws close they apply equal gripping force around the bit. This uniform pressure stabilizes the bit during rotation.
The threaded mechanism inside the chuck converts twisting motion into forward jaw movement. Once the jaws make full contact resistance increases sharply. This resistance prevents backward movement under drilling force.
Self locking occurs when internal friction and jaw pressure hold the bit securely. The chuck resists reverse rotation even if the drill vibrates or stops suddenly. This is why proper torque is critical during tightening.
Different chuck models offer different locking strength depending on design. Higher quality chucks have stronger internal components and better friction surfaces. These provide more reliable locking under heavier loads.
Users can feel when locking activates because the sleeve becomes harder to turn. Stopping too early prevents the mechanism from engaging fully. This often leads to slipping once drilling begins.
What makes a keyless chuck lock without a key?
Internal friction and jaw pressure create resistance that prevents reverse rotation during drilling.
Why does the chuck loosen if not locked correctly?
Insufficient torque stops the self locking mechanism from engaging which allows vibration to loosen the jaws.
Do all keyless chucks have the same locking strength?
No different designs and materials provide different levels of resistance and holding power.
How do you know when the chuck is fully locked?
The sleeve becomes harder to turn and additional tightening no longer changes jaw movement.
Can a bit still slip if the chuck is locked?
Yes extremely high torque drilling or worn jaws may still cause slippage but proper locking reduces the risk.
Step by Step Process to Lock a Keyless Chuck Properly
Start by inserting the drill bit all the way into the jaws until it reaches the deepest point. Centering the bit prevents wobbling and increases jaw contact. Partial insertion reduces gripping strength and increases slipping risk.
Hold the drill body steady and rotate the chuck sleeve clockwise with firm hand pressure. Continue turning until resistance increases and the jaws fully close. Tightening should feel smooth rather than forced or irregular.
Apply a final twist using both hands if needed to activate the locking resistance. Some drills include a spindle lock button that prevents rotation during tightening. Using this feature ensures maximum torque without slipping.
After locking pull the drill bit gently to confirm it does not move. Any slight sliding indicates the chuck needs further tightening. Retesting prevents slipping once drilling starts.
Repeat the process for large or smooth bits that require extra grip. Proper technique reduces the need for constant retightening during use. Consistency ensures long term performance and safety.
Should the drill bit be pushed fully into the chuck?
Yes full insertion increases jaw contact and prevents wobbling or slipping during drilling.
Do you need two hands to lock a keyless chuck?
Not always but using both hands can help apply final torque for a secure lock.
What is a spindle lock button used for?
It prevents the drill spindle from turning which allows easier tightening of the chuck.
How do you know if the bit is locked securely?
Pull the bit gently and if it does not move the chuck is locked correctly.
Can locking be repeated for extra security?
Yes applying a second tightening pass improves grip especially for large or smooth bits.
Locking a Single Sleeve vs Double Sleeve Keyless Chuck
Single sleeve chucks tighten using one rotating sleeve while the drill spindle locks the opposite side. This allows one handed operation on drills with spindle lock features. Cordless drills commonly use this design for speed and convenience.
Double sleeve chucks require holding one sleeve while rotating the other to tighten. This prevents the chuck body from spinning freely during adjustment. The two handed method provides more control and higher tightening force.
Single sleeve designs rely heavily on proper torque because the user cannot counter rotate manually. If the spindle lock is weak the chuck may not lock securely enough. Higher quality drills provide stronger internal locking support.
Double sleeve chucks are often found on older or heavy duty drills. Their mechanical design allows stronger manual tightening without depending on internal locking. This makes them more reliable for tough drilling conditions.
Choosing the correct technique depends on the chuck style and drill features. Understanding the difference ensures proper locking every time. Using the wrong method reduces grip strength and increases slipping risk.
How Ratcheting Keyless Chucks Improve Locking Strength
Ratcheting keyless chucks include an internal mechanism that clicks during final tightening. Each click indicates increased torque and improved jaw pressure. This helps apply stronger grip without slipping by hand.
The ratchet prevents the sleeve from backing off easily under vibration. Once tightened to the ratcheting point the chuck resists reverse rotation more effectively. This makes it ideal for drilling into harder materials.
Not all keyless chucks include ratcheting features especially on budget tools. Higher end cordless drills commonly use ratcheting for secure bit holding. The added control benefits both professionals and DIY users.
Ratcheting does not replace proper tightening technique. The user must still apply firm hand pressure to activate the mechanism. Light tightening will not trigger clicking or achieve proper locking.
Understanding how ratcheting works helps prevent slipping and loosening. When available it provides a noticeable improvement in gripping reliability. This feature enhances safety and performance without requiring extra tools.
What does the clicking sound mean on a keyless chuck?
It indicates the ratcheting mechanism has engaged and added extra locking torque.
Do all keyless chucks have ratcheting?
No only certain models include this feature typically on higher quality cordless drills.
Does ratcheting stop the chuck from loosening?
It helps resist reverse rotation but proper tightening is still required for secure locking.
Should you keep tightening after clicking begins?
No once clicking starts the chuck has reached its secure torque and additional force is unnecessary.
Is a ratcheting chuck better for heavy drilling?
Yes it provides stronger locking and reduces the chance of bit slippage under higher load.
How to Test if the Chuck Is Fully Locked Before Drilling
Testing the chuck before drilling prevents accidental slipping and improves safety. After tightening the sleeve firmly pull the bit straight outward with moderate force. If the bit does not move the locking mechanism has engaged correctly.
Rotate the bit slightly by hand while holding the sleeve still. Any twisting or shifting indicates the jaws have not gripped evenly. Retightening the chuck solves the issue before drilling begins.
Run the drill at low speed for a brief moment to check stability. A properly locked chuck keeps the bit centered without wobbling or vibration. Stopping immediately prevents damage if movement is noticed.
Larger bits require extra checking because their weight increases loosening risk. Confirm full jaw contact by inspecting for gaps around the shank. Uneven closure reduces gripping pressure during drilling.
Testing becomes especially important when switching between smooth and coated bits. Surface finish changes friction and affects how well the jaws grip. Correct technique ensures consistent results with different bit types.
Regular testing helps develop better tightening habits over time. Small checks prevent bigger problems and extend the lifespan of both the chuck and drill bits. Reliable testing creates safer and smoother drilling performance.
Common Mistakes That Stop a Keyless Chuck From Locking
A frequent mistake is inserting the bit only halfway into the jaws. Shallow placement reduces contact area and causes slipping under load. Pushing the bit fully down prevents uneven gripping and wobbling.
Light tightening is another common error that prevents proper locking. Users often stop as soon as the bit holds without activating the self locking mechanism. Final torque is necessary to secure the jaws firmly.
Allowing dust or debris to build up inside the chuck interferes with jaw movement. Dirt blocks the internal threads and reduces smooth tightening. Regular cleaning keeps the mechanism working reliably.
Holding the rotating sleeve incorrectly causes weak tightening. Gripping only the smooth surface may lead to slipping especially with gloves. Using textured areas improves control and applied torque.
Over tightening can also create problems by damaging internal components. Excessive force wears the jaws and threads and reduces long term locking strength. Hand pressure is enough when technique is correct.
Avoiding these mistakes ensures the chuck locks consistently and safely. Understanding common errors helps users improve performance with minimal effort. Simple habits lead to better drilling results in every situation.
How to Lock a Keyless Chuck for Large or Slippery Drill Bits
Large diameter bits require extra attention because they generate more torque during drilling. Full depth insertion increases jaw contact and improves stability under pressure. Proper centering prevents uneven strain on the chuck.
Smooth bits such as titanium or cobalt-coated shanks reduce friction between the jaws and the metal surface. Applying firm final tightening helps overcome lower grip resistance. Ratcheting chucks offer additional locking strength for these situations.
Using both hands during tightening increases torque and improves the locking effect. One hand stabilizes the drill body while the other rotates the sleeve firmly. Single sleeve chucks with spindle lock provide better one handed control.
Avoid using pliers or external tools to tighten the chuck for large bits. Mechanical force can damage the sleeve and weaken future locking. Correct hand technique achieves secure grip without excess pressure.
Rechecking the bit after initial tightening ensures reliable performance. Running the drill at low speed verifies that the bit remains stable. Immediate correction prevents slipping once drilling begins.
Do large drill bits need extra tightening?
Yes larger bits generate more torque and require firmer hand pressure for secure locking.
Why do smooth coated bits slip more easily?
Coatings reduce surface friction which makes gripping harder without proper tightening.
Can I use tools to tighten the chuck for big bits?
No external tools can damage the sleeve and internal threads so only hand tightening is recommended.
Is two handed tightening better for large bits?
Yes using both hands applies more torque and improves locking effectiveness.
Should I recheck the bit before drilling heavy materials?
Yes retesting ensures the chuck is still locked and prevents slipping under load.
What to Do if the Chuck Loosens While Drilling
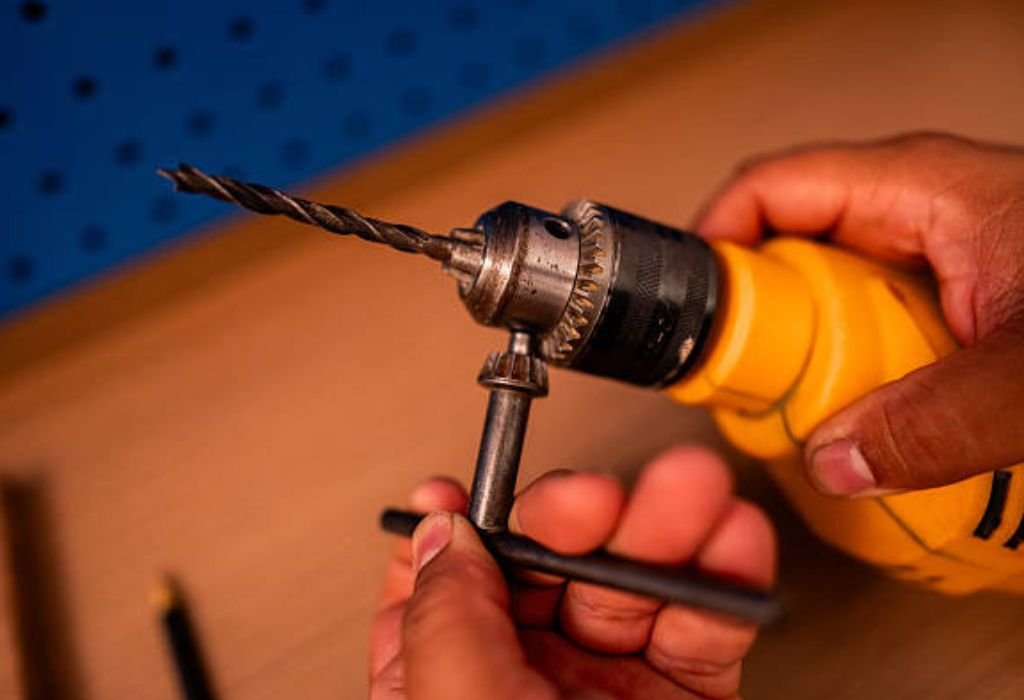
If the chuck begins to loosen stop drilling immediately to prevent damage. Continuing while the bit slips increases wear on both jaws and bit surface. Sudden release can also create a safety hazard.
Remove the bit and clean the jaws to eliminate dust or debris. Dirt reduces friction and prevents proper gripping. Compressed air or a small brush restores smooth jaw contact.
Retighten the chuck using proper technique with firm final torque. Activating the self locking mechanism prevents repeated loosening. Using a spindle lock improves tightening on single sleeve chucks.
Check the drill bit for wear or rounding on the shank. Damaged bits reduce gripping and may continue to slip even when tightened correctly. Replacing worn bits restores secure locking performance.
If loosening continues the chuck jaws may be worn or damaged. Uneven closure or visible gaps indicate mechanical failure. Professional replacement may be necessary for safe operation.
What should I do first if the chuck loosens while drilling?
Stop drilling immediately to prevent damage and retighten the bit securely before continuing.
Can debris cause the chuck to loosen?
Yes dirt reduces jaw friction and prevents proper locking so cleaning is important.
Do worn drill bits slip more easily?
Yes rounded shanks reduce grip and may require replacement for secure tightening.
What if the chuck keeps loosening repeatedly?
The jaws or threads may be worn and the chuck may need professional replacement.
Is it safe to keep drilling if the chuck is slightly loose?
No even slight slipping can damage components and should be corrected immediately.
Maintenance Tips to Keep a Keyless Chuck Locking Smoothly
Regular cleaning prevents dust metal shavings and debris from entering the chuck. After use blowing compressed air through the jaws restores smooth movement. This reduces the chance of sticking during tightening.
Applying small amounts of light machine oil keeps the internal threads lubricated. Lubrication reduces wear and prevents corrosion inside the mechanism. Excess oil should be avoided to prevent attracting additional debris.
Avoid dropping the drill or striking the chuck against hard surfaces. Impact can bend internal components and reduce locking efficiency. Storing the tool properly protects the chuck from accidental damage.
Inspecting the jaws periodically ensures they close evenly and maintain full contact. Uneven closure indicates wear or internal obstruction. Early detection prevents locking failure during drilling.
Storing the drill in a dry clean environment prevents rust and moisture damage. Humidity corrodes metal parts and reduces smooth rotation. Using a tool case increases long term durability.
Should I lubricate a keyless chuck regularly?
Yes occasional light lubrication keeps the internal threads moving smoothly and prevents sticking.
Can dropping the drill damage the chuck?
Yes impact can bend internal parts and reduce the ability to lock securely.
How often should the chuck be inspected?
Regular inspection during tool cleaning helps detect early wear or obstruction.
Does moisture affect locking performance?
Yes rust and corrosion restrict movement and reduce gripping strength over time.
Should excess oil be removed after lubrication?
Yes wiping off extra oil prevents dust buildup inside the chuck.
Conclusion
Learning how to lock a keyless chuck correctly ensures safer drilling and prevents frustrating bit slippage.
Proper technique allows the internal mechanism to engage fully and hold the bit firmly under pressure. Full insertion and firm final tightening create the secure grip needed for smooth operation.
Understanding the differences between single sleeve double sleeve and ratcheting designs improves locking success.
Avoiding common mistakes such as light tightening or debris buildup keeps the chuck reliable over time. Maintenance and testing help prevent problems before they occur.
With the right steps any user can lock a keyless chuck confidently for everyday drilling tasks. Proper handling protects both the tool and the drill bits and ensures stable accurate performance. Knowing how to secure the chuck transforms drilling into a safer and more efficient process.

I’m John F. Nicholas, the founder, lead writer, and drill enthusiast behind 101drill.com. With years of hands-on experience in power tools and DIY projects, I created this platform to share practical knowledge, expert tips, and real-world insights to help others master the art of drilling.