
When Imran drilled pilot holes for his first DIY project, the drill bit suddenly slipped and left a shallow mark instead of a clean hole. He tried tightening the chuck again but was unsure how much pressure to apply by hand.
After a few attempts, the bit loosened once more and made him question if he was using the drill correctly at all.
A friend later showed him the proper way to tighten a keyless chuck and explained why the sleeve must be turned firmly until it locks.
That simple instruction changed how confidently Imran handled the drill and prevented further slipping during the project. A small adjustment made a big difference in both safety and drilling accuracy.
Many beginners struggle with tightening a keyless chuck because the mechanism appears simple but requires the right technique.
Proper tightening ensures the bit stays secure under torque and prevents accidents or damaged materials. Understanding the correct method helps users work more efficiently and avoid common mistakes.
What a Keyless Drill Chuck Does and Why Proper Tightening Matters
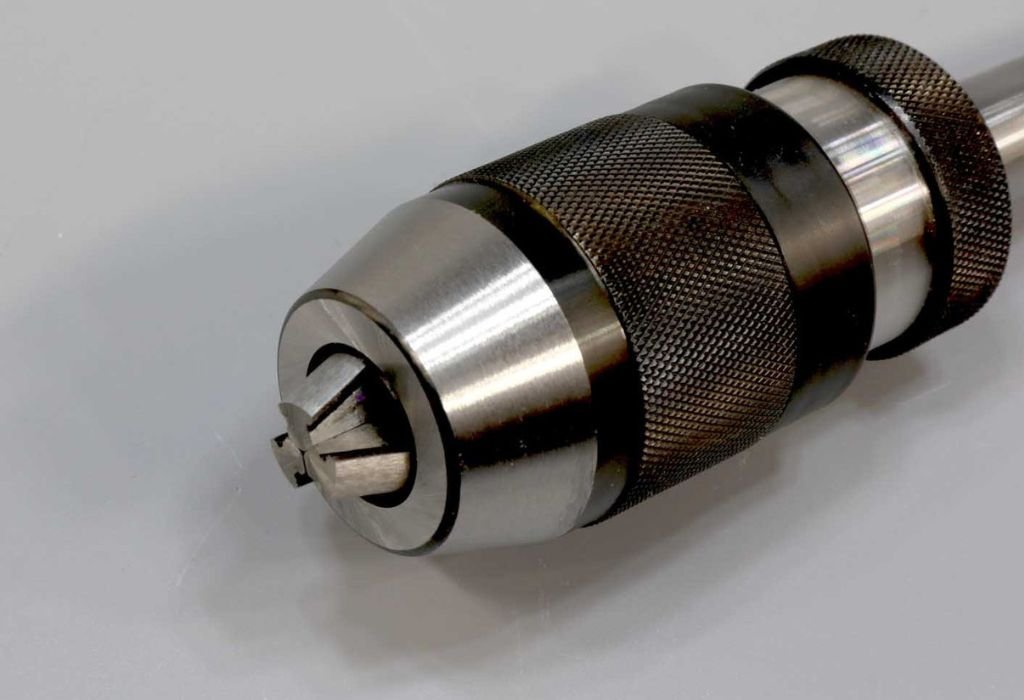
A keyless drill chuck holds the drill bit in place using internal jaws that tighten when the outer sleeve is rotated by hand. This design eliminates the need for a separate chuck key and allows quick bit changes during continuous work.
The jaws must clamp evenly around the bit to ensure smooth rotation and prevent slipping during drilling.
Proper tightening matters because loose bits can wobble and damage both the work surface and the drill motor.
A poorly secured bit may stop cutting midway and increase the risk of sudden kickback or loss of control. Ensuring a firm grip keeps the drill stable and improves accuracy for cleaner drilling results.
Most modern cordless drills rely on keyless chucks because they support fast adjustments during frequent task switching.
Tightening correctly extends the lifespan of the chuck by reducing internal wear. Understanding the purpose of the mechanism is the first step in preventing bit slippage.
Step by Step Process for Tightening a Keyless Chuck Correctly
The process begins by opening the jaws fully by rotating the outer sleeve counterclockwise. Once the bit is inserted to full depth, the sleeve is turned clockwise to begin tightening by hand. The user should continue rotating until firm resistance is felt and the bit no longer moves.
Ratcheting models may produce a clicking sound during the final tightening stage which indicates proper locking.
Pulling the bit gently helps confirm that the jaws have clamped securely around the shank. Testing before drilling reduces the risk of slippage and ensures a smooth start.
If the drill offers a spindle lock button, pressing it allows easier tightening with one hand. Cordless drills should have the battery removed before adjusting to avoid accidental activation. Following these steps ensures safe and reliable tightening every time.
Do I need tools to tighten a keyless chuck?
No, it is designed to be tightened completely by hand.
How tight should the chuck be?
Firm enough that the bit does not move when pulled gently.
Does every keyless chuck make a clicking sound?
Only ratcheting types click during final tightening.
Should the bit be fully inserted before tightening?
Yes, seating it completely ensures proper grip and alignment.
Can I tighten the chuck while the drill is powered on?
Never, always turn off or remove the battery before adjusting.
Common Mistakes to Avoid When Tightening the Chuck
One common mistake is tightening only lightly, assuming hand pressure alone is enough for secure grip. Insufficient tightening causes the bit to loosen under torque and results in uneven drilling. Applying steady rotation until full resistance is reached prevents this issue.
Another mistake is inserting the bit only halfway into the jaws instead of seating it fully. Partial insertion increases wobbling and weakens the grip even when the chuck appears tight. Always push the bit to the deepest position before tightening begins.
Some users hold the sleeve incorrectly and rotate the drill body instead, which leads to uneven force and improper locking.
Maintaining firm hand placement on the sleeve ensures smooth tightening. Avoiding simple mistakes improves performance and protects both the user and the tool.
How Ratcheting Keyless Chucks Improve Grip Strength
Ratcheting keyless chucks include an internal locking mechanism that clicks into place during final tightening.
This feature prevents the sleeve from loosening accidentally while drilling through tough materials. The ratchet increases grip strength and allows better torque transfer between the drill and the bit.
Users benefit from greater confidence because the bit remains secure even during long drilling sessions. The clicking action also provides feedback that the chuck has reached the correct tightness level. This guidance helps beginners avoid under tightening and reduces slipping during operation.
Ratcheting models often have stronger metal construction and improved durability for heavy duty use. They resist wear caused by repeated tightening and loosening cycles over time. Choosing a ratcheting chuck enhances stability and reliability during demanding drilling tasks.
Is a ratcheting chuck better than a standard keyless chuck?
It provides stronger holding power and prevents accidental loosening.
Do all cordless drills have ratcheting chucks?
No, some budget models use standard non ratcheting designs.
Does the clicking sound mean the chuck is fully tight?
Yes, it indicates the locking stage has been reached.
Can a ratcheting chuck still slip?
Improper tightening or worn jaws may still allow slippage.
Should beginners choose a ratcheting chuck?
It offers helpful feedback and improves gripping confidence.
Tightening Techniques for Cordless vs Corded Drills
Cordless drills rely heavily on proper tightening because high torque settings can loosen the bit if the chuck is not secured firmly.
Users should hold the sleeve with one hand and rotate the drill body slightly to apply stronger tightening force. Removing the battery before adjustment ensures safety and prevents accidental activation.
Corded drills do not have a removable power source, so unplugging before tightening is essential. These drills often deliver consistent torque which increases the need for correctly seated bits during operation.
Holding both the sleeve and drill body provides better stability and reduces slipping during high resistance drilling.
Some models include a spindle lock button that prevents rotation during tightening. Engaging this feature allows precise tension and reduces strain on the user’s hand. Understanding tool differences ensures proper tightening and safe usage with both drill types.
Using Different Bit Types and Shank Styles for Better Hold
Hex shank bits provide the most secure hold because their flat sides prevent slipping inside the jaws.
These bits are ideal for driving screws and drilling through tougher materials that require higher torque. Using hex shanks reduces wear on the chuck and improves overall drilling performance.
Round shank bits are common for woodworking and general household drilling tasks. They rely solely on friction for grip which requires proper tightening to prevent spinning. Seating the bit fully and applying firm pressure ensures better alignment and reduces wobbling.
Specialty bits such as SDS types are not compatible with standard keyless chucks. Using incorrect shank styles may damage both the chuck and the drill. Matching the bit design to the chuck maintains safe and reliable operation.
Safety Tips While Tightening and Changing Drill Bits
Safety begins with turning off the drill and disconnecting power before adjusting the chuck. This prevents accidental trigger presses that could cause injury while the bit is being handled. Wearing gloves provides better grip on the sleeve without slipping during tightening.
Users should avoid touching the bit immediately after drilling because heat can build up quickly and cause burns. Allowing the bit to cool before removal ensures safer handling. Keeping hair, clothing, and jewelry away from the rotating chuck prevents entanglement during operation.
Proper lighting helps the user see the jaws clearly to ensure the bit is positioned correctly before tightening. Working in a clean area reduces dust and debris that may enter the chuck mechanism. Following these safety habits protects both the user and the tool.
Should I remove the battery before tightening the chuck?
Yes, removing power prevents accidental activation.
Is it safe to change bits while the drill is still plugged in?
No, always disconnect power first.
Can gloves help when tightening the chuck?
They improve grip and reduce slipping on the sleeve.
Should I let the bit cool before removal?
Yes, hot bits can cause burns after heavy drilling.
Can loose clothing be dangerous near the chuck?
It may get pulled into rotation and cause injury.
Why the Chuck Loosens and How to Prevent It
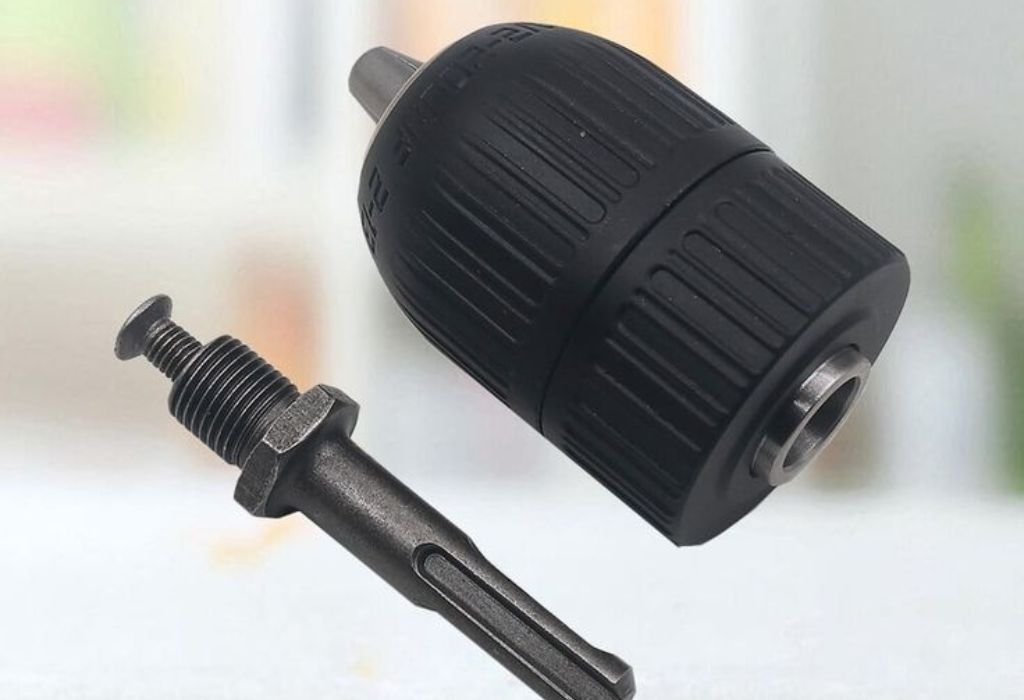
A keyless chuck may loosen when the bit is not fully seated before tightening. Partial insertion reduces the gripping surface and increases movement during drilling. Ensuring the bit reaches the bottom of the jaws prevents early slippage.
High torque loads can cause the sleeve to rotate slightly if not tightened firmly. Using a ratcheting chuck helps lock the mechanism and prevents accidental loosening during tough drilling tasks.
Reducing torque settings during light duty work also protects the chuck from unnecessary stress.
Wear and debris buildup can weaken grip strength over time. Cleaning the jaws and tightening sleeve periodically maintains smooth operation and reliable clamping. Preventive care reduces slipping and extends chuck lifespan.
Troubleshooting Slipping, Wobbling, and Stuck Chucks
Slipping often occurs when the internal jaws become worn or the bit is not tightened completely. Switching to hex shank bits helps improve grip when drilling into dense materials. If slippage continues, inspection is necessary to determine whether replacement is required.
Wobbling may result from improper bit seating or internal misalignment. Removing the bit and reinserting it fully often resolves minor wobbling issues. Persistent wobbling indicates wear in the chuck or drill spindle and should be checked professionally.
A stuck chuck can be caused by dirt, rust, or overtightening. Applying light lubrication around the sleeve threading may restore movement, but excessive oil attracts debris. Severe cases may require mechanical removal or replacement.
Why does my bit keep slipping even when tight?
Worn jaws or insufficient tightening may be the cause.
What if the bit wobbles during drilling?
Improper seating or internal wear can lead to misalignment.
Can a stuck chuck be loosened at home?
Light cleaning and lubrication may help in mild cases.
Is wobbling always a sign of a damaged chuck?
Sometimes reseating the bit solves the problem.
Should I replace a chuck that slips repeatedly?
Yes, consistent slipping indicates worn internal parts.
When to Replace a Keyless Chuck and How to Choose a New One
Replacement becomes necessary when the jaws no longer grip securely despite proper tightening. Repeated slipping or visible wear indicates the mechanism has reached the end of its service life. Continued use in this condition risks damaging the drill and compromising safety.
Choosing a new chuck requires matching thread size and mounting style to the drill model. Most chucks attach using a threaded connection or internal retaining screw. Checking manufacturer specifications ensures compatibility and proper installation.
Selecting a metal or ratcheting chuck improves durability and holding strength for long term use. High quality models maintain alignment better and resist wear during frequent tightening cycles. Upgrading the chuck restores performance and extends the drill’s lifespan.
Conclusion
Tightening a keyless drill chuck correctly ensures safe operation and prevents slipping during drilling tasks.
Understanding how the mechanism works and following proper steps improves accuracy and protects both the user and the tool. Seating the bit fully and applying firm tightening provide stable gripping for smooth performance.
Avoiding common mistakes and recognizing early signs of loosening help maintain reliable chuck function over time.
Using compatible bit types and practicing safe handling prevent unnecessary wear and reduce the risk of injury. Regular care keeps the chuck operating smoothly and extends its lifespan.
Knowing when to replace the chuck ensures continued performance and prevents long term damage to the drill. With correct technique and proper maintenance, a keyless chuck offers convenience, stability, and dependable gripping for everyday drilling needs.

I’m John F. Nicholas, the founder, lead writer, and drill enthusiast behind 101drill.com. With years of hands-on experience in power tools and DIY projects, I created this platform to share practical knowledge, expert tips, and real-world insights to help others master the art of drilling.