
A drill press is one of the most precise tools you can have in your workshop, but for many DIYers and hobbyists, buying one can be expensive. The good news? You can make your own version using a regular hand drill — and it doesn’t have to cost a fortune.
With some creativity, patience, and basic materials, you can build a reliable, budget-friendly drill press that rivals commercial options in functionality.
The idea is simple: by creating a stable frame and guiding system, you can hold your hand drill vertically, ensuring that every hole you drill is perfectly straight and consistent. This DIY method saves money and lets you adapt the setup to your exact project needs.
According to Family Handyman, DIY drill press jigs can be built using scrap materials like wood or metal brackets, offering professional-grade results without big spending.
Plus, constructing your own setup teaches valuable mechanical skills — like understanding drill alignment, leverage, and depth control.
Understanding the Concept of a DIY Drill Press
Before jumping into the build, it’s important to understand what a drill press actually does. A drill press ensures accuracy by holding the drill in a fixed vertical position while controlling the downward feed movement.
This keeps holes straight, consistent, and repeatable — something nearly impossible with handheld drilling.
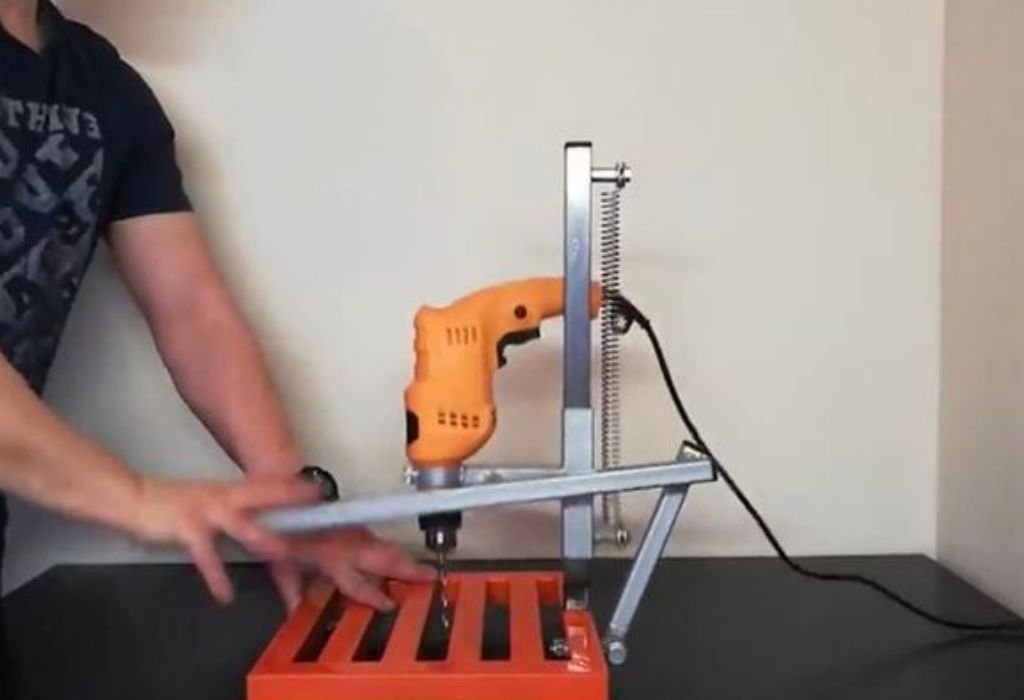
When you convert a hand drill into a press, you’re essentially replicating this same principle using a support frame, guide rails, and a secure base. The frame keeps the drill steady, while the guide rails let you lower it smoothly onto your workpiece.
The goal isn’t to replace an industrial machine but to achieve similar accuracy at a fraction of the price. By controlling the angle, speed, and depth, your DIY setup can perform woodworking, metal drilling, or plastic boring with surprising precision.
Materials You’ll Need on a Budget
The best part about this project is that most of the materials can be found in your garage, local hardware store, or even repurposed from old tools. To build your drill press, you’ll need:
- A hand drill (corded or cordless)
- A sturdy baseboard (wood or metal)
- Vertical supports (scrap wood, metal rods, or PVC pipe)
- A sliding carriage or hinge assembly for vertical motion
- Clamps or U-bolts to hold the drill securely
- Screws, washers, and nuts
- Optional: springs for return motion, and measuring scale for depth
If you’re on a tight budget, use leftover plywood or repurpose metal brackets from furniture or old shelving units. According to Popular Mechanics, creative reuse of scrap parts can save up to 70% of the cost compared to buying prefabricated drill press stands.
Once you’ve gathered your materials, you can begin assembling the base and frame that will form the foundation of your DIY press.
Building the Base Platform
The base is the backbone of your entire setup. It provides stability, supports the frame, and holds your workpiece securely while drilling.
Start with a flat, heavy baseboard — plywood, MDF, or thick metal sheet works well. The size should be at least 12×12 inches to accommodate most workpieces. Attach rubber pads underneath to prevent vibration and movement during drilling.
Next, mark the center point where the drill bit will pass through. Drill a small pilot hole there so that chips can fall through during use. You can also add a clamp system or vise to hold materials firmly in place.
A solid, balanced base ensures accuracy and safety. Remember: a wobbly foundation equals a wobbly hole. Take your time to make the base as sturdy as possible.
Constructing the Vertical Frame
The vertical frame holds the hand drill in alignment and guides it up and down. You can make this using scrap wood, metal pipes, or angle iron, depending on what’s available and affordable.
Attach two parallel vertical supports to the base using screws or bolts. These will act as guide rails for the drill carriage. Make sure they are perfectly perpendicular to the base — use a square to verify alignment.
At the top, connect the two supports with a crossbeam to stabilize the structure. The crossbeam can also house your drill’s hinge or sliding mechanism. Once completed, this frame will allow your hand drill to move vertically with controlled precision.
Can I use plastic or PVC pipes instead of metal rods?
Yes, but for light drilling only — PVC can flex under heavy pressure.
How tall should the frame be?
At least 18–24 inches to allow clearance for different workpiece sizes.
What’s the best wood for the frame?
Hardwood like oak or maple; softwoods may flex slightly.
Should I glue or screw the joints?
Use screws — they’re stronger and allow easy disassembly.
Can I mount it to a workbench?
Yes, clamping the base to your workbench adds stability.
Attaching the Hand Drill
This step transforms your frame into a functioning drill press. The goal is to secure the drill tightly while keeping its bit perfectly vertical.
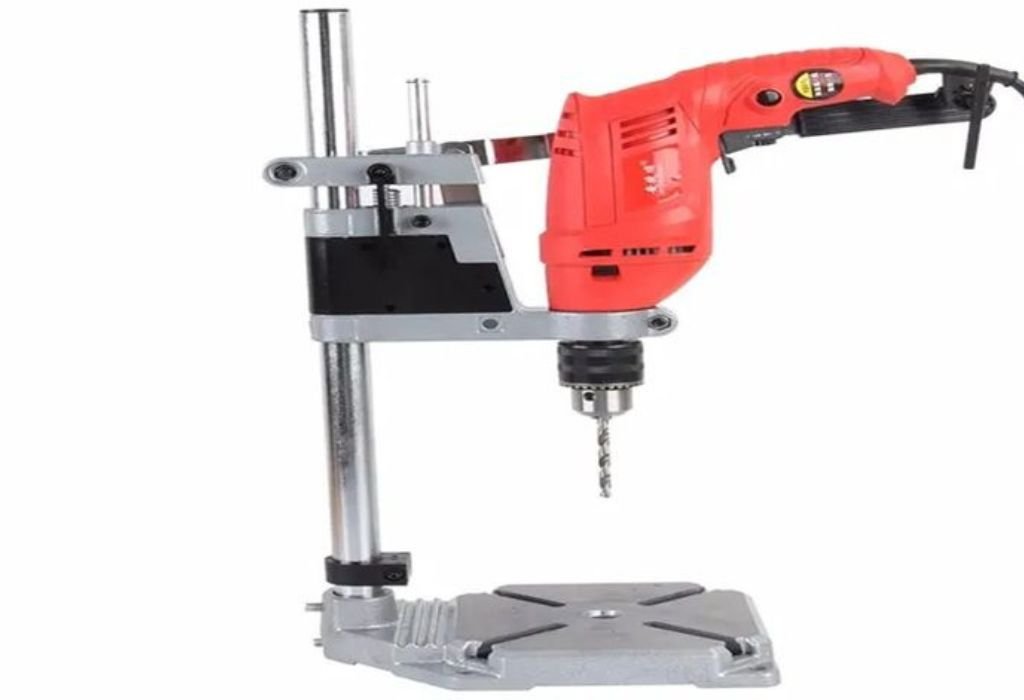
Position your drill between the vertical supports and decide where to attach it. The chuck should point downward, with enough space beneath it for your workpiece. Use heavy-duty clamps, U-bolts, or adjustable straps to hold the drill in place.
If your frame includes a sliding carriage, mount the drill to the carriage plate. Make sure the drill’s body doesn’t move when pressure is applied. Test it by lowering and raising the drill several times to ensure smooth movement.
Finally, connect the trigger switch using a small clamp or cable tie so you can operate the drill conveniently. Avoid permanent modifications — keeping the drill removable allows you to use it normally whenever needed.
Creating a Depth-Control Mechanism
A key advantage of a drill press is consistent drilling depth. You can mimic this feature using a simple mechanical stop.
Attach a small metal rod or screw parallel to the drill’s vertical travel path. By adjusting this rod’s position, you can control how deep the bit goes into your material. Another method is adding a ruler or scale on one side of the frame for quick reference.
For smoother operation, consider adding a spring between the carriage and frame top. This will help the drill return to its starting position automatically after each hole.
Depth control improves consistency, especially when drilling multiple holes in a pattern. Even a low-budget setup can achieve near-professional accuracy with this simple addition.
Can I use a spring from an old pen or toy?
Yes, as long as it provides enough tension for the drill’s weight.
What if I don’t need depth control?
You can skip it, but your holes may vary in depth slightly.
Should I measure depth manually each time?
For precise work, yes — using a small ruler or caliper helps.
Can I add a stop block?
Definitely, a wooden stop block behind the frame works great.
Does depth control improve safety?
Yes, it prevents over-drilling and protects both bit and material.
Testing and Adjusting the Setup
Once your frame and drill are assembled, it’s time to test the performance. Place a piece of scrap wood under the bit and run the drill at low speed. Observe how straight the bit travels and whether there’s any wobble or vibration.
If you notice uneven movement, check your vertical alignment. Use a square to verify that the drill bit and base remain perpendicular. Tighten any loose connections and ensure the drill is clamped securely.
For added stability, you can attach extra braces to the sides or back of the frame. Testing several times before actual use helps refine your design and guarantees cleaner results during real projects.
Safety and Maintenance Tips
Safety is crucial when working with any power tool — even a DIY setup. Always wear safety goggles to protect your eyes from flying debris. Avoid wearing loose clothing or jewelry that could catch in the drill.
Unplug or remove the battery before making adjustments. Check that all parts are tight and stable before every session. If you notice unusual vibration or burning smells, stop immediately and inspect the alignment.
For maintenance, clean dust and chips after every use. Occasionally lubricate the moving hinges or carriage slides, but never oil the chuck or taper area — they must remain dry for grip. According to FineWoodworking, consistent cleaning and inspection prevent 80% of drill-related performance problems.
Advantages of a DIY Drill Press
Building a drill press from a hand drill has several benefits beyond saving money. It allows you to customize the size, height, and features based on your specific needs. For small workshops or hobby setups, it’s the perfect space-saving alternative to bulky machinery.
The DIY version also teaches valuable skills — like understanding how alignment, balance, and rigidity affect drilling performance. You gain insight into mechanical structure, improving your future projects as well.
Finally, the cost savings are substantial. A homemade press can cost under $30 using scrap materials, compared to $150–$300 for a store-bought version. It’s an excellent blend of creativity and practicality for anyone who loves hands-on problem-solving.
Can it handle metal drilling?
Yes, if your hand drill has sufficient torque and the frame is sturdy.
Is accuracy close to a real drill press?
With proper alignment, it can be 90–95% as precise.
Can I use it for sanding or polishing attachments?
Absolutely — it works well for rotary tools and accessories.
Is it portable?
Yes, lightweight and removable — great for small workspaces.
Can I upgrade it later?
Yes, you can add features like laser guides or adjustable stops.
Conclusion
Building a drill press from a hand drill on a budget is one of the most rewarding DIY projects for any craftsman. It combines creativity, mechanical understanding, and resourcefulness — all while giving you a powerful, practical tool for accurate drilling.
By using simple materials, following careful assembly steps, and applying good alignment practices, you can create a functional press that rivals commercial models in performance. The process also deepens your understanding of how stability and precision work together.
As Popular Mechanics points out, the best tools aren’t always the most expensive — they’re the ones built with skill and maintained with care. Your DIY drill press proves that innovation and craftsmanship can overcome cost barriers easily.
Keep it clean, recheck alignment regularly, and use it with patience. With this setup, you’ll enjoy cleaner holes, straighter cuts, and more professional results — all without breaking your budget.

I’m John F. Nicholas, the founder, lead writer, and drill enthusiast behind 101drill.com. With years of hands-on experience in power tools and DIY projects, I created this platform to share practical knowledge, expert tips, and real-world insights to help others master the art of drilling.