
You pick up a strong ceramic magnet, mark the center, start drilling—and it suddenly snaps in two.
That’s the frustrating reality of working with ceramic (ferrite) magnets: they’re powerful but incredibly brittle. Most people assume drilling a hole in them is impossible without cracking, but with the right technique and patience, it can be done perfectly.
Ceramic magnets are used everywhere—speakers, motors, crafts, scientific models, and DIY projects. Sometimes, you need to mount them with screws or bolts, which means drilling a clean hole through the magnet. But because they’re made of compressed ferrite powder baked at high heat, they behave more like glass than metal.
The secret is simple: use diamond or carbide bits, slow speed, steady pressure, and continuous water cooling. With proper preparation, you can create perfect mounting holes in ceramic magnets without damage. Let’s explore the full step-by-step process, essential tools, and safety precautions to make it work flawlessly.
Understanding Ceramic Magnets
Ceramic magnets—also called ferrite magnets—are composed of iron oxide blended with strontium or barium carbonate, then sintered at high temperatures.
The result is a material that’s extremely hard but also brittle. They’re magnetic, durable, and inexpensive, which is why they dominate industrial and household applications.
However, the same molecular hardness that gives them strength also causes fragility. When you apply mechanical pressure, instead of flexing like metal, they fracture. Even slight overheating or vibration during drilling can cause invisible micro-cracks that lead to breakage later.
Compared to neodymium magnets, ceramics have lower magnetic strength but higher heat resistance. They’re ideal for motors, loudspeakers, and refrigerator seals because they can operate in high-temperature environments without losing magnetism.
Understanding their structure is the first step—if you treat ceramic like glass instead of metal, you’ll instantly improve your success rate.
What materials are ceramic magnets made of?
Iron oxide and strontium/barium compounds.
Why do they break so easily?
They’re sintered powders with little tensile strength.
Are ceramic and ferrite magnets the same?
Yes—“ferrite” is the technical term.
Can I drill them with a normal bit?
No, standard steel bits will chip or overheat them.
Are neodymium magnets harder to drill?
Yes—they’re even more brittle and can ignite from heat.
Tools and Materials You’ll Need
Before you start, gather everything required for control, stability, and cooling.
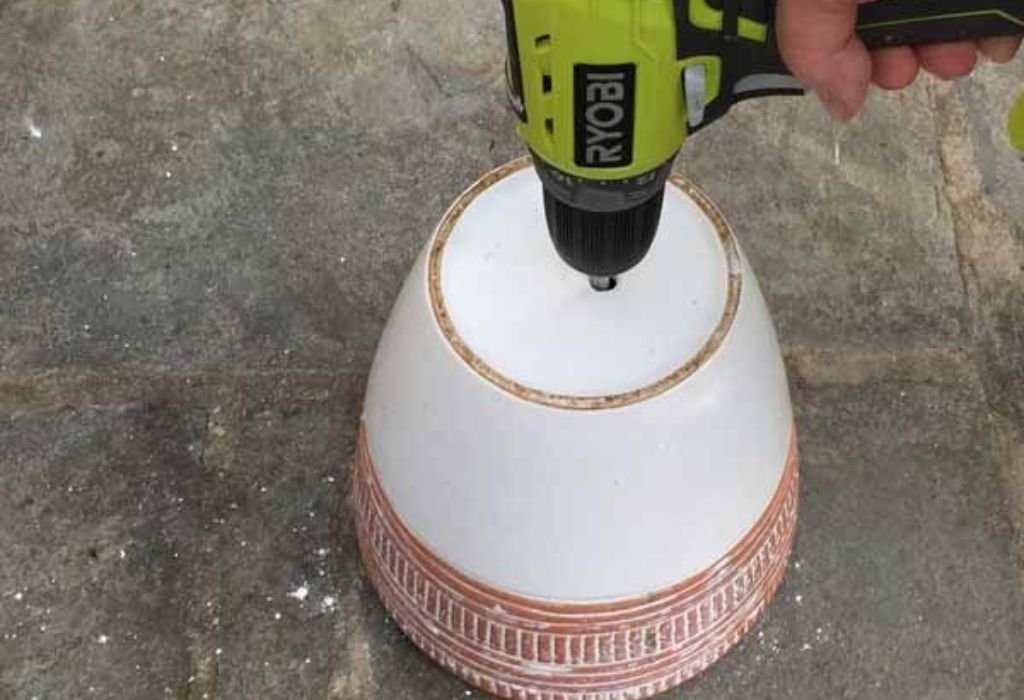
- Drill press or Dremel rotary tool – keeps angle consistent and minimizes wobble.
- Diamond-tipped drill bit – best for grinding through brittle materials.
- Clamp or vise – holds magnet securely, preventing vibration.
- Container of water – for underwater drilling or continuous cooling.
- Masking tape – to reduce chipping at entry points.
- Marker or punch – to mark the hole location gently.
- Safety gear – goggles, gloves, and dust mask.
Diamond bits are preferred because they don’t cut; they grind slowly, producing less stress. A small rotary tool is often easier to handle than a large power drill.
What bit works best?
Diamond-coated glass or tile bits.
Why use water?
To cool the bit and prevent thermal shock.
Can I drill dry?
Not recommended—it causes heat cracks.
Do I need a drill press?
It helps immensely but a steady hand with a Dremel can work.
Is oil an alternative to water?
Water dissipates heat faster; stick to it.
Step-by-Step Process to Drill a Hole Safely
- Clean the Magnet: Remove oil, dust, or corrosion.
- Mark the Spot: Use a fine marker. Don’t strike with a punch; it can start cracks.
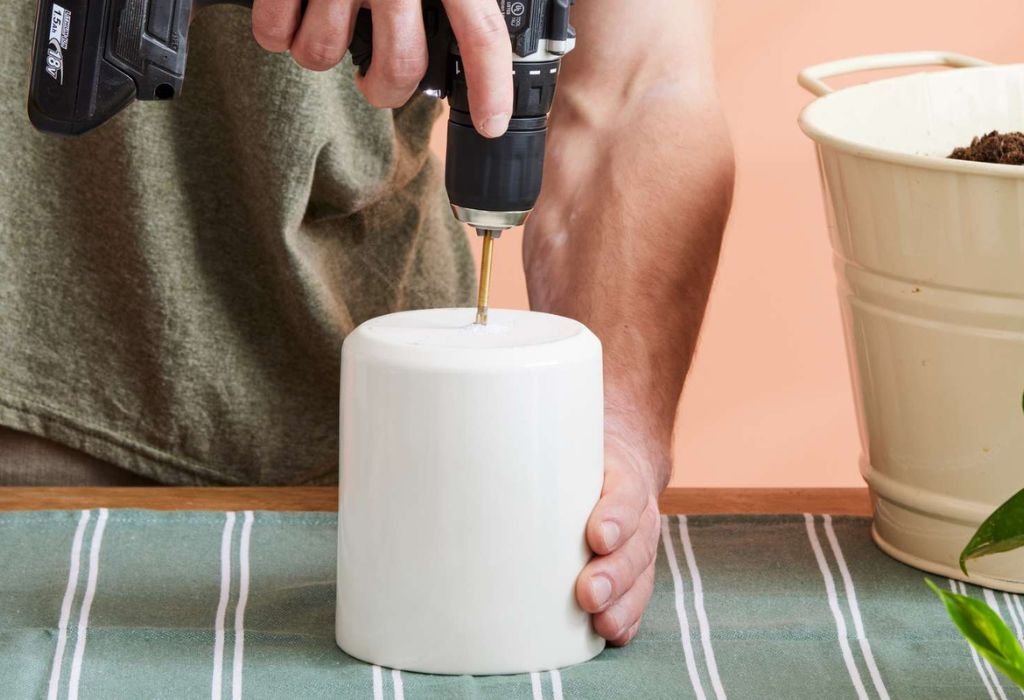
- Secure It Firmly: Sandwich the magnet between thin wood sheets or rubber pads and clamp gently.
- Add Coolant: Submerge the area underwater or have a steady trickle over it.
- Start Slow: Use low speed (400–800 RPM). High speed creates instant fractures.
- Apply Light Pressure: Let the bit grind; don’t force it.
- Drill Halfway: Stop when you reach the middle.
- Flip the Magnet: Drill from the other side to meet in the middle. This prevents breakout chips.
- Smooth the Edges: Use fine sandpaper or a diamond file to remove sharp corners.
Patience is the real secret—slow, steady grinding will always win over speed.
Why flip halfway?
To prevent chipping on the exit side.
What speed is best?
Low RPM—fast speed overheats quickly.
Should I use hammer mode?
Never. Hammering shatters magnets instantly.
Can I drill several holes?
Yes, but cool the bit between each one.
What if bubbles appear in the water?
That’s heat—pause and let the bit cool down.
Choosing the Right Drill Bit for Ceramic Magnets
Using the correct bit makes or breaks your success.
Diamond bits grind smoothly and evenly. The diamond grit layer shaves microscopic layers off the ceramic surface. Carbide masonry bits can work but create more vibration and heat, increasing risk.
Avoid high-speed steel or wood bits completely—they dull within seconds.
Choose a small pilot bit first if you’re drilling large holes. Gradually increase size with the next bit instead of forcing a large one through at once.
Are diamond bits expensive?
No—sets of small diamond bits are affordable and last long.
Can I reuse the same bit on glass?
Yes, they work great for tiles, glass, and stone.
What happens if the bit dulls?
It grinds slower and overheats the magnet. Replace it.
What shape works best?
Cylindrical or core-type bits for thick magnets.
Do I need a lubricant besides water?
Water alone is enough—avoid oils near magnets.
Controlling Heat and Vibration During Drilling
Heat and vibration are the two biggest enemies. Ceramic magnets expand unevenly when heated, causing internal fractures invisible to the eye. Always drill underwater or with constant cooling flow.
Keep the drill speed low and pressure light. Let the bit do the work. Stop every 15–20 seconds to check temperature. If it feels warm, pause until cool.
Use rubber pads or wooden clamping blocks to absorb vibration. Never drill freehand—tiny movements can cause micro-cracks.
Why is heat dangerous?
It expands the magnet unevenly and fractures it.
Can vibration alone crack it?
Yes—even without heat, excessive vibration causes splitting.
How much water is enough?
Submerge just enough to cover the drilling point.
Can I spray instead of submerge?
Yes, as long as cooling is continuous.
What if the magnet starts squealing?
That’s friction—reduce speed immediately.
Alternative Methods Without Drilling
If drilling feels risky, there are safer alternatives.
- Use epoxy or industrial glue: Bonds magnets securely to metal or plastic.
- Mounting brackets or clips: Hold magnets mechanically instead of through holes.
- Magnetic backplates: Attach the magnet to a plate with pre-drilled holes.
- Embed in resin or epoxy molds: Perfect for custom fixtures.
- Laser cutting or CNC water-jet: Industrial precision for delicate parts.
These alternatives eliminate fracture risks while still allowing clean mounting.
Can glue hold strong magnets?
Yes—epoxy or Loctite adhesives are very effective.
Do brackets weaken magnet pull?
Not noticeably if they’re thin and non-magnetic.
Can I melt a hole through?
Never—heat destroys magnetism permanently.
Is laser drilling safe?
Only in industrial setups with cooling control.
Are these methods permanent?
Yes, epoxy or bracket mounts are long-lasting.
Common Mistakes to Avoid
- Drilling too fast — cracks instantly.
- Using no coolant — creates heat fractures.
- Pressing too hard — brittle materials can’t flex.
- Skipping clamps — vibration leads to chipping.
- Using hammer drills — catastrophic failure.
- Ignoring PPE — dust and shards can injure eyes.
- Drilling both sides at once — uneven stress causes splitting.
Why did my magnet shatter instantly?
You likely used too much pressure or speed.
Can a chipped magnet still work?
Yes, but its magnetic field may weaken.
Should I wear a mask?
Yes—ceramic dust can irritate lungs.
Can drilling affect magnet strength?
Only if overheated beyond its Curie temperature.
How can I fix a cracked magnet?
Epoxy it together and let it cure 24 hours.
Post-Drilling Finishing and Cleaning
Once your hole is complete, focus on finishing:
- Rinse under running water to remove dust and grit.
- Dry completely to prevent corrosion.
- Inspect closely under light for hidden cracks.
- Smooth edges with fine sandpaper or a diamond file.
- Apply a thin epoxy coat inside the hole to reinforce edges.
- Clean your tools—metal filings stick magnetically to bits.
How do I polish the hole?
Use a 1000-grit sandpaper or fine diamond file.
Can I reseal the surface?
Yes, a thin epoxy coat works best.
Why are my edges rough?
Speed was too high or bit was dull.
Can I use compressed air?
Yes, just wear goggles—debris can fly.
Does coating affect magnetism?
No, unless it’s very thick or metallic.
Safety Tips for Drilling Magnets
- Always wear goggles and gloves.
- Use a dust mask to avoid ceramic powder inhalation.
- Keep magnets away from electronics and credit cards.
- Do not drill neodymium magnets dry—they can ignite.
- Avoid hammer function or impact drills.
- Clean magnetic debris after work—it can cause cuts.
- Keep children and pets away while drilling.
Is magnet dust toxic?
Ferrite dust irritates lungs; wear a mask.
Can magnets catch fire?
Ceramic magnets can’t, but neodymium ones can.
Can I drill indoors?
Yes, with proper ventilation and waterproof mat.
Can I reuse cooling water?
No, it contains abrasive grit—discard safely.
Is it safe for kids nearby?
No, magnets can snap together violently.
Troubleshooting Cracks and Damage

Even with care, accidents happen. Here’s how to handle them.
Small chips: Smooth gently with sandpaper and apply epoxy.
Large cracks: Glue with two-part epoxy and clamp until set.
Completely split magnets: Can sometimes be re-bonded, but magnetic alignment may weaken.
If the magnet’s pull drops after drilling, remagnetization using a coil or strong magnet stack may restore it.
Can cracked magnets still work?
Yes, though slightly weaker.
Does drilling change polarity?
No—only demagnetization does.
How can I tell if it weakened?
Compare with an identical magnet by attraction strength.
Can I remagnetize it?
Yes, by placing it against a strong magnet for several hours.
Why did it break even underwater?
Likely from uneven pressure or dull bit friction.
Conclusion
Drilling a hole in a ceramic magnet may seem intimidating, but it’s achievable with the right approach. Think glass-cutting technique, not metal drilling—steady hands, low RPMs, and plenty of water cooling.
Use a diamond-tipped bit, apply light pressure, and always keep the magnet cool. Drill halfway from one side, flip, and complete from the other to prevent breakout chips. Once done, smooth the edges and seal them for long-term durability.
With patience, preparation, and safety gear, you can customize ceramic magnets for mounting or assembly without cracking or losing strength. Precision, not speed, is what gets you a flawless hole through one of the most delicate magnetic materials around.

I’m John F. Nicholas, the founder, lead writer, and drill enthusiast behind 101drill.com. With years of hands-on experience in power tools and DIY projects, I created this platform to share practical knowledge, expert tips, and real-world insights to help others master the art of drilling.