
A drill press is only as accurate as the surface it rests on. When the table is even a few degrees off, holes come out crooked, bits wander, and projects lose precision.
Many people underestimate how crucial proper table alignment is until their first misaligned hole ruins an expensive workpiece.
Attaching and aligning a drill press table is not difficult, but it requires patience and a methodical approach. If the table isn’t square to the spindle, even the best bits and drill motors cannot produce straight results. A small tilt or loose clamp can throw off your angle and compromise every cut.
According to Fine Woodworking, nearly 70% of drilling accuracy errors come from uneven or misaligned work surfaces (source).
Additionally, an OSHA workshop study found that improper table mounting contributes to unstable drilling, increasing the risk of bit breakage by over 30% (source). Those numbers prove that proper alignment is more than convenience—it’s safety and performance combined.
Understanding the Drill Press Table and Its Function

The drill press table serves as the foundation for precision. It holds your material steady, provides clamping support, and determines the vertical accuracy of every hole. The table connects to the column through a collar or bracket that can tilt, rotate, and move up or down.
Most modern presses feature adjustable tables that allow fine angular tuning. However, these adjustments only help if the table itself is securely attached and perfectly square to the drill spindle. Even a one-degree tilt results in visibly angled holes, especially when drilling deep or using large bits.
The mounting surface underneath the table is equally critical. Dust or burrs left on the collar can prevent tight contact, leading to wobble or vibration. Before tightening, both surfaces should be cleaned and inspected for paint buildup, rust, or debris.
The table’s flatness also affects the final result. High-end models include cast-iron surfaces ground to tight tolerances, while budget versions may require shimming to correct factory variance. A quick check with a machinist’s square ensures the surface is truly perpendicular to the spindle.
What material are drill press tables usually made from?
Cast iron, steel, or aluminum depending on press size and cost.
Why is cast iron preferred?
Because it dampens vibration and maintains a flatter surface under pressure.
Can table flatness affect drilling accuracy?
Yes, any warp or curve causes uneven depth and inconsistent holes.
How to test if the table is square to the spindle?
Lower a bit toward the table and check contact points using a square or alignment bar.
Is it okay to lubricate the table collar?
A small amount of dry lubricant helps prevent rust but avoid greasy buildup that causes slippage.
Tools and Materials You’ll Need
Attaching a drill press table requires basic tools, but precision instruments help achieve perfect alignment. A proper setup ensures each bolt and bracket performs as intended.
You’ll need a combination square, Allen wrenches, socket set, rubber mallet, torque wrench, and a spirit level. For fine calibration, a dial indicator or alignment gauge offers accurate readings of table tilt. Keep a few shop rags, rust cleaner, and dry lubricant spray handy for surface preparation.
Optional items like shims, washer sets, and thread-locking fluid may also be useful for long-term stability. Each tool plays a specific role—while alignment tools fine-tune accuracy, cleaning supplies ensure full contact between components.
Working in a clean, well-lit area minimizes error. Small debris or metal shavings can wedge under the collar, throwing off the final setup. Preparing properly before attaching saves you from redoing adjustments later.
Can I attach the table without special tools?
Yes, but precision instruments like a square and dial indicator improve accuracy.
Why use thread-locker?
It prevents bolts from loosening due to vibration over time.
What type of lubricant works best?
A dry Teflon or silicone spray; avoid greasy oils that attract dust.
Are shims necessary?
Only if the table surface or collar has minor uneven spots.
Do digital angle gauges help?
Yes, they measure tilt precisely and speed up squaring adjustments.
How to Attach Drill Press Table Step by Step
Start by unplugging the drill press to ensure full safety. Clean the column and collar area where the table will attach. Any rust, paint, or dust must be removed to allow a tight fit.
Slide the table collar over the column until it reaches the desired height. Use both hands to steady it, ensuring no tilt or slant forms. Once in place, align the mounting hole or bolt slot with the locking screw, then lightly tighten it to hold position.
Next, attach the table surface to the bracket or support arm. Insert mounting bolts loosely so the table can still move during alignment. Adjust the height as needed—typically, the table should sit at a comfortable working level with full spindle clearance.
Check that the surface faces forward and not skewed to one side. Tighten the clamp bolts gradually and evenly across all points to prevent binding. Finally, test smooth up-and-down movement along the column. It should glide freely but remain stable once locked.
Should the column be greased before installation?
Only lightly; excessive oil can cause the table to slip when locked.
How tight should the collar bolt be?
Firm but not over-torqued—just enough to prevent movement under pressure.
Can one person install the table alone?
Yes, though larger presses may require assistance for lifting stability.
Why tighten bolts gradually?
To distribute pressure evenly and avoid distorting the mounting bracket.
What if the table doesn’t move smoothly?
Clean the column and collar again; buildup or burrs may be causing friction.
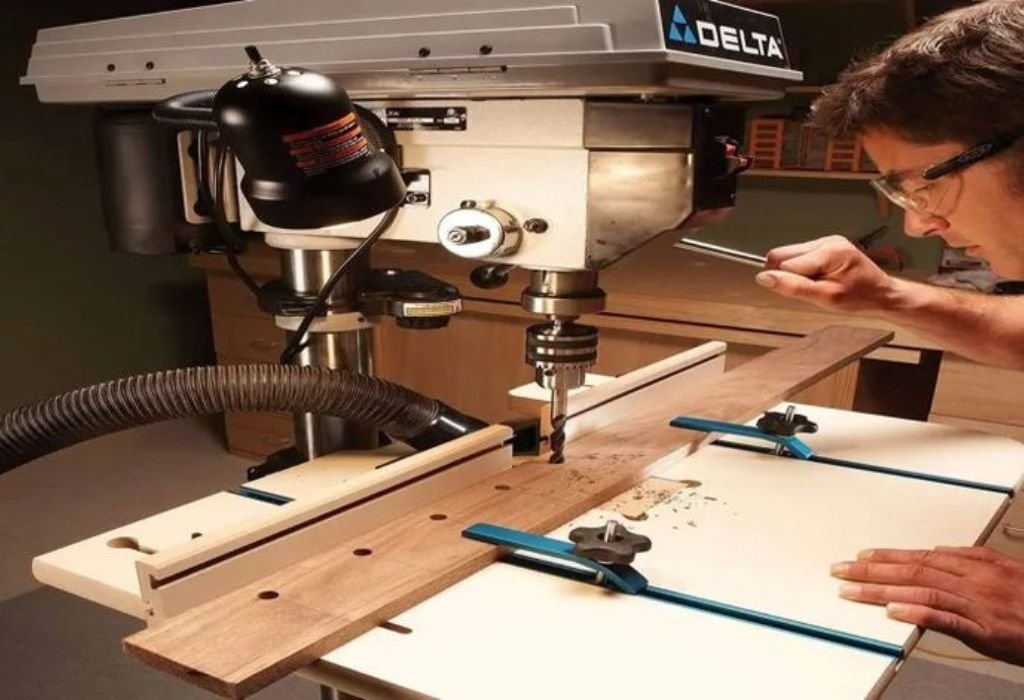
Aligning the Drill Press Table for Perfect Accuracy
After attachment, alignment ensures the drill bit meets the table at a perfect 90-degree angle. Begin by inserting a long, straight bit or alignment rod into the chuck. Lower it close to the table and use a square to check contact along both front-to-back and side-to-side directions.
If a gap appears, loosen the table’s tilt bolts slightly and adjust until the rod touches evenly on all sides. Some presses include a built-in tilt scale; however, mechanical readings can vary, so visual verification is essential. Tighten all bolts once the alignment is correct.
A dial indicator gives even finer results. Set it on the table and rotate the chuck by hand to measure variance across 360 degrees. If readings differ more than 0.002 inches, minor shimming under one edge may be needed to perfect squareness.
Once squared, mark a reference line on the tilt gauge with a permanent marker. This helps you return to perfect alignment quickly if the table moves during future adjustments.
How to check if the table is perfectly square?
Use a machinist’s square or dial indicator for precise measurement.
What if readings differ slightly?
Shim the low side using thin metal washers or brass shims.
How tight should bolts be after alignment?
Firmly snug to maintain position but not so tight that threads strip.
Is a laser alignment tool useful?
Yes, it offers quick visual confirmation for frequent setup changes.
How often should alignment be rechecked?
After heavy drilling or monthly during regular use.
Common Mistakes When Attaching a Drill Press Table
Many alignment issues begin with rushing through setup. The most frequent mistake is tightening the bolts before confirming the table’s squareness. Once over-tightened, adjustments become difficult and often lead to stripped threads.
Another common problem is ignoring dust or paint buildup on the column. Even a thin layer can tilt the collar slightly. Using lubricants excessively also leads to slippage, while uneven torque on bolts creates one-sided pressure.
Users sometimes overlook column plumbness. If the press itself is leaning, no amount of table alignment will compensate. Always verify that the drill press base sits flat and secured before attaching the table. Proper maintenance from the start eliminates long-term frustration.
What happens if bolts are over-tightened?
Threads may strip, or brackets may warp permanently.
Can misalignment damage the press?
Yes, it stresses bearings and causes uneven spindle wear.
Why is dust a big problem?
It prevents full metal contact, causing tilt or vibration.
Is lubricant bad for stability?
Too much makes the table slide during drilling; use minimal amounts.
Should the base be leveled before alignment?
Always, as a crooked base makes perfect squaring impossible.
Maintenance and Long-Term Stability
A well-aligned drill press table can stay accurate for years with minimal maintenance. Regular inspection keeps bolts tight and surfaces clean. Wipe the table after each session to remove dust and cutting residue.
Once a month, check the collar bolt and tilt lock for tension. If any movement occurs during drilling, retighten immediately. Applying a light coat of dry lubricant to the column prevents rust and keeps motion smooth.
After long periods of use, alignment may shift slightly due to vibration. Re-test with a square and adjust if necessary. Storing the press in a low-humidity area also extends the life of the table and column surfaces.
How often should alignment be checked?
Every few months or after moving the press.
What to do if rust forms on the column?
Remove it using fine steel wool and reapply a dry protective spray.
Can table bolts loosen over time?
Yes, vibration naturally loosens them; inspect periodically.
Does temperature affect alignment?
Extreme heat or humidity can expand metal slightly; recheck in seasonal shifts.
How to keep the table clean?
Wipe with a soft cloth after each use and avoid moisture buildup.
Tips for Upgrading or Replacing Your Drill Press Table
If your factory table is too small or lacks slots for jigs, upgrading enhances both precision and versatility. Aftermarket tables often include T-tracks, fences, and built-in clamps designed for woodworking or metal drilling.
When installing a new table, follow the same attachment and alignment process. Ensure the mounting surface matches the column diameter and check squareness carefully. Use thread-locker for long-term stability.
For users seeking extreme precision, adding a digital angle gauge helps monitor tilt within 0.1 degrees. Combine it with a laser guide system for perfect centering. Even a small upgrade can transform how efficiently and accurately you work.
Are aftermarket tables universal?
Most fit standard columns, but always measure before buying.
Do larger tables affect balance?
Heavier tables may require additional support or counterweights.
Can I build my own table extension?
Yes, plywood or MDF extensions with T-tracks work well for woodworking.
Why add a fence to the table?
It helps position workpieces consistently for repetitive drilling.
Does a digital angle gauge improve accuracy?
Yes, it provides real-time tilt data for fine alignment control.
Conclusion
Learning how to attach a drill press table for perfect alignment is more than a one-time setup—it’s a commitment to precision, safety, and craftsmanship. Every hole you drill depends on how firmly and accurately your table is positioned.
A misaligned surface can destroy accuracy, shorten bit life, and increase safety risks, while a properly attached table turns any drill press into a precision instrument.
Alignment begins with preparation. Cleaning surfaces, verifying the base level, and attaching the table correctly establish a foundation for dependable performance.
Using proper tools such as a machinist’s square or dial indicator ensures your adjustments meet professional standards. Over time, small checks prevent major problems.
Properly aligned tables also extend equipment lifespan. Balanced pressure reduces bearing wear, keeps belts tracking straight, and improves spindle stability. The benefits are noticeable—quieter operation, smoother drilling, and sharper bit edges lasting longer.
Beyond performance, perfect alignment builds confidence. Knowing your setup is accurate allows you to focus on creativity and technique instead of fighting against mechanical error. Every wood panel, metal bracket, or plastic sheet will receive the same precision treatment from your drill press.
Ultimately, precision is not achieved by chance but through discipline. Once you understand how each adjustment affects performance, you gain complete control over every project.
Whether working in a home garage or a professional shop, taking the time to attach and align your drill press table correctly guarantees cleaner holes, safer operation, and results you can be proud of for years to come.

I’m John F. Nicholas, the founder, lead writer, and drill enthusiast behind 101drill.com. With years of hands-on experience in power tools and DIY projects, I created this platform to share practical knowledge, expert tips, and real-world insights to help others master the art of drilling.