
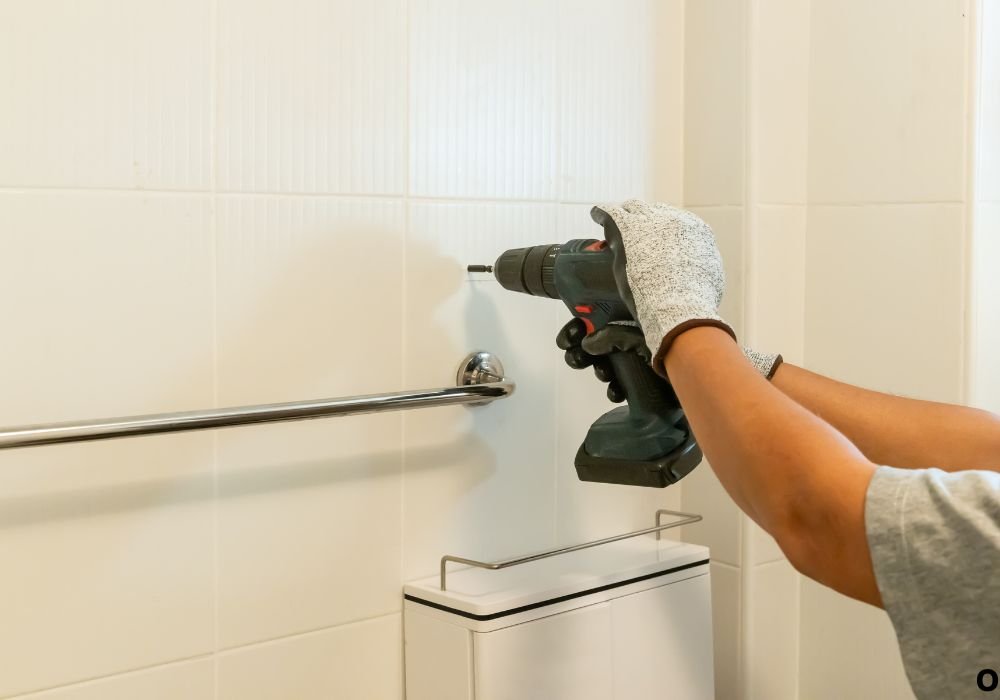
It was a bright Saturday morning when Olivia decided to hang a floating shelf in her bathroom. With her drill in one hand and a masonry bit in the other, she lined up on her new ceramic wall tile.
A few seconds later, a high-pitched squeal filled the air, and then a tiny, heartbreaking crack shot through the glossy surface. What was supposed to be a quick DIY project had suddenly turned into an expensive lesson.
Many homeowners make the same mistake. Ceramic tiles look strong and solid, but they’re actually brittle and sensitive to pressure, heat, and vibration.
Using a masonry bit, built for dense stone and concrete, can easily damage them if you don’t control the drill speed or temperature. Yet, with the right technique and patience, you can use a masonry bit successfully and create clean holes for anchors, hooks, and fixtures.
This complete guide walks you through the process step-by-step: understanding the material, selecting the right tools, controlling heat, and preventing chips.
Whether you’re mounting towel bars, mirrors, or kitchen accessories, you’ll learn how to drill ceramic tile correctly, confidently, and without a single crack.
Understanding Ceramic Tiles and Masonry Bits
Ceramic tiles are made by firing a mixture of clay and minerals at high temperatures. The process creates a dense inner core covered by a hard, glazed surface that resists water and stains.
This glossy glaze is the first challenge when drilling — it’s slippery and can cause the bit to skate across the surface before it starts cutting.
Masonry bits are designed to crush through hard, coarse materials such as brick and concrete. They feature a tungsten carbide tip that chips away material through friction and impact.
While that toughness makes them perfect for stone, it can be too aggressive for the delicate surface of ceramic tiles.
The key to making them work together is control. A masonry bit can penetrate ceramic if used slowly, gently, and with continuous cooling. Instead of cutting or hammering, it should grind through the glaze. Using too much speed or pressure creates heat, and heat makes tiles expand unevenly — leading to cracks or shattered corners.
Once you understand that ceramic drilling is a balancing act between force, heat, and time, you can adapt even a masonry bit to work like a precision tool rather than a blunt instrument.
Tools and Safety Gear You’ll Need
Before you start drilling, preparation is everything. A standard hammer drill or heavy-duty tool is not suitable — you’ll need a variable-speed drill so you can start slow and stay steady. The bit should be a carbide-tipped masonry bit, sharpened and free of residue. If you have access to diamond-tipped bits, keep them as backup for denser tiles.
Gather cooling materials — a spray bottle of water, a wet sponge, or even a small putty dam that holds water around the drilling area. Cooling keeps both the bit and tile safe from thermal stress.
For protection, wear safety goggles, gloves, and a mask. Even a small ceramic chip can become razor-sharp. Work under good lighting, and ensure the tile surface is firmly supported. If you’re working on a loose tile or spare piece, lay it on a folded towel or foam pad to absorb vibration.
Preparation takes minutes but prevents hours of frustration and potential damage.
Preparing the Tile Surface
Every successful drill starts with a clean, well-prepared surface. First, wash the tile with mild soap or alcohol to remove oils and dust. A clean surface gives the bit better traction.
Next, place a small square of masking tape over the spot where you’ll drill, and mark the exact point with a pencil. The tape adds friction and stops the bit from sliding. For even more precision, lightly tap the spot with a center punch or a nail to create a tiny dimple — this helps the bit stay centered.
If you’re drilling on a vertical wall, ensure the tile is mounted securely and the wall behind it is solid. For freestanding tiles, use a clamp or lay them on a cushioned surface to reduce vibration. Stability is crucial: even the slightest wobble can crack glazed ceramic.
Finally, have your coolant ready before drilling. Once you start, you don’t want to stop to grab water — consistent cooling makes or breaks the process.
Step-by-Step Drilling Process
- Mark the Drilling Point – Double-check your measurements. Even a few millimeters off can make a big difference once you’ve drilled through tile.
- Apply Masking Tape – Reinforce the area to prevent the bit from slipping or scratching.
- Set the Drill to Low Speed – Keep your RPMs around 400–600. High speed equals high heat.
- Start at an Angle – Hold the drill at a 45° angle to create a small groove. This helps the bit “bite” into the glaze.
- Straighten Gradually – Once the bit catches, slowly bring the drill to a vertical position.
- Use Gentle Pressure – Let the bit grind at its own pace; forcing it will only create cracks.
- Cool Constantly – Keep water flowing over the area or dip the sponge frequently to cool both bit and tile.
- Drill in Short Bursts – Work for a few seconds, then pause briefly. This reduces heat and gives you control.
- Finish Slowly – As the bit breaks through the tile, ease up on pressure to avoid chipping the back.
If done correctly, you’ll hear a smooth, low hum rather than a squeal. The result should be a clean, perfectly round hole with no hairline fractures.
Controlling Heat and Friction
Heat is the invisible enemy of ceramic drilling. Every second of friction adds temperature to both the bit and the glaze, and the harder the surface, the faster it builds up. A single hot spot can cause the glaze to expand faster than the body underneath, resulting in tiny cracks that may appear days later.
To combat this, use constant cooling. A spray bottle is ideal — it keeps the area wet without flooding your workspace. For horizontal tiles, form a small clay or plumber’s putty dam around the hole and fill it with water. This mini pool keeps temperatures even and captures debris.
Speed control matters just as much. Drilling too fast generates unnecessary friction. If you see steam or smell burning, stop immediately and let everything cool down. Always think of drilling tile as polishing glass — slow, light, and steady wins every time.
Avoiding Common Mistakes
Beginners often approach ceramic like they would concrete, using brute force or hammer mode. That’s mistake number one. Hammer mode will destroy your tile in seconds. Masonry bits need steady rotation, not impact.
Another common mistake is rushing. High RPMs create instant heat, while pushing harder doesn’t speed up progress — it just shortens the tile’s lifespan. The bit should glide, not dig.
Ignoring cooling or skipping tape are equally bad habits. The surface glaze is slippery and heat-sensitive; both tape and water are mandatory safeguards. Finally, never drill near tile edges or grout lines. Leave at least one inch of buffer space to avoid spreading cracks through multiple tiles.
By avoiding these pitfalls, you’ll not only protect your current project but also extend your tools’ life for future work.
Finishing and Aftercare
Once the hole is complete, rinse the area thoroughly with clean water to remove ceramic dust and slurry. Dry it gently with a microfiber cloth and inspect the edges. Minor roughness can be smoothed with a diamond file or fine sandpaper.
If the hole will house screws or anchors, let it cool completely before inserting hardware. For bathroom or kitchen installations, use plastic anchors instead of metal — they’re flexible and less likely to stress the tile.
Afterward, clean your drill bit with a damp cloth, removing any hardened residue, then dry it completely to prevent rust. Store bits in a protective case away from humidity.
Proper finishing ensures your project looks professional and lasts for years without cracks or corrosion.
FAQ’s About-can i use a masonry drill bit on ceramic tile
Can I use a masonry bit for all types of ceramic tile?
Yes, for standard ceramic wall or floor tiles, but use diamond bits for porcelain or extra-hard surfaces.
Do I need to soak the tile before drilling?
No, just apply water consistently while drilling to manage heat.
Will high speed help me finish faster?
No — higher speed increases friction and cracks tiles.
Is oil better than water for cooling?
No, water cools faster and doesn’t stain grout or tile.
How close can I drill to an edge?
Maintain at least one inch of distance to prevent splitting.
Can I drill ceramic with a hammer drill?
Never. Even light hammering causes instant fractures.
Why does my bit squeal or smoke?
It’s overheating — reduce speed and cool it immediately.
Should I start at a 45-degree angle?
Yes, it helps the bit bite into the glaze before going vertical.
Can I drill multiple holes in one session?
Yes, but cool the bit between each to maintain sharpness.
Do I need tape on every hole?
Yes, tape prevents slipping and surface scratches.
Why did my tile crack even though I went slow?
You might have pressed too hard or drilled too close to an edge.
Can I use masonry bits on glass tiles?
Only with extreme caution; diamond bits are safer for glass.
How do I know when the hole is done?
You’ll feel the resistance drop as the bit breaks through.
What should I do if the tile chips slightly?
Polish with a diamond file and seal with clear epoxy.
How can I make my masonry bit last longer?
Clean it after each use, keep it cool, and avoid drilling dry surfaces.
Conclusion
Drilling ceramic tile with a masonry bit may sound intimidating, but with patience and the right technique, it’s entirely achievable. The secret lies in low speed, steady pressure, and continuous cooling.
Always remember: ceramic isn’t concrete — it’s closer to glass in how it behaves. Slow grinding, not brute force, gives perfect holes. With masking tape, water cooling, and a sharp masonry bit, you can install fixtures, shelves, and décor without cracks or chips.
Take your time, respect the material, and the result will be flawless — a perfectly drilled ceramic tile that looks as beautiful as the day it was installed.

I’m John F. Nicholas, the founder, lead writer, and drill enthusiast behind 101drill.com. With years of hands-on experience in power tools and DIY projects, I created this platform to share practical knowledge, expert tips, and real-world insights to help others master the art of drilling.