
It was a Saturday afternoon when Jake decided to hang a heavy shelf on his brick wall. He grabbed his regular household drill and a masonry bit he had lying around, confident he could get the job done.
As soon as he started drilling, the bit struggled against the hard brick, and he wondered if he was using the right tool for the job. Many DIYers face the same question: can you safely use a masonry bit with a standard drill, or do you need a hammer drill for every masonry project?
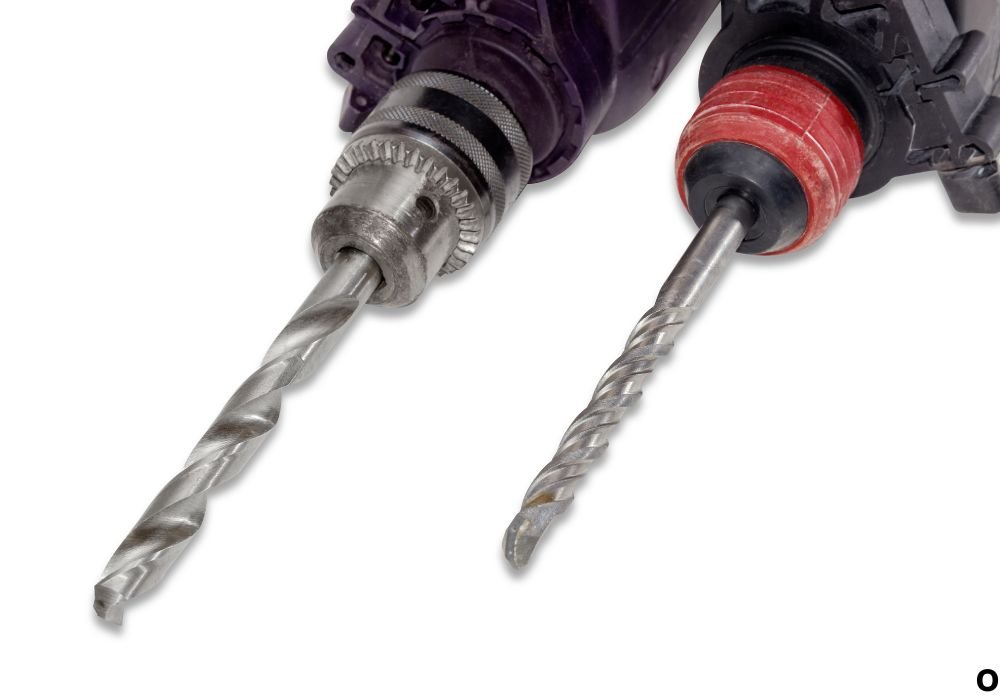
Masonry bits are designed to cut through tough surfaces like brick, stone, and concrete, typically featuring a tungsten carbide tip for durability. Standard drills, however, rotate without the percussive hammer action that makes drilling into masonry easier.
While it’s possible to use a masonry bit with a regular drill for lighter tasks, understanding the limitations and proper technique is essential to avoid damaging the bit, the drill, or the wall.
This guide will explain when and how a standard drill can be used with masonry bits, safety precautions, proper drilling techniques, and tips for maintaining your bits and drill.
With these insights, you’ll know exactly how to tackle light masonry projects safely and effectively, even without specialized tools.
Understanding Masonry Bits and Regular Drills

It was a Saturday afternoon when Jake wanted to hang a heavy shelf on his brick wall. He grabbed his regular household drill and a masonry bit he had bought from the hardware store.
As he started drilling, he noticed the drill struggling against the brick. Many homeowners ask: can you really use a masonry bit with a standard drill?
Masonry bits are designed with a tungsten carbide tip to handle hard surfaces like brick, concrete, and stone.
Regular drills, especially without hammer function, can work with masonry bits, but there are limitations. Standard drills often rotate slower and lack the percussive hammering that makes masonry drilling easier.
Using a masonry bit on a standard drill is possible for light tasks or smaller holes, particularly in softer brick or mortar.
However, drilling into concrete or dense stone can overheat the bit, damage the drill motor, or produce poor results. Understanding the capabilities of both the drill and the bit is key before starting your project.
Proper preparation is crucial. Selecting the correct bit size, using a slow and steady drilling motion, and avoiding excessive pressure can prevent damage to both the drill and the masonry bit. With the right technique, even a regular drill can perform simple masonry drilling tasks safely.
Can a regular drill handle a masonry bit?
Yes, for softer masonry like brick or mortar, but it struggles with concrete.
Will it damage the drill?
It can if you force it or drill for too long without breaks.
Does the drill need hammer function?
Hammer action is ideal but not necessary for small, soft masonry holes.
Should I use water or lubricant?
No, for small holes water is optional; larger concrete holes benefit from cooling.
Can I drill large holes in concrete?
Not recommended; use a hammer drill for best results.
Does bit size matter?
Yes, larger bits require more torque, which a regular drill may not handle.
Will drilling slowly help?
Yes, steady pressure and slow speed reduce heat and wear.
Choosing the Right Drill and Bit Combination
Selecting the proper drill and masonry bit is key to safe and effective drilling. Standard drills work best with small-diameter masonry bits for lighter tasks like hanging pictures on brick or drilling into mortar joints.
Larger bits or hard concrete require a hammer drill or rotary hammer to avoid overloading the motor.
Masonry bits come in various materials and tip designs. Carbide-tipped bits are durable for repeated use, while standard steel bits may wear quickly on dense masonry.
Ensure the bit size matches your drill’s chuck capacity and the hole you need to create. Attempting a bit that is too large can strain the drill and cause uneven holes or even breakage.
Consider the drill’s power and speed settings. Lower RPM settings with steady pressure help prevent overheating, while higher RPMs may cause bits to dull quickly.
For battery-powered drills, ensure the battery is fully charged to maintain consistent torque throughout the drilling process.
Proper pairing of drill and bit ensures the drill performs efficiently, the bit lasts longer, and the masonry surface remains intact. Combining the right tools with correct technique reduces energy consumption, prevents overheating, and avoids frustration during DIY projects.
Can I use any masonry bit with a standard drill?
Small-diameter bits work best; large bits can overload the drill.
Do carbide tips make a difference?
Yes, carbide-tipped bits are more durable and effective on hard surfaces.
Should drill speed be adjusted?
Yes, lower RPM and steady pressure prevent overheating.
Can battery power affect drilling?
Yes, low battery reduces torque and makes drilling harder.
Will the wrong bit size damage the drill?
Yes, oversized bits strain the motor and may break the bit.
How do I know which bit fits my drill?
Check the drill chuck size and select a compatible bit diameter.
Does the material of the wall matter?
Yes, softer brick allows standard drills; hard concrete usually requires a hammer drill.
Tools and Safety Gear Needed
Before drilling, it’s important to prepare both tools and safety gear. Always wear safety glasses to protect your eyes from masonry dust and flying debris. A dust mask is recommended when drilling concrete or brick to avoid inhaling dust particles.
Gloves protect your hands, especially when handling large or sharp masonry bits. Ear protection can be helpful for prolonged drilling as masonry work produces higher noise levels. Ensure the drill’s cord is clear of obstructions and the workspace is well-lit and stable.
For drilling masonry with a standard drill, a sturdy work surface is crucial. Clamp materials where possible, and mark drill points with a pencil or punch. This prevents the bit from wandering and reduces stress on the drill motor.
Selecting the right drill and bit combination reduces wear. Standard drills paired with small masonry bits are suitable for light-duty tasks, while heavier work requires hammer drills or rotary hammers. Knowing your drill’s limitations prevents accidents and ensures efficient drilling.
Do I need safety glasses?
Yes, masonry dust and fragments can injure your eyes.
Should I wear gloves?
Yes, gloves protect your hands from sharp bits and debris.
Is a dust mask necessary?
Recommended, especially for concrete or brick drilling.
Do I need ear protection?
Optional, but useful for long or loud drilling sessions.
Should I clamp the workpiece?
Yes, it prevents movement and reduces drill stress.
How important is a stable surface?
Critical for safety and precise drilling.
Can I drill anywhere with a standard drill?
Only softer masonry; dense concrete requires a hammer drill.
Step-by-Step Drilling Process
Begin by marking the spot where you want to drill. Use a pencil, marker, or punch to create a small indentation for the bit. This helps prevent the bit from wandering during initial drilling.
Insert the masonry bit into your standard drill securely and ensure it is tightened properly. Set the drill to a lower speed to start, especially if your drill lacks a hammer function. Apply steady, moderate pressure, letting the bit do the cutting rather than forcing it.
Drill in short intervals to avoid overheating. Pull the bit out periodically to remove debris and allow cooling. If drilling brick or mortar, maintain straight alignment for a clean, precise hole. Avoid twisting or angling the drill, which can damage the bit or wall surface.
After drilling, remove dust with a brush or vacuum before inserting anchors or screws. Proper cleaning ensures the hole is ready for mounting shelves, fixtures, or anchors. Following these steps preserves both the drill and masonry bit while producing clean, usable holes.
Do I need to mark the spot before drilling?
Yes, it prevents the bit from wandering.
Should the drill be set to low speed?
Yes, slow speed reduces heat and preserves the bit.
How much pressure should I apply?
Moderate, steady pressure; don’t force the bit.
Is it necessary to drill in short intervals?
Yes, to prevent overheating and debris buildup.
Can I drill angled holes?
No, keep the drill perpendicular for clean holes.
Do I need to remove dust after drilling?
Yes, ensures the hole is ready for anchors or screws.
Will forcing the bit damage the drill?
Yes, excessive pressure can burn the motor or break the bit.
Drilling Techniques and Common Mistakes
Even with the right drill and masonry bit, proper technique is essential for safe, effective drilling. Always hold the drill perpendicular to the surface for straight holes.
Start slowly, letting the bit establish a guide point before applying moderate pressure. Avoid forcing the drill, as this can damage both the motor and the bit.
Short drilling intervals are recommended, especially with a standard drill. Pull the bit out occasionally to remove dust and debris.
This reduces heat buildup and ensures consistent performance. For dense brick or stone, use slow, steady pressure rather than high speed, which can cause the bit to skid or wear unevenly.
Common mistakes include using the wrong bit size, applying too much force, drilling continuously without breaks, and attempting to drill hard concrete with a standard drill. Each mistake increases the risk of overheating, motor burnout, or bit breakage.
Proper setup also includes securing the workpiece or wall area, marking your drilling point, and wearing safety gear such as gloves, safety glasses, and dust masks. Following these precautions reduces injury risk and ensures clean, precise holes.
Can I drill at an angle?
No, perpendicular drilling ensures straight, clean holes.
Should I drill continuously?
No, pause to remove debris and allow the bit to cool.
Does too much pressure help?
No, forcing the bit risks motor damage and uneven holes.
Can standard drills handle hard concrete?
Not effectively; use a hammer drill for dense materials.
Is marking the drill point important?
Yes, it prevents bit wandering and ensures accurate placement.
Should safety gear be used?
Yes, gloves, glasses, and dust masks protect against debris.
Do short drilling intervals improve performance?
Yes, they reduce heat buildup and prolong bit life.
Maintenance Tips for Masonry Bits
Proper maintenance extends the life of your masonry bits. After each use, wipe bits clean of dust and debris to prevent corrosion. Store them in a dry location to avoid rusting, especially if made of carbon steel.
Sharpen bits when dull to maintain efficiency. Carbide-tipped bits may require professional sharpening. Avoid using bits that are chipped or cracked; damaged bits reduce drilling efficiency and can break during use.
Using appropriate lubrication or water for larger holes reduces heat buildup and prolongs bit life. For standard drills, always match bit size with the drill’s torque capacity to prevent motor strain. Regular inspection ensures the bit remains safe and effective for future projects.
Should I clean masonry bits after use?
Yes, remove dust and debris to prevent corrosion.
Where should I store bits?
In a dry place to avoid rusting.
Can masonry bits be sharpened?
Yes, but carbide tips may need professional sharpening.
Is it safe to use damaged bits?
No, they can break and cause injury.
Does lubrication help?
Yes, for larger holes it reduces heat and wear.
Can using the wrong bit size damage the drill?
Yes, it can overload the motor and reduce efficiency.
Should I inspect bits regularly?
Yes, to maintain safety and drilling efficiency.
Tips for Successful Drilling Without a Hammer Drill
When using a regular drill with a masonry bit, choose smaller diameter bits for easier penetration. Drill slowly and steadily, avoiding continuous high pressure, especially in dense material.
Use short intervals to let the bit cool, and clear dust frequently. If the drill struggles or the bit stalls, stop and assess whether a hammer drill or rotary hammer is required. Do not force the drill, as this risks overheating the motor and damaging the bit.
Proper alignment and support improve accuracy. Clamp workpieces if possible and maintain the drill perpendicular to the surface. By following these techniques, even a standard drill can perform light masonry tasks safely and effectively.
Can I use small bits for easier drilling?
Yes, smaller bits are easier to drill with a regular drill.
Should I drill continuously?
No, take breaks to avoid overheating.
Is it okay to force the drill?
No, forcing can damage the motor and bit.
Do I need a hammer drill for hard concrete?
Yes, standard drills are insufficient for dense material.
Does alignment matter?
Yes, maintain perpendicular drilling for accuracy.
Should workpieces be clamped?
Yes, clamping ensures stability and precise holes.
Will short drilling intervals help?
Yes, it prevents overheating and extends bit life.
Conclusion
Using a masonry bit with a regular drill is possible for light-duty tasks such as drilling into brick or mortar. However, for concrete or dense stone, a hammer drill is recommended. Always wear proper safety gear, use correct technique, and choose bit sizes compatible with your drill.
By drilling slowly, taking breaks, and maintaining your bits, you can safely perform simple masonry projects with a standard drill. Following these practices preserves both the drill and bits, produces clean holes, and reduces the risk of injury or damage.
For more demanding masonry work, investing in a hammer drill or rotary hammer ensures efficiency, safety, and professional results. With careful preparation and attention to technique, even a regular drill can handle basic masonry projects effectively.

I’m John F. Nicholas, the founder, lead writer, and drill enthusiast behind 101drill.com. With years of hands-on experience in power tools and DIY projects, I created this platform to share practical knowledge, expert tips, and real-world insights to help others master the art of drilling.