
It was a rainy Saturday afternoon when Tom decided to hang a new set of shelves in his living room.
He grabbed a masonry bit from his toolbox, thinking it would work on drywall just as well as it did on brick in the basement. But as soon as he started drilling, he noticed the drywall tearing and dust flying everywhere.
This is a common dilemma for DIY enthusiasts: can a masonry drill bit safely be used on drywall?
Drywall is a soft, fragile material compared to brick, concrete, or stone. Masonry bits are designed for hard materials with tungsten carbide tips, which can easily gouge or crack drywall if used incorrectly.
Choosing the right bit for the material and using proper technique ensures clean holes, avoids wall damage, and protects your drill from unnecessary strain.
This guide explores when and how masonry bits can be used on drywall, the risks involved, the proper alternative bits, and tips for safe and efficient drilling. You’ll also learn best practices for mounting fixtures, anchors, and screws without damaging your walls.
Understanding Drill Bit Types
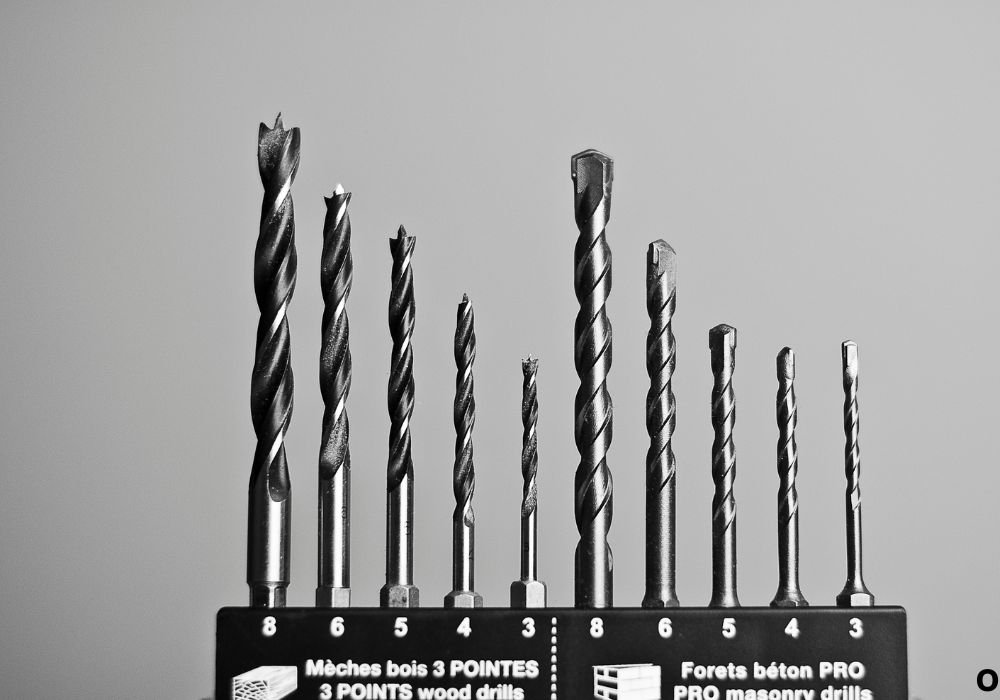
Drill bits come in various shapes and materials, each designed for specific surfaces. Masonry bits have a carbide tip and fluted body to grind through concrete, brick, and stone. Their hard tips allow drilling without chips, but they are aggressive for soft materials like drywall.
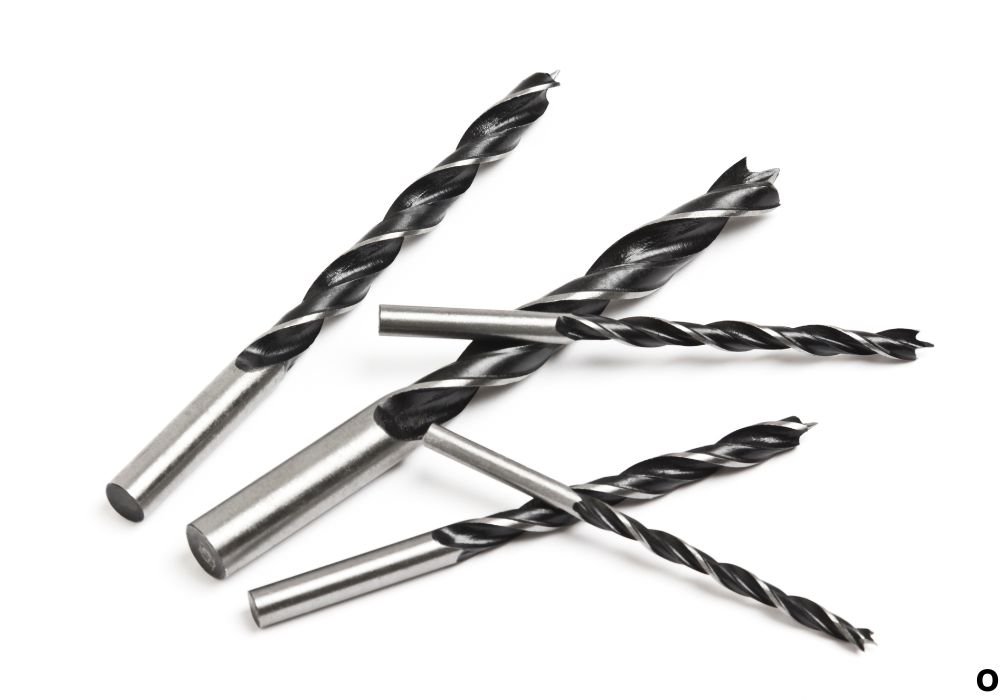
High-speed steel (HSS) bits are versatile and ideal for softwood, plastics, and drywall. Spade bits and twist bits with sharp tips can create precise holes without tearing. Drywall bits often have a pointed tip or spade design for clean entry and smooth edges.
Using the right bit reduces wall damage, prevents drill slippage, and protects both the material and your tools. Masonry bits applied to drywall tend to overcut the hole and create jagged edges, making anchors less secure and potentially weakening the wall structure.
Proper identification of the material and matching it with the correct bit ensures efficient drilling, clean holes, and safe installation of anchors, shelves, or fixtures. Knowledge of bit types is the first step in a successful DIY project.
Can masonry bits work on soft surfaces?
Technically yes, but they are too aggressive for drywall and wood.
Are HSS bits better for drywall?
Yes, they produce clean, precise holes without damage.
Do spade bits work on drywall?
Yes, especially for larger anchor holes.
Can masonry bits be used for small plastic anchors?
Occasionally, but better with a smaller, softer bit.
Does the tip shape matter?
Yes, pointed tips penetrate soft surfaces cleanly.
Will the hole size be affected?
Masonry bits can oversize holes and tear the drywall.
Is knowledge of bit types important?
Absolutely, it prevents damage and ensures anchor stability.
Alternatives to Masonry Bits for Drywall
When drilling into drywall, the safest and most efficient approach is to use the right bit. Standard high-speed steel (HSS) bits, spade bits, or drywall-specific bits produce clean holes without tearing the wall.
Unlike masonry bits, these bits are designed for softer materials and prevent jagged edges or oversized openings.
Plastic or toggle anchors also work best with appropriately sized bits. Using a masonry bit may enlarge the hole unnecessarily, reducing anchor stability. Lightweight drywall screws can be pre-drilled with HSS bits to ensure a snug fit, protecting the wall and the fixture.
Other alternatives include step drill bits, which are ideal for slightly larger holes in drywall, and brad-point bits, which create a precise entry point.
These bits allow for controlled drilling without damaging the surface. Choosing the proper bit reduces frustration, prevents repair work, and ensures anchors or screws hold securely.
Can I use step drill bits on drywall?
Yes, they are ideal for slightly larger holes and clean edges.
Do brad-point bits work on drywall?
Yes, they create precise, controlled entry points.
Are toggle anchors compatible with masonry bits?
Not effectively; they fit better with appropriately sized HSS or spade bits.
Will masonry bits oversize holes?
Yes, they can tear drywall and reduce anchor stability.
Can HSS bits handle all drywall projects?
Yes, for small to medium holes they are ideal.
Do alternative bits reduce wall damage?
Yes, they prevent jagged edges and tearing.
Are these alternatives easier for DIYers?
Yes, they require less force and skill compared to masonry bits.
Tools and Safety Gear Needed
Safety is key when drilling into drywall. Always wear safety glasses to protect your eyes from dust and small debris. A dust mask prevents inhalation of fine drywall particles, which can be irritating to lungs. Gloves can protect hands from sharp bits and screws.
A stable drill and a properly selected bit are essential. Corded or cordless drills can be used, but cordless drills with variable speed control provide better precision. For heavy-duty holes or repeated drilling, a drill with adjustable torque settings prevents tearing.
Other helpful tools include a pencil or awl to mark drill points, a level to ensure straight placement, and a small piece of masking tape over the drill point to reduce surface chipping. Securing the wall or stabilizing large panels can also prevent accidental damage.
Proper preparation ensures efficient drilling, minimizes wall damage, and keeps the work area safe. Using the correct gear reduces errors, improves results, and prevents accidents.
Do I need safety glasses?
Yes, to protect against drywall dust and flying debris.
Is a dust mask necessary?
Recommended, especially when drilling multiple holes.
Are gloves required?
Yes, to protect hands from sharp bits and screws.
Can I use a corded drill?
Yes, but cordless with variable speed offers more control.
Should I mark drill points?
Yes, to prevent wandering and ensure straight holes.
Does masking tape help?
Yes, it prevents chipping around the entry point.
Should the wall be stabilized?
Yes, especially for large drywall panels.
Step-by-Step Drilling Process on Drywall
Start by marking the exact point where you want to drill. Use a pencil or awl to create a small indentation, which guides the bit and reduces wandering. Place a piece of masking tape over the mark to prevent surface chipping.
Select an appropriate bit—high-speed steel or drywall-specific spade bit—for the hole size. Insert the bit into the drill and ensure it is secure. Set the drill to a low or medium speed, particularly for standard drills without hammer action.
Hold the drill perpendicular to the wall and apply gentle, steady pressure. Avoid forcing the bit, as excessive pressure can tear the drywall. Drill in short intervals, periodically withdrawing the bit to remove dust. Clean the hole after drilling to ensure anchors or screws fit properly.
This method produces clean, precise holes, reduces the risk of wall damage, and ensures that anchors hold firmly. Following a careful, controlled process prevents tearing, cracking, and oversized holes.
Should I mark the drill point?
Yes, it helps the bit start cleanly.
What bit type should I use?
High-speed steel or drywall spade bits are ideal.
Do I need to use hammer action?
No, hammering can destroy drywall.
Should I drill slowly?
Yes, gentle speed reduces tearing.
Can I force the drill?
No, let the bit do the work.
Do I need to remove dust?
Yes, clean holes ensure proper anchor fit.
Will this prevent wall damage?
Yes, proper technique produces smooth, clean holes.
Anchors and Drywall Mounting Tips
Once the right bit is selected, proper mounting of anchors or screws ensures the fixture holds safely.
Plastic anchors, toggle bolts, or Molly bolts require pre-drilled holes that match the anchor size. Drilling too large or using a masonry bit can make the anchor loose, compromising the hold.
For light objects, plastic anchors with a standard HSS bit work well. Heavier items like shelves require toggle or Molly bolts, which expand behind the drywall for maximum stability. Pre-drilling pilot holes ensures screws or anchors do not crack or split the drywall.
Using masking tape over the drill point prevents chipping, while keeping the drill perpendicular guarantees a straight hole.
Removing debris from the hole before inserting anchors allows for snug, secure placement. Following these tips minimizes wall damage and ensures your mounted objects stay safely in place.
Can toggle bolts be used with masonry bits?
Not recommended; use HSS or drywall bits for proper fit.
Do anchors need precise hole sizes?
Yes, oversized holes reduce holding strength.
Can heavy shelves be mounted on drywall?
Yes, using toggle or Molly bolts for stability.
Does masking tape help?
Yes, it prevents chipping at the drill entry.
Should the drill be perpendicular?
Yes, to ensure straight and secure holes.
Is debris removal important?
Yes, it allows anchors to fit snugly.
Can improper bits damage drywall anchors?
Yes, masonry bits can enlarge holes and weaken hold.
Common Mistakes to Avoid
Using a masonry bit on drywall often causes jagged holes, tearing, or oversized openings. Applying too much pressure can break the wall surface. Drilling at an angle results in uneven holes and unstable anchors.
Skipping masking tape or guide marks can lead to wandering bits and chipped surfaces. Using a hammer drill on drywall is unnecessary and dangerous, as the impact can destroy soft material. Overloading small cordless drills with large bits can damage the motor.
Following correct bit selection, drilling speed, and technique prevents these common mistakes. Pre-drill pilot holes for large anchors and ensure the drill is perpendicular for precise results. Correct preparation saves time, prevents wall repair, and improves the stability of fixtures.
Is using a masonry bit risky?
Yes, it can tear drywall and make holes too large.
Can too much pressure damage the wall?
Yes, always use gentle, steady pressure.
Is drilling at an angle okay?
No, perpendicular drilling ensures stability.
Do I need masking tape?
Yes, it prevents surface chipping.
Can hammer drills be used?
No, hammer action destroys drywall.
Will large bits overload a small drill?
Yes, always match bit size to drill capacity.
Does preparation prevent mistakes?
Yes, marking, pilot holes, and proper bits ensure success.
Maintenance Tips for Bits and Drill
Clean masonry or HSS bits after each use to remove dust and prevent corrosion. Store bits in a dry place, away from moisture. Inspect bits for wear, chipping, or cracks before each project.
For standard drills, check the chuck and torque settings regularly. Avoid overheating by drilling in short intervals. Maintaining tools prolongs their life and ensures consistent performance on drywall and other materials.
Should bits be cleaned after use?
Yes, to prevent corrosion and debris buildup.
Where should bits be stored?
In a dry, organized toolbox.
Can damaged bits be reused?
No, cracked or chipped bits are unsafe.
Should I check drill settings?
Yes, adjust speed and torque for optimal control.
Does proper maintenance improve results?
Yes, it ensures cleaner holes and longer tool life.
Will overheating affect the drill?
Yes, avoid continuous drilling to protect the motor.
Conclusion
Using a masonry bit on drywall is possible only for small, light-duty tasks, but it is generally not recommended. The hard carbide tip can easily tear the drywall and create uneven holes. Standard high-speed steel or drywall-specific bits produce cleaner, safer results.
Understanding your drill, the bit, and the material is crucial for success. Proper marking, steady speed, perpendicular alignment, and short drilling intervals prevent damage.
By following these tips, DIYers can safely drill into drywall, install anchors, and hang fixtures without wall damage or tool strain.
For harder materials like concrete or brick, masonry bits with a hammer drill are necessary. With the right bit and technique, even a standard drill can perform light drywall projects effectively, producing strong, clean holes for all your mounting needs.

I’m John F. Nicholas, the founder, lead writer, and drill enthusiast behind 101drill.com. With years of hands-on experience in power tools and DIY projects, I created this platform to share practical knowledge, expert tips, and real-world insights to help others master the art of drilling.