
Drilling a hole in the wrong place on a piece of metal can feel like a major setback, especially when the part is expensive or already assembled. The shock hits instantly because metal isn’t something you can patch the same way you would with wood or plastic.
I once watched someone drill a mounting hole for a bracket completely off-center, and the fear in their eyes said they thought the entire piece was ruined.
Many people don’t realize that almost every metalworker makes this mistake at some point. Bits slip, measurements get misread, tools vibrate, and sometimes the punch mark is not deep enough to guide the drill.
Metal’s hardness makes these errors feel permanent, but surprisingly, they are far from unfixable.
The good news is that metal is more repairable than most beginners think. From epoxy fillers to welding, brazing, patch plates, and even repurposing the wrong hole, there are multiple ways to restore the metal’s strength and appearance.
Each method has precise steps that, when done correctly, make the repair practically invisible.
Whether the misdrilled hole is small, large, shallow, deep, or in a critical location, there is a technique designed to fix it. The key is choosing the right method based on the metal thickness and project requirements.
This guide walks you through every reliable way to fix a hole drilled in the wrong place so your project stays on track without wasting materials.
Why Holes Get Drilled in the Wrong Place
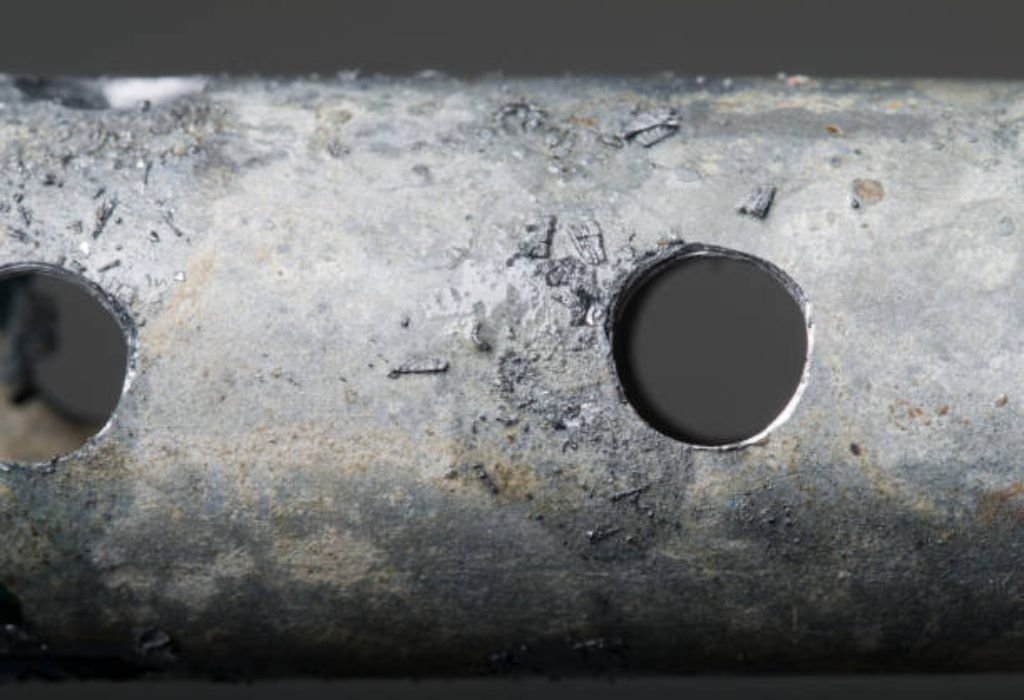
Misdrilled holes often happen because the drill bit slips at the start due to a smooth metal surface. Without a deep enough center punch mark, the bit glides across the metal before cutting, leading to inaccurate entry points.
This is one of the most common causes for a hole landing even a few millimeters away from the intended location.
Another reason is measurement errors, especially when working with tight tolerances. A slight misreading of a ruler or marking from the wrong angle can easily shift hole placement. These tiny errors become noticeable only after drilling is complete.
Vibration is another major issue when drilling into metal. Without proper clamping, the metal shifts under pressure and the drill bit enters at an unintended position. This is more common when drilling larger or thicker surfaces.
Incorrect drilling angles also contribute to misaligned holes. Even a small tilt in the drill causes the bit to enter the material at an angle, resulting in an off-center or crooked hole. This is especially common with beginners or when working without a drill press.
The lack of pilot holes can also lead to mistakes. Large bits require a smaller hole to guide them, and skipping this step makes the bit catch aggressively. Aggressive grabbing often pulls the bit slightly off the mark.
Finally, drilling too fast can cause wandering due to heat, friction, and micro-skidding. Speed and pressure mistakes combine to push the drill bit away from the intended mark before it fully bites into the metal. These issues are easily preventable but also easily repairable if they occur.
Assessing the Damage Before Repairing
Before fixing a misdrilled hole, it’s important to assess the extent of the mistake. First, examine the hole size and how far off it is from the intended location. Small holes that are slightly misplaced are much easier to repair cosmetically, while larger holes may require structural fixes.
Consider the thickness of the metal because thin sheet metal can be repaired using filler, while thick plate metal may demand welding or brazing. Thicker metals offer more flexibility for robust repairs without losing strength. Thin sheets, however, may warp or distort if repaired improperly.
Next, determine whether the piece must withstand structural loads. If the hole was meant for a bolt or bracket under weight, the repair method must restore full strength. Cosmetic filler would not be appropriate for high-stress areas.
Also evaluate whether the wrong hole is completely unusable or could potentially be repurposed. Sometimes, adjusting the project layout slightly allows you to reuse the hole creatively. Repurposing avoids unnecessary repairs and saves time.
Check the surrounding material for cracks or stress marks. Drilling incorrectly can cause micro-damage that must be addressed before performing repairs. Ensuring the metal is stable helps guarantee a successful fix.
Finally, decide whether the location of the wrong hole will affect aesthetics. Visible surfaces require smoother and cleaner repairs to maintain appearance. Understanding the damage helps you choose the right technique for a seamless result.
Tools and Materials Needed for Repairing Wrong Holes
Repairing misdrilled holes requires a specific set of tools depending on the chosen method. Metal epoxy and industrial fillers are essential for small holes that need cosmetic restoration. These fillers bond strongly with metal and create a solid surface for sanding and repainting.
Welding equipment is needed for structural repairs or larger holes. MIG, TIG, or stick welding can fill holes completely by adding molten metal to the gap. Welders make the surface as strong as the original metal when done properly, but require proper skill and safety measures.
Brazing rods and soldering tools provide a medium-strength repair solution. Brazing uses lower temperatures than welding and is ideal for thin metals that may warp under high heat. It creates a solid patch that is strong enough for moderate use.
Metal patch plates and rivets are useful when the hole is too large to fill. These patches return strength by covering the wrong hole completely. Rivets, bolts, or welds secure the patch effectively depending on project needs.
A grinder or metal file helps smooth repairs and blend them with the original surface. Proper grinding ensures the patch or filler is flush and aesthetically acceptable. Sandpaper may also be needed for fine finishing.
Clamps, sanding blocks, cleaning solvents, and protective gear complete the repair kit. These tools ensure the metal stays stationary and clean during the repair process. Having all materials ready makes the repair efficient and professional.
Can I fix any wrong hole with epoxy?
Epoxy works for small, non-structural holes but not for load-bearing repairs.
Do I need welding for thick metal mistakes?
Yes, welding is the strongest method for thick steel repairs.
Can rivets cover large wrong holes?
Yes, patch plates secured with rivets are effective for oversized holes.
Is brazing easier than welding?
Brazing uses lower heat and is often easier for beginners.
Can I fill holes in stainless steel?
Yes, but stainless steel repairs require proper filler material and technique.
Method 1: Using Metal Epoxy or Filler on Small Holes
Metal epoxy is one of the simplest methods for fixing small misdrilled holes. Start by cleaning the hole thoroughly using a degreaser or solvent. A clean surface ensures strong adhesion when applying the epoxy.
Mix the epoxy components according to the manufacturer’s instructions. Some epoxies harden quickly, so prepare only the amount you can apply in time. Apply the mixture into the hole using a putty knife or spreader.
Press the epoxy firmly into the hole so it fills completely without air pockets. Smooth the surface slightly while it is still pliable. Allow the epoxy to cure for the recommended time listed on the package.
Once hardened, sand the area using fine-grit sandpaper. Sanding helps blend the repaired area into the surrounding metal. Proper sanding creates a nearly invisible repair if painted later.
If the repair is on a visible surface, apply a primer and paint to match the metal. Epoxy can be finished to look like new when done carefully. This method is ideal for cosmetic rather than structural repairs.
Epoxy repairs work best on small-diameter holes that will not carry load. Using epoxy on heavy-duty parts is not recommended. Always consider the functional requirements of the metal piece before choosing epoxy.
Method 2: Welding the Wrong Hole Closed
Welding is one of the strongest methods for repairing misdrilled holes, especially in thick metal. Begin by cleaning the surface thoroughly to remove paint, rust, or coatings. A clean metal surface allows proper weld penetration and strong bonding.
Use a MIG or TIG welder depending on the metal thickness and your experience level. TIG welding provides more precise control for smaller holes. MIG welding is faster and better for filling larger gaps.
Start welding by adding small amounts of molten metal into the hole. Build up the weld gradually until the entire hole is filled. Let the weld cool slightly before continuing to prevent warping.
Once the hole is fully filled with weld material, use a grinder to smooth the surface. Grinding helps blend the repair with the original metal. The smoother the surface, the less noticeable the repair becomes.
Check for small pits or gaps after grinding. If needed, apply additional weld beads to ensure full coverage. Repeat grinding until the repair is flush with the surrounding area.
Welding creates a repair that is as strong as or stronger than the original metal. This makes it ideal for load-bearing parts or structural components. Proper welding ensures long-lasting and professional-quality repairs.
Method 3: Brazing or Soldering to Fill Misdrilled Holes
Brazing is a suitable alternative when welding is not possible due to thin metal or limited equipment. Begin by cleaning the hole and surrounding area with a wire brush or solvent. Clean metal ensures better bonding with brazing filler.
Heat the metal using a torch until it reaches brazing temperature. Avoid overheating, as excessive heat may warp thin metal. Once heated, apply the brazing rod into the hole.
The filler material melts and flows into the hole, creating a smooth and strong patch. Use the torch to guide the flow evenly. Allow the material to cool naturally without forced cooling.
After cooling, sand or file the surface to smooth the repair. Brazed joints are strong but easier to grind compared to welds. The smooth surface can be painted later if needed.
Brazing offers a medium-strength repair suitable for lightly loaded parts. It is easier for beginners and requires less heat than welding. This method works well on thin steel, brass, copper, and aluminum.
Always ensure proper ventilation when brazing to avoid inhaling fumes. Safety equipment such as gloves and eye protection is essential. Brazing is a versatile option for repairing holes in delicate or thin metals.
Method 4: Installing a Metal Patch Plate Over the Hole
When the wrong hole is too large or located in a structurally important area, a patch plate is often the best solution. Start by cutting a metal patch slightly larger than the hole. The patch should be made of the same material for compatibility.
Clean the surface of both the patch and the base metal thoroughly. Dirt or rust prevents proper bonding and weakens the repair. A clean surface ensures strong mechanical attachment.
Position the patch over the hole and clamp it securely in place. Ensure that it covers the entire damaged area without gaps. Proper alignment is key to achieving a smooth and strong repair.
Attach the patch using rivets, bolts, or welds depending on structural needs. Rivets work well for non-structural applications, while welding offers full strength. Bolts can also be used if removable repairs are desired.
Grind or sand the edges to blend the patch with the surrounding metal. This step enhances appearance and reduces sharp edges. A smooth edge creates a cleaner finish and prevents catching or injury.
Prime and paint the patched area to protect the metal from corrosion. Painting also helps make the repair less noticeable. A properly installed patch plate restores strength and functionality to the metal.
Can patch plates fix large holes?
Yes, patch plates are ideal for holes too large to fill with epoxy or weld.
Should the patch match the original metal?
Yes, matching metals ensures strength and prevents corrosion issues.
Are riveted patches strong?
They are strong enough for non-structural repairs but not for heavy loads.
Can I weld a patch instead of riveting?
Yes, welding provides the highest strength.
Does patch thickness matter?
Yes, patch plates should match the thickness of the original metal for best results.
Method 5: Enlarging and Repurposing the Hole
Sometimes the easiest fix is to repurpose the wrongly drilled hole rather than patch it. If the design allows flexibility, consider turning the incorrect hole into part of the final layout. This approach eliminates unnecessary repair work.
You can enlarge the hole and use it for a different purpose, such as mounting another component. Enlarging the hole using a step drill bit ensures smooth edges. This technique works well when hole position is not critical.
Another option is to convert the wrong hole into a slot. Slots provide adjustable mounting positions for bolts or screws. This modification can actually improve the design’s flexibility.
For thin sheet metal, you can create a decorative pattern if the wrong hole is in a visible location. Adding more holes transforms the mistake into a deliberate design element. This is often used in custom fabrication or artwork.
Repurposing is ideal when the hole is only slightly misplaced. Minor adjustments to part placement can make the wrong hole useful. This saves time and avoids unnecessary repair.
Always evaluate whether repurposing fits the project’s structural and visual requirements. If strength is compromised, choose a stronger repair method. Repurposing provides creative solutions without additional tools.
How to Prevent Drilling Holes in the Wrong Place
Prevention begins with accurate measurement. Measure twice and mark once to ensure perfect alignment before drilling. Having a precise marking process reduces the risk of drilling errors.
Use a center punch to create an indentation exactly at the drilling point. This indentation keeps the drill bit from slipping on the metal surface. A deep punch mark is essential for accurate drilling.
Drill a pilot hole before using larger bits. Pilot holes guide the main bit and reduce wandering. This step significantly improves drilling accuracy.
Clamp the metal securely to a solid surface before drilling. Movement during drilling causes crooked or misplaced holes. A stable workpiece always results in better accuracy.
Use slow drilling speed when starting the hole. High speed may cause the bit to skate across the surface. Slow entry ensures the bit bites into the metal cleanly.
Check drill bit sharpness before starting. Dull bits slip more easily and make mistakes more likely. Sharp bits cut cleanly and follow punch marks accurately.
Why do drill bits wander when starting a hole?
Because the metal surface is too smooth without a punch mark.
Is a pilot hole always necessary?
It is strongly recommended, especially for larger bit sizes.
Can clamping reduce drilling mistakes?
Yes, clamping stabilizes the metal and prevents movement.
Why do measurements end up slightly off?
Small reading errors or marking from incorrect angles cause misalignment.
Does drill speed affect accuracy?
Yes, slower speeds provide more control and reduce slipping.
Mistakes to Avoid When Fixing Misdrilled Holes
One common mistake is choosing the wrong repair method for the hole size. Using epoxy on large holes results in weak repairs. Match the method to the hole’s size and structural needs.
Another mistake is rushing the cleaning process. Dust, oil, or rust prevents fillers or welds from bonding correctly. Always ensure the metal is clean before starting any repair.
Overheating the metal during welding or brazing is another common issue. Too much heat can warp thin metal or damage coatings. Control the heat carefully to maintain metal integrity.
Failing to grind repairs properly leaves rough or uneven surfaces. Inadequate finishing makes the repair visible and weakens bonding. Smooth finishing ensures durability and aesthetic appeal.
Using mismatched metal for patches can cause corrosion later. Different metals react differently when exposed to moisture. Always match patch metal to the original sheet.
Skipping primer or paint after repairs reduces long-term durability. Bare metal oxidizes quickly and weakens over time. Proper finishing prevents future corrosion issues.
Conclusion
Fixing a hole drilled in the wrong place on metal is completely possible with the right method and tools.
Whether you choose epoxy filler for small cosmetic holes, welding for structural repairs, brazing for thin metal, or patch plates for oversized mistakes, each technique restores function and appearance effectively.
Understanding the metal type, hole size, and load requirements helps you choose the best repair method for flawless results.
Taking time to clean, prepare, and finish the repair ensures long-lasting durability. With careful technique and proper prevention methods, you can avoid drilling mistakes in the future and create precise, professional-quality work every time.
Even a wrong hole becomes a minor setback when you know exactly how to fix it.

I’m John F. Nicholas, the founder, lead writer, and drill enthusiast behind 101drill.com. With years of hands-on experience in power tools and DIY projects, I created this platform to share practical knowledge, expert tips, and real-world insights to help others master the art of drilling.