
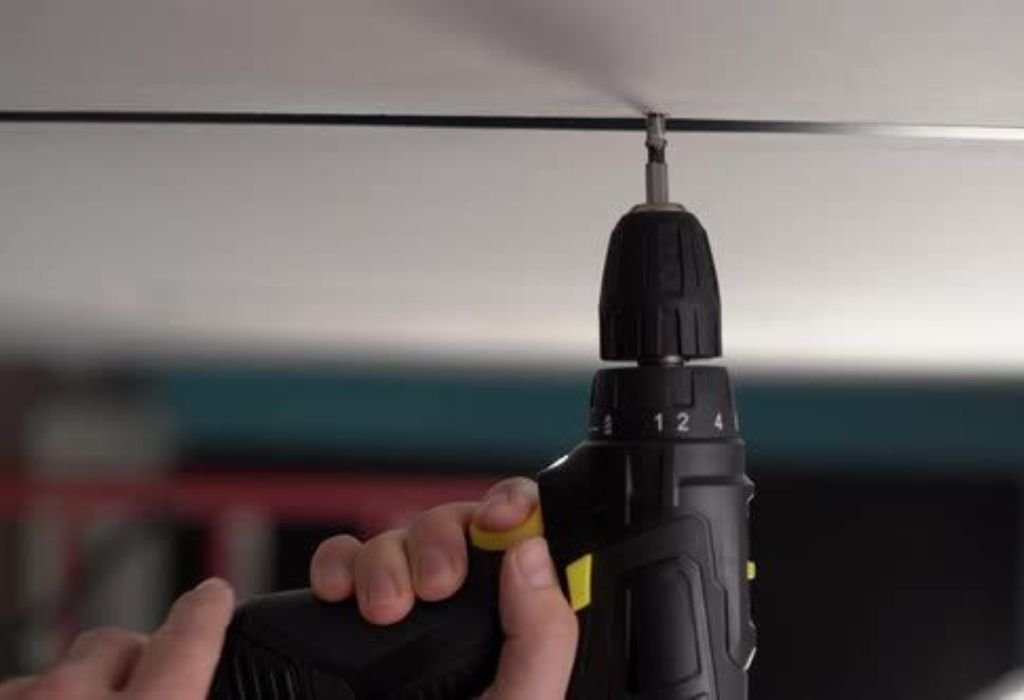
Drilling into a wall feels simple until you realize there are metal studs hidden behind the drywall. What looks like a normal surface quickly becomes frustrating when the drill bit slips, makes noise, or refuses to penetrate the metal.
Many people damage drywall or break drill bits because they don’t understand how metal studs behave compared to wooden studs.
Metal studs are strong but thin, and they react differently to pressure and drilling speed. When you don’t know how to drill them properly, the bit skids off the surface or overheats. This leads to cracked drywall, bent screws, and holes that are no longer usable for mounting anything safely.
But with the right preparation and correct tools, drilling through metal studs becomes a simple and predictable task.
Understanding where to drill, how to angle the drill, and which bit to choose completely changes the result. Once you follow the proper steps, the hole becomes clean, accurate, and strong enough to support fixtures.
Whether you are installing a TV mount, shelving, electrical conduit, or a heavy bracket, the process stays the same.
A safe approach ensures that you avoid electrical wiring, prevent drywall damage, and maintain the integrity of the stud. This guide breaks down every step so you can drill confidently and professionally.
Understanding Metal Studs Behind Drywall
Metal studs are commonly used in modern buildings because they are lightweight, straight, and resistant to moisture.
Unlike wooden studs, they do not warp or swell, which means walls stay smooth and stable for many years. This makes them ideal for offices, apartments, and commercial spaces.
Most metal studs are shaped like a C, which means they have flat sides and a curved back. This shape creates strength while keeping the interior hollow. When drilling, the thin flat surface can flex or vibrate, making it harder to keep the drill bit centered.
The thickness of metal studs is usually between 25 to 20 gauge. Thinner studs are easier to penetrate but require careful drilling to avoid deforming the hole. Thicker studs offer better support but create more resistance to the drill bit.
Metal studs often have pre-made holes for running wires and pipes. If you drill too close to these holes, the stud may weaken or become unstable. Knowing the stud structure helps you choose the best drilling position.
Drywall conceals the metal stud, so you cannot see the exact drilling surface. This hidden structure increases the risk of hitting electrical wiring or plumbing. Understanding these risks helps you plan safely.
Metal studs also conduct heat faster than wood. As a result, drill bits overheat quickly if used at high speed. Proper drilling speed and lubrication prevent damage and produce smoother holes.
Tools Needed to Drill Into Metal Studs Safely
A variable-speed power drill is essential because metal requires slow and controlled drilling. Cordless drills offer flexibility, while corded drills provide higher torque. Either option works well as long as speed is adjustable.
You will need metal-specific drill bits such as cobalt bits, titanium-coated bits, or carbide-tipped bits. These bits stay sharp longer and cut metal efficiently. A normal wood bit will not work for metal studs.
A stud finder helps you locate metal studs accurately through the drywall. Modern stud finders detect both metal and wood, giving you a clear idea of where to drill. Some models also detect electrical wiring.
A center punch or nail helps create a small indentation in the metal before drilling. This indentation prevents the drill bit from slipping on the smooth metal surface. A stable starting point increases safety and accuracy.
Masking tape is useful for marking positions and preventing drywall chipping. It also helps the drill bit grip the surface during the first few seconds. Tape reduces vibration and scratching.
Cutting oil or light machine oil keeps the drill bit cool. Metal generates heat quickly, and lubrication prevents overheating. This protects both the bit and the metal stud.
A screwdriver or impact driver is needed if you plan to install screws into the metal stud after drilling. Metal screws bite into pre-drilled holes more efficiently when driven with the right tool. Safety gear such as gloves and glasses protects you from metal shavings.
How to Locate Metal Studs Behind Drywall
Use a high-quality stud finder to detect the position of metal studs behind the drywall. Move the stud finder slowly across the wall until it beeps or lights up. This indicates the edge of the metal stud.
Mark both edges of the stud so you can locate the stud center accurately. Drilling in the center ensures stronger support and reduces the risk of piercing through the side. A centered position is essential for mounting heavy objects.
Run the stud finder vertically to confirm the path of the stud. Metal studs run from floor to ceiling in straight lines. This helps you follow the alignment and drill along the correct section.
Check for electrical wiring using the stud finder’s wire-detection mode. Wires often run horizontally through the holes inside studs. Drilling into wiring is dangerous and must be avoided.
Tap the wall lightly with your knuckles to confirm stud density. A solid thump usually signals a stud, while a hollow sound indicates empty space. This auditory test doubles your accuracy.
Use a thin nail to test the stud location before drilling a large hole. The nail helps you feel the metal surface behind the drywall. If the nail bends or resists sharply, you have found the stud.
Finally, outline the drilling area with a marker. Knowing exactly where to drill prevents unnecessary drywall damage. Proper positioning ensures the hole is secure and aligned.
Choosing the Right Drill Bit for Metal Studs
Cobalt drill bits are one of the best choices for metal studs because they handle heat efficiently. Their alloy composition makes them strong enough to cut thin metal cleanly. They also stay sharp longer than regular bits.
Titanium-coated bits work well for light to medium metal thickness. The coating reduces friction and allows faster drilling at low speed. Titanium bits offer a good balance of durability and cost.
Carbide-tipped bits are the strongest option and are ideal for thick studs or heavy-duty applications. They resist wear even under high pressure. However, they can be brittle if dropped.
Step drill bits are excellent for drilling holes in thin metal studs. They expand the hole gradually, preventing tearing or deforming. Step bits also leave smoother edges compared to standard bits.
High-speed steel bits are an entry-level option, but they wear out quickly when used on metal. If you drill metal studs frequently, cobalt bits provide the best long-term performance. Choosing the right bit ensures a clean and precise hole.
Drill bit size depends on the type of screw you plan to install. Always check the manufacturer’s recommendation for pilot hole sizes. A correct pilot hole prevents screw wobbling and increases load capacity.
Keep multiple drill bits available because metal drilling can dull bits quickly. Switching to a fresh bit ensures consistency. Using dull bits causes overheating and rough holes.
How to Prepare the Wall and Metal Stud Before Drilling
Start by marking the drill point on the drywall. Use masking tape over the marking area to prevent chipping and provide a better surface for the drill bit. Tape makes the process cleaner and smoother.
Insert a thin nail into the marked spot to confirm the stud location. This small test hole creates minimal damage and confirms metal behind the drywall. It also ensures the drill aligns with the stud center.
Use a center punch to create a small indentation in the metal stud. This indentation keeps the drill bit from slipping during the first few seconds. A slipping bit can damage the drywall surface.
Clean the wall surface and surrounding area to remove dust. A clean area improves marking visibility and prevents slipping. Dust also affects drill grip during the initial drill contact.
Position your drill at a perpendicular angle to the wall. A straight angle ensures a clean and accurate hole. Tilting the drill creates crooked holes and reduces screw stability.
Apply one or two drops of cutting oil onto the punch mark. This lubrication reduces friction and heat during drilling. Proper oiling ensures a smoother cut and longer drill bit life.
Double-check for wiring or plumbing behind the stud before drilling. A quick scan using a stud finder prevents dangerous situations. Once confirmed safe, the wall is ready for drilling.
Step by Step Method to Drill Through Metal Studs
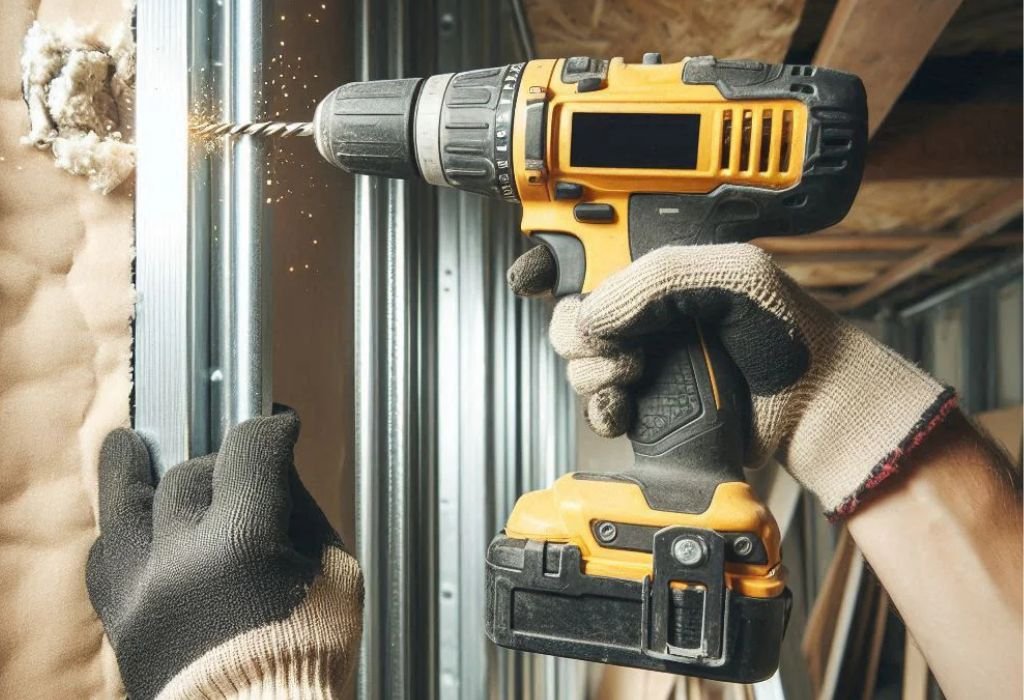
Start the drill at the lowest speed and position the drill bit exactly on the punch mark. Slow drilling helps the bit bite into the metal surface without slipping. Once the bit sets in place, gradually increase speed.
Apply steady but gentle pressure to avoid bending the thin metal stud. Too much force may deform the stud and create jagged edges. Slow and consistent pressure ensures precision.
Add cutting oil every few seconds to keep the drill bit cool. Oil reduces friction and makes drilling smoother. Without lubrication, the bit may overheat and become dull.
Once you drill through the first layer of the metal stud, reduce speed slightly. The hollow interior allows the bit to move more easily. Controlling speed prevents uncontrolled movement.
Continue drilling until you reach the back layer of the C-shaped stud. The back surface is thinner but may vibrate more. Keep the drill stable to avoid jumping.
Pull the drill out slowly while spinning to clean metal shavings. Removing shavings prevents clogging and keeps edges clean. A clean hole improves screw installation later.
Inspect the hole to ensure smoothness and symmetry. If the edges are sharp, lightly sand the opening. A clean hole increases screw grip and load capacity.
Why does the drill bit slip on metal studs?
Because metal is smooth, so you need a center punch to prevent slipping.
Do metal studs break drill bits easily?
Yes, if you drill too fast or use the wrong bit.
Should I drill at an angle?
No, always drill straight to avoid enlarging or damaging the hole.
Can I drill without lubrication?
Lubrication is necessary to prevent overheating and protect the bit.
How do I know I reached the hollow part of the stud?
The drill suddenly moves forward with less resistance.
How to Prevent Drill Bit Slipping on Metal Studs
Use masking tape on the drilling area to create extra friction. Tape helps the drill bit stay aligned during the first few seconds. It also makes your markings easier to see.
Create a clear indentation with a center punch before drilling. This indentation anchors the drill bit and prevents sideways movement. Without this step, metal studs cause immediate slipping.
Start drilling at the slowest speed possible. High speed at the beginning leads to uncontrolled slipping. Slow speed allows better control and initial penetration.
Use both hands to stabilize the drill. One hand controls angle while the other applies pressure. A stable grip reduces vibration that causes bit movement.
Hold the drill perpendicular to the drywall. Any tilt makes the bit slide sideways and damages the drywall surface. Straight drilling improves accuracy and prevents wandering.
Apply gentle pressure until the bit creates a visible groove. Once the groove forms, the risk of slipping decreases. You can increase speed slightly after that.
Avoid lubricating during the first two seconds because oil makes the surface slippery. Lubrication is recommended only after the bit has created a groove. This ensures stability and smooth drilling.
Avoiding Damage to Drywall While Drilling
Drywall is fragile and prone to tearing when drilling near metal studs. Using masking tape over the drill point helps prevent chipping. The tape adds structural support during drilling.
Keep the drill steady and avoid pushing too hard. Excessive pressure cracks the drywall or causes the bit to break through aggressively. Maintaining balance is key for clean drilling.
Use a sharp drill bit to reduce vibrations. Dull bits cause shaking that damages the surrounding drywall. Sharp bits cut cleanly and reduce stress.
Support the drill with both hands to maintain control. Even slight lateral movements can widen the hole unnecessarily. Steadiness ensures the drywall stays intact.
Drill slowly through the drywall layer before reaching the metal stud. Fast drilling breaks drywall fibers and causes surface chipping. Slow drilling reduces damage and keeps the hole neat.
Place a vacuum near the drill to remove dust as you work. Dust buildup hides cracks and can interfere with your view. Keeping the surface clean helps you drill more accurately.
Stop immediately if the drill jumps or shakes. Correcting direction prevents larger drywall damage. Restart at a slower speed for maximum control.
Why did my drywall crack during drilling?
You may have applied too much pressure or used a dull drill bit.
Do I need tape for all drilling?
Tape helps prevent chipping, especially on painted drywall.
Is it normal for drywall dust to fall?
Yes, but keeping a vacuum nearby helps maintain visibility.
Can fast speed cause drywall damage?
Yes, high speed increases vibration and breaks the surface.
What happens if the hole becomes too large?
You must use drywall anchors or repair the surface.
What to Do If You Hit Electrical Wiring or Plumbing
Stop immediately if you feel unusual resistance or see sparks. Sparks indicate contact with electrical wiring. Continuing to drill can cause serious hazards.
Turn off electricity to the room before inspecting further. This prevents shock or accidental short circuits. Safety should always come first.
Use a flashlight to check the hole for wire insulation. Damaged insulation increases fire risk and must be repaired by a professional. Do not attempt to repair electrical wiring yourself.
If you hit plumbing, water leakage may occur. Even a small puncture can cause major damage over time. Turn off the water supply before inspecting.
Call a licensed plumber or electrician to assess damage. Professionals can repair lines safely and ensure your wall remains structurally sound. Attempting DIY repair increases risk.
Use a stud finder with wire detection before drilling next time. This reduces the chance of hitting hidden systems. Prevention is always more effective than repair.
Mark safe drilling zones for future reference. Keeping notes helps avoid future mistakes when drilling in the same wall. Knowledge of wiring paths is extremely useful.
Common Mistakes to Avoid When Drilling Metal Studs
One common mistake is drilling at high speed. High speed overheats the bit and increases slipping. Slow speed ensures control and smooth penetration.
Another mistake is using wood drill bits instead of metal bits. Wood bits do not cut metal properly and easily break. Always choose cobalt or titanium bits for metal studs.
Many people skip lubrication, which leads to overheating. Overheated bits dull quickly and produce rough holes. Lubrication increases bit lifespan and hole quality.
Incorrect stud location is another major issue. Drilling outside the stud introduces drywall anchors rather than screw support. Always locate the stud accurately before drilling.
Applying too much pressure can deform thin metal studs. Metal studs are light and can bend inward under force. Gentle pressure is more effective for clean drilling.
Failing to create a punch mark results in slipping. The punch mark is essential for stable drilling. Without it, accuracy decreases significantly.
Using dull drill bits creates jagged edges and requires more force. Replacing or sharpening bits ensures smoother results. A sharp bit cuts more efficiently and safely.
Why is my drill smoking?
Your bit is overheating, likely due to no lubrication.
Why does my screw not grip the stud?
The pilot hole may be too large for the screw size.
Can metal studs hold TV brackets?
Yes, if drilled and reinforced properly with metal anchors.
Why did my drill bit break inside the stud?
Too much pressure or wrong angle caused stress on the bit.
Do metal studs vibrate during drilling?
Yes, because they are hollow, but proper stabilization reduces vibration.
Safety Tips When Drilling Through Metal Studs
Wear safety glasses to protect your eyes from metal shavings. Even small particles can cause injuries. Eye protection is essential.
Use gloves to protect your hands from sharp metal edges. Metal shavings can cause cuts easily. Gloves improve grip and safety.
Keep the drill stable using both hands. A stable grip prevents slipping and improves accuracy. Controlled drilling reduces accidents.
Ensure the work area is clean and free from clutter. A messy environment increases risks. Clean surroundings improve focus and safety.
Do not rush the drilling process. Metal requires slow and steady cutting. Rushing increases mistakes and overheating.
Avoid wearing loose clothing that can get caught in the rotating drill. Clothing entanglement can cause injuries. Fitted clothing is safer.
Always check for wiring and pipes before drilling. Hidden systems pose serious risks. Knowing what is behind the wall prevents accidents.
Conclusion
Drilling through metal studs behind drywall may seem intimidating, but the right tools and techniques make it simple and safe.
Slow drilling, proper lubrication, and correct drill bits ensure clean and accurate holes. These steps help you avoid damage to drywall, metal studs, and hidden systems.
Understanding the structure of metal studs allows you to drill with confidence. Locating studs properly, marking accurately, and stabilizing the drill reduce mistakes. A controlled approach gives you perfect pilot holes and strong support for mounting fixtures.
Whether you are installing shelving, running wires, or mounting heavy brackets, the same drilling principles apply.
With patience and the correct method, drilling through metal studs becomes a smooth and predictable process. Following this guide gives you the skill and safety needed for any wall project.

I’m John F. Nicholas, the founder, lead writer, and drill enthusiast behind 101drill.com. With years of hands-on experience in power tools and DIY projects, I created this platform to share practical knowledge, expert tips, and real-world insights to help others master the art of drilling.