
Creating an oval hole in metal is not as simple as drilling a round hole because metal resists shaping and demands a precise technique.
Many people start drilling without understanding how to connect cuts, widen openings, and maintain control while shaping metal. As a result, the hole becomes uneven, the drill bit overheats, and the metal surface gets scratched.
But with careful planning and the right combination of drilling and shaping tools, making an oval hole becomes surprisingly easy.
The process requires patience, proper lubrication, and a technique that allows you to expand a round hole into a smooth oval opening. Once you understand how the metal behaves against different tools, the shaping becomes more controlled and predictable.
Oval holes are needed in many practical situations, whether you’re creating cable pass-throughs, mounting adjustable brackets, or shaping slots for mechanical parts.
With the right preparation and the correct tools, anyone can create a clean oval-shaped hole in metal without damaging the surface. This guide walks you through every step, from preparation to finishing, ensuring professional results.
Why Oval Holes Are Harder to Drill in Metal
Drilling a round hole is straightforward because the bit cuts evenly in a circular motion, but creating an oval shape requires additional shaping beyond drilling.
Metal resists sideways cutting, making it difficult to expand a hole in one direction without affecting the entire edge. This extra resistance is why beginners struggle to produce a clean oval.
Another challenge is the hardness of metal, which makes shaping more demanding than in softer materials like wood or plastic.
Metal generates a lot of heat during cutting, and this heat affects accuracy if not managed properly. Overheating can distort the edges, making the oval hole uneven.
The curved or flat metal surface also changes how tools behave. When shaping sideways, the tool may slip and scratch the metal unexpectedly. Controlling movement becomes harder because metal surfaces are smooth and offer little friction.
Maintaining symmetry is another challenge when creating an oval hole. A perfectly balanced oval requires careful shaping on both sides so that the hole expands evenly. Without proper measuring or marking, the oval may become crooked, affecting the fit of any hardware.
Oval holes require multiple tool types, including drill bits, files, grinding stones, and rotary tools. Each tool behaves differently against metal, adding complexity to the shaping process. When these tools are used incorrectly, the result becomes rough and unprofessional.
Finally, metal’s toughness means mistakes are harder to correct. Unlike wood, metal does not compress or smooth easily, so errors stay visible. This is why proper steps are essential from the beginning.
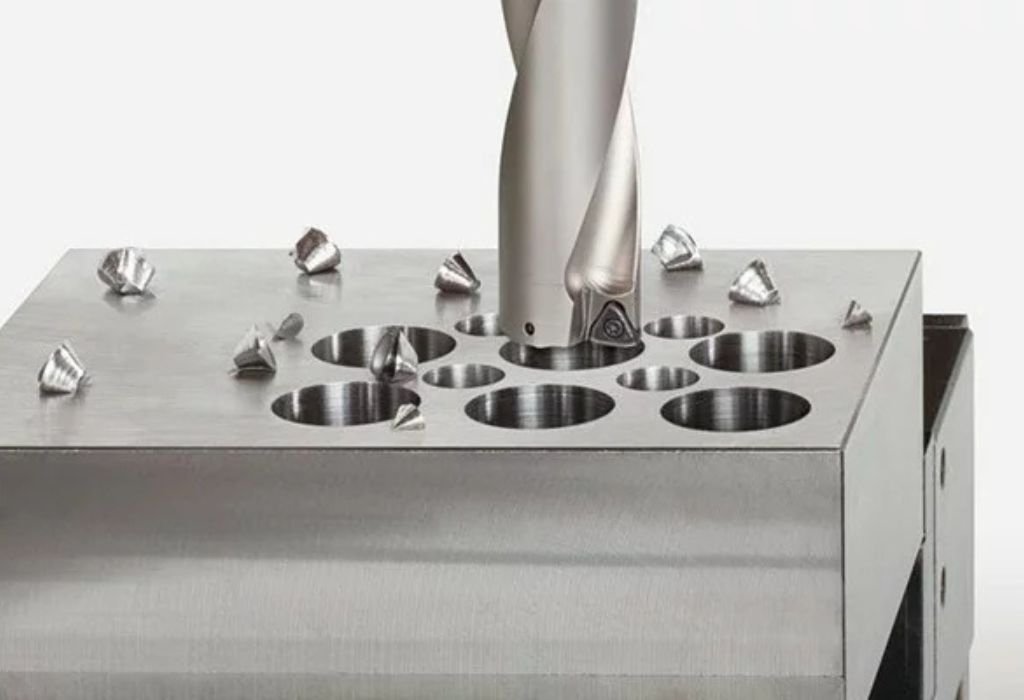
Tools Required to Drill an Oval Hole in Metal
A power drill with variable speed control is essential because metal requires slower drilling for accuracy. Variable speed helps you start gently and increase speed only when needed. A stable, comfortable grip ensures better control during drilling and shaping.
You will need high-quality metal drill bits such as cobalt or titanium bits. These bits handle heat better and maintain sharpness longer. For initial drilling, a small pilot bit is often necessary to guide the larger bits.
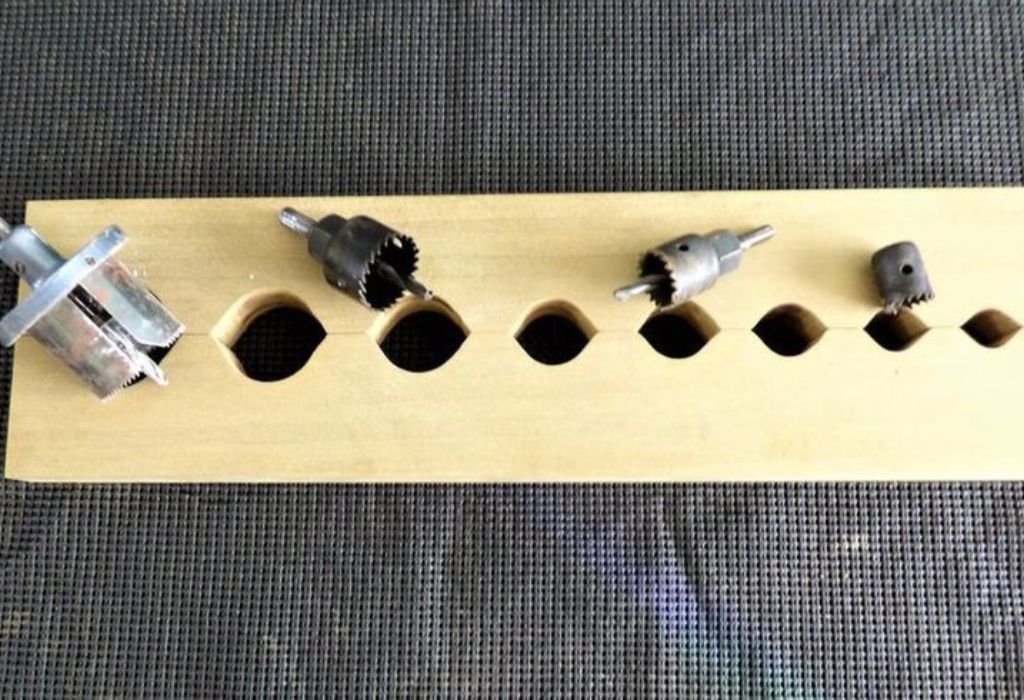
A step drill bit is highly useful for enlarging round holes before shaping. Step bits gradually expand the hole in smooth increments, giving you a controlled starting point for creating the oval shape. They are especially effective on thin or medium-thickness metal sheets.
Rotary tools such as a Dremel with grinding or sanding attachments help shape the oval precisely. These tools provide fine control and allow you to shave metal gradually. They are perfect for adjusting the oval shape without damaging the edges.
Metal files such as round files and flat files are essential for smoothing and refining the oval shape. Files remove small amounts of metal and help you shape the hole evenly. They also allow precise control around corners and edges.
Lubrication oil such as cutting oil is critical for drilling because it keeps the drill bits cool. Lubrication reduces friction and extends the life of your tools. Using oil also helps the tool cut metal more smoothly.
Clamps or a vise are necessary to keep the metal piece stable during drilling and shaping. Movement increases mistakes and damages tools. Safety gear such as gloves and eye protection ensures you stay safe from sharp metal shavings.
Choosing the Right Method to Make Oval Holes
The simplest method involves drilling two overlapping round holes and then shaping the connection between them.
This method works well for most metal thicknesses because it reduces the amount of shaping required. Once the two holes overlap, you can smooth the connection into an oval.
Another method uses a step drill bit to enlarge a single round hole to the maximum size. After reaching the desired round diameter, you shape the sides outward using a rotary tool or file. This method creates smoother oval edges with fewer scratches.
If you need a large or long oval hole, cutting tools such as rotary burrs may be more effective. Burrs can grind away metal in specific directions to stretch the round hole into the desired oval. They allow precise shaping as long as you control the pressure.
For thin metal sheets, a metal nibbler or electric shear may also work. These tools can cut smooth curves or straight lines, making it easy to form an oval. However, they require careful handling to maintain symmetrical shape.
Some users prefer the grinding approach because grinders remove material faster. Using a small grinding stone on a rotary tool helps shape the oval quickly. The downside is heat buildup, which must be managed with slow passes and lubrication.
Selecting the right method depends on the size of the oval hole, the thickness of the metal, and the tools you have available. Each method works as long as you follow proper steps and maintain control over the shaping.
How to Prepare Metal Surface Before Making an Oval Hole
Prepare the metal by cleaning the drilling area with a cloth or sandpaper. Dust, grease, and rust interfere with the marking and drilling accuracy. A clean surface gives you better visibility during shaping.
Mark the oval shape using a permanent marker or scribe tool. Draw the outline of your desired oval hole so you know exactly where to cut and shape. Clear markings ensure the final shape is symmetrical.
Place masking tape over the area where you will drill. Masking tape provides extra grip for the drill bit and makes the markings stand out. Tape also reduces scratches during shaping.
Use a center punch to make small dents at the points where you will drill the initial holes. These dents guide the drill bit and prevent slipping. Punching is essential because metal surfaces are smooth and slippery.
Secure the metal using clamps or a vise to prevent movement. Any movement during drilling causes misalignment and damage. Keeping the piece stable increases accuracy dramatically.
Choose the correct drill bits before starting. Using the right bit size for the pilot hole ensures the larger holes remain centered. Proper preparation makes shaping safer and smoother.
Apply a drop of cutting oil to the marked drilling points. Oil reduces friction, prevents overheating, and increases drilling speed. Once prepared properly, the metal is ready for the hole-making process.
Step-by-Step Process to Drill an Oval Hole in Metal
Start by drilling a small pilot hole on the first punch mark using a slow drill speed. The pilot hole serves as the guiding point for your larger drill bit. Slow drilling prevents heat buildup and increases accuracy.
Switch to a larger drill bit or step bit to expand the hole. Drill slowly and apply lubrication frequently to keep the bit cool. Expand the hole to about half of the intended oval size.
Drill a second hole right next to the first one, allowing the edges to overlap. Overlapping holes form the basic structure of the oval shape. Ensure both holes line up perfectly with your marking.
Once both holes are drilled, use the drill to remove the narrow metal strip between them. Move the bit back and forth gently to connect the two holes. This creates an opening that begins to resemble an oval.
Use a rotary tool to shape the connecting section between the two circles. The grinding or sanding attachment helps smooth the edges and blend the shapes. This step requires patience to avoid removing too much metal.
Switch to a metal file to refine the oval shape. A round file helps smooth inner curves, while a flat file shapes the straight sides. Filing produces a clean finish and fine-tunes the oval.
Add lubrication during shaping to reduce friction and prevent burning. Lubrication keeps the tools cool and maintains consistent cutting. After final shaping, clean the area to inspect the smoothness of the oval hole.
Can I make an oval hole using only a drill?
Yes, but you must drill two overlapping holes and shape the rest using files.
Do I need a rotary tool for oval holes?
A rotary tool makes shaping easier, but manual files also work.
What drill bit is best for starting an oval hole?
A cobalt bit works best because it handles heat and hard metal.
Why are my two drilled holes uneven?
Your markings or punch marks may not be aligned perfectly.
Should I drill fast when shaping the oval?
No, slow speed prevents overheating and ensures accuracy.
How to Use a Rotary Tool for Shaping Oval Holes
A rotary tool is one of the best tools for expanding and shaping an oval hole because it allows precise control over material removal. Start with a small grinding stone attachment to remove excess metal gently. Use light pressure to avoid gouging the edges.
Work around the edges in small circular motions. This technique blends the overlapping holes and shapes the oval smoothly. Moving slowly helps you maintain symmetry and prevents mistakes.
Switch to sanding drums when you need to refine the inner surface. Sanding drums smooth the roughness created by grinding stones. They also help maintain the oval boundaries accurately.
Use lubrication when necessary because rotary tools generate significant heat. Heat causes metal to expand and may distort your shape if not managed. Lubricating frequently makes shaping easier and cleaner.
Hold the rotary tool with both hands to maximize stability. One hand guides the tool while the other controls the speed and direction. Better stability improves the quality of the oval shape.
Take short breaks to cool both the tool and the metal. Overheating damages attachments and shortens their lifespan. Cooling also helps you maintain consistent shaping throughout the process.
Complete shaping by switching to fine-grit sanding attachments. Finer grits polish the surface and prepare it for deburring. After smoothing, the oval hole will have a more professional finish.
How to Enlarge and Smooth the Oval Opening
Begin enlarging the hole using a flat metal file. Move the file back and forth along the sides of the oval where expansion is needed. Filing removes small but precise amounts of metal.
Use a round file to smooth and widen curved sections. Round files are excellent for shaping the top and bottom curves of the oval. They also help blend the sides and corners together.
Switch between files frequently to keep the shape balanced. Each file removes metal differently, so alternating helps maintain symmetry. This step requires patience and careful observation.
Apply lubrication on the edges while filing to reduce friction. Lubrication helps the file slide smoothly and prevents scratching. Keeping the area cool also protects the metal from discoloration.
Use fine-grit sandpaper wrapped around a rod to polish the inner surface. Sanding removes micro scratches and gives the hole a uniform finish. A polished surface looks professional and prevents wear on inserted components.
Clean metal dust from the hole using a cloth. Dust buildup interferes with smoothing and hides imperfections. Cleaning frequently ensures you maintain the oval’s true shape.
Inspect the size and shape of the hole by inserting the hardware or fitting. If adjustments are needed, repeat filing and sanding lightly. Proper fitting ensures the oval hole meets your project requirements.
Why does shaping metal take so long?
Metal is tough and requires slow, controlled removal for accuracy.
Can I use a grinder to enlarge the oval?
Yes, but grinders remove material fast, so be careful.
Should I file before sanding?
Yes, filing shapes the oval; sanding smooths the edges.
Does lubrication help during filing?
Yes, it reduces friction and produces cleaner cuts.
What if the oval becomes too wide?
You must adjust the hardware because metal cannot be added back.
Preventing Drill Slipping When Starting the Hole
Use a center punch to create a dent where you plan to drill. This dent prevents the drill bit from slipping on the metal surface. Drilling without a punch mark is the most common cause of slipping.
Apply masking tape over the drilling area. Tape increases friction and helps the drill bit grip the surface better. It also provides a comfortable surface for marking guidelines.
Start drilling at the lowest possible speed. Slow speed lets the bit bite into the metal without bouncing. Once the bit has created a shallow path, increase speed slightly.
Keep the drill perfectly perpendicular to the metal surface. Tilting the drill causes sideways movement and inaccurate holes. Maintaining alignment improves control and accuracy.
Use steady but gentle pressure on the drill. Pushing too hard makes the bit skid across the surface. Let the bit cut naturally for best results.
Lubricate the area lightly after the drill has begun cutting. Too much oil too early can make the surface slippery. Controlled lubrication prevents overheating while maintaining stability.
If drilling on curved surfaces, support the drill with both hands. Curved metal makes slipping more likely, so extra stability helps maintain the starting point. With controlled movements, slipping becomes less of an issue.
Avoiding Heat Damage While Making Oval Holes
Heat is one of the biggest enemies when drilling or shaping metal. Excess heat burns the drill bit and makes shaping more difficult. To avoid this, use cutting oil generously throughout the process.
Start drilling slowly to reduce friction. High speed generates heat quickly, especially on harder metals. Slow drilling prevents early overheating and bit damage.
Take breaks while drilling to cool the drill bit and the metal. Pull the bit out and allow air to circulate. This prevents burning and keeps the cutting process smooth.
Avoid excessive pressure because pushing hard increases friction. Let the tool work naturally and apply steady force. Too much pressure also reduces control and accuracy.
Use sharp drill bits because dull bits generate more heat. A sharp bit cuts cleanly and requires less force. Replacing or sharpening worn bits improves performance.
Clean metal chips frequently because chips trap heat and reduce cooling efficiency. Removing them allows better air circulation. Clean cutting areas ensure smoother drilling.
Lubricate during shaping as well, not just drilling. Rotary tools and files also produce heat from friction. Keeping everything cool ensures better shaping and longer tool life.
Why does my drill bit turn blue?
It is overheating, which damages the cutting edge.
How much oil should I apply while drilling?
A few drops every few seconds are enough to keep it cool.
Is water a good coolant for drilling metal?
Water cools but does not lubricate; oil is better.
Can overheating warp the oval hole?
Yes, metal expands when hot and contracts unevenly.
Does fast drilling always cause overheating?
Almost always; slow drilling is safer for metal.
Common Mistakes When Making Oval Holes in Metal
A common mistake is drilling holes without proper marking. Misaligned markings cause uneven holes that are difficult to correct. Always mark the oval clearly before drilling.
Another mistake is skipping the pilot hole. Starting with a large drill bit on metal makes slipping inevitable. Pilot holes improve accuracy and stability.
Using dull drill bits is another major issue. Dull bits require more force, generate more heat, and create rough edges. Sharp bits produce cleaner cuts and smoother shaping.
Applying too much pressure during shaping causes uneven edges. Metal must be shaped slowly and carefully. Heavy pressure leads to deep scratches that are hard to remove.
Not using lubrication is a common problem. Without lubrication, tools overheat and wear out quickly. Oil also ensures smoother cutting.
Failing to secure the metal results in shaky drilling. Movement causes crooked holes and potential safety hazards. Clamping or holding firmly is essential.
Finally, removing too much metal while shaping is a frequent error. Metal cannot be added back, so shaping must be controlled. Gradual shaping ensures the oval remains symmetrical.
Which Metals Are Hardest and Easiest to Shape Oval Holes In
Aluminum is the easiest metal to shape because it is soft and offers minimal resistance. Drilling and filing aluminum require less effort. Its softness allows faster shaping without excessive heat.
Mild steel is moderately easy to shape. It offers more resistance than aluminum but is manageable with the right tools. It requires more lubrication and slower drilling speeds.
Stainless steel is much harder and challenging to shape. It heats quickly and dulls drill bits faster than mild steel. Drilling stainless steel demands patience and high-quality bits.
Galvanized steel is tough but workable. The zinc coating can melt under heat, so cooling is essential. Proper lubrication prevents overheating and coating damage.
Iron is strong and difficult to shape. It requires cobalt bits and slow, controlled drilling. Shaping iron oval holes takes more time due to its hardness.
Sheet metal is generally easier to shape regardless of material. Thin sheets deform faster but also risk tearing, so careful shaping is needed. Thick sheets require more force and precision.
Choosing the right method depends heavily on the metal type. Understanding hardness helps you adjust speed, pressure, and lubrication accordingly.
Conclusion
Creating an oval hole in metal takes more time and care than drilling a simple round hole, but the right steps make the process manageable and precise.
With proper marking, drilling, shaping, and smoothing, you can create a clean, professional oval that fits any hardware or application. Understanding how metal reacts to heat, pressure, and tool movement gives you full control during the shaping process.
High-quality tools such as cobalt bits, step bits, rotary grinders, and files make the job easier. Lubrication keeps everything cool and prevents damage, while controlled drilling ensures accuracy. Slow, steady shaping finishes the oval hole with smooth edges and a perfect fit.
Whether you’re working on a DIY project, modifying machinery, or customizing metal parts, using the methods in this guide will save time and effort. With practice, patience, and the right tools, drilling a perfect oval hole in metal becomes a simple and satisfying task.

I’m John F. Nicholas, the founder, lead writer, and drill enthusiast behind 101drill.com. With years of hands-on experience in power tools and DIY projects, I created this platform to share practical knowledge, expert tips, and real-world insights to help others master the art of drilling.