
Imagine setting up a new DIY project, marking your wood board precisely, and pressing the drill trigger—only to watch the bit wander and tear the surface fibers.
Instead of a smooth 3/4-inch hole, you’re left with rough edges and frustration. It’s a common mistake that happens when you use the wrong tools or technique.
Drilling a clean 3/4-inch hole in wood may sound simple, but it requires accuracy, the right bit, and controlled speed. Whether you’re installing a dowel joint, running electrical cables, or fitting plumbing pipes, the quality of your hole determines the project’s finish.
Understanding how bit design, wood grain, and pressure interact helps you achieve professional-level results even with a handheld drill.
In this complete guide, you’ll learn everything from choosing the perfect drill bit to handling tear-out, centering, and depth control.
With a few simple adjustments, you’ll make clean holes that look as if they came off a drill press. Let’s start with understanding which drill bits work best for 3/4-inch holes in different types of wood.
Choosing the Right Drill Bit for a 3/4 Inch Hole
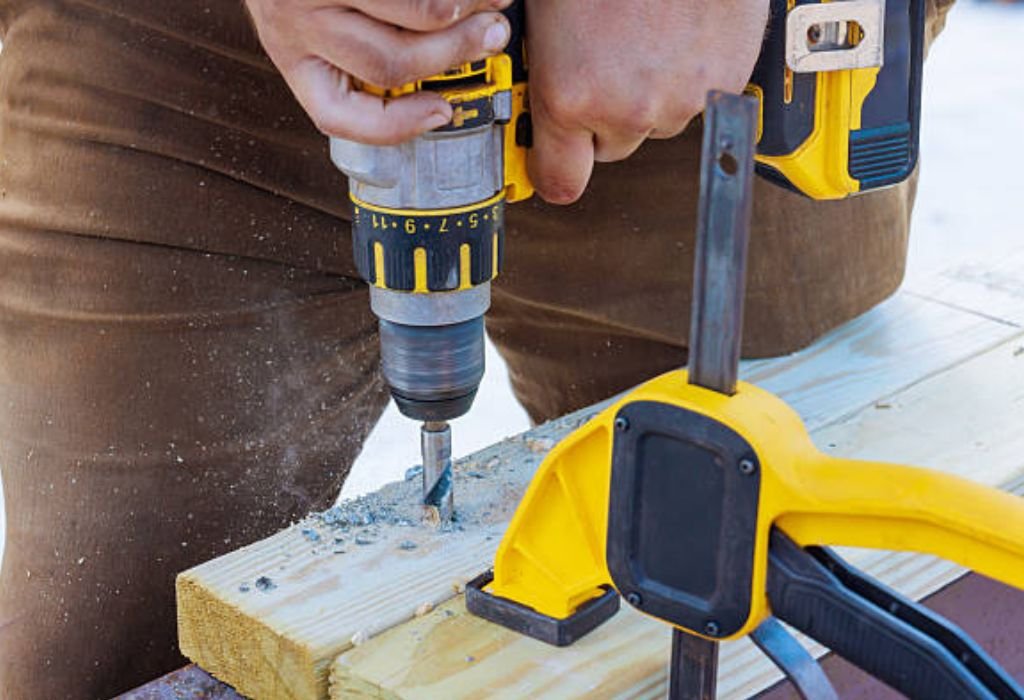
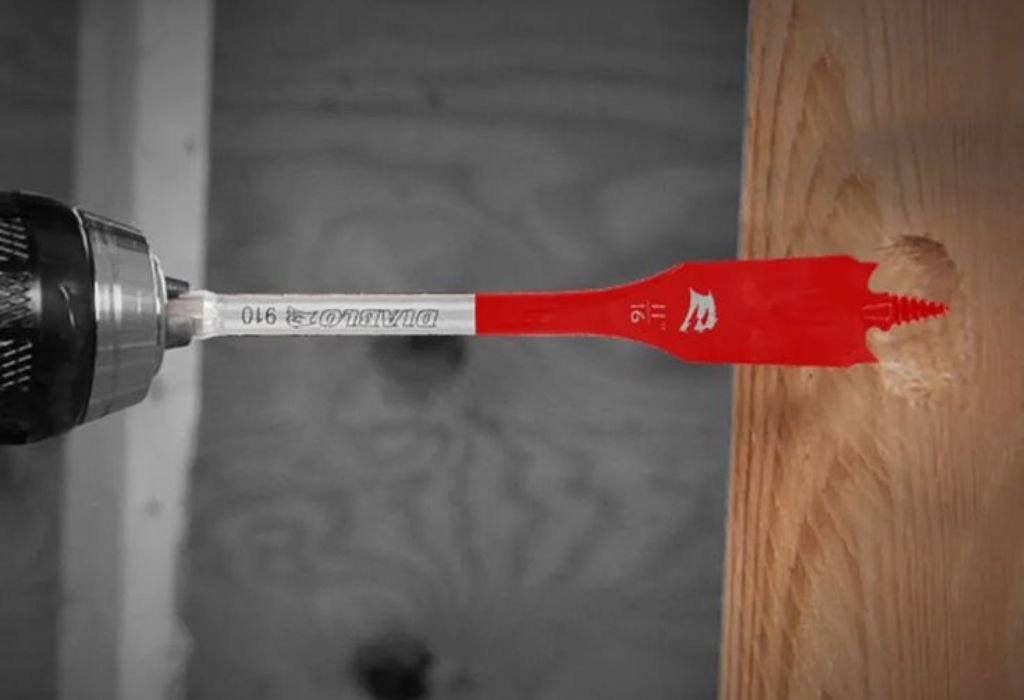
Drill bits aren’t all created equal, and picking the correct one ensures both speed and accuracy. For a 3/4-inch hole, you can use spade bits, auger bits, hole saws, or Forstner bits depending on your purpose. Each offers unique advantages depending on the material and finish you need.
Spade bits are the most common choice for general drilling in soft or medium woods. They remove material quickly but can cause splintering on exit. To reduce tear-out, drill halfway from one side and finish the hole from the opposite side.
Auger bits work beautifully on thick lumber. Their screw-tip design pulls the bit smoothly through the grain, maintaining straight alignment and fast chip removal. However, they require slower speed and steady pressure to avoid jamming.
Forstner bits are ideal when you need smooth, flat-bottom holes. Cabinetmakers and furniture builders prefer them for precision work. They cut with clean edges and produce minimal chipping, perfect for visible surfaces.
A hole saw is best for larger circular cuts, such as routing pipes or wires through beams. It uses a pilot bit in the center for guidance and teeth around the rim for cutting. Use low speed and moderate pressure for clean results.
Understanding how each bit interacts with your drill and wood type ensures efficiency, safety, and a perfect finish every time.
Preparing the Wood Before Drilling
Preparation determines how clean and accurate your 3/4-inch hole will be. Start by marking the center with a pencil and use an awl or nail to create a small pilot dent. This prevents the bit from wandering when you begin drilling.
Clamp the wood firmly to a stable workbench or sawhorse. Vibration and movement are major causes of inaccurate drilling. Tight clamping keeps the drill bit aligned and ensures consistent pressure throughout the process.
If you’re working on finished wood or plywood, use masking tape over the drilling spot. The tape supports wood fibers and prevents splintering as the bit enters and exits.
Choose the correct drill speed for the wood density. Hardwoods like oak or maple require slower speeds to prevent overheating, while softwoods like pine can handle faster rotations. Adjust speed gradually rather than pushing full power immediately.
Check your drill bit for sharpness and cleanliness. A dull bit burns wood and causes smoke, while a dirty bit leaves rough edges. Sharpen or replace bits when you notice resistance.
Measure and mark the drilling depth with a piece of tape wrapped around the bit. This acts as a quick visual stop marker to prevent over-drilling. Proper setup saves time and ensures a professional outcome.
Drilling the Hole Step by Step
Once you’ve prepped everything, you’re ready to drill your 3/4-inch hole precisely. Start by positioning the drill bit tip into your pilot mark. Hold the drill perpendicular to the wood surface unless you’re intentionally drilling at an angle.
Begin at low speed until the bit bites into the surface. Gradually increase the speed while applying steady, even pressure. Let the drill do the work rather than forcing it.
As you drill deeper, periodically lift the bit slightly to clear wood chips from the hole. This prevents clogging, overheating, and friction burns. Consistent chip removal also maintains cutting efficiency.
When the bit is close to exiting the opposite side, reduce pressure and slow down. This helps prevent blow-out or splintering on the exit surface. For perfectly clean holes, stop halfway and drill from the opposite face.
If you’re drilling through thick lumber, use an auger or Forstner bit for better control. They maintain a smoother cut and prevent bit deflection. Check progress regularly to ensure alignment.
When finished, remove the bit carefully while the drill is still running slowly. This reduces the chance of the bit catching or chipping the hole’s edge. A clean withdrawal keeps both tool and surface intact.
Which drill bit is best for a 3/4-inch hole in wood?
A spade or Forstner bit works best for general use, while an auger bit suits deep holes in thick lumber.
Should I drill all the way through in one go?
No. Drilling halfway and finishing from the other side prevents tear-out and keeps edges smooth.
Can I use a hole saw instead of a bit?
Yes, for larger projects or when passing pipes or wiring, a hole saw provides consistent circular cuts.
Why is my drill smoking while cutting?
This happens when the bit is dull, dirty, or the speed is too high for the wood type.
Do I need to clamp the wood every time?
Absolutely. Clamping ensures stability and prevents the drill from slipping or damaging the workpiece.
Controlling Speed and Pressure
Speed and pressure control define the quality of your hole more than the bit itself. Beginners often press too hard, which overheats the bit and burns the wood. Gentle, consistent force keeps chips flowing and ensures a clean surface.
Start slow, especially at the beginning of the hole. This helps the bit bite accurately into the surface. Once the path is set, you can slightly increase speed for faster progress.
Avoid maximum RPM on cordless drills when drilling 3/4-inch holes. Large bits require torque, not speed. Over-spinning creates friction that scorches wood and dulls the cutting edge prematurely.
When using an auger or Forstner bit, apply steady downward pressure and let the screw-tip or rim guide the cut. Resist the urge to force the drill forward. If the bit jams, back it out halfway, clear chips, and continue.
Keep your wrist and arm aligned with the drill axis. Tilting slightly can widen the hole unintentionally. Maintaining balance improves accuracy and reduces fatigue during long projects.
If you notice squealing sounds, pause and check for debris inside the flutes. A quick brush or air blow clears the chips and restores smooth performance.
Preventing Tear-Out and Rough Edges
Tear-out is a common frustration when drilling large holes. It happens when wood fibers on the exit side splinter outward due to pressure and heat. Fortunately, there are simple ways to avoid it.
Always support the exit surface with scrap wood. Place a secondary board directly beneath your workpiece. This backing absorbs the pressure and allows a cleaner breakthrough.
Masking tape around the drill spot can help hold surface fibers in place. It’s especially effective for plywood or veneered boards. Peel it gently after drilling to reveal sharp edges.
Use sharp bits only. Dull bits tear rather than cut, creating fuzzy edges. If you see smoke or chattering, stop immediately and resharpen the bit.
Forstner bits naturally minimize tear-out because of their circular rim and shearing action. They produce flat, neat holes even on delicate surfaces.
If you must use a spade bit, reduce pressure just before exiting. Let the tip emerge first, then flip the board and complete the cut from the opposite side.
Finishing sandpaper wrapped around a dowel can smooth any remaining burrs. Light sanding restores a professional finish without enlarging the hole.
Using a Drill Press for Perfect Results
A handheld drill can do the job, but a drill press offers unbeatable precision. It maintains perpendicular alignment automatically, ensuring straight, even holes every time.
Set the depth stop on your drill press to avoid drilling too far. This is crucial for joinery or when installing hardware that requires exact depth.
Secure the wood firmly on the drill-press table using clamps or a vice. Even slight movement can ruin alignment. Make sure the bit is centered before starting.
Choose the correct drill-press speed for the bit size. Larger bits like 3/4 inch perform best at slower RPMs to prevent chatter and burning.
Use smooth downward motion and allow chips to clear between strokes. For deeper holes, retract the bit periodically to release debris.
When finishing the hole, reduce pressure gradually. A gentle exit avoids surface tearing and maintains hole accuracy.
If you plan frequent drilling of identical pieces, create a stop block on your table. This ensures consistent hole placement for repetitive work.
Is a drill press necessary for 3/4-inch holes?
Not required but highly recommended for precision and consistency.
Can I drill at an angle using a drill press?
Yes, by adjusting the table tilt feature, but always secure the piece tightly before drilling.
What speed should I use for a 3/4-inch bit?
Around 500–700 RPM for hardwood and 800–1000 RPM for softwood.
How do I prevent chips from clogging the bit?
Withdraw the bit every few seconds to allow chips to clear and reduce friction.
Can I use the same bit for both hand drills and drill presses?
Yes, as long as the shank fits securely into the chuck and the bit is sharp.
Drilling at an Angle or on Curved Surfaces
Sometimes projects require angled holes or drilling into curved wood pieces. Controlling bit alignment in these cases demands extra care.
To drill at an angle, mark your entry point and guide line. Use a wooden wedge or adjustable drilling guide to hold the drill at the correct angle. Consistency matters more than speed.
Begin with a small pilot hole to guide the larger bit. This helps prevent skidding and ensures accuracy from the start.
If drilling into a rounded or irregular surface, flatten a small section first. The flat area stabilizes the bit’s entry point and prevents slipping.
Slow speeds are critical when working on angles. Higher RPMs increase vibration and cause wandering. Maintain firm, balanced pressure for the cleanest results.
For deeper angled holes, withdraw the bit occasionally to remove chips. This prevents binding and overheating inside the wood.
Finish by sanding the rim gently to remove raised edges. A light touch gives a smooth, professional appearance even on tricky surfaces.
Cleaning and Maintaining Drill Bits
A clean bit cuts faster, lasts longer, and keeps holes smooth. After each project, take a few minutes to maintain your tools.
Wipe off wood resin and dust using a soft rag. Resin buildup dulls cutting edges and adds friction. Mild degreaser or mineral spirits remove tough deposits easily.
Inspect the bit tip under light. If edges appear dull or rounded, sharpen using a fine file or bench grinder. A sharp point ensures cleaner entry and reduces splintering.
Forstner and auger bits need occasional honing on their outer rims. Follow manufacturer angles carefully to maintain balance.
Store bits upright in a wooden block or plastic organizer. This prevents them from banging together and chipping.
Before each use, check the shank for rust or burrs. Smooth shanks ensure secure grip in the drill chuck and eliminate vibration.
Proper maintenance not only extends tool life but also guarantees professional-level performance every time you drill.
Safety Precautions During Drilling
Drilling may seem harmless, but wood chips and fast-spinning bits can cause injury. Always take basic safety measures before starting.
Wear safety goggles to protect your eyes from flying debris. Wood chips can eject suddenly, especially with spade or auger bits.
Keep loose clothing, hair, and jewelry away from the drill area. Entanglement is one of the most common workshop accidents.
Maintain a firm stance and two-hand grip on the drill. Sudden torque reactions can twist your wrist or pull the bit off alignment.
Never switch drill direction while the bit is under load. Wait until it stops spinning completely before reversing.
Unplug or remove the battery when changing bits. This simple step prevents accidental starts.
Work in a well-lit area to clearly see your markings and depth indicators. Good visibility improves accuracy and safety.
Following these habits ensures efficient, accident-free drilling for every woodworking task.
Conclusion
Drilling a 3/4-inch hole in wood isn’t just about brute power—it’s about precision, control, and understanding the tools you use. With the right bit, correct speed, and solid preparation, anyone can achieve clean, splinter-free results.
Always begin with a sharp bit, clamp your work securely, and adjust speed for the wood type. Support the backside with scrap wood and use gentle pressure during breakthrough. If you want flawless accuracy, a drill press provides the best results.
Regular maintenance of bits and adherence to safety rules transform basic drilling into craftsmanship.
Whether you’re building furniture, installing fixtures, or tackling DIY home repairs, these methods guarantee every 3/4-inch hole you drill looks clean, accurate, and professional.
Now that you know the techniques, grab your drill and put precision into practice — one perfect hole at a time.

I’m John F. Nicholas, the founder, lead writer, and drill enthusiast behind 101drill.com. With years of hands-on experience in power tools and DIY projects, I created this platform to share practical knowledge, expert tips, and real-world insights to help others master the art of drilling.