
You pick up your drill, hold two wooden boards in place, and wonder — how do I drill these two pieces of wood together properly? It looks easy, but getting the alignment right and avoiding splits can be tricky. One wrong move, and your joint might end up weak or crooked.
Every woodworker, from beginners to professionals, faces this question at some point. Whether you’re building a frame, a table, or a shelf, drilling correctly is key to making the joint strong and lasting. Doing it wrong can lead to cracks, gaps, or loose screws later on.
Drilling two boards together isn’t just about power — it’s about precision. The secret lies in marking, alignment, pilot holes, and choosing the right drill bit for the job. Once you understand the process, you can connect any two pieces of wood like a pro.
In this guide, you’ll learn step-by-step how to drill 2 pieces of wood together for perfect, sturdy results every time.
Understanding How Wood Joints Work
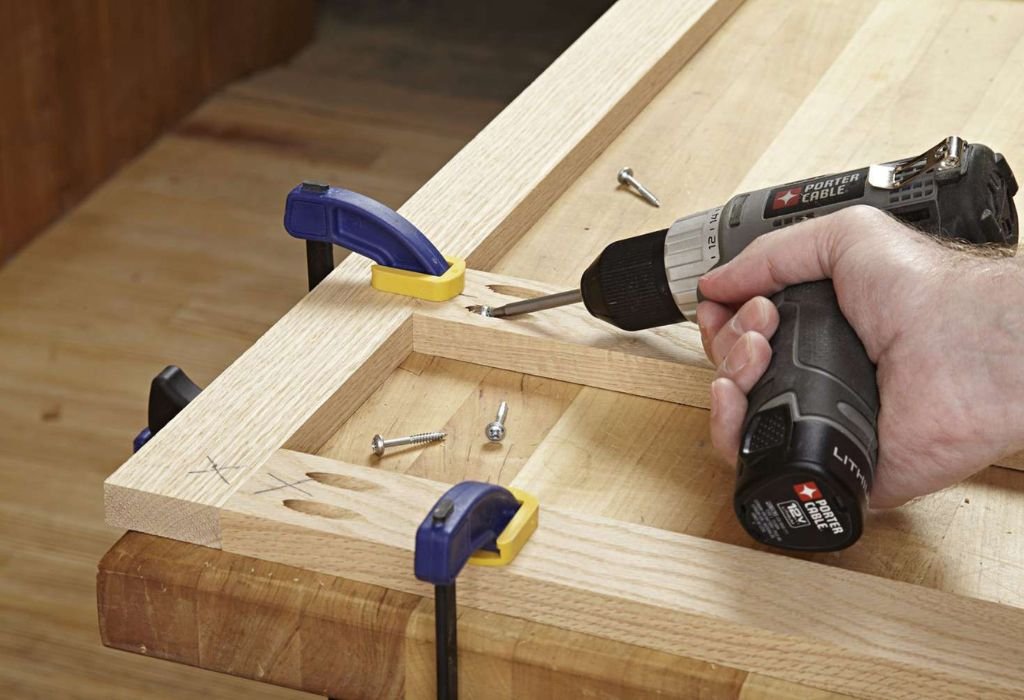
Before drilling, it’s important to know what happens inside the wood when you join two pieces together. Wood fibers compress, expand, and react to pressure and heat. The drilling process affects the strength of this bond.
When you drive a screw directly into wood without a pilot hole, the fibers split apart instead of compressing smoothly. This weakens the joint and may cause visible cracks. Proper drilling ensures fibers stay intact while holding tightly around the fastener.
Wood joints work best when the two surfaces fit flush and flat. Even a small gap between boards can reduce contact area and stability. Sanding the surfaces lightly before drilling ensures maximum grip.
Moisture also plays a role. Wet or unseasoned wood can shrink as it dries, loosening your screws over time. Always work with dry, stable wood for the strongest connections.
The angle of drilling matters too. A straight hole maintains full thread engagement, while a tilted one may pull the pieces apart under tension. Perfect alignment creates even pressure across both surfaces.
Understanding these principles gives you control over how your wood behaves during assembly.
Tools and Materials You’ll Need
Before starting, gather everything you need to drill accurately and safely. Having the right tools makes the process smoother and more efficient.
You’ll need a power drill or cordless drill with adjustable speed. For most woodworking tasks, a variable-speed drill gives you the best control.
Select drill bits designed for wood — brad-point bits work best because their sharp center tip keeps the hole straight and clean.
You’ll also need screws or dowels, depending on your project type. For screws, choose sizes that penetrate both boards without poking through.
A clamp is essential to hold both boards together firmly. This prevents slipping and ensures perfect alignment.
Keep a pencil or awl for marking drill points and a square for checking alignment. These small tools make a big difference in accuracy.
Lastly, have a drill stop collar or a piece of tape to control hole depth. This prevents drilling too deep and damaging the other side.
Gathering everything beforehand ensures a clean, uninterrupted workflow.
Step-by-Step: How to Drill Two Pieces of Wood Together
Drilling two pieces of wood together is all about sequence and control. Follow these steps carefully to get perfect alignment and strength.
Step 1: Measure and Mark
Place your two boards in the position you want to join them. Use a pencil or awl to mark where the screws or dowels will go. Even spacing creates balanced support.
Step 2: Clamp the Boards
Secure both pieces using clamps. Make sure the edges line up exactly as you want them to stay. Clamps prevent movement and keep your holes aligned.
Step 3: Drill Pilot Holes
Always start with pilot holes. Use a bit slightly smaller than your screw’s diameter. This helps prevent splitting and ensures the screw goes in straight.
Step 4: Drill the First Board Through
Drill completely through the top piece and slightly into the second piece. Keep the drill steady and perpendicular to the surface.
Step 5: Add a Countersink (Optional)
If you want screw heads to sit flush, use a countersink bit on the top board. This creates a neat recess for the screw head.
Step 6: Drive the Screws
Insert screws into the pilot holes and drive them in slowly. Stop as soon as the screw head sits flush or slightly below the surface.
Step 7: Check Alignment
After tightening, check both sides to ensure there’s no gap. If everything looks even and secure, your joint is complete.
These seven steps form the foundation of every strong wood connection.
Choosing the Right Drill Bit and Screw Size
Using the right drill bit and screw size makes or breaks your joint. If the screw is too thick or too long, it can split the wood or poke through.
For softwoods like pine, use coarse-thread screws. They grip better in lighter material. For hardwoods, fine-thread screws hold tighter and resist splitting.
Select a drill bit slightly smaller than the screw’s core (the shaft without threads). This ensures the threads bite firmly while the core slides through smoothly.
As a rule of thumb, the screw should penetrate at least half the thickness of the second board. For example, if your bottom board is 1 inch thick, the screw should go in about ½ inch deep.
If you’re using dowels, match the drill bit size exactly to the dowel diameter for a snug fit. Use wood glue to reinforce dowel joints.
Testing on a scrap piece first helps confirm the correct size before drilling your actual boards.
Precision here guarantees long-term stability and professional results.
Drilling Straight and Accurate Holes
One of the hardest parts of drilling two boards together is keeping your holes straight. Even a small angle mistake can misalign the joint.
Start by holding your drill perpendicular to the wood surface. A drill guide or drill press can help if you struggle with hand alignment.
Keep your elbows steady and apply gentle pressure. Don’t force the drill — let it do the work. Steady control gives better accuracy.
Watch the drill bit as it enters the wood. If it starts to wander, back out slightly and realign before continuing. Slow correction avoids widening the hole.
Use masking tape on the bit as a depth marker. This ensures consistent hole depth across multiple spots.
Drilling in short bursts instead of one long push keeps the bit cool and prevents clogging with sawdust.
Straight holes ensure both pieces of wood fit perfectly together without stress or movement.
Using Pilot Holes for Stronger Joints
Pilot holes are the secret to clean, strong wood joints. They guide your screws and reduce the risk of cracking or splitting.
Without pilot holes, the screw forces the wood fibers apart as it enters. This pressure can cause visible cracks, especially near edges or corners.
A pilot hole removes just enough material to let the screw glide in while still gripping tightly. It also ensures screws drive straight without drifting.
The pilot hole diameter should be about 80 percent of your screw’s core thickness. For example, for a #8 screw, use a 7/64″ bit.
Always drill the pilot hole through the first piece completely and slightly into the second piece. This helps the screw pull both boards together securely.
Add a countersink hole afterward if you want the screw head hidden or flush with the surface.
Pilot holes turn an ordinary screw joint into a professional-grade connection.
How to Prevent Wood Splitting
Wood splitting is the most common issue when drilling two pieces together. Thankfully, it’s easy to avoid with the right steps.
Start by drilling pilot holes before inserting screws. This relieves pressure and keeps the wood fibers from expanding too much.
Avoid drilling too close to the edge. Keep holes at least ¾ inch away from any side or corner. Edge drilling increases the chance of cracks.
If you’re working with hardwood, consider lubricating the screw threads with soap or wax. This reduces friction and prevents tearing as the screw enters.
Use clamps to keep both pieces tight and stable. Movement during drilling can create uneven stress and small cracks.
Drill at low to medium speed, especially near the end of the hole. This prevents overheating and burning the fibers.
Following these steps keeps your boards intact and your connections secure.
Tips for Drilling at an Angle
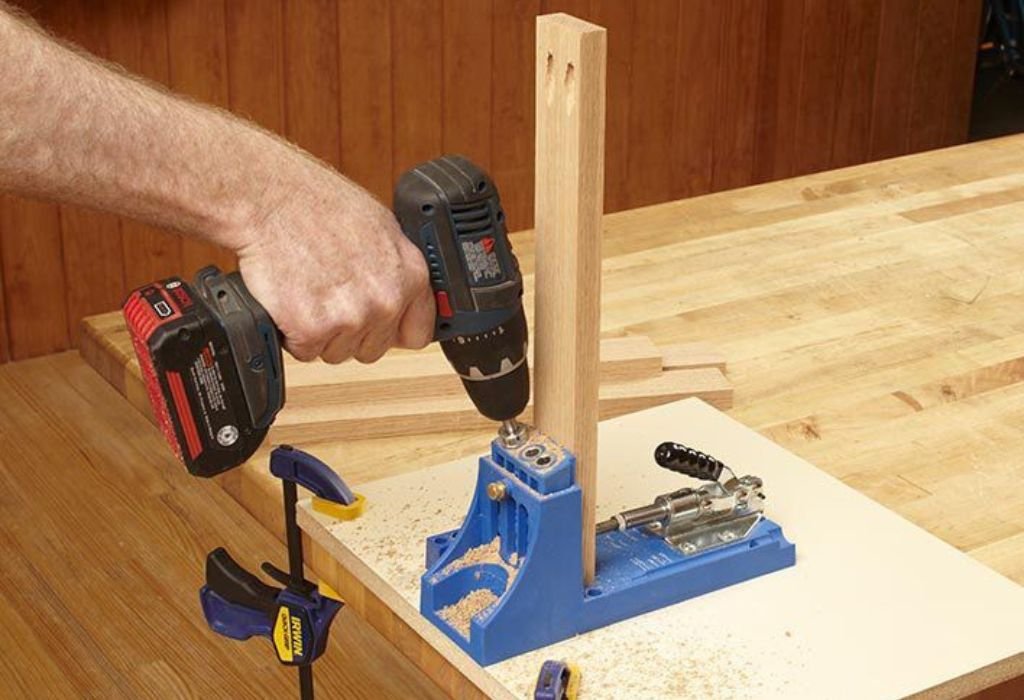
Sometimes, you need to join boards at an angle rather than straight on. Drilling angled holes requires extra precision and control.
Use a pocket hole jig if you’re joining boards at 90 degrees. It guides your drill bit perfectly, ensuring strong and hidden joints.
If drilling by hand, start at a shallow angle and increase it gradually. This prevents the bit from slipping across the surface.
Clamp the wood tightly before drilling. Any movement will change the hole’s angle and weaken the joint.
Mark both boards clearly to ensure the holes line up properly once joined. Proper marking saves time and ensures perfect fit.
When driving screws at an angle, use longer screws for added holding strength. Their diagonal path gives more surface grip.
Drilling at an angle takes practice, but once mastered, it creates professional-looking furniture and frames.
Safety and Tool Maintenance Tips
Safety always matters in woodworking, especially when using drills and clamps. Proper care keeps you safe and extends tool life.
Always wear safety glasses to protect your eyes from flying wood chips. Even small splinters can cause irritation.
Keep fingers away from drill bits while working. Secure pieces with clamps instead of holding them by hand.
Check your drill bits regularly for dullness or damage. Dull bits cause overheating and rough holes. Sharpen or replace them as needed.
After drilling, clean sawdust from your bits and store them in a dry case. Sawdust absorbs moisture, which can lead to rust.
Unplug or remove the battery from your drill before changing bits. This prevents accidental starts.
A clean, well-maintained tool set makes every project safer and smoother.
Joining Wood with Screws: Common Drilling Questions
Do I need pilot holes for every screw?
Yes. Pilot holes prevent splitting and help screws align straight every time.
Can I drill without clamps?
It’s possible but not recommended. Clamps ensure alignment and prevent slipping while drilling.
What’s the best bit for drilling wood?
Brad-point bits give the cleanest holes and stay centered better than regular twist bits.
Why do my boards separate after drilling?
You may have drilled without a pilot hole or driven screws too fast. Always drill slowly and evenly.
Can I use glue and screws together?
Yes. Wood glue adds strength and prevents movement in high-stress joints.
How do I hide screw heads?
Use countersink bits to recess the screws, then fill holes with wood filler or plugs.
What if my screw pokes through the other side?
Use shorter screws next time or reduce drilling depth. Always test on scrap first.
Should I drill pilot holes in both boards?
Only partially in the second board. This helps the screw pull them together tightly.
Can I drill multiple holes at once?
Yes, but space them evenly. Overcrowding holes weakens the joint.
How far from the edge should I drill?
Keep at least ¾ inch distance from edges to prevent cracking or splitting.
Conclusion
Drilling two pieces of wood together may seem simple, but precision is what makes your project last. Understanding alignment, bit selection, and pilot holes ensures every connection is solid.
With the right tools and a careful approach, you can create joints that stay tight and sturdy for years. Whether you’re crafting furniture or simple frames, these same rules apply.
Patience is your greatest tool. Measure twice, clamp securely, and drill slowly. Every clean, aligned joint brings you closer to professional woodworking results.
Once you master the process, joining wood becomes second nature — strong, reliable, and always precise.

I’m John F. Nicholas, the founder, lead writer, and drill enthusiast behind 101drill.com. With years of hands-on experience in power tools and DIY projects, I created this platform to share practical knowledge, expert tips, and real-world insights to help others master the art of drilling.