
You’ve got a woodworking project on your hands — maybe you’re fitting a vent, routing cables, or adding a cup holder to a table. You measure the opening and realize you need a 4-inch hole in the wood. The size looks intimidating, and your regular bits seem far too small.
This is a common challenge for DIYers and carpenters. Drilling large holes requires more than just power; it demands precision, stability, and the right tools. The good news is, with proper technique, even a 4-inch hole can be made cleanly and safely.
Many people try to force their way through with smaller bits or dull tools, ending up with splintered wood or misaligned holes. But by understanding the right bit type, drill speed, and setup, the process becomes smooth and predictable.
In this detailed guide, we’ll cover how to drill a 4-inch hole in wood the correct way, what tools you’ll need, and how to prevent cracking or burning.
By the end, you’ll know how to create perfect, professional-grade holes for any project — from furniture making to custom installations.
Why You Might Need a 4-Inch Hole in Wood
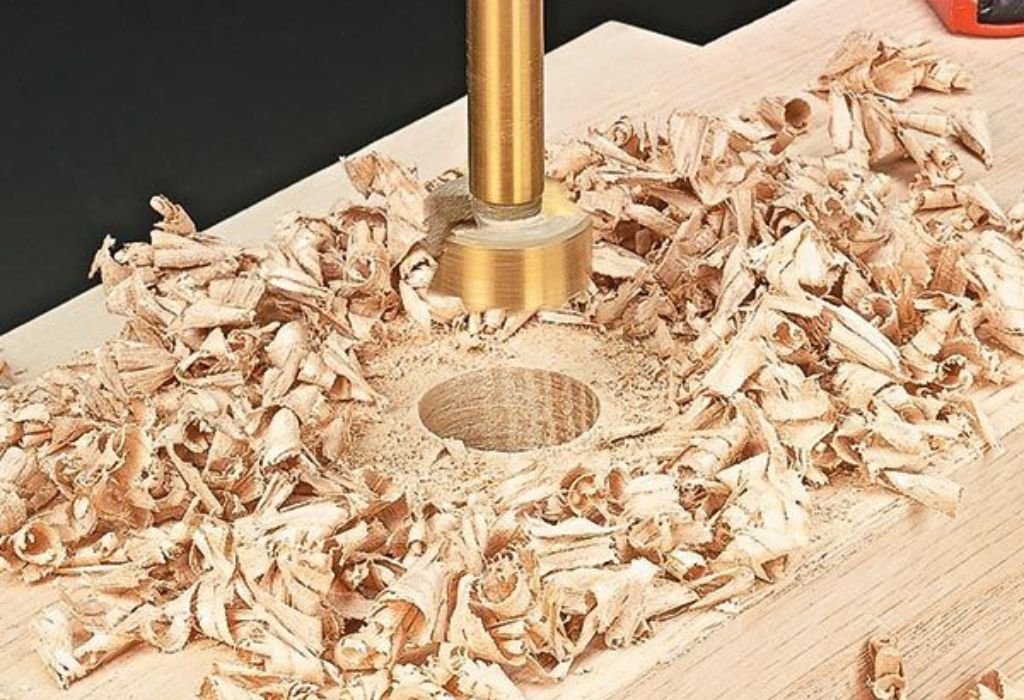
Large holes are more common in woodworking than many realize. You may need them for air vents, pipe installations, speaker mounts, or decorative cutouts. The goal is always the same: clean, accurate openings without damaging the surrounding surface.
A 4-inch hole is large enough to require power and technique beyond standard drilling. It’s too wide for twist bits and too deep for basic spade bits alone. That’s why understanding the proper method is critical.
In cabinetry, these holes often serve as access points for wires and tubing. In carpentry, they create functional features like drainage or fan vents. Each project demands slightly different cutting control.
The challenge lies in maintaining balance and preventing splinters. Large holes put more strain on both the tool and the operator. Without stable clamping, torque can twist the drill suddenly.
Proper planning ensures precision and safety. When you know what bit and speed to use, your results stay professional, even with thick hardwood.
Whether it’s for home improvement or creative woodworking, mastering this technique expands your skill set and tool confidence.
Tools You Need to Drill a 4 Inch Hole in Wood
Before you begin, gather all essential tools to ensure accuracy and safety. The right setup saves time and prevents frustration later.
1. Power Drill — A corded drill or high-torque cordless model (18V or higher) is best. Large hole drilling requires consistent power that small drills can’t sustain.
2. Hole Saw Bit — This is the most common tool for 4-inch holes. It’s a circular saw attachment with serrated teeth designed for cutting large diameters smoothly.
3. Spade Bit (Optional) — Spade bits can be used for thinner boards but may produce rougher edges. They’re inexpensive but harder to control at large sizes.
4. Forstner Bit (Optional) — Ideal for clean, flat-bottomed holes in hardwood. However, you’ll need a drill press for stable control at this diameter.
5. Center Drill Bit or Pilot Bit — Helps mark and guide the main hole saw to stay centered. It prevents wandering and uneven cuts.
6. Clamps and Workbench — Secure the wood tightly to prevent shifting. A wobbling piece is unsafe and produces uneven cuts.
7. Measuring Tape and Marker — Accurate marking ensures your hole lands precisely where you want it.
8. Safety Gear — Wear goggles, ear protection, and gloves. Large bits create vibrations and debris that require protection.
Having all of these tools ready ensures a smooth drilling process with minimal risk or error.
Choosing the Right Drill Bit for Large Holes
When it comes to a 4-inch hole, the hole saw is your best friend. Its circular design cuts along the perimeter, leaving a perfect circle with minimal effort.
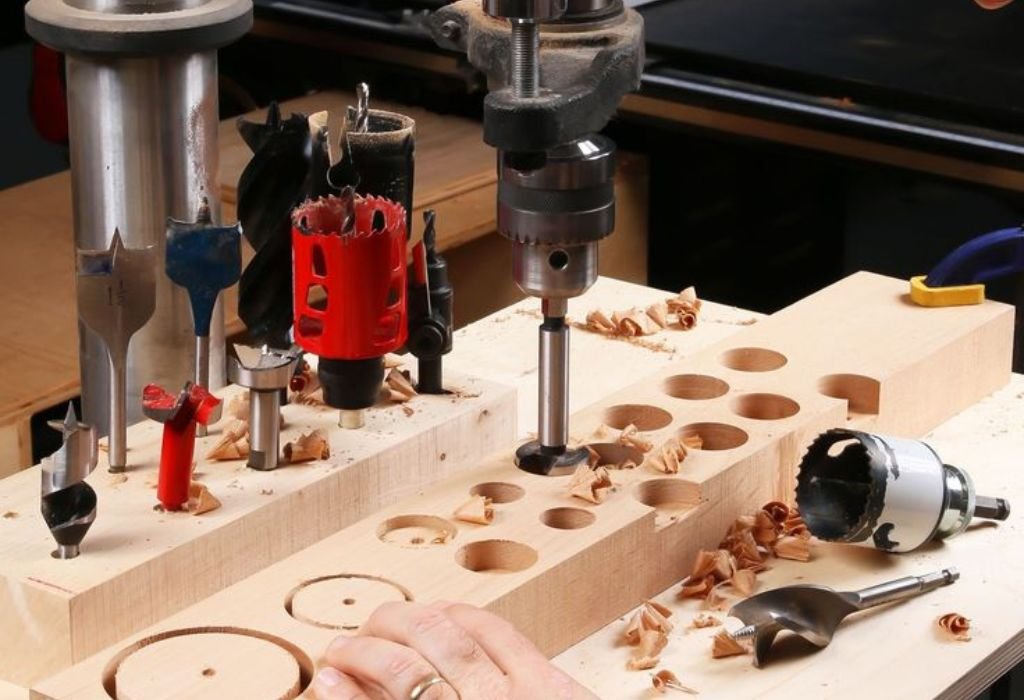
Hole saws come in bi-metal, carbon steel, or carbide-tipped varieties. For wood, carbon steel is sufficient. For hardwoods or plywood, bi-metal or carbide versions last longer.
The spade bit is another option, but it’s more suited for small to medium holes. At 4 inches, spade bits can chatter, splinter, or overheat. They’re better reserved for softer woods or rough utility work.
A Forstner bit creates the cleanest, most precise holes but demands high torque and stability. It’s best used in a drill press setup rather than handheld drills.
If you only have a standard drill, stick with a hole saw kit that includes an arbor and pilot bit. This setup balances power, control, and accuracy perfectly.
Always match the hole saw’s shank to your drill’s chuck size, and ensure your drill can handle the torque. A mismatched setup leads to wobbling or bit slippage.
By choosing the correct bit, you’ll cut efficiently without damaging your wood or your drill.
Step-by-Step Guide to Drilling a 4 Inch Hole
Step 1: Mark the center.
Use a tape measure and pencil to mark where you want the hole. Double-check the alignment to avoid misplacement.
Step 2: Secure your wood.
Clamp the wood tightly to a sturdy surface. This prevents movement and ensures safety while drilling.
Step 3: Attach the hole saw.
Connect the hole saw to your drill’s arbor and make sure the pilot bit extends slightly beyond the teeth. Tighten it securely.
Step 4: Start at low speed.
Position the pilot bit over your center mark. Begin drilling slowly to let the pilot bit dig in. Gradually increase speed as the teeth start cutting.
Step 5: Maintain steady pressure.
Keep the drill perpendicular to the surface. Apply moderate pressure — too much force causes binding, while too little slows cutting.
Step 6: Clear debris.
Stop occasionally to remove sawdust from the hole. Overheating dulls teeth and burns wood, so frequent clearing keeps the bit cool.
Step 7: Finish the cut.
As you near the end, reduce speed and pressure. If the board is thick, stop halfway and drill from the opposite side for a cleaner exit.
Step 8: Smooth the edges.
Use sandpaper or a rotary drum to remove splinters. The result is a neat, professional-looking hole ready for installation.
Following this sequence guarantees accuracy, control, and minimal tear-out.
Tips for Cleaner and Smoother Cuts
Always let the hole saw teeth do the work. Forcing the drill increases friction, creating burns and jagged edges. Patience leads to precision.
Use backing wood underneath your workpiece. It prevents blow-out when the bit exits the material, keeping both sides clean.
Mark your pilot hole clearly and avoid starting at an angle. An off-center start leads to uneven holes that can’t be corrected mid-cut.
For deep cuts, stop every few seconds to clear sawdust and cool the bit. Overheating softens teeth and reduces performance.
If the hole edges are rough, sand lightly with fine-grit paper or use a sanding drum on your drill. This improves both appearance and fit.
In hard woods, applying a small amount of beeswax to the hole saw teeth reduces friction. It keeps the cut smooth and extends bit life.
Finally, always test your setup on scrap wood before drilling your final piece. Small adjustments can make a big difference in quality.
Safety Precautions When Drilling Large Holes
Large hole drilling produces strong torque, so grip the drill firmly with both hands. A side handle helps control kickback when the bit bites into the wood.
Always wear safety goggles and gloves. Flying chips and splinters can injure your eyes or hands.
Never wear loose sleeves or jewelry while drilling. The spinning bit can catch clothing easily.
Secure your workpiece tightly using multiple clamps. Even minor movement can cause the hole to go off-center.
Avoid running the drill continuously for long periods. Overheating can damage both the bit and the motor. Take breaks between cuts.
Unplug the drill or remove the battery before changing bits. Accidental triggers can cause serious injuries.
Finally, always stand balanced with your feet apart. Stability prevents the drill from twisting you off balance during sudden torque.
Common Problems and How to Fix Them
Problem 1: Bit gets stuck halfway.
Stop immediately and reverse the drill slowly to free the bit. Clear sawdust and continue at a slower speed with less pressure.
Problem 2: Hole edges splinter.
Use a backing board or painter’s tape to reduce tear-out. Drilling from both sides also keeps edges smooth.
Problem 3: Drill overheats.
Pause often and remove debris. Lubricate lightly or reduce RPM for hard woods. A hot bit cuts poorly and dulls faster.
Problem 4: Hole off-center or uneven.
Always start with a pilot bit and double-check your markings. Keeping steady vertical alignment avoids drift.
Problem 5: Burn marks or smoke.
Reduce speed immediately. Friction or dull teeth are the cause. Sharpen or replace the hole saw if necessary.
By troubleshooting early, you prevent damage to your wood and extend the life of your tools.
Quick Answers About Drilling 4-Inch Holes in Wood
Can I drill a 4-inch hole with a cordless drill?
Yes, but use one with at least 18V of power. Cordless models with low torque may stall or overheat during deep cuts.
What’s the best bit for hardwoods?
A bi-metal or carbide-tipped hole saw performs best. It stays sharp longer and resists heat buildup.
How do I prevent tear-out on the backside?
Clamp a scrap board underneath your workpiece. It supports the wood fibers and prevents splintering as the bit exits.
Can I drill a 4-inch hole without a hole saw?
Yes, you can outline the hole and cut it with a jigsaw, but accuracy is harder to maintain. A hole saw is faster and cleaner.
Should I drill from both sides for cleaner edges?
Yes, for thick boards, start from one side until the pilot bit shows through, then flip and finish from the other side. This gives perfect edges on both sides.
Can I use a spade bit instead of a hole saw for 4-inch holes?
Technically yes, but it’s not ideal. Spade bits of that size create rough edges and require high torque, which makes the drill harder to control.
Do I need a drill press to make a 4-inch hole?
A drill press offers better accuracy and control, especially in thick or hardwood. However, a high-power handheld drill works fine if clamped securely.
How can I keep my hole saw from overheating?
Pause every 10–15 seconds to remove sawdust and allow air to cool the teeth. You can also apply a small amount of beeswax to reduce friction.
What’s the best way to center a large hole accurately?
Mark your center using a compass or template, then drill a small pilot hole first. This guides the hole saw and keeps it perfectly aligned.
Can I use a jigsaw to finish or enlarge a 4-inch hole?
Yes, a jigsaw can help refine or widen the hole slightly after drilling. Just move slowly and follow the original circular outline for precision.
Conclusion
Drilling a 4-inch hole in wood may sound challenging, but with the right tools and method, it’s entirely achievable. The secret lies in stability, patience, and using the proper hole saw for the job.
Take your time marking, clamping, and clearing debris. Use moderate drill speed and pressure to maintain control and avoid overheating.
Whether you’re cutting for ventilation, wiring, or decoration, clean results depend on preparation. With a little practice, you’ll master large-diameter drilling and achieve professional-level precision.
Once you understand how to manage speed, torque, and pressure, your 4-inch holes will look factory-perfect — ready for any woodworking project that comes next.

I’m John F. Nicholas, the founder, lead writer, and drill enthusiast behind 101drill.com. With years of hands-on experience in power tools and DIY projects, I created this platform to share practical knowledge, expert tips, and real-world insights to help others master the art of drilling.