
Imagine you’re building a custom furniture piece, designing a ventilation opening, or installing a speaker box, and you realize you need a perfect six-inch hole in wood.
It sounds simple, but once you pick up your drill, the size and precision suddenly seem intimidating. A 6-inch hole is much larger than what a standard drill bit can handle.
Many beginners start with the wrong tools, only to burn the wood, break the drill bit, or end up with rough, uneven edges.
The secret lies not in brute force but in using the correct bit type, speed, and technique for that specific hole size. With the right approach, drilling a clean six-inch hole becomes surprisingly manageable.
Professional carpenters and DIYers often use specialized bits like hole saws, Forstner bits, or spade bits, depending on the project type and wood thickness. Each tool has its strengths, but the method of alignment, drilling angle, and steady control is what ensures a perfect circular cut.
In this detailed guide, you’ll learn exactly how to drill a 6-inch hole in wood safely and accurately. We’ll cover the best tools, preparation steps, drilling techniques, and common mistakes to avoid.
Whether you’re working with plywood, hardwood, or treated lumber, by the end of this guide you’ll have the confidence to get a professional finish every single time.
Understanding the Challenge of Drilling a 6-Inch Hole in Wood
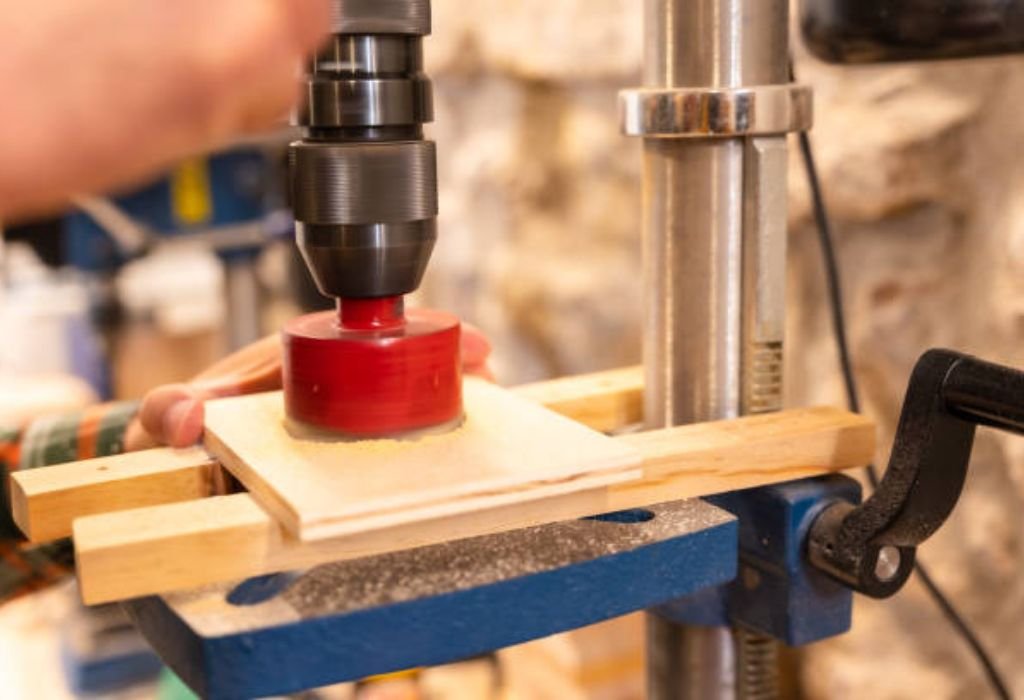
Drilling a small hole is easy; drilling a six-inch hole is another story. The diameter is large enough to require special bits and more torque from your drill. If not done carefully, the process can cause splintering or kickback.
The main challenge is maintaining control throughout the drilling process. A 6-inch bit or hole saw generates significant resistance as it cuts through dense wood. Without steady pressure, the drill can twist or bind.
Wood type also affects drilling performance. Softwoods like pine or cedar drill easily but can splinter along the edges. Hardwoods such as oak or maple resist cutting and may heat up quickly. Both require different speeds and pressure.
Another issue is drill power. Cordless drills often lack the torque to handle such a large diameter. A corded drill or a heavy-duty drill press is typically necessary for this task.
Precision is key when creating holes of this size. Even a slight wobble or misalignment can ruin the finish. Using a guide or pilot hole ensures accuracy from start to finish.
Lastly, the drill bit’s sharpness and quality determine how cleanly it cuts. Dull bits create friction, heat, and burns on the wood surface. Regular inspection and sharpening prevent this problem.
Understanding these challenges prepares you to choose the right equipment and method before starting.
Tools You’ll Need for Drilling a Large Hole
Drilling a six-inch hole requires more than just a regular handheld drill. You’ll need tools that can handle torque, depth, and accuracy. Here’s what to prepare before starting.
The primary tool is a hole saw kit. These come with various sizes, including 6-inch options, designed to cut large circular holes efficiently. Choose a bi-metal or carbide-tipped version for hardwoods.
You’ll also need a powerful drill — preferably corded or a high-torque cordless model. Ensure your drill has variable speed settings so you can control rotation as you cut deeper into the wood.
A pilot drill bit or center bit helps maintain balance at the start. It keeps the hole saw from wandering when you first make contact with the surface.
Other essentials include clamps to secure the wood, measuring tape for precision, and pencil markings for layout. Use a wood backing board if you’re drilling through thinner pieces to prevent tear-out on the bottom side.
Having safety equipment like goggles, gloves, and ear protection is also crucial. Large holes create more debris and friction, which can cause splinters or minor burns.
Lastly, a vacuum or brush keeps sawdust clear as you work. Visibility helps maintain straight alignment and prevents overheating. Preparing these tools ensures a smoother and safer drilling experience.
Choosing the Right Drill Bit Type for a 6-Inch Hole
Selecting the correct drill bit type is the most critical step for success. Not all bits are designed to handle wide holes, and choosing the wrong one can ruin your material or tool.
The hole saw bit is the best choice for creating 6-inch holes in wood. It has a circular blade with serrated teeth that cuts around the perimeter, leaving a smooth center core. Hole saws are efficient and available in metal or wood-specific versions.
Forstner bits are another option but are typically used for flat-bottom holes rather than full cutouts. However, they work well on thinner wood pieces or when precise depth control is needed.
Spade bits are not suitable for holes larger than about 1.5 inches. Using one for a 6-inch cut would be inefficient and unsafe. Instead, hole saws and Forstner bits provide the control needed for that scale.
When buying a hole saw, ensure it comes with a solid arbor or mandrel that supports the pilot bit. This keeps the bit centered as it rotates, ensuring a clean, circular shape.
For hardwood or composite woods, choose a carbide-tipped hole saw to prevent overheating. Bi-metal versions also perform well for mixed materials.
Using the right bit minimizes vibration, ensures smoother cuts, and extends both tool and drill life.
Preparing the Wood Surface Before Drilling
Proper preparation makes drilling easier and prevents splintering. Begin by marking the center of the hole with a pencil. Measure precisely with a ruler or compass to maintain alignment.
Secure your wood firmly using clamps. Movement during drilling can cause uneven holes or even kickback. Always place a sacrificial wood board underneath to catch the exit side of the hole.
Next, drill a small pilot hole at the center point using a 1/8-inch bit. This guide hole helps align the hole saw or Forstner bit perfectly before starting the larger cut.
Ensure your work area is well-lit and clean. Remove sawdust and debris from the surface to maintain accuracy and prevent slipping.
If you’re drilling into varnished or painted wood, use masking tape over the area first. This reduces splintering and keeps the edges neat.
Finally, check that your drill is fully charged or plugged into a stable power source. The last thing you want is a power interruption mid-cut.
Proper surface prep guarantees that your 6-inch hole will be smooth and symmetrical once finished.
Can I drill a 6-inch hole with a normal cordless drill?
Only if it’s a high-torque model; otherwise, use a corded or drill press for consistent power.
What’s the best bit for 6-inch holes?
A bi-metal or carbide-tipped hole saw is ideal for both softwood and hardwood.
Do I need to drill a pilot hole first?
Yes, it keeps the hole saw centered and prevents wobbling during the initial cut.
How do I stop wood from splintering when drilling?
Clamp the wood securely and use a backing board under the surface.
Can I use a spade bit for large holes?
No, spade bits are not suitable for holes over 1.5 inches; use a hole saw instead.
Step-by-Step Process for Drilling a 6-Inch Hole Safely
Once you’ve gathered the tools and prepped the surface, it’s time to start drilling. Follow these steps carefully to ensure precision and safety.
Step 1: Attach your 6-inch hole saw to the drill’s arbor. Tighten it firmly so there’s no wobble when spinning.
Step 2: Align the pilot bit with your pre-drilled guide hole. Hold the drill perpendicular to the surface to avoid angled cuts.
Step 3: Start at a low speed to allow the saw teeth to bite into the wood gently. Gradually increase speed as the groove deepens.
Step 4: Apply consistent, gentle pressure. Forcing the bit can overheat the saw and cause burns or chatter. Let the tool do the work.
Step 5: Periodically stop and remove sawdust buildup from inside the hole saw. This prevents heat buildup and blade dulling.
Step 6: If cutting through thick wood, stop halfway and flip the board. Drill from the opposite side using the pilot hole as your guide. This method prevents tear-out on the back edge.
Step 7: Once the hole is complete, sand the edges with fine-grit paper to remove any rough spots.
By following these steps, you’ll get a smooth, round, and professional-quality 6-inch hole every time.
Using Hole Saws vs Forstner Bits for Large Holes
While both hole saws and Forstner bits can make circular holes, their uses differ. Knowing when to use each can make your project easier and safer.
Hole saws are best for cutting completely through the wood. They remove a circular plug and leave clean edges with minimal effort. This makes them ideal for ventilation holes, wiring access, or pipe fittings.
Forstner bits excel at precision and control. They’re used for partial-depth holes, like recessed hinges or decorative woodworking. However, cutting an entire 6-inch hole with a Forstner bit requires a drill press and plenty of torque.
Hole saws are more affordable and widely available in large sizes. Forstner bits that large are rare and expensive. For practical woodworking, hole saws offer better versatility for a 6-inch diameter.
In terms of speed, hole saws cut faster but may leave a slightly rougher edge. Forstner bits are slower but create ultra-smooth walls. Choosing between them depends on whether you need full penetration or surface precision.
For most projects requiring 6-inch holes, the hole saw remains the recommended option. It balances speed, accuracy, and convenience.
Common Mistakes to Avoid While Drilling Large Holes
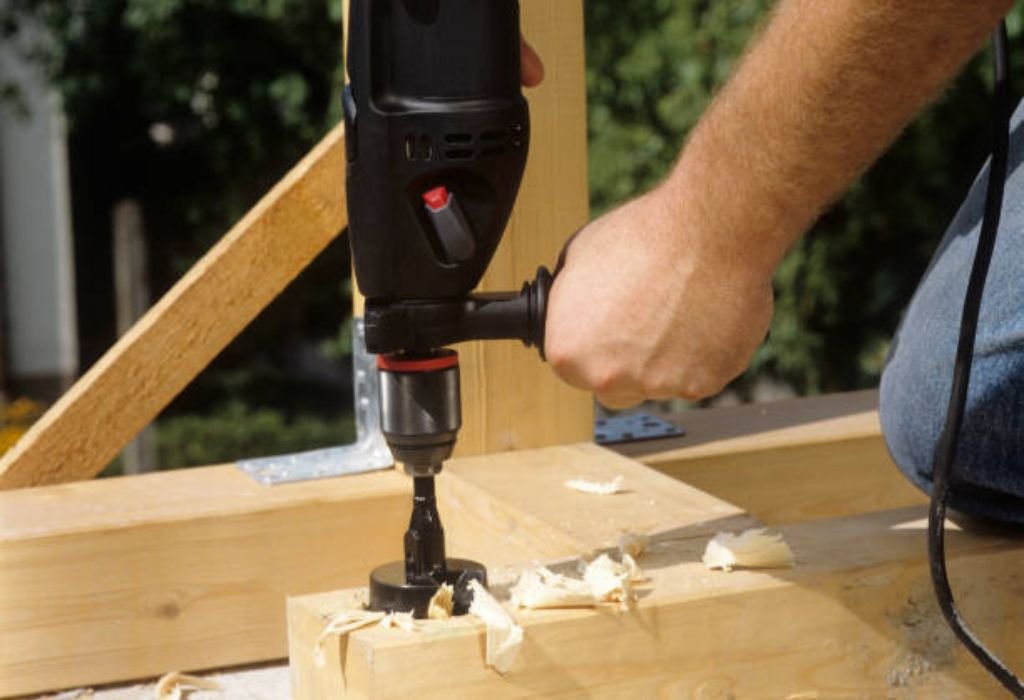
Even experienced DIYers make errors when drilling large holes. Avoiding these mistakes ensures safety and better results.
One of the biggest mistakes is using too much speed. High RPMs cause burning and overheating, especially in hardwoods. Always start slow and let the bit bite naturally.
Another error is skipping the pilot hole. Without it, the drill bit can wander and create uneven holes. Center alignment is crucial for clean circles.
Over-tightening clamps or using poor-quality wood can lead to cracking. Apply just enough pressure to stabilize without compressing the fibers.
Never forget to clear sawdust. Excess debris causes friction and dulls the blade prematurely. Stopping occasionally to clean helps the drill cut smoothly.
Many people push too hard on the drill, thinking it speeds up the process. It doesn’t — it just strains the motor. Controlled pressure gives the cleanest cut.
Lastly, skipping safety gear like goggles and gloves is risky. Large hole drilling can eject wood chips forcefully. Always protect yourself before starting.
Avoiding these common issues guarantees smoother, safer drilling with professional-quality results.
Why is my hole saw smoking?
You’re using too much speed or pressure; reduce RPM and clear sawdust more often.
What if my drill stalls during cutting?
Release pressure, back out slightly, and continue slowly to avoid overheating.
How can I make the edge smoother?
Lightly sand the perimeter with 120-grit paper after cutting.
Can I use a jigsaw to cut a 6-inch circle instead?
Yes, but it requires a guide or template to maintain perfect symmetry.
Do I need lubrication while drilling wood?
Not usually, but a little wax on the bit can reduce heat buildup in dense woods.
Safety Tips and Proper Drilling Techniques
Safety should always come first when working with power tools. Large hole drilling requires strength, precision, and protection.
Always wear safety goggles and gloves before drilling. Flying chips can cause eye injury or cuts on your hands. Ear protection is also useful if you’re working with high-torque drills.
Clamp your wood securely on a stable surface. Movement or shifting during drilling is dangerous and ruins accuracy.
Keep both hands on the drill handle for control. Use slow, steady pressure instead of pushing hard. The drill’s torque can twist unexpectedly if it catches on dense grain.
Take short breaks if you’re drilling thick hardwood. This prevents overheating of both bit and motor. A cooler drill cuts cleaner and lasts longer.
Always unplug or remove the battery when changing bits or adjusting clamps. Accidental activation can cause serious harm.
Finally, never force dull bits through the material. Replace or sharpen them to maintain safe, efficient performance.
Following these safety tips ensures that you complete your project without accidents or tool damage.
Alternative Methods for Making 6-Inch Holes in Thick Wood
If you don’t have a large drill or hole saw, there are other ways to create a 6-inch hole. These methods take longer but can be equally effective.
A jigsaw with a circle guide can cut out a perfect 6-inch diameter. First, draw the circle, drill a starter hole, and slowly cut along the line. This works best for thinner wood panels.
A router with a circle-cutting jig is another option. It provides cleaner edges and smoother walls, especially on hardwood or plywood. However, it requires experience to handle safely.
For artistic or decorative work, you can also use a scroll saw. It’s slower but ideal for precise control.
Some craftsmen prefer to drill multiple small holes around the perimeter and finish the cut with a coping saw. This traditional method works well when precision tools aren’t available.
If you have access to a CNC router, digital cutting ensures a flawless circular hole with minimal effort. Though expensive, it’s the most accurate option for repeatable results.
Each method has pros and cons depending on your tools, time, and skill level. Choose the one that best fits your woodworking setup.
Conclusion
Drilling a six-inch hole in wood might seem intimidating at first, but with the right preparation and tools, it’s completely manageable. The key lies in using a proper hole saw, steady speed, and a well-secured surface.
Always take time to mark, clamp, and clean before you begin. Small details like pilot holes and sawdust removal make a huge difference in finish quality.
Whether you’re crafting furniture, building ducts, or mounting equipment, the method remains the same — precision, patience, and protection. With this guide, you can now create perfect 6-inch holes in any wood safely and confidently.

I’m John F. Nicholas, the founder, lead writer, and drill enthusiast behind 101drill.com. With years of hands-on experience in power tools and DIY projects, I created this platform to share practical knowledge, expert tips, and real-world insights to help others master the art of drilling.