
A mortise joint is one of the strongest and most time-tested woodworking connections ever created. Whether you’re building furniture, doors, or cabinetry, mastering clean mortises can take your craftsmanship from average to exceptional.
The challenge, however, lies in cutting precise mortises efficiently — especially if you don’t own a dedicated mortising machine. Fortunately, your drill press can serve as a perfect alternative.
Learning how to mortise with a drill press for clean cuts allows you to achieve the same professional accuracy without investing in expensive machinery. The key lies in using your drill press not just as a boring tool, but as a precision cutting system that clears waste evenly and maintains perfect alignment.
According to FineWoodworking, a properly set drill press can produce mortises nearly indistinguishable from those made by high-end machines. The secret is control — controlling the setup, the spacing, and the final clean-up for tight, crisp edges.
Understanding Mortising and Its Purpose
Mortising is the process of cutting a rectangular or square cavity — known as a mortise — into a piece of wood. This cavity fits a tenon from another piece, creating a strong, interlocking joint used in furniture and framing.
Traditional mortising involves chisels, which require skill and time. But with a drill press, you can quickly remove most of the waste material using precise, overlapping holes. Once drilled, the remaining material is pared clean for a perfect fit.
The key to success lies in maintaining straight alignment and consistent depth. Since the drill press moves only vertically, it guarantees even cutting and prevents angled errors. You can then refine the edges manually for a snug tenon fit.
A mortise cut on a drill press is both efficient and repeatable — ideal for building multiple joints of identical size.
Choosing the Right Drill Bit and Accessories
Your choice of drill bit determines how clean your mortise will be. The most effective option is a Forstner bit, known for flat-bottomed holes and minimal tear-out. For rough removal, brad-point bits also perform well since they track accurately.
If you want to mimic a true mortising machine, consider using a mortising attachment kit, which includes a square chisel and matching drill bit. This setup lets you drill and square edges simultaneously.
You’ll also need:
- A sturdy clamp or vise to hold your workpiece firmly
- A depth stop to control hole depth
- A marking gauge or layout square for consistent lines
As Popular Mechanics explains, accuracy starts with preparation — clean bits, secured materials, and a properly calibrated drill press are the foundations of precision.
Marking and Layout: Setting Up for Precision
Before drilling, take time to mark your mortise layout carefully. Even the most advanced setup can fail if the layout is off by a fraction of an inch.
Use a sharp pencil or marking knife to outline your mortise length and width. For repeatable results, use a marking gauge to define parallel lines along the grain. Align your marks precisely with the center of your drill bit.
Clamp the workpiece securely on the drill press table. If the piece shifts even slightly during drilling, your mortise will be uneven. Make sure your table is perpendicular to the bit using a machinist’s square.
This stage is all about control and accuracy. Taking a few extra minutes here ensures clean, centered mortises every time.
Setting the Drill Press Depth Stop
Controlling depth is essential for consistency — especially when you’re cutting multiple mortises. Your drill press’s depth stop makes this easy.
Lower the bit until it touches the surface of your workpiece, then set the depth stop to the desired mortise depth. Most mortises are about two-thirds the thickness of the wood piece.
Perform a test hole on scrap material first. This helps you confirm depth accuracy and verify the bit’s performance. Once everything looks right, you can proceed with confidence.
Using a depth stop ensures each hole within your mortise cavity is uniform, preventing uneven bottoms or over-penetration. Consistency is the key to professional results.
Drilling the Mortise with Overlapping Holes
Now it’s time to cut the mortise. Start by drilling holes along the layout lines, slightly overlapping each one to remove most of the waste.
Begin at one end and work your way to the other, keeping the drill steady and slow. Don’t rush the feed rate — too much pressure can cause tear-out or burning. Instead, let the bit do the work while maintaining smooth downward movement.
Once the full mortise area is drilled, use the drill press to clean up any remaining material by slightly shifting the workpiece between passes. This overlapping technique ensures a flat and even bottom.
What’s the best speed for mortising with a drill press?
Use 700–1200 RPM depending on the bit size and wood type.
Should I drill from both ends?
Yes, starting at each end minimizes tear-out and keeps edges clean.
Can I mortise hardwood with this method?
Absolutely — just use sharp Forstner bits and moderate speed.
Do I need lubricant while drilling?
Not for wood; simply clear chips frequently to prevent heat.
How close should the holes overlap?
About half the bit diameter for smooth, even clearing.
Cleaning Up the Mortise for Smooth Walls
After drilling, the mortise cavity will still have ridges and uneven edges. To refine it, use a sharp chisel to pare down the walls.
Start by squaring the ends first. Place your chisel right on the layout line and tap gently with a wooden mallet. Then, remove small slices from the side walls until smooth.
For the bottom, use a wide chisel or small router plane to flatten any high spots. Always work slowly — a few light passes give better results than forcing deep cuts.
As FineWoodworking notes, clean mortises are all about patience. Take time to inspect your walls, ensuring they’re perfectly vertical and crisp.
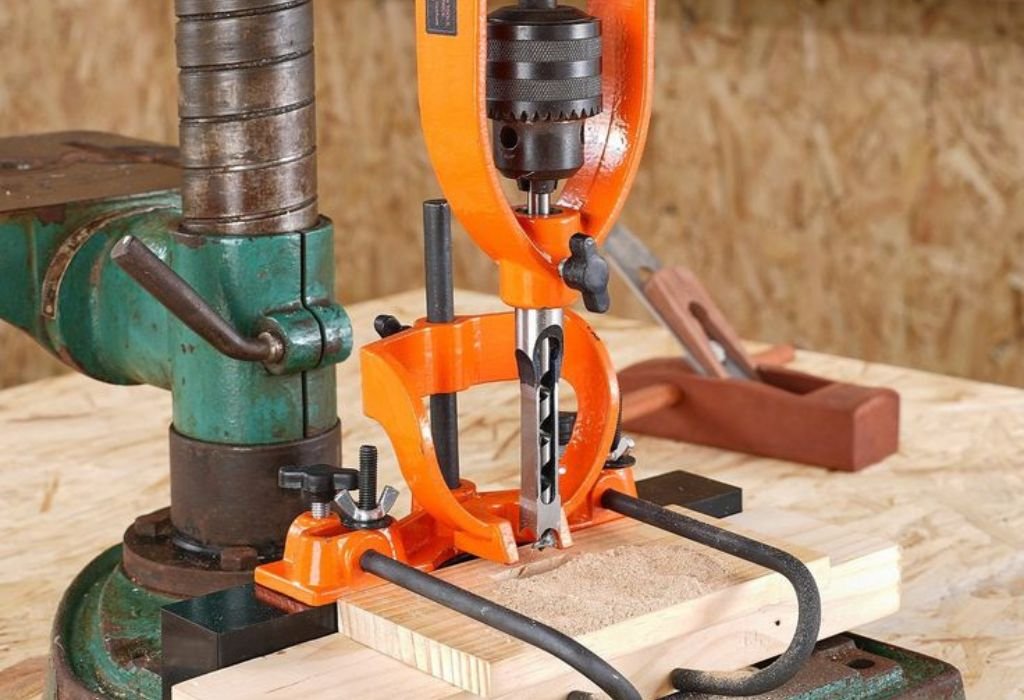
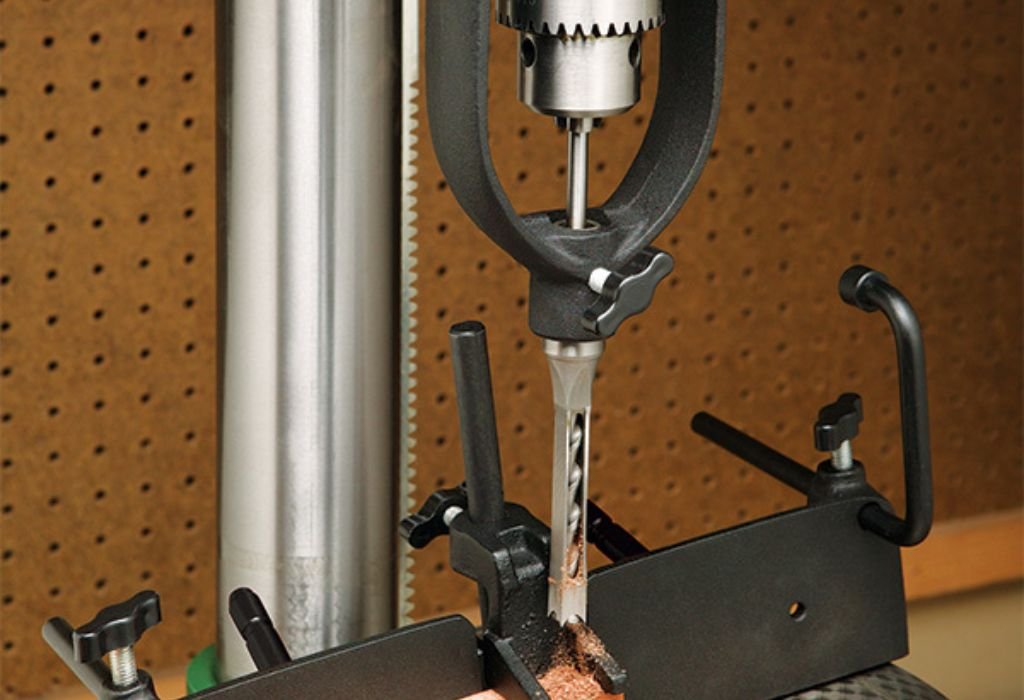
Using a Mortising Attachment (Optional Upgrade)
If you plan to make mortises regularly, a mortising attachment for your drill press is a worthwhile investment. It combines a drill bit and hollow chisel into one assembly, producing clean square holes directly.
Installation is straightforward: the attachment mounts onto your drill press column, and the chisel surrounds the drill bit. As you lower the handle, the chisel cuts the edges while the bit clears the waste inside.
This method delivers machine-quality mortises without needing a dedicated mortiser. While the attachments can cost between $60–$100, they’re still cheaper than a full machine and save hours of cleanup time.
Is a mortising attachment universal?
Most fit standard drill presses, but check your model’s specifications.
Can I use large chisels with small drills?
No, match the chisel size to your drill press power capacity.
How do I keep the chisel sharp?
Use a fine honing cone or chisel file before each use.
Will this attachment work on softwoods and hardwoods?
Yes — just adjust feed pressure accordingly.
Do I still need to chisel afterward?
Light cleanup is optional, but usually minimal with attachments.
Avoiding Common Mistakes in Drill Press Mortising
Even experienced woodworkers can make errors when mortising with a drill press. The most common issues include poor clamping, incorrect bit choice, and feeding too fast.
Always double-check your alignment before drilling. A small tilt in the setup can ruin the mortise geometry. Avoid dull bits, as they tear fibers instead of slicing cleanly.
Also, clear chips frequently. Excess sawdust increases heat and friction, leading to burning. Finally, never force the feed handle; steady pressure ensures cleaner holes and longer bit life.
As Family Handyman explains, slowing down your workflow often speeds up results — fewer mistakes mean less rework later.
Finishing Touches for Professional Mortises
Once your mortise is fully cut and cleaned, give it a final inspection. The walls should be straight, the bottom flat, and the edges sharp. Test the fit by inserting the tenon — it should slide in with light pressure, not force.
If the fit is too tight, pare the sides gently with a sharp chisel. If it’s loose, consider adding a thin wood shim or applying glue evenly for a stronger hold.
Finally, lightly sand the outer surface to remove pencil marks. A clean, professional mortise not only improves strength but also gives your project a polished look that stands out.
What’s the ideal mortise-to-tenon gap?
About 1/64 inch for a snug but workable fit.
Can I use sandpaper to clean the mortise walls?
Yes, but wrap it around a small flat stick for accuracy.
Should I glue before testing the fit?
No, always dry-fit first to confirm alignment.
What if the mortise is too deep?
Add a filler block at the bottom or shorten the tenon slightly.
Do I need to seal the mortise before assembly?
Optional — a thin coat of glue ensures durability.
Conclusion
Mortising with a drill press is one of the smartest and most cost-effective ways to achieve precision joinery. By understanding how to mortise with a drill press for clean cuts, you can produce strong, professional-quality joints without specialized machinery.
The key is preparation — marking accurately, securing firmly, drilling carefully, and cleaning up patiently. With these steps, even a basic drill press can perform like a high-end mortising machine.
As Popular Mechanics notes, efficiency in woodworking isn’t about having the most tools — it’s about knowing how to use them creatively. With a little practice, your drill press can handle everything from simple mortises to complex joinery with consistent results.
So take your time, keep your bits sharp, and enjoy the satisfaction of crafting clean, precise mortises every time — proof that skill and ingenuity can outperform expensive equipment any day.

I’m John F. Nicholas, the founder, lead writer, and drill enthusiast behind 101drill.com. With years of hands-on experience in power tools and DIY projects, I created this platform to share practical knowledge, expert tips, and real-world insights to help others master the art of drilling.