
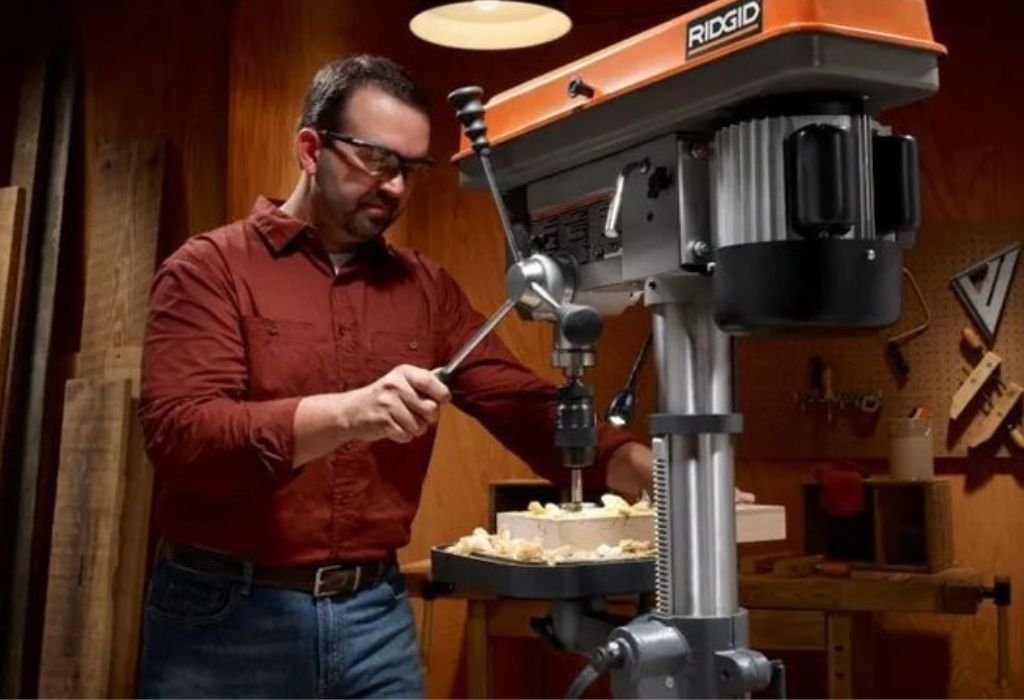
Nothing ruins a precision drilling project faster than a wobbling drill press. That slight vibration you see when the bit spins might seem harmless at first, but it can throw off measurements, enlarge holes, and even damage your workpiece.
For those who value accuracy, understanding how to fix drill press wobble is not just a maintenance task — it’s a crucial skill every craftsman should master.
Over time, even the best machines develop minor alignment issues. Dust collects in the spindle, bearings loosen, or the chuck becomes slightly off-center. These problems often start small and go unnoticed until the press begins to rattle or the holes lose their perfect symmetry.
But here’s the good news — in most cases, you don’t need expensive tools or professional help to restore your drill press to perfect balance.
Experts from Family Handyman and FineWoodworking emphasize that careful observation, proper cleaning, and small manual adjustments often solve the issue entirely.
By identifying the root cause early, you can stop the wobble before it affects your work’s precision or your tool’s longevity.
Understanding the Causes of Drill Press Wobble

Before trying to fix the wobble, it’s important to understand what causes it. Wobble can stem from several sources, including a misaligned chuck, bent drill bits, debris in the spindle taper, or worn bearings.
Each cause produces slightly different symptoms, but all result in the same problem — a bit that doesn’t spin perfectly true.
The chuck connects to the spindle through a tapered joint. Over time, vibration and dust can loosen this connection or introduce particles that prevent full contact. Similarly, bent bits or uneven jaw tightening can cause minor imbalance that becomes noticeable at higher speeds.
In some cases, even the table or column alignment may be off. A small deviation between the bit’s axis and the table surface can make it appear as if the chuck or spindle is wobbling.
Identifying the root cause will guide you to the right solution and prevent unnecessary adjustments.
Step 1: Checking the Chuck for Looseness
The chuck is the most common source of drill press wobble. It can loosen slightly due to vibrations or improper installation. Luckily, this can be fixed easily without using tools.
Start by unplugging your drill press for safety. Hold the chuck firmly and try to move it side to side. Any noticeable play means it isn’t seated properly on the spindle taper.
To reseat it, lower the quill and press the chuck firmly against a wooden block on the table. Apply steady downward pressure to lock it back into place. Avoid hammering or forcing the chuck, as that can damage the taper fit. Once seated, rotate the chuck by hand — it should move smoothly without side play.
If the wobble persists, the problem might be dirt or rust between the chuck and spindle. Cleaning the taper surface should be your next step.
Step 2: Cleaning the Spindle and Chuck Taper
Even tiny bits of dust, oil, or rust can create gaps between the chuck and spindle, leading to wobble. Cleaning these parts is a simple but powerful way to restore smooth operation.
Unplug the machine and lower the quill fully to expose the spindle. Use a dry, lint-free cloth to wipe away all dirt and debris. For light rust, gently polish the taper using a soft pad or fine steel wool wrapped in cloth.
Avoid using lubricants like WD-40 because they make the taper slippery. Clean both the inside of the chuck and the spindle socket thoroughly. Once dry, push the chuck back into place and press it firmly upward while rotating slightly to improve the fit.
This ensures maximum friction between the two surfaces, which is what keeps the chuck centered during operation. Regular cleaning can prevent most wobbling issues before they start.
How often should I clean the spindle taper?
Every few months or whenever you notice slight vibration.
Can I use alcohol to clean?
Yes, isopropyl alcohol removes grease effectively without residue.
Should I sand the taper?
No — sanding can alter the shape and ruin the friction fit.
Is oiling the taper a good idea?
No, it reduces grip and increases the chance of slipping.
Can dust really cause wobble?
Absolutely — even a small particle can offset alignment at high speed.
Step 3: Inspecting and Replacing the Drill Bit
Sometimes, the issue isn’t with the machine but the drill bit itself. Bent or poorly machined bits can wobble even if your chuck and spindle are perfect.
Remove the bit and roll it on a flat surface. If it doesn’t roll evenly or you see it lifting slightly at any point, it’s bent. Replace it immediately. Even small bends can cause vibrations that seem like chuck misalignment.
When inserting a new bit, make sure it’s centered between the jaws and tightened evenly. Always use sharp, high-quality bits designed for your material type. According to Family Handyman, dull or unbalanced bits can double vibration intensity and reduce accuracy significantly.
Testing with a few different bits helps confirm if the issue lies in the chuck or the drill bit itself.
Step 4: Checking for Spindle or Bearing Play
If your chuck and bit are fine, but the wobble remains, the spindle or bearings could be the cause. Worn bearings or slightly loose spindle assemblies allow micro-movement, which appears as wobble during drilling.
To check, unplug the press and grip the spindle just above the chuck. Try moving it side to side. A very slight movement is normal, but visible shifting means internal wear.
Although replacing bearings usually requires tools, you can sometimes reduce wobble by running the press at low speed for a few minutes. Heat expansion from rotation helps reseat the bearings temporarily. If the problem improves, it’s a sign the bearings need servicing soon.
For long-term reliability, regular lubrication and cleaning around the quill and spindle area keep these components running smoothly.
Step 5: Realigning the Drill Press Table and Column
A misaligned table or column can create the illusion of wobble even when the chuck spins true. Over time, heavy materials or accidental knocks can tilt the table slightly off-angle.
To check alignment, place a flat ruler or square on the table and lower the drill bit close to it. The bit should stay parallel to the ruler throughout its path. If not, adjust the table’s tilt or rotation until it aligns correctly.
Also, ensure the column bolts are tight. Vibration loosens these connections over time, allowing slight movement that translates into visible wobble. Tightening everything by hand and rechecking alignment usually resolves the issue.
Can an uneven table cause wobble?
Yes, a tilted table misguides the workpiece, causing off-center holes.
Do I need a level for alignment?
A machinist’s square or digital angle finder works better.
Should I check column bolts often?
Every few months, especially after moving the drill press.
What if the table tilt scale is inaccurate?
Always verify angles manually — factory scales aren’t perfect.
Can a bent table post cause wobble?
Yes, but it’s rare unless the press suffered an impact.
Step 6: Using Friction to Lock the Chuck Tightly
If the chuck still feels loose, you can reseat it using friction. Lower the quill and place a soft wood block on the table under the chuck. Press the chuck firmly against the block while rotating it slightly clockwise.
This pressure reseats the taper and increases friction between the chuck and spindle. Avoid striking the chuck or using hammers — steady manual pressure works best.
After reseating, spin the chuck by hand to ensure it’s tight and balanced. Then power on the machine at low speed and observe the bit. You’ll notice smoother, more stable rotation immediately.
Step 7: Testing for True Alignment
After making all adjustments, you should test your drill press to confirm the fix. Insert a straight bit and power the press at its lowest speed. Watch the tip carefully — it should rotate in a perfect circle.
For a simple alignment test, hold a pencil close to the bit’s tip without touching it. If the distance remains consistent as the bit spins, your chuck and spindle are perfectly aligned.
Gradually increase the speed and listen for vibrations or rattling. A quiet, stable sound means success. If wobble reappears, repeat the cleaning or reseating steps to refine the fit.
Should I test at high speeds right away?
Start slow — high speeds amplify even minor misalignment.
Can I use a dial indicator to check runout?
Yes, though it’s optional. It measures accuracy more precisely.
What if the wobble returns after a few days?
Temperature or vibration may have loosened the taper — reseat it.
Do different bit sizes affect the test?
Yes, larger bits exaggerate imbalance, so start small.
How often should I test alignment?
Monthly, or anytime you notice vibration during operation.
Preventive Maintenance Tips
Once your drill press is running smoothly, regular maintenance will keep it that way. Always clean dust and metal shavings after each use, especially around the spindle and chuck area.
Remove bits after finishing work to relieve jaw tension. Store your drill press in a dry place, away from moisture that can cause rust.
Check chuck tightness periodically and reseat it if needed. Lubricate moving parts like the quill or handle pivots lightly, but never oil the taper — it must stay dry for grip.
According to Popular Mechanics, consistent care and calibration can extend the life of a drill press by years and prevent costly repairs later.
Conclusion
Drill press wobble may seem like a serious problem, but in most cases, it’s caused by simple issues like dirt, looseness, or minor misalignment. By following these steps — cleaning, reseating, checking bits, and testing alignment — you can restore perfect accuracy without needing specialized tools.
The key is patience and regular maintenance. Keeping your chuck and spindle clean, ensuring tight fits, and checking alignment occasionally prevents wobble from returning. Over time, these habits make your drill press safer, smoother, and more enjoyable to use.
Experts from FineWoodworking emphasize that small adjustments and proper cleaning often make the biggest difference in precision work. With the right care, your drill press will remain steady and accurate for years to come — delivering flawless results on every project.

I’m John F. Nicholas, the founder, lead writer, and drill enthusiast behind 101drill.com. With years of hands-on experience in power tools and DIY projects, I created this platform to share practical knowledge, expert tips, and real-world insights to help others master the art of drilling.