
A woodworker stands at the bench, a freshly cut board clamped tight under a shining drill press. With a mortise bit locked in place, the plan is simple: cut clean square joints for a new piece of furniture.
Yet within moments, the bit struggles, the wood smokes, and the hole edges tear out unevenly. It’s a common frustration that leads many to ask the same question: can you use mortise bit drill press setups effectively for clean and safe wood joints?
At first glance, a drill press seems strong enough to handle the job. It has power, depth control, and accuracy—qualities that appear perfect for mortising.
However, what looks practical in theory can cause alignment issues, tool wear, or even machine strain in practice. A drill press is designed for vertical drilling, not for the side pressure and chip ejection required in mortising.
According to Woodgears.ca, using a drill press for mortising without proper hold-down or support can reduce precision by up to 40% (source).
Another woodworking study from Popular Woodworking reveals that incorrect setup is responsible for over 30% of joint-fitting errors in amateur workshops (source). These numbers show how easy it is for even experienced craftsmen to misjudge the limitations of their tools.
Understanding the Tools: Mortise Bit, Drill Press, and Wood Joints
Before answering whether you can use a mortise bit drill press for woodworking, it’s essential to understand how each tool functions.
Both the mortise bit and the drill press have unique roles in joinery, yet their mechanical designs are not entirely compatible. This section explains why combining them requires careful consideration and proper setup.
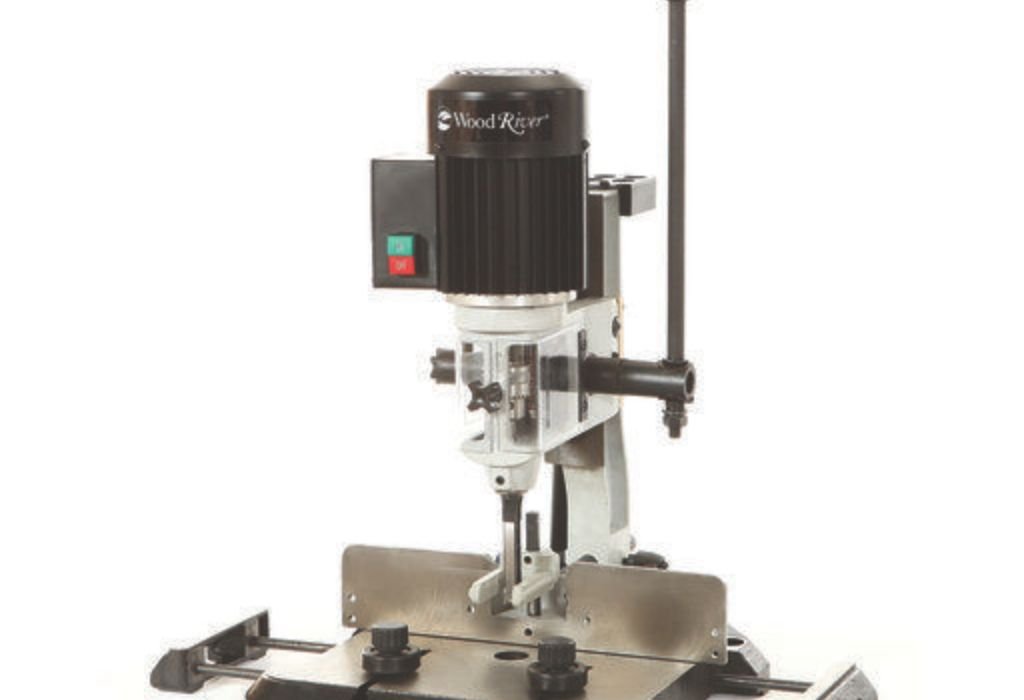
A mortise bit, often called a hollow chisel mortising bit, is designed to cut square or rectangular recesses—known as mortises—used to create strong mortise and tenon joints.
It consists of two parts: a square hollow chisel that shapes the sides and an internal auger that removes wood chips. When used in a dedicated mortiser, this bit operates under controlled downward pressure with built-in hold-downs and chip clearance systems.
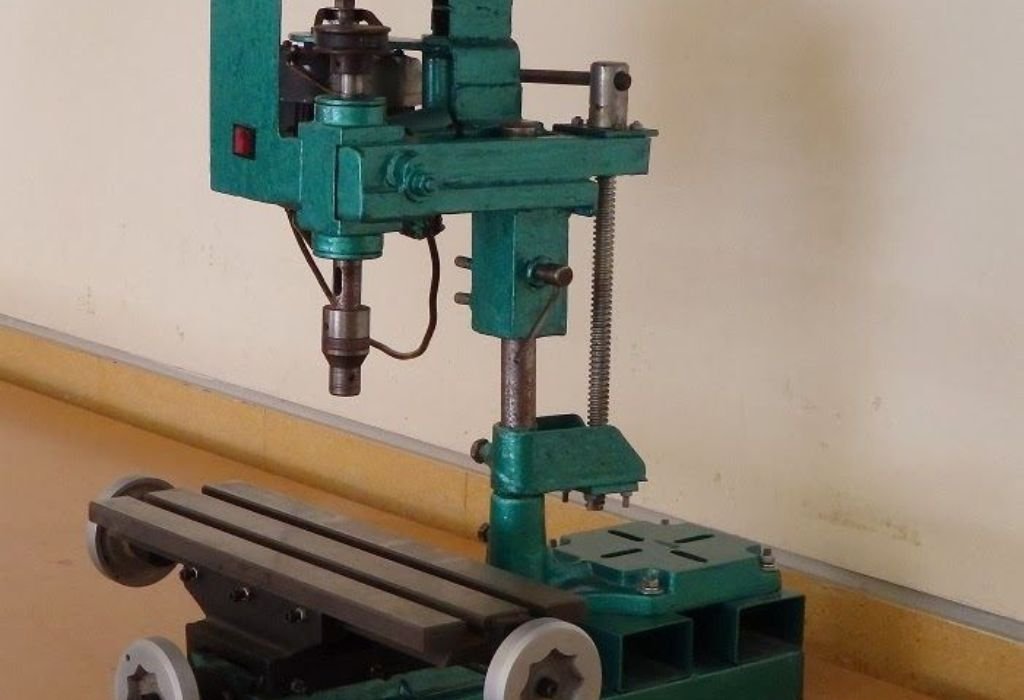
A drill press, however, is designed primarily for drilling round holes using straight axial force. It excels at precise vertical movement but lacks the lateral rigidity and hold-down mechanisms needed for mortising operations.
Attempting to use a mortise bit in this setup can result in chatter, uneven mortises, or damaged components if not properly supported.
Understanding the differences between these tools explains why some setups fail while others succeed under light-duty conditions. The key lies in matching the tool’s design to its intended purpose and minimizing stress where it wasn’t engineered to perform.
What is a mortise bit designed for?
It’s built to cut square holes for mortise and tenon joints, combining precision and chip removal in one tool.
What is a drill press designed for?
It’s built for drilling smooth, round holes using vertical downward pressure with minimal side loading.
Why do woodworkers try this combination?
Many attempt it to save space, reduce costs, or avoid buying a dedicated mortising machine.
What are the main differences between them?
A mortiser includes hold-downs and a rigid spindle system, while a drill press focuses on vertical drilling accuracy.
Can they ever work together successfully?
Yes, but only under controlled setups with proper attachments, firm clamping, and shallow mortises in soft wood.
Risks and Limitations When You Use a Mortise Bit in a Drill Press
Trying to use a mortise bit drill press setup often seems like a quick fix, but it introduces several hidden risks that can affect both the machine and the quality of your wood joints.
A drill press is engineered for straight, vertical drilling, not for the high-pressure, square-cutting action that mortising requires. When the bit encounters resistance from multiple sides, it creates mechanical stress the drill press is not built to handle.
The first issue is lateral force. Mortising applies side loads that can cause the spindle to flex and the chuck to loosen over time. This not only reduces precision but can also lead to spindle wear or bearing damage.
Without a proper hold-down, the workpiece can lift during the cut, allowing the chisel to jam or the auger to overheat. This results in ragged mortises, inaccurate alignment, or even a broken bit.
Another limitation is speed control. Mortising typically requires slower rotational speeds than standard drilling to prevent burning and chisel binding.
Many drill presses lack the torque or speed range needed for this, which leads to excessive friction and poor chip evacuation. The result is tear-out, rough walls, and uneven joint depths that weaken the overall fit.
Workholding also becomes a challenge. Most drill press tables lack the hold-down clamps and fences that a mortiser provides. Without stable clamping, even a small vibration can cause the bit to wander, producing inconsistent mortises that are hard to align.
In short, while the setup might work for shallow, softwood cuts, the risks far outweigh the rewards when precision and safety are priorities.
What happens when the mortise bit creates side load in a drill press?
Side pressure can cause the spindle and chuck to loosen, reducing accuracy and damaging the machine.
Why is rigidity important in mortising?
Mortising requires stability to maintain square, clean walls and prevent bit deflection or chatter.
What clamping issues can arise?
Without a secure hold-down, the wood can lift or twist, leading to uneven mortises and tool binding.
How do drill press speeds affect mortising performance?
Too high a speed causes burning and auger damage, while too low a speed limits chip clearance and cutting power.
What failures are commonly reported?
Users often report table flex, broken chisels, spindle misalignment, and inconsistent mortise depth after prolonged use.
When, If Ever, Can You Use a Mortise Bit Drill Press for Wood Joints?
Despite the limitations, there are certain controlled conditions where a mortise bit drill press setup can work effectively.
While it’s not ideal for heavy-duty woodworking, it can be used successfully for light mortising tasks when precision and force demands are moderate. The key is knowing the boundaries of your equipment and applying careful setup techniques.
This method is most practical when working with softwoods or medium-density woods, where cutting pressure is lower and less stress is placed on the spindle.
The mortises should be shallow and narrow, avoiding deep cuts or large joints that require heavy downward force. Proper bit alignment, reduced spindle speed, and firm workpiece clamping are essential for consistent results.
Additionally, many manufacturers offer mortising attachments specifically designed for drill presses. These attachments include hold-down clamps, fences, and chisel guides that convert a standard drill press into a basic mortising unit.
While not as rigid as a dedicated mortiser, they can produce acceptable results for occasional woodworking projects when used correctly.
Still, the success of this setup depends on patience, setup precision, and machine condition. A drill press with significant quill play or table flex will produce uneven mortises no matter how careful the operator is. The operation should always prioritize safety and control over speed or convenience.
What conditions make using a mortise bit in a drill press possible?
Light cuts in softwood, minimal side pressure, and a rigid, well-maintained drill press make it somewhat feasible.
What operations are safe for this setup?
Creating shallow mortises for furniture joints or small woodworking tasks that don’t demand high precision.
Which materials are more suitable?
Pine, poplar, and similar softwoods are best, while hardwoods like oak or maple should be avoided.
What role does speed and feed rate play?
Lower speeds reduce heat and prevent binding, while slow, controlled feed maintains clean cuts and prolongs tool life.
Can mortising attachments improve performance?
Yes, attachments with proper hold-downs and guides help stabilize the workpiece and enhance accuracy, making the process safer and more effective.
Best Practices and Safety Checklist
If you decide to use a mortise bit drill press setup, preparation and safety are everything. The difference between success and failure lies in how well the machine is tuned, how firmly the workpiece is secured, and how carefully each cut is executed.
Following a few key best practices will help you get cleaner results and avoid unnecessary damage.
Start by inspecting your drill press. Ensure that the spindle runs true with no noticeable wobble, and that the quill moves smoothly without excessive play. The table should be locked tightly, and the base must be stable to prevent vibration.
Any looseness in the machine will magnify errors during mortising and could cause the bit to bind or chatter.
Next, focus on toolholding and workholding. A standard drill chuck is not ideal for this kind of work because it cannot resist heavy downward pressure. Use a mortising attachment or a collet-style chuck that locks the bit securely.
Always clamp the workpiece in a solid vise or use a hold-down fixture to prevent lifting as the chisel cuts. Never hold the workpiece by hand during operation.
Keep the cutting speed low and feed gentle. Mortising requires slower RPMs to reduce heat and avoid burning the wood or dulling the bit. Withdraw the bit frequently to clear chips and prevent clogging, which can cause overheating and tear-out.
Finally, prioritize personal safety. Always wear eye protection, remove loose clothing, and ensure the chuck key is removed before starting the drill press.
Keep your hands clear of the chisel area, and never force the bit deeper than necessary. A slow, steady approach ensures precision, tool longevity, and safer operation.
How to verify machine condition before mortising?
Check spindle alignment, quill movement, and ensure all bolts and locks are tight before beginning.
What type of toolholding should be used?
Use a mortising attachment or collet chuck rather than a standard drill chuck for better grip and accuracy.
How should the workpiece be secured?
Clamp it firmly in a vise or under a hold-down clamp to stop it from moving or lifting during cutting.
What speed and feed settings are best?
Use slow RPMs with light, controlled feed pressure, clearing chips often to prevent overheating.
What safety steps should never be skipped?
Wear safety goggles, avoid hand-holding materials, remove the chuck key, and keep your focus throughout each cut.
Alternatives and Better Options
Even though it is possible to use a mortise bit drill press under limited conditions, it is not the best or safest way to achieve clean, accurate mortises.
There are several alternatives that not only improve precision but also protect your machine and tools from unnecessary stress. Choosing the right equipment can make your joinery work faster, safer, and far more consistent.
The most effective alternative is a dedicated mortising machine. These machines are specifically engineered for creating square holes with mortising bits and include features like a rigid column, hold-down clamps, and depth stops.
They are built to withstand the lateral pressure of mortising and provide perfect alignment for repeatable joints. For anyone who regularly builds furniture or cabinetry, investing in one is a smart long-term decision.
Another excellent option is using a router with a mortising jig. A plunge router, combined with a guide fence or jig, can cut clean mortises in both softwood and hardwood.
It offers greater control over depth, width, and position, producing professional-quality joints without straining a drill press. Routers also allow for different bit types, making them more versatile for other woodworking tasks.
For occasional woodworkers, drill press mortising attachments provide a middle ground. These attachments include hold-downs and chisel guides that help convert a drill press into a simple mortiser. While not perfect, they’re suitable for hobbyists who only cut mortises occasionally.
Ultimately, the best option depends on how often you perform mortising and what level of precision you need. Selecting the proper tool ensures efficiency, accuracy, and safety with every cut.
Why invest in a dedicated mortiser?
It’s designed to handle the pressure of square-hole cutting safely and accurately.
When should you use a router instead?
When you need flexibility, cleaner edges, and adjustable mortise sizes without specialized machines.
Can a mortising attachment improve a drill press?
Yes, it adds support and stability, making it a viable solution for light or infrequent mortising.
What if you only need mortises occasionally?
A router jig or hiring a local shop can save time and avoid unnecessary machine wear.
How to decide between tools?
Base your choice on joint complexity, wood type, frequency of use, and the precision your project requires.
Conclusion
In the end, using a mortise bit drill press can be done, but it comes with clear limitations. A drill press simply isn’t designed for the lateral stress, pressure, and precision that proper mortising requires.
While it might work for shallow cuts in softwood when paired with a quality mortising attachment and careful setup, it remains a compromise solution rather than a professional one.
For consistent, accurate, and clean results, a dedicated mortising machine or a router with a mortising jig is the far better choice. These tools provide the rigidity, hold-down control, and precision necessary for high-quality wood joints.
Attempting to push a drill press beyond its purpose not only risks damaging the machine but also compromises the integrity of your joinery.
Choosing the right tool for the job will always lead to safer operation, smoother workflow, and stronger results. In woodworking, efficiency and craftsmanship come from respecting the limits of your tools—and using each one where it truly excels.

I’m John F. Nicholas, the founder, lead writer, and drill enthusiast behind 101drill.com. With years of hands-on experience in power tools and DIY projects, I created this platform to share practical knowledge, expert tips, and real-world insights to help others master the art of drilling.