
You’ve got your 1/4-inch wood dowels ready, the glue on the bench, and your drill in hand. Then you stop for a moment and think — what size drill bit should I use for a 1/4-inch dowel?
It’s one of those small but crucial questions that can make or break your woodworking project. Drill too small, and the dowel won’t fit; drill too large, and the joint will be loose and weak.
Every woodworker, from hobbyist to professional, has faced this at least once. Choosing the right bit size seems simple, but there’s a science behind creating a perfect dowel joint that’s strong, snug, and precise.
This guide covers everything you need to know about choosing the correct drill bit for a 1/4 wood dowel, understanding the fit types, accounting for glue space, and drilling techniques that ensure professional-quality results every time.
By the end, you’ll know not only which bit size works best but also how to drill accurately, align perfectly, and create joints that hold firm for years.
Understanding How Dowel Fit Works
Before picking a drill bit, it helps to understand what makes a dowel joint strong. The entire joint depends on fit, which controls how tightly the dowel sits in its hole.
There are three main fits: loose fit, standard fit, and tight fit. A loose fit means the dowel slides in easily but relies heavily on glue. It’s fast to assemble but weaker structurally.
A tight fit requires tapping the dowel in gently with a mallet. It offers excellent strength but can squeeze out too much glue if the hole is too small.
A standard fit sits between the two — snug enough to hold by friction but not so tight that it damages the hole walls. This is the most reliable type for furniture or structural woodworking.
The ideal hole size changes slightly depending on wood density, moisture, and dowel material. Understanding this balance ensures you choose a drill bit that creates just the right friction for a lasting joint.
What Size Drill Bit for a 1/4 Wood Dowel
For a 1/4-inch wood dowel, the correct drill bit size depends on the fit you want. In most cases, the best drill bit is a 1/4-inch bit — exactly the same as the dowel’s nominal size.
However, real dowels are rarely a perfect 0.250 inches. They often measure slightly smaller, around 0.245 to 0.248 inches. This means drilling a 1/4-inch hole gives a snug but workable fit.
If your dowels are slightly oversized or you want an easier insert with more glue space, a 17/64-inch drill bit works better. It’s just one size up and creates a comfortable fit that’s still secure.
For hardwood dowels or very tight joints, you can stick with the exact 1/4 bit but lightly sand or shave the dowel ends to ease insertion.
Softwoods compress more easily, so even a 1/4 hole may feel loose. In that case, switch back to the 15/64 bit for extra grip.
So the short answer:
- Standard fit: 1/4-inch drill bit
- Tight fit: 15/64-inch drill bit
- Loose fit: 17/64-inch drill bit
Testing on scrap wood before final drilling is always wise. Wood density, dowel coating, and glue thickness can subtly change the result.
How to Choose the Right Drill Bit Type
Not all drill bits perform equally in wood dowel joinery. The type of bit affects precision, speed, and hole quality.
Brad point bits are the best choice for wood. Their sharp center tip prevents wandering, ensuring holes are perfectly centered. The outer spurs slice cleanly through fibers, leaving smooth edges.
Twist bits can work but tend to tear fibers around the entry and exit points. They’re fine for rough carpentry but not ideal for clean furniture joints.
Forstner bits are useful when you need flat-bottomed holes, such as for shallow dowel joints or decorative plugs. They drill cleanly with sharp edges.
Avoid spade bits for dowel holes — they cut fast but roughly, often causing tear-out and uneven diameters.
Finally, always use sharp bits. A dull drill bit burns wood, widens the hole slightly from friction, and ruins alignment. Clean holes ensure dowels slide in smoothly and stay firm once the glue cures.
Choosing the right bit type is just as important as picking the right size.
How to Drill Perfect Holes for 1/4 Dowels
Drilling straight, consistent holes is essential for strong dowel joints. Even if your bit size is correct, misalignment can weaken the joint.
Start by marking your hole location precisely with a center punch or awl. This prevents the bit from wandering during drilling.
Clamp the wood securely on a flat surface. Movement during drilling can create angled holes that won’t align correctly.
If you’re drilling multiple matching holes, use a dowel jig. It ensures perfect alignment and consistent depth on both pieces.
Set your drill speed to medium — too fast can burn the wood, too slow may splinter it. Keep steady, even pressure throughout the cut.
Stop drilling as soon as you reach your desired depth. A simple depth stop collar or masking tape wrapped around the bit helps maintain consistency.
After drilling, clean the holes of dust using compressed air or a small brush before inserting dowels. This ensures a firm glue bond without trapped debris.
Proper technique makes your dowel joints accurate, strong, and professional-looking every time.
Accounting for Glue Space and Expansion
When inserting dowels, it’s easy to overlook how much space glue takes up inside the hole. Too much glue can cause hydraulic pressure and split the wood or force the dowel back out.
For a 1/4 dowel, a few drops of glue are all you need. Spread it evenly around the dowel, not inside the hole. This prevents buildup at the bottom that can stop full insertion.
Wood swells slightly when it absorbs moisture from glue, tightening the fit even more. That’s why a slightly larger drill bit, like 17/64, sometimes gives a better result with wood glue.
Avoid coating the entire dowel at once. Instead, cover about two-thirds of its length, leaving the tip dry so air and glue can escape as you press it in.
Once inserted, tap gently with a mallet until it sits flush. Wipe off excess glue immediately to prevent staining.
Understanding how glue and wood expansion interact ensures your joints stay tight without cracking or bulging later.
How Wood Type Affects Drill Bit Choice
Different woods behave differently when drilled. Density, grain direction, and moisture content all play a role in how tightly a dowel fits.
Softwoods like pine or spruce compress easily. A standard 1/4-inch bit may create a looser hole, so a 15/64-inch bit often works better.
Hardwoods such as oak, maple, or walnut resist compression. You can use the exact 1/4-inch bit for a snug, perfect fit.
For oily woods like teak or mahogany, glue adhesion can be tricky. Lightly sanding both the hole and dowel improves bonding.
Moisture also matters. Damp wood swells after drilling, tightening the fit once it dries. For freshly cut or humid wood, drill slightly larger holes.
Always test the fit on scrap pieces from the same material before committing. Wood density varies even within the same species, and small differences can affect hole precision.
Adapting your bit size to the wood type ensures better accuracy and stronger joints in every project.
Using Dowel Jigs and Guides for Accuracy
A dowel jig is one of the most useful tools for consistent, precise dowel joinery. It aligns your drill bit perfectly with the workpiece edge or surface.
Insert your drill bit through the jig’s guide bushings and drill straight into the marked hole. This keeps every dowel hole at the same angle and depth.
Dowel jigs come in adjustable models for different board thicknesses. Some even include centering pins that mark matching holes automatically.
If you don’t have a dowel jig, a drill press with a fence and depth stop works just as well for accuracy.
Always double-check alignment between both workpieces before gluing. Misaligned holes can cause gaps, uneven joints, or weak structural connections.
Adding this simple tool to your process takes your dowel work from beginner to professional-grade precision.
Consistency is everything in woodworking, and dowel jigs make it effortless.
Common Problems When Drilling for 1/4 Dowels
Even experienced woodworkers encounter issues when drilling dowel holes. The most common problem is tear-out, where fibers break around the hole edges.
Using a backing board helps prevent this. It supports the fibers as the bit exits, leaving a clean hole.
Another issue is misalignment. If the drill wanders or tilts, the dowel won’t fit properly between pieces. Always use a jig or drill press to keep holes straight.
Sometimes the hole ends up too loose because of a worn drill bit or excessive wobble. Sharpen or replace dull bits regularly.
On the other hand, too tight a hole can cause splitting or push glue out. Sand the dowel lightly or switch to a slightly larger bit.
Finally, don’t overlook dust buildup. Sawdust in the hole weakens glue adhesion and prevents full seating. Clean every hole thoroughly before assembly.
Fixing these common issues will give you cleaner holes, smoother fits, and stronger joints in every project.
Testing Fit Before Final Assembly
Always test your dowel fit before applying glue. This small step saves time, frustration, and wasted material.
Drill one test hole in scrap wood from the same project stock. Insert a dowel halfway and see how it feels.
If it slides too easily, your hole is slightly oversized — switch to the next smaller bit. If it requires hammering, the hole is too tight. Lightly sand the dowel ends or increase bit size slightly.
Aim for a fit that allows firm hand pressure insertion with a gentle mallet tap at the end.
Also, test your glue. Some wood glues expand slightly, affecting the final tightness.
Once you find the perfect combination, use the same drill setup for all holes to maintain consistency.
Taking five minutes to test saves hours of rework later — a hallmark of careful craftsmanship.
Best Practices for Strong Dowel Joints
For lasting strength, follow these key dowel joinery habits.
Always drill holes straight and to equal depth on both sides of the joint. Uneven depth weakens the connection and causes alignment issues.
Use high-quality wood glue designed for hardwoods or construction-grade adhesives for heavier loads.
Coat both the dowel and the hole lightly. Too much glue causes hydraulic pressure; too little leads to gaps.
After assembly, clamp the joint tightly for at least 30 minutes, or longer if using slow-dry glue. Clamping ensures full contact and uniform drying.
Once cured, sand flush any exposed dowel ends for a clean, seamless finish.
Following these steps guarantees dowel joints that are sturdy, precise, and built to last.
Alternative Joining Methods to Dowels
Dowels are popular for their simplicity, but they’re not the only option. Other joinery methods can sometimes offer faster or stronger connections.
Pocket holes are a quick alternative for non-visible joints, commonly used in cabinetry. They require less precision and are easy to assemble.
Biscuit joinery uses thin oval biscuits that swell with glue, providing good alignment for panels or frames.
Domino joiners, though more expensive, combine the accuracy of dowels with the strength of mortise-and-tenon joints.
For rustic or heavy furniture, traditional mortise and tenon joints remain unmatched in strength.
Dowels, however, remain the go-to for projects needing both simplicity and precision. They balance strength and ease of assembly like no other method.
Knowing your alternatives helps you choose the best joinery for each project’s style and durability needs.
Maintenance and Storage of Drill Bits
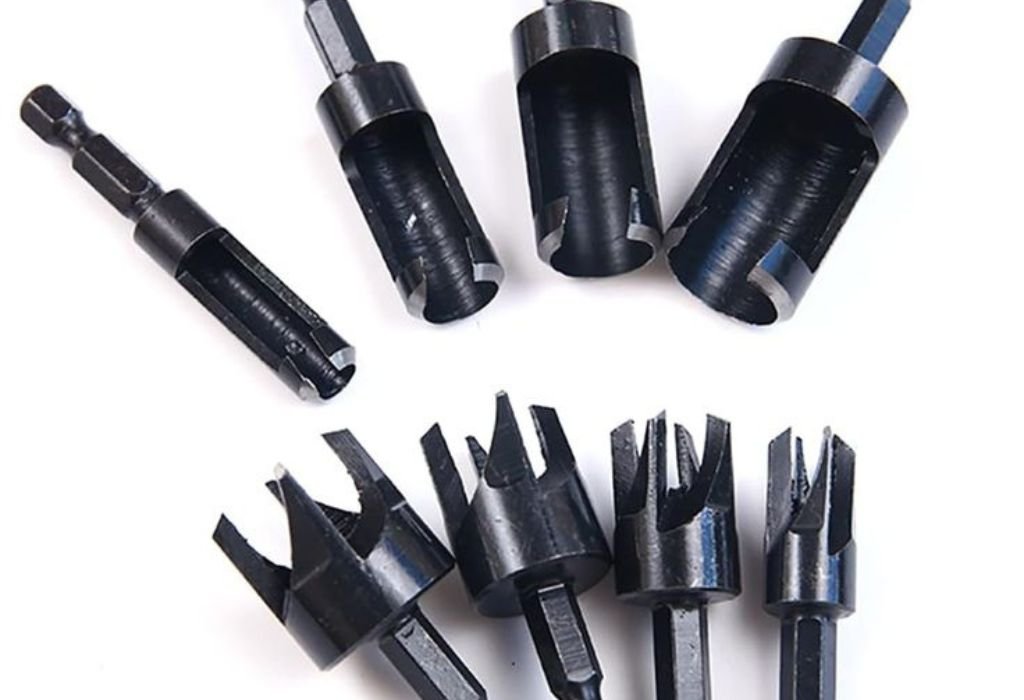
Proper drill bit care ensures accuracy for years. Clean bits after each use to remove wood dust and resin buildup.
Lightly oil metal bits before storing to prevent rust, especially if your workshop is humid.
Keep bits organized in labeled cases by size — losing track of fractions like 15/64 or 17/64 can cause mistakes in tight-tolerance work.
Sharpen brad point and twist bits occasionally using a fine file or sharpening tool. Dull bits cause heat buildup and inaccurate holes.
Avoid dropping bits on hard surfaces; even small bends make them wobble and enlarge holes during drilling.
Store your most-used dowel bits separately, ready for quick access. A clean, sharp set of bits is the foundation of perfect dowel joinery every time.
Common Questions About Drill Bit Sizes for 1/4 Wood Dowels
What size drill bit for a 1/4 wood dowel?
Use a 1/4-inch bit for a snug fit, or 17/64 for a slightly looser fit.
Can I use a 1/4 drill bit exactly for 1/4 dowels?
Yes, most dowels are slightly smaller than labeled, so it fits tightly.
What if the dowel won’t fit into the hole?
Sand the dowel ends lightly or use the next larger bit size.
How deep should I drill for 1/4 dowels?
Drill about half the dowel length into each piece, leaving room for glue.
Should I glue the dowel before inserting?
Yes, apply a thin layer of glue on the dowel for better bonding.
Can I use twist bits instead of brad point bits?
You can, but brad points give cleaner, more precise holes in wood.
What if my drill hole is too loose?
Use thicker glue, a slightly larger dowel, or fill the hole with wood dust and glue.
Can I drill through both pieces at once?
Yes, if clamped tightly together and aligned perfectly.
Why is my dowel joint misaligned?
Your holes weren’t drilled straight — use a dowel jig next time.
Should I clamp after gluing dowels?
Always. Clamping ensures even pressure and stronger joints.
How do I prevent wood from splitting near dowel holes?
Drill slowly and avoid drilling too close to edges.
Do I need to countersink dowel holes?
Not for most joints, but shallow countersinks help hide dowel heads.
Can I reuse old dowel holes?
Yes, fill with epoxy filler and redrill once cured.
Is it okay to drill slightly deeper than needed?
Yes, a little extra depth allows space for glue buildup.
What’s the best glue for dowels?
Use wood glue like Titebond or Gorilla Wood Glue for strong, long-lasting joints.
Conclusion
Choosing the right drill bit size for a 1/4 wood dowel might seem minor, but it defines the strength, precision, and appearance of your entire project.
For most cases, a 1/4-inch drill bit provides the perfect fit. When wood type or glue expansion requires adjustment, 15/64 gives extra tightness and 17/64 allows a looser, easier insert.
The secret is testing first, drilling cleanly, and allowing glue to do its work. Combine those habits with sharp bits, proper alignment, and a steady hand, and your dowel joints will always be strong and flawless.
In woodworking, perfection comes from patience. Measure carefully, drill accurately, and let craftsmanship guide every step.
With the right bit and the right technique, a simple 1/4 dowel becomes a professional-grade connection that lasts a lifetime.
Now you know exactly what size drill bit to use — and how to make it count every time you build.

I’m John F. Nicholas, the founder, lead writer, and drill enthusiast behind 101drill.com. With years of hands-on experience in power tools and DIY projects, I created this platform to share practical knowledge, expert tips, and real-world insights to help others master the art of drilling.