
Most people pick up a hand drill without thinking about how many parts are working together inside. At first it feels simple because squeezing the trigger spins the bit and drilling just happens naturally.
But when the drill slips overheats or refuses to grip a bit correctly the importance of each component becomes obvious. Many problems that seem complicated are actually caused by a single worn or misunderstood part.
A hand drill is more than a motor and chuck. Every switch gear bearing and internal connector plays a role in transferring power smoothly and safely to the drill bit.
Understanding the parts of a hand drill helps beginners avoid mistakes and helps experienced users maintain their tools properly. Knowing what each component does makes troubleshooting easier and prevents unnecessary repairs.
This guide explains every major part of a hand drill in simple detailed language. By the end even a first-time user will understand how the drill works from the inside out and how to keep it performing reliably.
Drill Housing and Body Structure Explained

The housing is the outer shell that protects all internal components of the hand drill. It is usually made from durable plastic or metal to withstand drops vibration and heat during extended use. Without this protective structure the drill would be unsafe to handle and easily damaged.
The shape of the housing is designed for comfort and stability. Curved surfaces and textured grips help the user hold the drill securely without slipping. This ergonomic design reduces hand fatigue and improves control during drilling.
Inside the housing are mounting points that secure the motor gears and switches. These supports prevent internal movement and keep components properly aligned. A loose housing would allow vibration that causes noise and performance issues.
Ventilation slots are built into the housing to release heat. Airflow passes through the drill to cool the motor and prevent overheating during heavy use. Blocking these vents can shorten the drill’s lifespan and reduce power output.
Some drills include reinforced sections around high stress areas. These areas protect internal wiring and reduce cracking near the handle or chuck. This reinforcement is especially important for professional-grade tools.
Understanding the drill housing helps users maintain cleanliness and storage. Keeping the exterior clean prevents debris from entering ventilation slots. Proper handling and storage ensure longer lasting performance and safety.
The Trigger Switch and Power Control System
The trigger switch is the primary control that starts and stops the drill. When the user squeezes the trigger electrical current flows to the motor and begins rotation. Releasing the trigger cuts the power immediately for safe stopping.
Many hand drills include a variable speed trigger. Light pressure produces slow rotation while full pressure increases speed significantly. This control allows precise drilling in delicate materials like plastic or soft wood.
A forward and reverse switch is located near the trigger. This switch changes motor direction and allows drilling in or removing screws. Proper use prevents stripping fasteners and improves efficiency during projects.
Some drills include a trigger lock button for continuous operation. This feature keeps the drill running without holding the trigger. It is useful for polishing or sanding where long operation is needed.
Internal wiring connects the trigger switch to the power source and motor. Damaged wiring may cause intermittent starting or overheating. Maintaining clean dry contact points ensures reliable power delivery.
Understanding the trigger system helps diagnose common problems. A drill that will not start may have a faulty switch rather than a bad motor. Knowing these functions supports faster repairs and safer operation.
Electric Motor and Power Delivery Mechanism
The electric motor is the heart of the hand drill. It converts electrical energy into rotational motion that drives the chuck and drill bit. Without the motor the drill cannot generate the torque needed for drilling.
Most hand drills use brushed motors with internal carbon brushes. These brushes transfer power to the spinning armature and require occasional replacement. Worn brushes cause sparking reduced power and overheating.
Ventilation around the motor prevents heat buildup during continuous use. Overheating reduces motor efficiency and weakens insulation on internal wiring. Keeping air vents clear helps the motor run cooler and longer.
The motor shaft connects directly to the transmission system. This connection transfers rotational force smoothly into the gears. A damaged shaft causes vibration noise and poor performance.
Motor power varies depending on drill type and application. Higher wattage motors deliver stronger torque for drilling metal or masonry. Lower power models are suitable for light household tasks.
Understanding how the motor works helps users avoid misuse. Allowing the drill to cool between long operations prevents premature failure. Proper care ensures consistent power and longer motor lifespan.
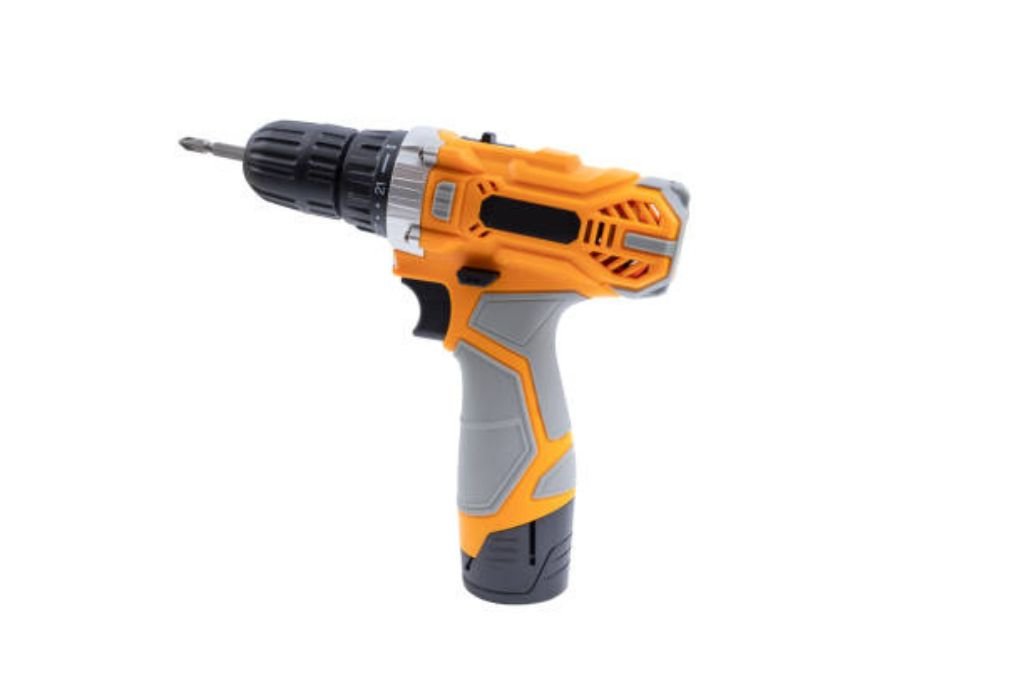
Battery and Power Source System in Cordless Hand Drills
The battery is the primary power source for cordless hand drills and replaces the need for a direct electrical connection.
Rechargeable lithium ion batteries are most common because they provide consistent power output without fading quickly during use. Older nickel based batteries are heavier and lose charge faster which limits performance.
Battery voltage determines how much power the drill can deliver. Higher voltage batteries provide stronger torque for drilling through dense materials like metal or masonry. Lower voltage options are suitable for small household tasks and lightweight fastening.
Battery capacity is measured in amp hours and affects how long the drill can operate before recharging. Larger capacity batteries extend runtime but also add weight to the tool. Choosing the right balance depends on the type of work and user comfort.
Most cordless drills feature a slide in or clip on battery design for easy replacement. Quick change systems allow users to swap batteries mid project without delay. This design improves workflow for professionals who rely on continuous operation.
Some drills include built in battery indicators to display remaining charge. This prevents unexpected shutdown during drilling and helps plan recharge timing. External chargers may offer fast charging options to reduce downtime.
Understanding the battery system helps users maintain performance and safety. Avoiding extreme temperatures preserves battery lifespan and prevents internal damage. Proper charging habits ensure reliable power delivery for every drilling task.
Gearbox and Torque Transfer Components
The gearbox transfers motor rotation into usable drilling power. It contains gears that adjust speed and torque depending on user needs. Without a gearbox the drill would spin too fast and lack the control required for precision.
Inside the gearbox are metal or reinforced plastic gears that interlock. These gears reduce speed while increasing torque for harder materials. Proper lubrication prevents wear and maintains smooth operation.
Some drills feature a two-speed gearbox controlled by a top switch. Low speed provides more torque for driving screws or drilling metal. High speed is used for fast drilling through soft materials.
The planetary gear system is common in cordless drills. It distributes force evenly and allows compact high-torque design. This system improves durability without increasing tool size.
A damaged gearbox produces grinding noises and inconsistent rotation. Continuing to use the drill may cause further mechanical failure. Professional servicing or replacement is required in severe cases.
Understanding the gearbox helps users choose the correct speed for each task. Using the right setting prevents strain on both the drill and the bit. Proper operation improves performance and extends tool lifespan.
Clutch and Torque Adjustment Ring Function
The clutch is a key component that controls torque output in a hand drill. It prevents overdriving screws and protects both the fastener and material from damage. When resistance increases the clutch slips and stops rotation while the motor continues running.
The torque adjustment ring surrounds the front of the drill behind the chuck. It features numbered settings that allow users to select how much force the drill applies. Lower settings are ideal for delicate tasks while higher settings handle tougher materials.
Using the clutch correctly improves precision during screw driving. It prevents stripping screw heads and reduces the chance of burying fasteners too deeply. This control is especially valuable when working with soft wood or thin metal.
In drilling mode the clutch bypasses torque limitation entirely. This setting allows full motor power for boring holes and heavy duty tasks. Users must switch back to numbered settings when returning to fastening work.
Wear or damage to the clutch can cause slipping even at high settings. This results in reduced performance and difficulty completing tasks that require strong torque. Replacing worn internal parts restores proper operation.
Understanding how the clutch works helps users choose the correct setting for different materials. Proper use protects both the tool and work surface. This improves accuracy and extends the life of screws drill bits and internal components.
Chuck Assembly and Bit Holding Mechanism
The chuck is the component that holds the drill bit securely. It clamps the bit using internal jaws and prevents slipping during rotation. Without a functioning chuck drilling would be unsafe and ineffective.
Keyed chucks require a separate tool to tighten and loosen. This provides strong grip for heavy duty drilling. Keyless chucks allow hand tightening and faster bit changes for convenience.
Inside the chuck are three jaws that move inward or outward. Rotating the sleeve changes jaw position and adjusts grip. Even pressure ensures the bit remains centered and stable.
The chuck threads onto the drill spindle. A retaining screw may secure it depending on the model. Removing the chuck allows cleaning or replacement when damaged.
A worn chuck causes wobbling or slipping during drilling. This affects accuracy and increases risk of bit breakage. Inspecting jaws regularly prevents these issues.
Understanding the chuck mechanism helps users insert bits properly. Proper tightening ensures safe drilling and smoother performance. Regular cleaning keeps the chuck operating reliably.
Auxiliary Handle and Stability Support Features
Some hand drills include an auxiliary handle for additional control. This handle attaches near the front of the drill and allows two-handed operation. It improves balance when drilling through tough materials.
The auxiliary handle reduces wrist strain during extended use. Holding the drill with both hands distributes force more evenly. This reduces fatigue and improves accuracy.
Most auxiliary handles are adjustable and rotate around the drill body. Users can position the handle for overhead horizontal or angled drilling. This flexibility supports more comfortable operation in tight spaces.
Textured grips provide slip resistance even when hands are sweaty or dusty. Rubber or molded plastic enhances comfort during long tasks. Secure grip prevents loss of control while applying pressure.
Some drills include vibration-reducing handles. These features decrease user fatigue by absorbing movement. Reduced vibration also improves drilling precision and tool longevity.
Understanding auxiliary handle function improves safety and performance. Using both hands prevents sudden rotation from high torque. Proper support ensures smoother operation on demanding projects.
Cooling and Ventilation System for Heat Management
The cooling system in a hand drill prevents overheating during continuous use. Air vents built into the housing allow airflow to pass through the motor area. This flow removes heat generated by electrical and mechanical components.
Internal fans rotate with the motor to increase ventilation. These fans draw cool air inward and push hot air outward through the exit vents. Proper airflow maintains safe operating temperature and prevents overheating.
Blocked vents reduce cooling efficiency and increase motor strain. Dust debris or accidental hand placement can restrict airflow without the user noticing. Over time this leads to reduced power and potential internal damage.
Heat buildup affects lubrication and insulation inside the drill. Excessive temperature can dry out grease in the gearbox and weaken wire coatings. This increases friction wear and risk of electrical failure.
Allowing the drill to rest between long drilling cycles prevents temperature spikes. Short breaks enable cooling and maintain consistent performance. Continuous use without rest shortens motor lifespan significantly.
Understanding the ventilation system helps users protect their tools. Keeping vents clean and avoiding operation in heavy dust improves airflow. Proper cooling ensures the drill remains reliable and safe during demanding tasks.
Frequently Asked Hand Drill Component Questions
Do all hand drills have the same internal parts?
Most share common components but designs vary by brand. Features change based on power type and purpose. Always check the manual for specifics.
Why does my drill get hot near the vents?
Heat comes from motor workload and restricted airflow. Cleaning vents improves cooling. Allow the drill to rest during long use.
What causes a drill chuck to wobble?
Worn jaws or a bent bit create wobbling. Cleaning or replacement may be needed. Inspect both the bit and chuck.
Can I replace the drill motor at home?
Only if you have experience with electrical repairs. Incorrect handling is unsafe. Professional service is recommended.
Why is my trigger switch not responding?
Dust or worn contacts may block power flow. Cleaning or replacement may solve the issue. Disconnect power before inspection.
Do cordless and corded drills have different parts?
Cordless models include a battery system and control board. Core components remain similar. Differences depend on power delivery.
How often should I lubricate the gearbox?
Only when servicing or instructed by the manufacturer. Over-lubrication causes issues. Most drills are factory sealed.
What does the forward reverse switch control?
It changes rotation direction for drilling or screw removal. Proper use prevents fastener damage. Always stop the drill before switching.
Why does my drill lose power while running?
Overheating worn brushes or weak battery may be the cause. Checking each component helps identify the problem. Maintenance restores performance.
Can I operate a drill without the auxiliary handle?
Yes but stability may decrease on high torque tasks. Using the handle increases safety. It is recommended for heavy drilling.
Conclusion
Understanding the parts of a hand drill makes operation safer and troubleshooting easier. Each component from the housing to the chuck plays a specific role in transferring power smoothly to the drill bit. Knowing how these parts work prevents misuse and damage.
Regular maintenance such as cleaning vents inspecting the chuck and avoiding overload improves drill lifespan. Small issues become easier to diagnose when users recognize the function of each internal system.
Choosing the right settings and handling techniques reduces strain on components. Proper operation ensures stable performance and prevents overheating or mechanical failure.
Whether used for simple home repairs or professional work a hand drill performs best when its parts are understood and cared for. With the right knowledge every user can improve safety efficiency and long term reliability.

I’m John F. Nicholas, the founder, lead writer, and drill enthusiast behind 101drill.com. With years of hands-on experience in power tools and DIY projects, I created this platform to share practical knowledge, expert tips, and real-world insights to help others master the art of drilling.