
Most people only think about measuring a chuck key when the original one goes missing. At first it seems like any similar sized key should work until it slips and refuses to turn the chuck correctly.
This usually happens in the middle of a project when the bit needs changing and nothing fits. The wrong key can damage the chuck teeth or leave the drill completely unusable.
A chuck key must match the drill precisely based on pilot diameter and gear tooth size. Even a tiny difference prevents the key from engaging properly and makes tightening impossible.
Understanding how to measure a chuck key saves time frustration and unnecessary tool replacement. With the right steps anyone can identify the correct size without guessing.
This guide explains the measurement process clearly so both beginners and experienced users can find the perfect match confidently and safely.
What Measuring a Chuck Key Really Means
Measuring a chuck key is more than checking its overall length. The important dimensions relate to the pilot size and the tooth gear that engages the chuck. These measurements determine whether the key will fit securely and turn the mechanism correctly.
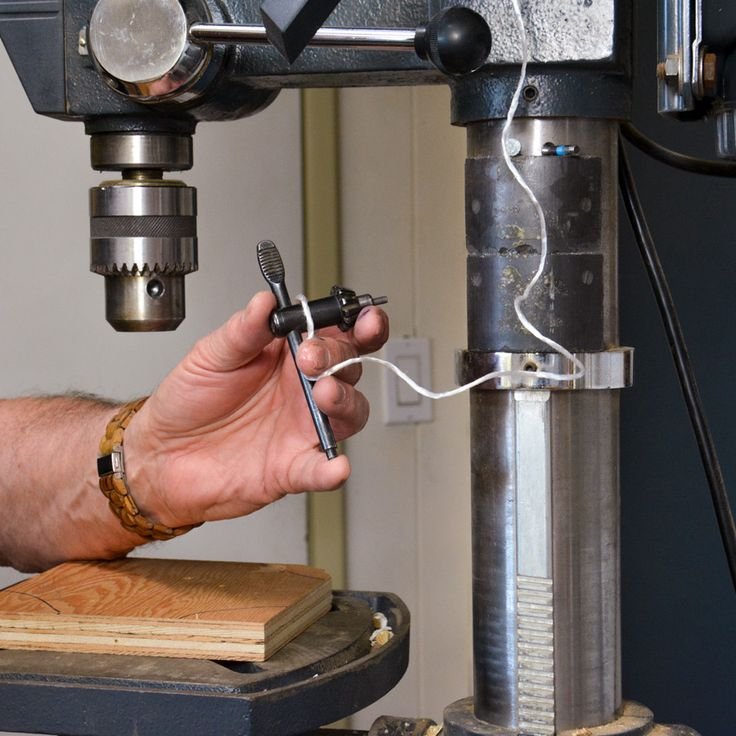
The pilot is the round shaft that sits inside the chuck’s side hole. If the pilot is too small it wobbles and cannot apply force safely. If it is too large it will not enter the hole at all and becomes unusable.
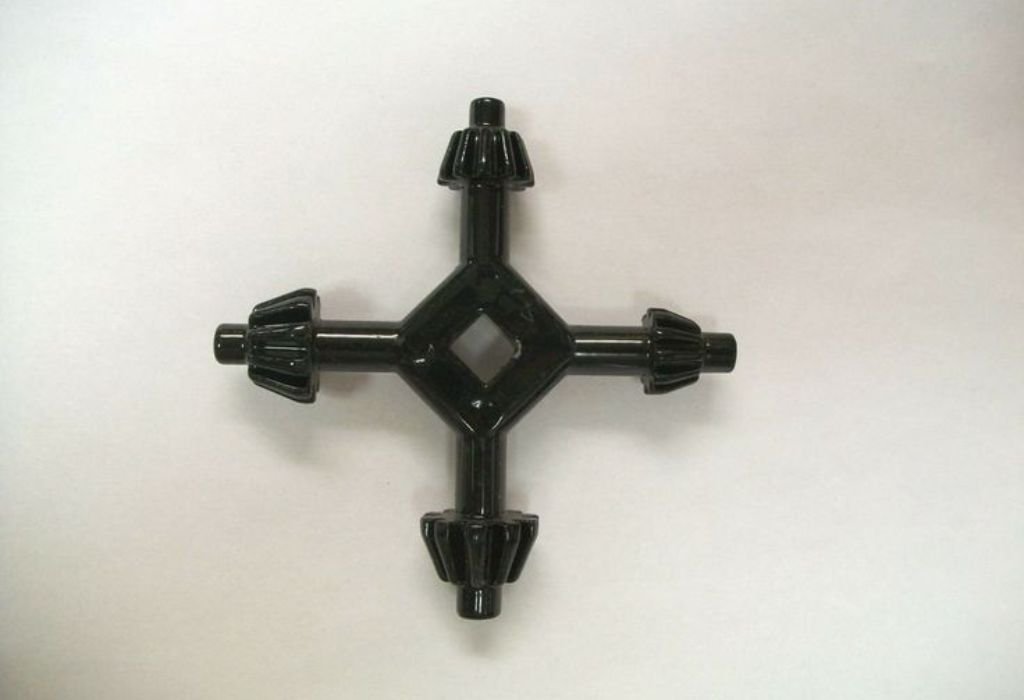
The teeth of the chuck key must match the gear ring on the chuck. These teeth transfer torque from the user’s hand to the tightening system. If the pitch or spacing is incorrect the key will slip and damage the chuck.
Some users assume that chuck keys are universal but they are not interchangeable. Different drill brands and sizes use different gear configurations. Choosing the wrong key leads to stripped teeth and safety hazards.
The measurement process ensures proper engagement of the key and chuck. Correct sizing maintains secure tightening while preventing mechanical wear. This accuracy improves drilling performance and tool longevity.
Understanding what makes a chuck key compatible is the first step in selecting the right replacement. Measuring the proper components avoids frustration and protects both the tool and user.
Why Measuring a Chuck Key Matters Before Replacement
A properly sized chuck key ensures the drill bit stays secure during operation. When the key fits correctly the jaws tighten evenly and prevent slipping. This improves drilling accuracy and prevents accidents.
Using the wrong size key can result in stripped gear teeth. Damage occurs when the key slips under pressure and grinds against the chuck surface. Repairing the chuck is more expensive than replacing a key.
A missing chuck key often leads users to try random sizes. Guessing usually results in forced engagement that damages both tools. Accurate measurement avoids this problem entirely.
Incorrect key sizing can cause uneven tightening of the drill bit. This leads to wobbling during drilling and increases the risk of bit breakage. Precision matters even in small hand tools.
Professional workshops require reliable chuck performance to maintain safety standards. Measuring replacement keys ensures consistent tool operation throughout frequent usage. This reduces downtime and improves productivity.
Understanding the importance of proper sizing prevents costly mistakes. Accurate measurement guarantees compatibility and reliable function. Taking time to measure avoids long term damage and tool failure.
Tools Needed to Measure a Chuck Key Accurately
A caliper is the most reliable tool for measuring a chuck key pilot diameter. Digital or manual versions provide precise readings down to small increments. This accuracy ensures the correct match without estimation.
A ruler may be used if a caliper is unavailable. While less precise it still provides a general measurement for comparison. Careful alignment reduces the chance of error during reading.
A flashlight helps illuminate the chuck hole where the pilot inserts. Proper lighting makes it easier to see internal surfaces and determine correct alignment. This prevents misreading caused by shadows or debris.
A magnifying glass can assist with inspecting tooth spacing on both the key and chuck. Small differences in tooth shape affect engagement performance. Detailed viewing helps identify proper matching.
Pen and paper are useful for recording measurement results. Keeping notes avoids confusion when comparing replacement options. Documentation also helps when ordering parts online.
Having the right tools makes the process easier and more accurate. Improvised measuring leads to mistakes and wasted purchases. Proper preparation ensures quick and successful chuck key identification.
How to Measure a Chuck Key Step by Step
Begin by measuring the pilot diameter using a caliper. Place the caliper jaws around the shaft and record the reading precisely. Make sure the pilot is clean and free of dirt for an accurate measurement.
Next measure the pilot length from the base to the tip. This ensures the key inserts fully into the chuck hole. Incorrect length prevents proper engagement and reduces turning force.
Compare the tooth gear of the key with the chuck gear visually. The teeth should align without slipping or excess spacing. Matching pitch ensures smooth transfer of torque during tightening.
Insert the pilot gently into the chuck hole without force. A proper fit feels snug but not tight. If the pilot wobbles or jams the measurement is incorrect.
Rotate the key slightly to test engagement of the teeth. Smooth rotation indicates correct fit while grinding suggests mismatch. Avoid forcing the key to prevent damage.
Completing these steps confirms proper sizing before purchasing a replacement. Accurate measurement eliminates uncertainty and ensures reliable tightening performance. This method works for all keyed drill chucks regardless of brand.
Common Mistakes When Measuring a Chuck Key
Many users measure the outer length of the key instead of the pilot diameter. Length does not determine compatibility and leads to incorrect selection. Focusing on the wrong dimension wastes time and money.
Some people assume keys are universal across drills. This results in forced usage that damages the chuck teeth. Each key must match its corresponding gear pattern.
Measuring while the pilot is dirty causes inaccurate readings. Debris changes the diameter slightly and leads to improper fit. Cleaning the pilot first ensures reliable measurement.
Holding the caliper loosely leads to inconsistent results. Light pressure ensures exact contact with the pilot surface. Tight or uneven grip distorts the reading.
Comparing keys visually without taking measurements causes errors. Small differences are difficult to judge with the eye alone. Precise measurement removes guesswork and prevents incorrect purchases.
Avoiding these mistakes ensures proper chuck key selection. Correct measurement protects both the key and chuck mechanism. Careful attention improves safety and drilling performance.
Quick Answers to Chuck Key Measurement Problems
Are chuck keys universal?
No chuck keys are not interchangeable. Each key must match the chuck gear. Using the wrong size causes slipping and damage.
Can I measure a chuck key without a caliper?
Yes a ruler provides an approximate measurement. A caliper gives more accuracy. Use caution when estimating size.
What is the most important measurement on a chuck key?
The pilot diameter is the primary measurement. It determines fit inside the chuck. Tooth alignment is also essential.
How do I know if the key is the correct size?
The pilot should fit snugly without wobbling. The teeth must engage smoothly. Test rotation gently for confirmation.
Can forcing a wrong key damage the chuck?
Yes forcing can strip teeth and deform the gear. This leads to permanent failure. Always avoid applying excess force.
Do drill presses and hand drills use different keys?
Sometimes depending on model and size. Always measure before replacement. Do not assume compatibility.
Can I file or modify a chuck key to fit?
No modification weakens the key and causes failure. Replacement is the proper solution. Always use correct sizing.
How often should a chuck key be replaced?
Only when worn lost or slipping. Proper use extends lifespan. Replacement is inexpensive and safer.
Why does my key slip even when sized correctly?
The chuck teeth may be worn or dirty. Cleaning or replacement may be required. Inspect both components.
Can I switch to a keyless chuck instead?
Yes many drills allow conversion. Match spindle thread type before upgrading. A keyless chuck offers faster bit changes.
Conclusion
Measuring a chuck key correctly ensures proper engagement and safe operation. The pilot diameter and tooth alignment determine whether the key fits and functions as intended. Guessing the size often leads to slipping damaged gears and wasted time.
Using the right tools such as a caliper improves accuracy and confidence. Following step by step measurement prevents mistakes and provides reliable results. Careful checking guarantees smooth tightening and better drilling performance.
Avoiding common errors protects both the chuck and the replacement key. Trying to force a poor fit creates long term damage and safety risks. Accurate measurement is the safest and most cost effective approach.
Understanding how to measure a chuck key makes replacing one simple and stress free. With proper technique the drill remains dependable and easy to use. Correct sizing ensures long lasting performance and safe operation for every project.

I’m John F. Nicholas, the founder, lead writer, and drill enthusiast behind 101drill.com. With years of hands-on experience in power tools and DIY projects, I created this platform to share practical knowledge, expert tips, and real-world insights to help others master the art of drilling.