
Drilling glass is already delicate but trying to drill it at an angle feels like stepping into unknown territory. Many people imagine the drill sliding across the surface before the hole even begins. One small slip could turn a simple project into a broken piece of glass on the floor.
Picture someone setting up their tools with confidence believing the angle will make the job easier. The moment the drill touches the glass it skids sideways instead of biting into the surface. The sound of scraping creates instant panic and the project stops before it starts.
Most beginners think angled drilling is impossible because the surface offers no grip. They try to push harder which only makes the glass more likely to crack. The real problem is not the angle but how quickly the pressure is applied.
Then there are those who approach the process patiently and get perfect results. They start with a shallow angle create a small groove and gradually increase depth. The drill stays steady the glass remains intact and the hole forms smoothly.
This guide is designed for anyone who wants that calm controlled outcome. You will learn how to prepare the surface start safely and keep the drill from slipping. Each step focuses on protecting the glass while creating a clean angled opening.
Why Drilling Glass at an Angle Is More Difficult
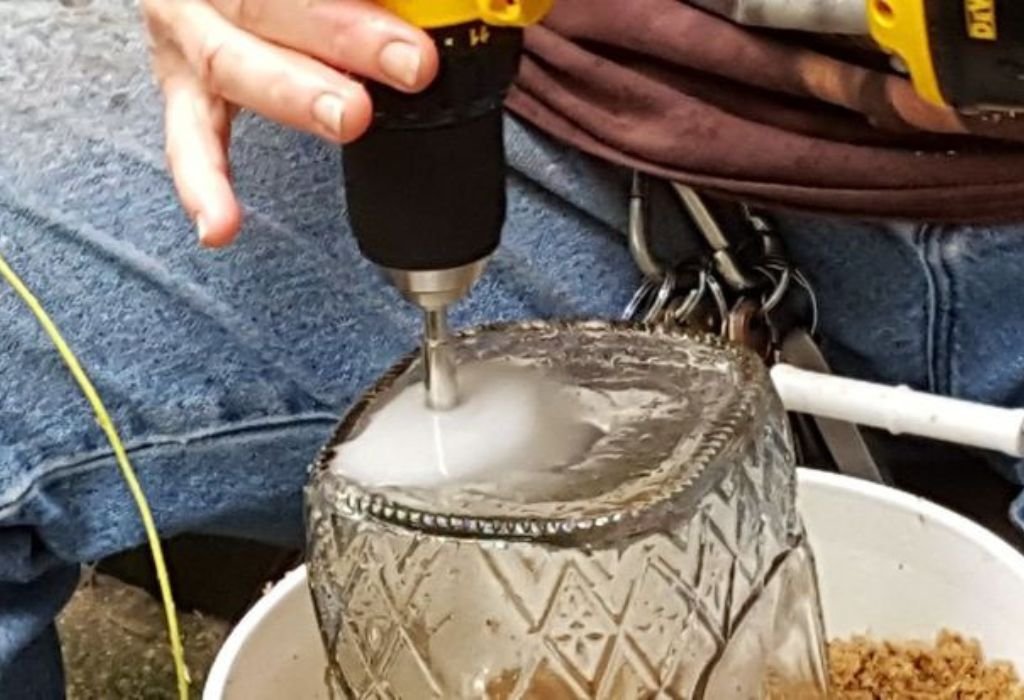
Drilling glass at an angle requires more control than drilling straight through. The surface offers no grip and the drill bit tries to slide instead of cutting. This makes the starting stage delicate and prone to cracking.
Angled drilling increases pressure on one side of the hole. The glass reacts unevenly because force concentrates on a single edge. Without proper support the stress can spread faster than expected.
Heat also builds differently during angled drilling. The bit touches a wider surface area which creates more friction. Without cooling the temperature rises and weakens the material.
Many beginners assume angled drilling is impossible. In reality the process becomes safe when the angle is created gradually. Understanding how glass responds makes the method smoother.
Tools and Materials Required for Angled Drilling
A variable speed drill is essential for controlling rotation. Slow movement allows the bit to grind instead of cutting sharply. This prevents sudden slips that damage the surface.
Diamond coated spear point bits are ideal for angled entry. They create a guided bite that keeps the drill from wandering. The sharp point helps maintain direction while grinding.
Masking tape gives the surface friction. The smooth glass becomes easier to control when tape is applied. It also reduces early edge chipping.
Water is needed for cooling throughout the process. A spray bottle or drip method keeps temperature stable. Cooling protects the glass from thermal stress.
Safety gloves and protective glasses should always be worn. Tiny fragments may fly when the angle shifts. Protection ensures a safer working environment.
Preparing the Glass Surface Before Starting
Clean the glass thoroughly to remove dust fingerprints and residue. A clean surface allows tape to stick firmly. Dirt increases slipping and reduces accuracy.
Apply two layers of masking tape over the drilling spot. The tape gives the drill bit better traction during the angled start. It also protects the glass from scratches while positioning.
Mark the drilling point with precision. A fine marker ensures the angle aligns correctly with the desired placement. Accuracy prevents accidental misdirection later.
Support the glass securely before drilling. A rubber mat or foam pad absorbs vibration. Movement during drilling increases cracking risk.
Ensure the surface is dry before beginning. Moisture reduces friction and causes slipping. Preparation creates a stable drilling environment.
How to Begin Drilling the Angle Safely
Start drilling at the lowest possible speed. High rotation causes the bit to slide across the taped surface. Slow grinding creates a gentle starter groove.
Hold the drill at a shallow angle. Begin with approximately ten to fifteen degrees for controlled entry. This prevents sudden pressure on the edge of the bit.
Do not apply heavy pressure at the beginning. Let the bit skim the surface and create a small indentation. Forcing downward increases cracking risk.
Once the starter groove forms increase the angle slightly. This helps the bit sink deeper without slipping. The shift must be slow to avoid stressing the glass.
Use both hands to stabilize the drill. One hand guides direction while the other maintains balance. A steady hold ensures a smooth beginning.
Why does the bit slide when starting at an angle?
The surface is too smooth so tape and low speed help the bit grip correctly.
Can I begin drilling directly at a steep angle?
No the angle must start shallow and increase gradually to prevent slipping.
Should I hold the drill in one position while starting?
Yes keep steady contact until the bit creates a guided groove.
What if the bit skids across the glass?
Stop reposition and restart slowly because skipping weakens the surface.
How do I know the angle is stable enough to continue?
When the bit stays in place without sliding you can increase depth slowly.
Controlling Speed Depth and Angle During Drilling
Speed should stay between 400 and 600 RPM. Faster rotation builds heat and makes the bit wander. Slow speed keeps the angle controlled.
Pressure must remain light while deepening the angle. The bit should grind into the glass naturally. Heavy force creates vibration and stress marks.
Cooling is essential for temperature control. Continuous water prevents heat from spreading through the glass. Without cooling the angle becomes unstable.
Take short pauses to allow natural cooling. Drilling continuously risks thermal shock. Patience protects the glass and keeps progress smooth.
Keep the angle consistent once drilling begins. Sudden shifts change pressure points. Maintaining alignment ensures a clean opening.
Preventing Cracks and Edge Damage at an Angle
Never drill too close to the edge of the glass. Edge sections are more fragile and hold internal tension. Angled pressure makes them crack quickly.
Check the glass for hidden scratches or flaws. Even small marks weaken the surface. Drilling through damaged glass increases failure risk.
Avoid forcing the drill deeper. Grinding slowly protects the structure. Pressure changes should always be gradual.
Do not raise the angle too quickly. Sharp changes stress one side of the hole. A smooth transition prevents uneven cracking.
Support the glass throughout drilling. Movement causes the bit to shift unexpectedly. Stability ensures a cleaner and safer result.
Why did the glass crack during angled drilling?
The angle changed too quickly or pressure was applied unevenly on one side.
Can I drill near an existing chip?
No chips spread rapidly under angled stress so choose a clean area.
How steep can the angle be safely?
A shallow gradual angle works best and should not exceed the safe entry point.
What if the surface warms during drilling?
Stop cool and resume slowly to prevent thermal stress.
Can I switch directions while drilling?
No sudden changes cause vibration so maintain one steady angle.
Deepening the Hole Smoothly Without Slipping
Once the starter groove holds the bit increase depth slowly. The bit should sink while maintaining the angle. Rushing increases the chance of slipping.
Keep water flowing at all times. Cooling maintains a smooth grinding motion. Dry drilling causes heat that weakens the surface.
Avoid pressing harder to speed up progress. Let the diamond bit remove material at its natural rate. Patience ensures cleaner results.
Stay steady during deeper drilling. Slight movements can widen the groove unevenly. Consistency keeps the angle clean.
Listen to the sound while drilling. Smooth grinding indicates proper progress. Harsh noise may mean the bit needs cooling or cleaning.
Finishing and Polishing an Angled Hole
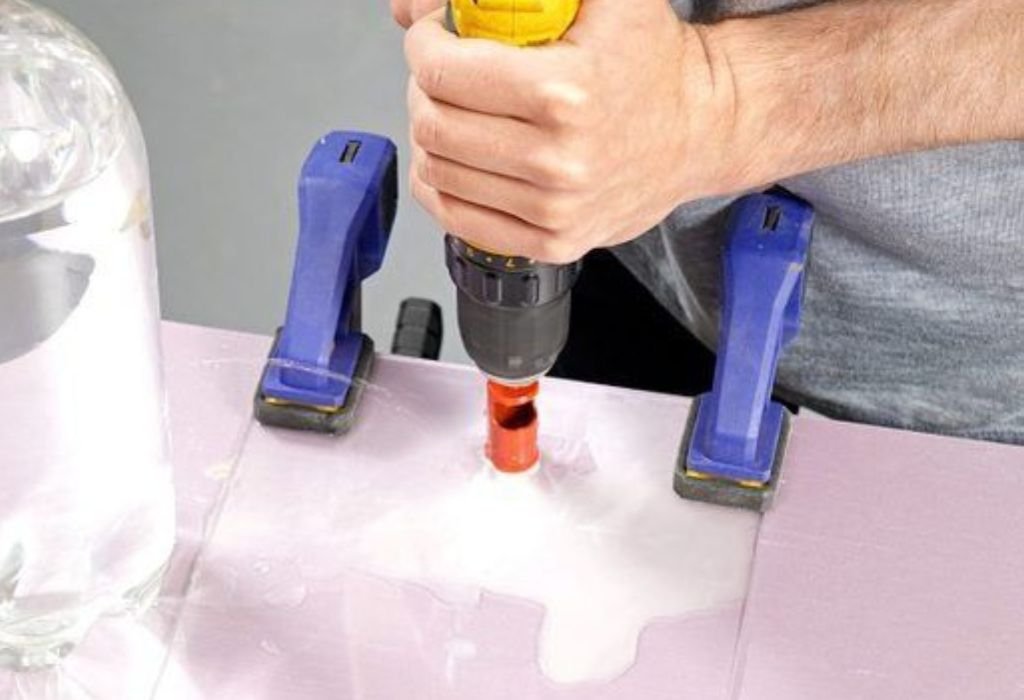
As the bit reaches breakthrough slow down carefully. The final layer is the most fragile. Reducing pressure protects the exit side.
Lift the drill gently once the hole is complete. Pulling too quickly can chip the opening. Smooth removal keeps the edges clean.
Rinse the area to remove fine dust. Leftover particles interfere with polishing. Clean surfaces produce better finishing results.
Use fine grit sandpaper to soften the edges. Wet sanding prevents dust and protects the glass. Polished edges reduce the risk of cut injuries.
Check both sides of the hole for hidden cracks. Some may appear only on the interior. Early detection prevents further damage.
Common Mistakes to Avoid When Drilling at an Angle
Using high speed is the biggest mistake. Fast drilling builds heat that spreads quickly. Slow speed keeps the process controlled.
Applying pressure instead of letting the bit grind creates stress. Forcing the drill increases cracking risk. Gentle contact is always safer.
Skipping cooling leads to temperature imbalance. Water keeps the glass stable throughout drilling. Never attempt dry drilling.
Changing angle too quickly causes surface stress. Smooth adjustments keep pressure even. Abrupt shifts weaken the drilling area.
Finishing too fast causes chipping near the breakthrough. Slowing down protects the final layer. Clean results depend on steady movement.
Conclusion
Drilling glass at an angle becomes safe when done slowly and patiently. Creating a shallow starter groove prevents slipping and gives the bit a guided path. Cooling stabilizes temperature and protects the surface from heat damage.
Light pressure helps the bit grind naturally instead of forcing the glass. Maintaining a steady angle keeps stress distributed evenly. Finishing with gentle movement ensures clean and smooth edges.
Avoiding common mistakes such as rushing applying pressure or skipping cooling prevents cracking. With preparation and careful control anyone can drill angled holes successfully. Using the correct technique transforms a difficult task into a confident and safe process.

I’m John F. Nicholas, the founder, lead writer, and drill enthusiast behind 101drill.com. With years of hands-on experience in power tools and DIY projects, I created this platform to share practical knowledge, expert tips, and real-world insights to help others master the art of drilling.