
Drilling a bolt into wood may look simple, but doing it correctly requires accuracy, patience, and the right tools. Bolted joints provide far stronger and longer-lasting connections than screws or nails when used properly.
Understanding how to drill, align, and secure the bolt ensures a durable and clean result every time.
Many beginners make the mistake of driving bolts directly into the wood without proper preparation. This often leads to splitting, weak grip, or crooked alignment. By learning the right process, you’ll not only protect your materials but also improve the overall quality of your project.
Whether you’re building furniture, repairing outdoor decks, or joining heavy timbers, the same core principles apply. You’ll need a matching drill bit size, steady drilling technique, and correct tightening torque. Once mastered, bolting wood becomes one of the most reliable skills in woodworking.
This detailed guide covers everything from bolt selection to drilling technique and final tightening. By the end, you’ll know how to choose, drill, and fasten bolts professionally and safely. Let’s start by understanding how bolts actually work inside wood.
Understanding Bolts and How They Work in Wood
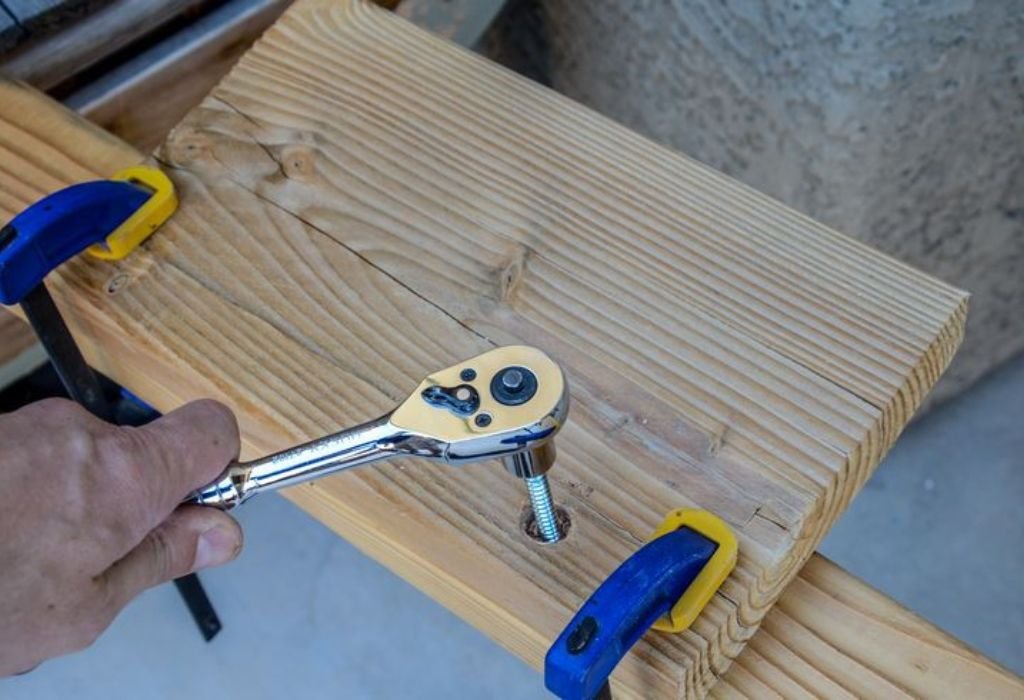
Bolts are cylindrical metal fasteners designed to hold two or more pieces together under compression. Unlike screws, bolts rely on a drilled hole and a nut to clamp materials firmly. This makes them perfect for load-bearing wooden joints where strength and stability matter most.
When you drill a hole and insert a bolt, it passes completely through the material. A washer and nut on the other side distribute pressure evenly, preventing the wood from crushing. This creates a strong mechanical bond that can be loosened or adjusted when needed.
Wood bolts come in various styles: carriage bolts, hex bolts, lag bolts, and machine bolts. Carriage bolts have a smooth rounded head for clean finishes; hex bolts offer high torque; lag bolts thread directly into wood without nuts. Selecting the right one affects both performance and appearance.
Wood behaves differently from metal—it expands and contracts with humidity and temperature. Bolted joints accommodate this movement by allowing slight flexibility while maintaining compression. Proper installation prevents loosening and ensures long-term strength.
Bolts work best when holes are drilled precisely and aligned perfectly. Oversized or off-center holes weaken the structure. That’s why correct drill bit size and depth control are essential before any bolt installation.
Essential Tools and Materials You’ll Need
Drilling and installing bolts in wood requires a specific set of reliable tools. Having everything prepared beforehand makes the job efficient and prevents damage. Always ensure your tools are sharp, clean, and functioning properly.
A power drill is your primary tool. Choose a model with variable speed and strong torque output. Corded drills provide constant power, while high-voltage cordless drills offer mobility.
Next, select a drill bit that matches the bolt’s diameter. Use a bit slightly larger than the bolt’s shank if you want a loose fit, or the exact size for a tight one. For hardwoods, brad-point or auger bits perform best because they stay centered and cut cleanly.
You’ll also need wrenches or socket sets to tighten nuts and bolts. Adjustable spanners work well for general use, but a torque wrench is ideal for consistent tightening force.
Gather washers and nuts before starting. Flat washers prevent wood compression, while lock washers stop nuts from loosening over time. Stainless-steel hardware is recommended for outdoor or moisture-prone projects.
Additional items include clamps, a measuring tape, a pencil for marking, and safety gear like goggles and gloves. These essentials ensure accuracy and safety during every stage of drilling.
Finally, keep a backing board handy. It supports the exit side of the hole, reducing tear-out and keeping your work surface smooth.
Choosing the Right Bolt Type and Drill Bit Size
The choice of bolt affects both the appearance and the strength of your joint. Carriage bolts are commonly used for furniture, decks, and visible surfaces because of their domed heads. Hex bolts are better suited for heavy-duty frames or structural applications requiring more torque.
If you’re fastening wood to metal, choose machine bolts with washers and nuts. For direct wood-to-wood fastening, lag bolts (lag screws) may suffice, as they don’t need nuts. Always check load requirements before selecting the bolt type.
Bolt material matters as much as size. Zinc-plated bolts resist corrosion indoors, while galvanized or stainless-steel bolts perform best outdoors. Rust-free hardware maintains integrity even in wet conditions.
Choosing the correct drill bit size is crucial. The hole should be just large enough for the bolt to pass through without wobbling. A general rule is to use a drill bit the same diameter as the bolt’s shank (not the threads).
If your bolt is 3/8 inch, use a 3/8 inch drill bit. For carriage bolts, the square neck under the head needs a slightly smaller pilot hole to prevent rotation. For lag bolts, use a bit roughly 60–75 percent of the root diameter to maintain grip.
Always drill test holes on scrap wood before working on the final piece. This confirms bit size accuracy and avoids surprises once the bolt is inserted. Precision at this stage ensures perfect alignment later.
Preparing the Wood Before Drilling
Proper preparation prevents cracking, misalignment, and uneven pressure on the bolt. Before drilling, inspect the wood for defects such as knots, splits, or embedded nails. Weak spots can compromise joint integrity once tightened.
Mark the exact location where the bolt will pass through. Use a measuring tape and pencil to ensure both entry and exit points align. Double-check alignment, especially if drilling through multiple boards.
Clamp the boards securely together. Unsecured wood may shift during drilling, causing angled or off-center holes. Clamping also prevents sudden movement that could twist the bit or cause injury.
Use a center punch or nail to create a small indentation at the drilling point. This guides the bit tip and prevents wandering. Accurate starts lead to straight, clean holes.
Place a backing board beneath the exit side to prevent tear-out. Large drill bits can splinter fibers when exiting, leaving rough surfaces. Supporting the underside keeps the edges clean.
Check the drill’s speed setting. High speed can burn the wood, while low speed produces smoother control. Adjust the trigger gradually to find the optimal balance between cutting power and precision.
Finally, make sure the drill bit is sharp and firmly secured in the chuck. Loose bits can vibrate, causing uneven holes and damaging the drill’s bearings. Always verify tightness before turning on the drill.
Step-by-Step Process to Drill a Bolt into Wood
Step 1: Mark and Align the Bolt Locations.
Use a pencil and ruler to mark the bolt’s entry and exit points on each board. Precise alignment ensures that when the bolt passes through, it seats evenly and doesn’t stress the joint. Always double-check your markings before drilling.
Step 2: Drill the Pilot Hole.
Begin with a smaller pilot hole, about half the bolt’s diameter. This guides the larger bit and reduces splitting. Keep the drill perpendicular to the wood surface to guarantee straight alignment.
Step 3: Enlarge the Hole to Full Size.
Switch to the final bit that matches your bolt’s shank diameter. Drill slowly and steadily through both boards. Stop periodically to remove chips and prevent overheating.
Step 4: Clean and Test-Fit the Bolt.
Remove sawdust from the hole using a brush or compressed air. Insert the bolt gently to confirm a proper fit. It should slide smoothly without excess play.
Step 5: Install the Bolt, Washer, and Nut.
Insert the bolt through the hole, add a flat washer, and thread on the nut. Tighten it finger-tight first to align everything, then use a wrench or socket for full torque.
Step 6: Secure and Finish.
Once tight, check that the bolt head is flush and the joint is snug. Wipe away debris and apply a finish or sealant if needed. A properly installed bolt should feel solid without crushing the wood fibers.
How to Install Washers and Nuts for Strong Fastening
Washers distribute the bolt’s pressure evenly across the wood surface. Without them, the nut or bolt head can sink into the wood and weaken the joint. Always use flat washers under both the nut and head for stability.
Lock washers prevent nuts from loosening due to vibration. They grip the surface and maintain consistent tension over time. These are especially useful for outdoor or load-bearing projects.
Thread the nut carefully by hand before tightening with a wrench. Forcing the nut onto misaligned threads can strip the bolt and ruin the hardware. Smooth, controlled turns ensure long-term strength.
For carriage bolts, tap the rounded head gently with a mallet to seat the square neck into the wood. This locks the bolt from spinning when you tighten the nut. Avoid hammering too hard, which can split the surface.
Check alignment before final tightening. Misaligned washers or angled nuts can cause uneven compression. Tighten gradually from both ends if possible to maintain balance.
When finished, the washer should sit flat and the nut should feel snug but not over-tightened. Over-torquing can crush wood fibers and reduce joint strength.
Techniques to Prevent Splitting and Stripping
Splitting occurs when internal stress builds as the bolt or bit displaces wood fibers. To prevent this, always drill pilot holes before inserting bolts. A smaller hole relieves pressure and guides the larger one.
Avoid drilling too close to the wood’s edge. Keep at least twice the bolt’s diameter as a margin from edges or ends. This ensures structural integrity and prevents cracks.
Use steady pressure and moderate speed while drilling. High speeds can overheat bits and dry out wood, making it brittle. Controlled drilling produces smoother, cleaner holes.
When tightening bolts, use a torque wrench to control force. Over-tightening compresses the fibers and can strip the wood internally. Tighten only until resistance is firm and consistent.
If working on thin or softwood, use washers with larger diameters to spread load across a wider surface. This keeps the joint stable without damaging the grain.
Moisture content also affects splitting risk. Drill when wood is dry and acclimated to its environment. Wet wood swells around the bolt and later contracts, causing cracks.
Torque Control and Tightening Tips
Torque is the rotational force applied to a bolt while tightening. Proper torque ensures secure clamping without crushing or stripping wood. Too little torque results in loose joints; too much can cause damage.
A torque wrench provides precise measurement. Follow manufacturer recommendations or apply enough pressure that the washer just begins to compress the surface. Avoid “cranking” the wrench excessively.
Tighten bolts in small increments, alternating between bolts on the same assembly if you’re joining multiple points. This distributes pressure evenly and prevents twisting.
If you hear creaking or see compression marks, stop tightening immediately. These are signs that the wood fibers are being crushed. Back off slightly to release excess tension.
Recheck all bolts after 24 hours, especially on outdoor structures. Wood settles and expands, sometimes loosening nuts. Retighten lightly if needed to maintain firmness.
Use locking nuts or thread-locker compound for joints exposed to vibration. This keeps tension consistent without frequent maintenance.
Finishing and Sealing Bolt Holes for Durability
Finishing is more than cosmetic—it protects wood from moisture, dirt, and rust migration. Once the bolt is secure, sand the surrounding area to remove burrs or raised fibers. Smooth surfaces absorb finishes evenly and prevent splinters.
Apply wood filler or sealant around exposed holes if desired. This closes gaps and prevents water penetration that can corrode hardware. Let it dry fully before sanding again.
Use outdoor-grade sealers or polyurethane coatings for decks and furniture exposed to weather. Indoors, a light stain or varnish preserves appearance and texture.
If the bolt head or nut is visible, consider painting or coating it with rust-resistant enamel. Matching hardware to the wood finish gives a professional look while extending longevity.
Regularly inspect exposed bolts for rust or looseness. Reapply sealant annually in humid or coastal environments. Consistent care keeps joints strong and attractive for years.
Maintenance of Tools and Fastened Joints
Clean drill bits and wrenches after every session. Sawdust, oil, and metal shavings shorten tool life and affect accuracy. Wipe them dry and store in a rust-proof case.
Sharpen or replace worn bits to maintain cutting efficiency. A dull bit increases friction, causing splintering and uneven holes.
Lubricate moving parts of the drill periodically. A drop of machine oil on the chuck or bearings keeps rotation smooth and quiet.
Check bolt joints every few months for tightness. Wood expands and contracts naturally, sometimes loosening hardware. Tighten gently to restore pressure.
If bolts are installed outdoors, inspect for corrosion. Replace rusted hardware immediately to maintain safety. Stainless-steel bolts last longer in damp environments.
Store tools in a cool, dry place away from direct sunlight or humidity. Proper storage prevents damage and keeps performance consistent for future projects.
Safety Precautions While Drilling Bolts
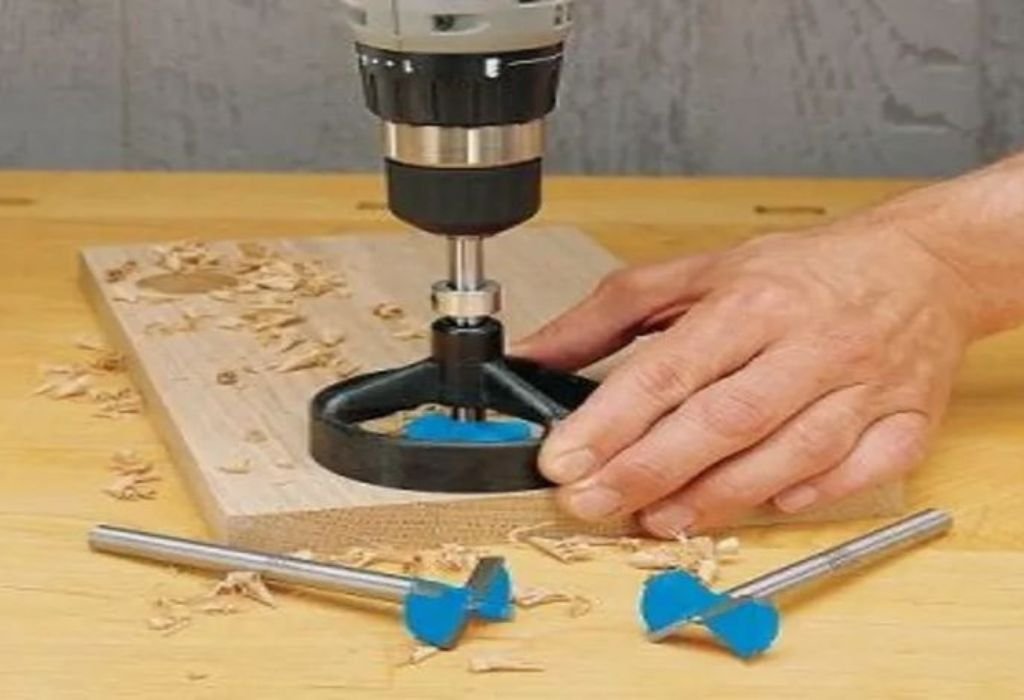
Safety should never be an afterthought when using drills and metal fasteners. Large bits and bolts create torque that can twist or kick the drill suddenly. Always wear eye protection and snug-fitting gloves.
Secure the workpiece with clamps or a vise. Unsecured wood can spin violently, causing injuries or damaging the surface. A stable setup keeps your hands free for full control.
Keep fingers clear of the bit and rotating parts at all times. Maintain a balanced stance and hold the drill with both hands for better stability.
Avoid loose clothing, jewelry, or long hair near moving equipment. These can get caught in the drill mechanism within seconds.
Disconnect the power source before changing bits or adjusting settings. For cordless drills, remove the battery; for corded models, unplug them completely.
Drill at comfortable speed settings. Forcing the bit or using excessive pressure increases the chance of slipping. Controlled speed ensures safety and precision together.
Keep the work area clean and well-lit. A tidy workspace reduces tripping hazards and allows better visibility while drilling
Expert Answers on Wood Bolting Techniques
Can you screw a bolt directly into wood without drilling?
No. Bolts require pre-drilled holes for proper fit and pressure distribution. Driving them directly can split or damage the wood.
What size drill bit should I use for a bolt?
Use a bit equal to the bolt’s shank diameter, not including threads. For lag bolts, use about 70 % of the root diameter.
How deep should I drill for a bolt?
The hole should be slightly longer than the bolt’s length to ensure full seating without bottoming out.
Should I use washers with every bolt?
Yes. Washers distribute pressure evenly and prevent crushing the wood surface.
How tight should bolts be in wood?
Tighten until the washer just begins to compress the wood—never over-torque.
Can I reuse bolts after removal?
Yes, if threads are clean and undamaged. Replace rusted or stripped ones.
How do I stop nuts from loosening?
Use lock washers, locking nuts, or thread-locker compound.
What’s the best bolt for outdoor projects?
Stainless-steel or galvanized bolts resist corrosion and weather damage.
Why did my wood crack when drilling?
Likely from skipping pilot holes or drilling too close to the edge.
Do I need to drill all the way through both boards?
Yes, bolts require full penetration to secure with a nut and washer.
Can I drill bolts into hardwood and softwood the same way?
Yes, but use slower speeds and sharper bits for hardwood.
What happens if I overtighten the bolt?
You’ll crush wood fibers, weaken the joint, and possibly strip threads.
How can I hide bolt heads for a cleaner finish?
Countersink the top slightly or cover with wood plugs or filler.
How often should I check bolt tightness?
Every 3–6 months, especially in outdoor or load-bearing structures.
Can I drill at an angle for bolt installation?
Yes, but use a drilling guide to maintain consistent alignment.
Conclusion
Drilling a bolt into wood is not just about creating a hole and tightening hardware; it’s about precision, preparation, and technique. Each step, from marking and drilling pilot holes to controlling torque, ensures strength and accuracy.
When done correctly, a bolted joint becomes one of the most durable and reliable wood connections.
Proper tool maintenance and safety measures play a vital role in the process. Clean bits, sharp edges, and stable workpieces prevent accidents and deliver smoother results. Taking time to align, drill, and fasten carefully always pays off in both performance and longevity.
With the right approach, anyone can achieve professional-grade bolting without damaging the wood or compromising stability.
Combining steady drilling, correct washer placement, and consistent torque creates joints that can withstand pressure and time. Master this technique once, and it will serve you in every woodworking project that follows.

I’m John F. Nicholas, the founder, lead writer, and drill enthusiast behind 101drill.com. With years of hands-on experience in power tools and DIY projects, I created this platform to share practical knowledge, expert tips, and real-world insights to help others master the art of drilling.