
You’ve got a project that needs a perfect round opening — maybe for a speaker hole, a tabletop cord slot, or a wooden clock face. You grab your drill and wonder, “Can I actually cut a clean circle with this?” The answer is yes — if you use the right tools and technique.
Drilling circles isn’t just about power; it’s about precision and control. The right attachment can transform your everyday drill into a versatile circle-cutting tool.
From hole saws to adjustable circle cutters, several methods can help you achieve flawless round cuts in any wood thickness.
Many beginners struggle because the bit drifts, burns the surface, or leaves rough edges. But with proper setup, marking, and speed, you can create circles that look machine-cut.
This guide explains the tools, step-by-step process, safety precautions, and pro tips to get smooth, accurate results.
By the end, you’ll know exactly how to use your drill to cut perfect circles in wood — clean, even, and ready for any project.
Tools You Need to Cut Circles with a Drill
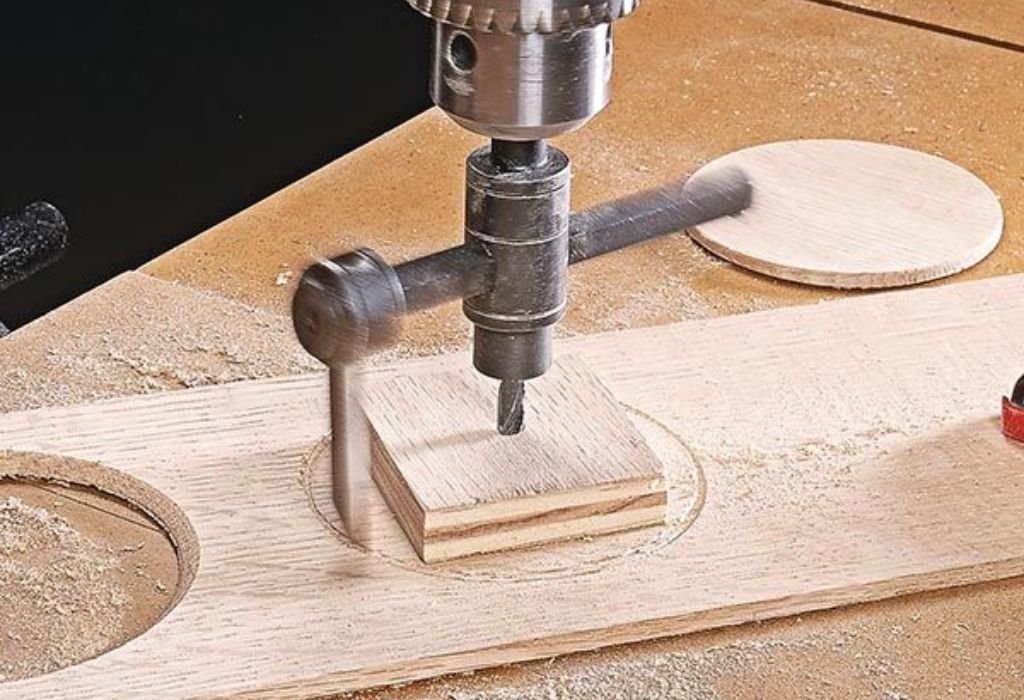
Before cutting, gather the right tools. A regular drill alone can’t make circles — you’ll need a hole saw, spade bit, or circle cutter attachment depending on your project.
Hole saws are ideal for larger circles (¾ inch to 6 inches). They come as cylindrical blades with a central pilot bit that keeps the cut centered. Spade bits work well for smaller holes up to 1½ inches, while adjustable circle cutters allow you to set custom diameters using an adjustable arm.
You’ll also need clamps to secure the wood, safety goggles, and masking tape to prevent splintering. For smoother cuts, use medium-speed drills — too fast burns the wood; too slow causes chattering.
Always check that your drill can handle the bit size. Larger circle cutters create torque that can twist the tool unexpectedly if not stabilized.
Preparation ensures cleaner, safer cuts with minimal effort.
Choosing the Right Bit or Attachment for the Job
The correct attachment determines how clean your circle turns out. Hole saws are best for most medium or large projects — they produce uniform edges and are easy to control. Spade bits excel in thinner materials where speed matters more than edge smoothness.
If you’re working on furniture or custom decor, an adjustable circle cutter gives you flexibility to set any diameter. It’s ideal for one-off projects where you need precision more than speed.
For deep holes or thick planks, choose bi-metal hole saws or carbide-tipped cutters. They resist heat buildup and stay sharp longer. Pair them with variable-speed drills to reduce vibration.
Mark the center point clearly before starting, as your pilot bit will guide the entire cut. Keeping your attachment perpendicular ensures perfectly round results every time.
Can you use a regular drill for circle cutting?
Yes, if fitted with a proper hole-saw or cutter attachment.
What is the best bit for large holes?
A hole saw with a pilot bit ensures clean, centered cuts.
Can spade bits make smooth holes?
They can, but may leave rough edges on softwood.
Do hole saws work on plywood?
Yes, just use masking tape to prevent splintering.
Can I cut different sizes with one bit?
Yes, adjustable circle cutters allow diameter changes easily.
Step-by-Step Process to Cut a Circle in Wood with a Drill
Cutting circles with a drill is simple when done methodically. Follow these steps for the best results:
Step 1: Mark the center point. Use a pencil and ruler to find the exact middle of your desired circle. This ensures your pilot bit stays aligned.
Step 2: Secure the wood. Clamp your board firmly to a stable surface. Movement during drilling causes wobble and uneven edges.
Step 3: Attach the right tool. Choose a hole saw or circle cutter suited for your circle size and wood thickness.
Step 4: Set drill speed. Start slow to let the pilot bit anchor. Once stable, increase to medium speed for a smooth cut.
Step 5: Drill halfway, then flip. For thick boards, drill from one side halfway through, then flip the wood and finish from the other side to avoid tear-out.
Step 6: Clean edges. Use sandpaper or a round file to smooth the hole’s interior.
Following this method ensures perfectly centered circles with clean edges every time.
Tips for Smooth and Accurate Cuts
Even the right bit can leave rough edges if technique is off. The key to smooth cuts is controlled pressure and proper speed. Press too hard, and the bit overheats or binds; too light, and it skips or splinters.
Use masking tape over your marked area to minimize surface tear-out. If you’re drilling through veneer or plywood, start from the finished side so any splintering occurs on the backside.
Keep your drill straight and steady throughout. Tilting even slightly can distort the circle or jam the bit. For large circles, periodically withdraw the bit to clear sawdust — this prevents burning and keeps your cut clean.
If your hole saw gets hot, stop briefly to cool it. Heat dulls teeth quickly, especially in hardwood.
A steady rhythm and patient approach always outperform brute force when cutting circles.
Avoiding Common Mistakes When Drilling Circles
Many beginners press too hard or use the wrong bit type. Forcing the drill makes it wander or seize, leaving jagged edges. Instead, let the bit do the work — moderate pressure and consistent speed are key.
Using dull blades is another mistake. They tear fibers rather than slice cleanly. Always check sharpness before starting, especially if your hole saw has been used on multiple projects.
Failing to clamp the wood properly causes vibration and uneven cuts. Movement during drilling ruins precision.
Also, never skip marking the center — misaligned starts lead to off-center holes that can’t be corrected once drilling begins.
Why does my hole smoke?
You’re drilling too fast or using a dull bit.
Can I use a hammer drill?
No, it’s too aggressive for wood and causes chipping.
Should I drill all the way through at once?
No, drill halfway and finish from the back for clean exits.
Can I reuse hole saws?
Yes, if they’re kept sharp and debris-free.
Do I need lubrication for wood?
Not usually, but wax helps reduce friction on large cuts.
Safety Tips When Cutting Circles with a Drill
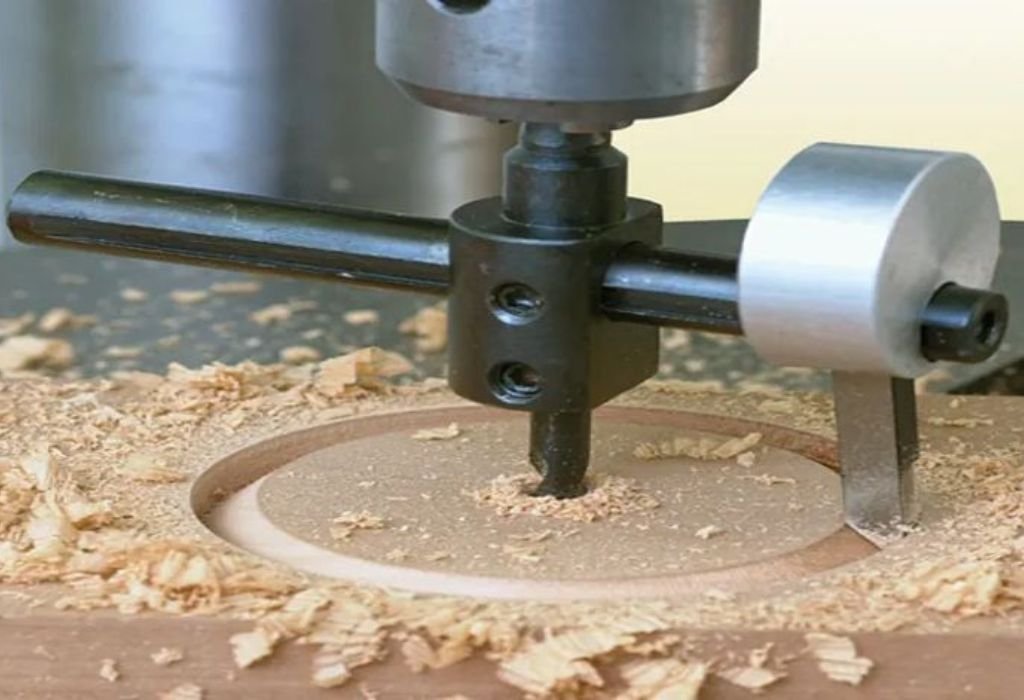
Safety is essential whenever cutting or drilling. Always wear eye protection to guard against flying sawdust and wood chips. Fine particles can cause irritation or injury.
Clamp your workpiece securely before starting. Loose wood can spin or jerk unexpectedly when the bit catches. Keep both hands on the drill and stand balanced to control torque.
Avoid loose clothing, jewelry, or hair near the rotating bit. Ensure your drill bit is tight and centered before turning on the power.
Work at moderate speed — excessive RPMs overheat both the tool and the wood, increasing the risk of burns or kickback. If the drill binds, stop immediately, back it out slowly, and clear debris before continuing.
Never force your drill. Let the bit cut at its natural pace. If cutting large holes, pause to allow the motor and bit to cool.
Safety isn’t just protection — it’s precision. Controlled movement prevents accidents and ensures every circle you cut is clean and accurate.
Conclusion
Learning how to cut a circle in wood with a drill turns a basic power tool into a precision instrument. With the right bit or attachment, such as a hole saw or adjustable circle cutter, even beginners can create clean, perfectly round shapes for any woodworking project.
The technique may seem challenging at first, but patience and preparation make it easy to master.
What truly matters is balance — the right speed, correct pressure, and steady alignment. Rushing the process causes rough edges or uneven holes, while careful control delivers professional results.
Simple steps like marking your center point, clamping securely, and drilling from both sides make a visible difference in accuracy and finish quality.
Every detail contributes to success. Using sharp bits prevents burn marks, keeping your edges smooth and your wood undamaged.
Clearing sawdust regularly and letting the bit cool during longer cuts helps maintain performance and safety. Even the smallest project benefits when precision and technique work together.
Cutting circles with a drill is more than just a skill — it’s a foundation for creativity. From furniture design to decorative wood art, this method opens the door to countless DIY possibilities.
Once you master it, you’ll never look at a simple drill the same way again. It becomes a versatile, reliable tool capable of transforming raw wood into refined, beautifully shaped creations that reflect both patience and craftsmanship.

I’m John F. Nicholas, the founder, lead writer, and drill enthusiast behind 101drill.com. With years of hands-on experience in power tools and DIY projects, I created this platform to share practical knowledge, expert tips, and real-world insights to help others master the art of drilling.