
It usually starts with a light screeching sound followed by the sudden stop of progress. The drill handle keeps turning, but the bit refuses to bite into the surface. In that brief moment, frustration replaces focus, and the job that once felt simple now feels unreliable.
A slipping bit is one of the most common and irritating problems faced by hand drill users at every skill level.
Many people immediately blame weak arm strength or dull drill bits when slippage occurs. In reality, the problem almost always begins at the chuck.
The chuck is the only component responsible for gripping the bit, and when that grip weakens for any reason, control is lost. Once slippage begins, drilling accuracy, safety, and efficiency all collapse at the same time.
Hand drill slipping bit issues are not just about annoyance. Repeated slippage damages drill bits, enlarges holes, increases injury risk, and shortens the life of the drill itself.
This guide explains every major cause behind slipping bits, how to diagnose the exact reason, how to fix the problem safely, and how to prevent it permanently through proper technique and maintenance.
What Bit Slippage Means and Why It Happens
Bit slippage occurs when the drill bit rotates inside the chuck instead of cutting into the material. Instead of transferring turning force to the cutting edge, that force is wasted through friction loss between the chuck jaws and the bit shank.
This creates heat, noise, surface burnishing, and total loss of drilling efficiency.
Slippage usually begins quietly. At first, the bit may slip only when resistance increases suddenly. Over time, it starts slipping under even light pressure. This gradual failure is why many users ignore early warning signs.
The fundamental cause of slippage is insufficient clamping force. Either the chuck cannot tighten enough, or the grip is compromised by wear, contamination, or incorrect bit type.
Once the grip weakens, the chuck jaws polish the bit shank smooth. A polished shank reduces friction even further and accelerates the slipping cycle.
Slippage also causes rotational shock. When the bit suddenly grabs and releases repeatedly, it creates jerking motion in the handle. This instability makes accurate drilling nearly impossible and increases muscular strain.
Bit slippage is not a normal limitation of hand drills. It is always a symptom of mechanical fault, improper setup, or worn components that require correction.
Worn Chuck Jaws as a Primary Cause
Chuck jaws are hardened metal gripping surfaces that close around the drill bit shank. Over years of use, these jaws slowly wear down due to friction, heat, and repeated micro-slippage under load.
Once the sharp gripping edges of the jaws round off, their ability to clamp securely drops sharply.
Worn jaws cannot generate enough surface pressure to resist drilling torque. Even if the chuck is tightened fully, the contact area becomes too smooth to hold the bit firmly. This is one of the most common reasons older hand drills develop persistent slipping problems.
Jaw wear is often uneven. One jaw may degrade faster than the others, creating off-center clamping. This misalignment causes wobble in addition to slippage. Once wobble begins, the bit experiences uneven resistance and slips even more easily.
Rust inside the jaw mechanisms also contributes to grip loss. Corrosion prevents jaws from closing evenly and reduces mechanical leverage. What feels like a fully tightened chuck may actually be gripping only partially.
Once jaw wear reaches an advanced stage, tightening harder no longer helps. The only permanent solution becomes chuck replacement or jaw rebuilding.
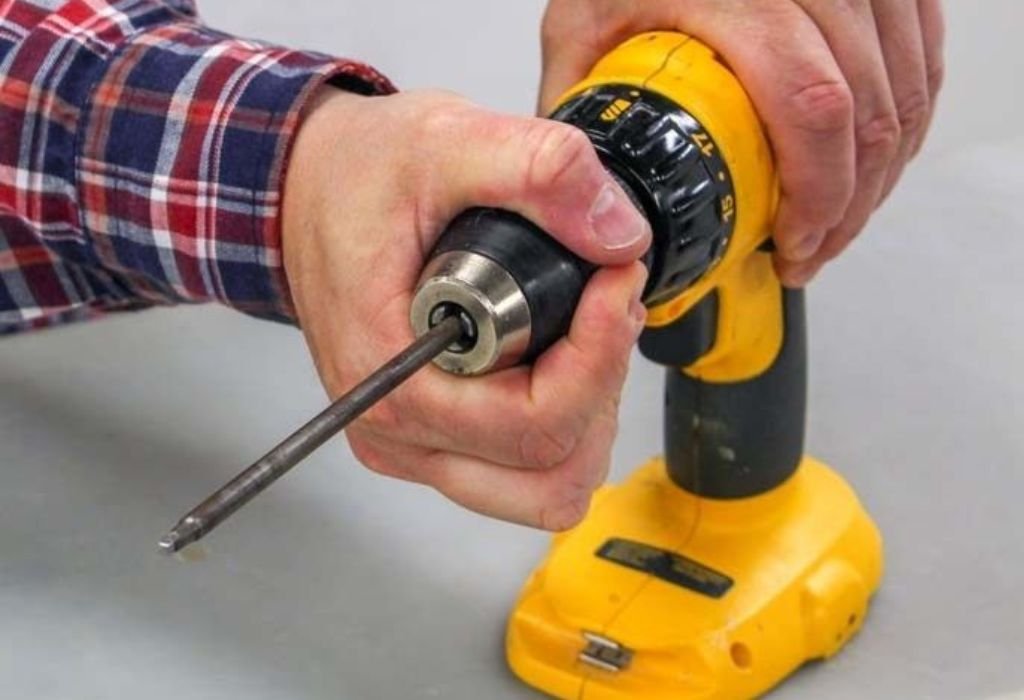
Poor Chuck Tightening Technique
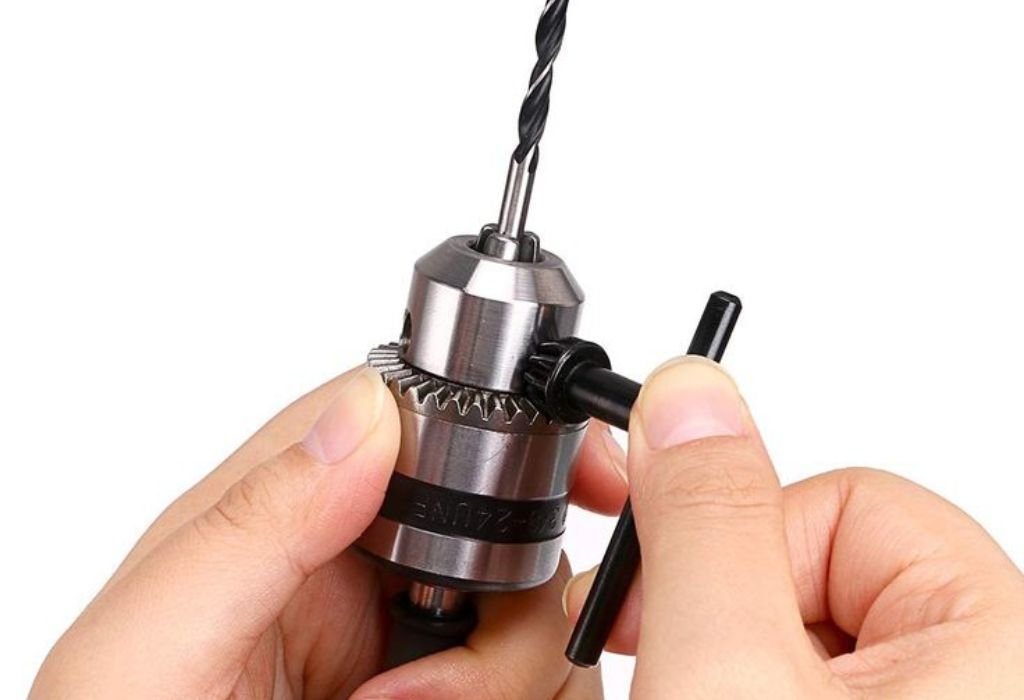
Improper tightening is one of the most overlooked causes of slipping bits. Many users assume that a quick twist of the chuck is enough. In reality, proper tightening requires balanced pressure across all jaw positions, especially with key-type chucks.
With keyed chucks, tightening only in one gear position applies uneven force. The jaw closest to the gear tightens the most, while the other jaws remain loose. This uneven clamping leads directly to slippage under load.
Correct tightening requires rotating the key through multiple tightening holes around the chuck. This distributes force evenly and centers the bit correctly. Skipping this step compromises grip strength dramatically.
With keyless chucks, users often stop tightening as soon as resistance increases. However, most keyless designs require a final locking twist to activate internal ratcheting mechanisms. Without that final lock, the chuck relaxes slightly under torque and slips.
Under-tightening is far more common than over-tightening. Many slipping issues disappear instantly when proper tightening technique is applied correctly and consistently.
Smooth or Polished Drill Bit Shanks
Drill bit shank condition has a major influence on grip strength. New high-quality bits often have matte or textured shanks that allow strong friction against chuck jaws. Older or low-grade bits often develop smooth, polished shanks after repeated slippage.
Once the shank surface becomes glossy, friction drops drastically. Even a perfectly functioning chuck struggles to grip a polished shank under resistance. This creates a cycle where slippage causes polishing, which then causes more slippage.
Bits used in metal drilling are especially prone to shank polishing. Heat generated during slippage hardens surface oils and creates slick surfaces that resist gripping.
Hex-shank bits reduce this problem because flat edges prevent rotational slip. Round-shank bits depend entirely on friction and therefore suffer most from polishing.
Lightly roughening a polished shank with fine sandpaper can temporarily improve grip. However, if slippage has been severe, replacing the bit is often the only reliable long-term solution.
Using the Wrong Chuck Type for the Job
Different chuck types provide different levels of grip strength. Using a chuck that is not designed for high resistance drilling almost guarantees slipping under load.
Keyless chucks are excellent for speed and light work but often lack the clamping force needed for thick hardwood or metal drilling. Under high resistance, they relax slightly and allow micro-slippage.
Keyed chucks provide greater tightening force and are far better suited for heavy-duty tasks. If a keyless chuck is being used for aggressive drilling, slippage should be expected.
Precision collet chucks grip evenly but are not designed for high torque. They excel at small-diameter fine drilling and perform poorly under heavy cutting loads.
Mismatch between chuck type and drilling task is one of the fastest ways to create chronic slipping problems.
Material Resistance and Torque Overload
Material hardness directly affects how much torque is required to drill. Softwoods allow easy cutting with low resistance. Hardwoods, aluminum, and steel increase resistance sharply.
When torque demand exceeds the gripping capacity of the chuck, slippage becomes inevitable. Even a well-tightened chuck has a mechanical limit.
Users often apply excessive downward pressure to compensate for resistance. This increases heat and biting forces but does not increase grip strength. Instead, it forces the chuck jaws to slip more violently.
Proper drilling technique requires controlling pressure and allowing cutting speed to remain stable. Forcing the drill never increases grip. It only amplifies slippage damage.
If slippage occurs only on certain materials and not others, torque overload is the most likely cause.
Incorrect Drilling Technique That Causes Bit Slippage
Even when the chuck and bit are in good condition, poor drilling technique alone can cause repeated slippage. One of the most common mistakes is applying sudden bursts of force instead of steady pressure.
When pressure spikes sharply, the chuck jaws are shocked rather than gradually loaded. This sudden torque change causes the bit to spin inside the chuck.
Another technique error is drilling at an angle instead of keeping the drill perfectly perpendicular to the surface. Angled drilling increases side loading on the bit. This sideways force reduces effective jaw contact and promotes slippage, especially with round-shank bits.
Many users also rotate the drill too fast under high resistance. Fast rotation combined with heavy pressure generates heat at the shank. Heat expands the metal slightly and temporarily reduces friction inside the chuck, allowing the bit to slip.
Stopping and restarting under heavy load also worsens slipping. Each restart places shock torque directly into the gripping surface. Over time, this repeated shock polish damages both jaws and bit shanks.
Proper technique requires steady speed, controlled pressure, straight alignment, and smooth starts. When these fundamentals are ignored, even a new chuck can begin slipping quickly.
Safety Risks of a Slipping Drill Bit
A slipping drill bit creates serious safety hazards that many users underestimate. When the bit suddenly loses grip, the stored rotational energy transfers to the handle. This can jerk the drill violently and twist the user’s wrist unexpectedly.
Repeated slippage also causes sudden biting and releasing. This creates unpredictable motion that can throw the drill off line. The bit may skid across the surface and strike fingers, hands, or nearby body parts.
Heat generated by slippage adds another layer of danger. The shank of a slipping bit becomes extremely hot very quickly. Many users instinctively touch the bit to reposition it and suffer instant burns.
Slipping also increases the risk of bit breakage. As the bit grabs and releases repeatedly, stress concentrates near the shank. When a small-diameter bit snaps, sharp fragments can eject at high speed without warning.
In metal drilling, slippage creates smooth burnished holes that suddenly allow the bit to grab violently later. This delayed grabbing effect increases the risk of tool kickback during later drilling stages.
Slipping is not just a nuisance. It is a mechanical failure that directly increases the risk of cuts, burns, wrist injuries, and flying debris.
How to Fix a Slipping Bit Step by Step
The first step in fixing slippage is removing the drill bit and inspecting its shank. If the shank is glossy and smooth, lightly roughening it with fine sandpaper helps restore temporary grip. Deeply polished or deformed shanks should be replaced entirely.
Next, inspect the chuck jaws under good lighting. Look for rounding, uneven wear, rust, or debris buildup. Dirt inside the jaws prevents full closure and reduces grip strength significantly. Cleaning the chuck with light oil and a soft brush often restores lost gripping power.
With a keyed chuck, reinsert the bit and tighten it in all three key positions. This distributes clamping force evenly. With a keyless chuck, tighten firmly and apply the final locking twist until resistance stops increasing.
If the drill slips only in hard materials, reduce pressure and drilling speed. Allow cutting speed to do the work instead of forcing torque into the chuck.
If slippage persists after cleaning and proper tightening, the chuck jaws are likely worn beyond recovery. At that point, replacing the chuck becomes the only permanent mechanical solution.
Chuck and Bit Compatibility Problems
Not all drill bits are equally compatible with all chuck types. Round shank bits rely entirely on friction. If placed in a weak or worn chuck, they will slip easily under load.
Hex-shank bits provide flat faces that physically lock into the jaws. These bits resist rotational slippage far better than round shanks. When a user experiences chronic slippage, switching to hex-shank bits often produces an immediate improvement.
Small bits placed in large-capacity chucks also slip more easily. The jaws operate near their closing limit and generate weaker gripping pressure. Using a chuck closer to the bit’s size range greatly improves holding strength.
Old aftermarket bits often use low-grade steel with very smooth plating. These surfaces reduce friction and encourage slipping. High-quality matte-finish bits hold far more reliably.
Compatibility between bit shank shape, surface finish, size, and chuck design is critical. Even a perfectly maintained chuck struggles when paired with poorly matched bits.
Maintenance Practices That Prevent Slipping
Routine maintenance plays a major role in preventing slippage. Chuck jaws should be cleaned periodically to remove metal dust, oil residue, and debris. Contaminants inside the jaw tracks prevent full jaw closure.
Light lubrication is also essential. A few drops of light machine oil inside the chuck restore smooth jaw movement and prevent corrosion. However, excessive oil must be wiped away because oily jaws actually reduce grip friction.
Bits should also be cleaned regularly. Metal shavings and cutting oil on the shank reduce friction. Wiping the shank before insertion greatly improves grip.
Storage environment matters as well. Moist conditions promote rust inside the chuck. Rust locks jaw movement and weakens grip. Storing hand drills in dry toolboxes dramatically extends chuck life.
Preventive maintenance takes only minutes but can prevent years of frustrating slipping problems.
Choosing the Right Chuck to Eliminate Slipping Permanently
If chronic slipping continues despite proper maintenance and technique, upgrading the chuck is often the smartest solution. Keyed chucks offer the strongest clamping force and are the best choice for heavy drilling tasks.
Precision three-jaw chucks with hardened jaws reduce wobble and maintain grip over long service life. Cheap replacement chucks often introduce more slippage than they solve.
For fine drilling, collet systems eliminate round-shank slipping entirely within their size range. For mixed-use work, heavy-duty keyed chucks provide the most reliable universal solution.
Ultimately, no amount of tightening can compensate for poor chuck design. Proper chuck selection prevents slipping at the source instead of fighting symptoms.
Drill Bit Slippage Causes and Fixes FAQs
Why does my hand drill bit keep slipping?
Slipping is usually caused by worn chuck jaws, poor tightening technique, polished bit shanks, or weak chuck design.
Can a slipping bit damage my drill?
Yes, repeated slippage damages jaws, gears, and bits while increasing heat and internal wear.
Is a keyed chuck better than a keyless chuck for preventing slippage?
Yes, keyed chucks provide higher clamping force and resist slipping under heavy load.
Can I roughen a slipping bit to fix the problem?
Light sanding can improve grip temporarily, but heavily worn bits should be replaced.
Why does my bit slip only in metal but not in wood?
Metal creates higher resistance and torque demand, which exceeds the chuck’s grip capacity.
Do hex-shank bits slip less than round bits?
Yes, hex shanks resist rotation far better because flat sides lock into the jaws.
Is it dangerous to keep drilling with a slipping bit?
Yes, it increases the risk of wrist injury, burns, bit breakage, and tool kickback.
Should I oil my chuck to prevent slipping?
Light lubrication is useful for jaw movement, but excess oil reduces gripping friction.
Can I replace the chuck on a hand drill?
Yes, many hand drills allow thread- or taper-mounted chuck replacement.
How do I know when my chuck is beyond repair?
If slippage continues after cleaning, tightening, and bit replacement, the jaws are likely worn out.
Conclusion
Hand drill slipping bit issues may seem like a minor annoyance at first, but they reflect deeper mechanical and technique problems that only worsen with continued use.
Slippage wastes energy, damages tools, ruins accuracy, and creates real safety hazards that should never be ignored.
This guide has shown that most slipping problems originate from worn chuck jaws, poor tightening technique, polished bit shanks, incorrect chuck selection, torque overload, and improper drilling methods.
Once slippage begins, it creates a destructive cycle that damages both the chuck and the bit even faster.
The solution is never brute force. Proper tightening technique, maintaining clean and well-lubricated jaws, using quality drill bits with suitable shank designs, and matching the correct chuck type to the job eliminate slipping at its source. In advanced wear cases, replacing the chuck permanently restores drilling control.
When the chuck grips properly, the hand drill regains its precision, safety, and reliability. Solving slipping issues transforms drilling from a frustrating struggle into a smooth, controlled, and satisfying process once again.

I’m John F. Nicholas, the founder, lead writer, and drill enthusiast behind 101drill.com. With years of hands-on experience in power tools and DIY projects, I created this platform to share practical knowledge, expert tips, and real-world insights to help others master the art of drilling.