
Drilling a 3 inch hole in wood is a challenging task that demands both the right tools and careful technique.
Unlike smaller holes, large holes are more prone to splintering, uneven edges, or misalignment. Understanding the process ensures clean, precise, and professional results every time.
Beginners often underestimate the difficulty of drilling such wide holes. Standard bits, high speed, or insufficient support can easily ruin the workpiece. Proper planning, preparation, and steady execution are crucial to avoid mistakes and save time.
Large holes are frequently needed for pipes, wiring, dowels, or decorative purposes. The functional and aesthetic quality depends on precision.
This guide will walk you through everything from tool selection to finishing techniques, ensuring perfect holes even in hardwoods.
By the end of this comprehensive guide, you will be able to drill 3 inch holes confidently and safely. You’ll also understand how to care for your tools, prevent mistakes, and finish holes professionally. Let’s begin by reviewing the essential tools you’ll need.
Tools Needed to Drill a 3 Inch Hole in Wood
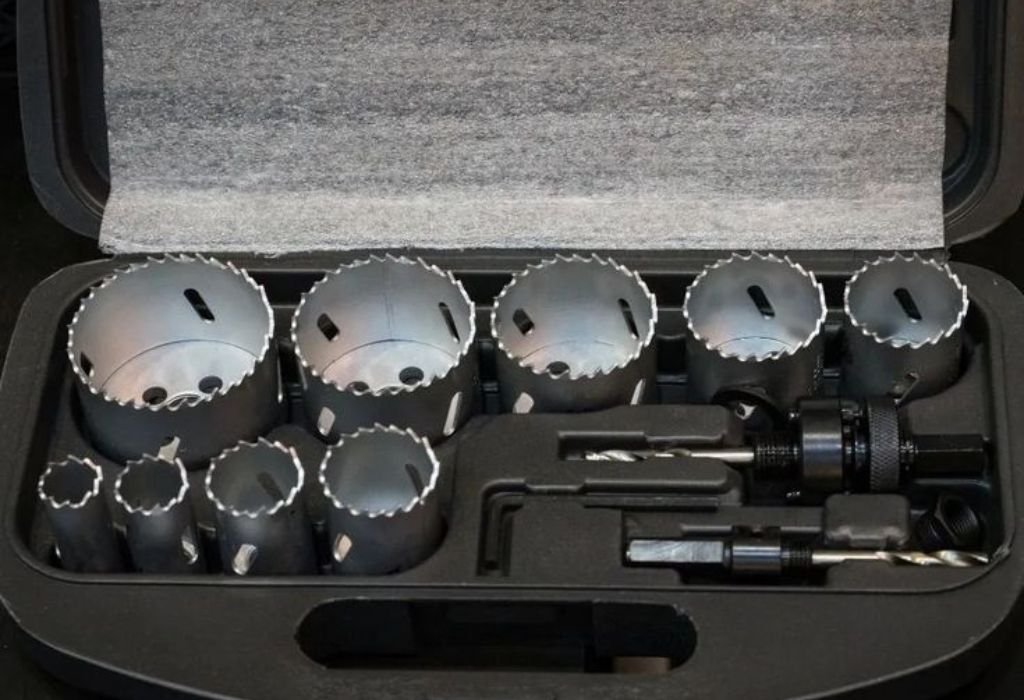
A high-powered cordless or corded drill is necessary to maintain consistent torque for large holes. Larger diameter holes require more force, making weak or underpowered drills inefficient. Look for variable speed control to balance power and precision.
A 3 inch hole saw, Forstner bit, or spade bit is required for this size. Each has advantages: hole saws remove a cylinder of wood, Forstner bits produce smooth, flat-bottomed holes, and spade bits are fast but rougher. Choosing the right bit depends on your project needs.
Use clamps or a vise to secure the wood. Large holes exert torque on the drill and may spin or shift the material. Clamped wood ensures safety and accuracy.
Measuring tools like rulers, marking gauges, and pencils help identify the exact drilling point. Accurate marking prevents off-center holes and maintains alignment with other components. Precision at this stage saves corrective work later.
A drill guide or jig helps beginners maintain perpendicular angles. Keeping the bit straight prevents angled or wobbly holes. This is especially important when drilling deep or long holes.
Safety gear is essential: goggles to protect eyes, gloves for hands, and a dust mask for sawdust. Large bits generate wood chips, dust, and torque, increasing the risk of injury.
Finally, have a backing board or scrap wood ready. This reduces tear-out on the exit side of the hole. Supporting the wood ensures smoother edges and cleaner finishes.
Choosing the Right Drill Bit for Large Holes
Hole saws are ideal for cutting out cylinders of wood. They include a central pilot bit for alignment and remove a core from the workpiece. Hole saws work well for rough openings in soft and medium hardwoods.
Forstner bits provide flat-bottomed, clean holes with precise edges. They are slower but produce professional results. Best for visible surfaces or cabinetry projects.
Spade bits are flat, fast-cutting bits that create rougher holes. Ideal for construction or situations where speed matters more than finish.
Select the appropriate material for your bit: high-speed steel (HSS) for softwoods, and carbide-tipped or brad-point bits for hardwoods. Hardwoods require sharp, strong cutting edges.
Check the diameter accuracy: ensure your bit is exactly 3 inches to prevent mismatched fittings. Even a small difference can compromise the project.
Regularly sharpen or replace dull bits. Dull edges increase friction, produce splintered wood, and require more effort. Maintaining sharp tools ensures smooth, accurate drilling.
Preparing the Wood Surface for Accurate Drilling
Mark the center point of your hole carefully. Use a compass, ruler, or template to ensure precision. Misaligned holes compromise both function and aesthetics.
Clamp the wood firmly to a workbench or vise. Movement during drilling can result in angled holes, splintering, or damage to your drill. Stability is essential.
Use a backing board underneath the wood. This prevents tear-out as the bit exits the material. A backing board also supports thin or delicate wood pieces.
Consider a pilot hole if drilling hardwood or thick material. A smaller initial hole guides the large bit and reduces stress on the wood fibers. It improves accuracy and prevents splitting.
Ensure the surface is clean and free of debris. Dust, knots, or small objects can divert the bit or damage it. Clear surfaces improve both safety and precision.
Check the drill for power and bit tightness. Ensure battery is charged or cord is secure. A sudden loss of power mid-hole can cause uneven cuts or injury.
Step-by-Step Guide to Drilling a 3 Inch Hole
Step 1: Position the drill perpendicular to the marked center point. Maintaining a 90-degree angle ensures a straight hole.
Step 2: Start slowly to create a guide path. Gentle pressure prevents the bit from wandering off-center.
Step 3: Increase speed gradually while keeping firm, steady pressure. Let the bit cut naturally without forcing it.
Step 4: Drill through the wood using a backing board if possible. This prevents tear-out on the exit side.
Step 5: Remove the drill slowly after passing through. This prevents splintering at the hole’s exit.
Step 6: Inspect the hole for rough edges and splinters. Correct minor imperfections with sandpaper or a round file.
Step 7: Test fit any pipe, dowel, or insert. Adjust with sanding or filing if necessary for a snug, precise fit.
Techniques for Clean and Smooth Holes
Drill at a steady pace. Rushing causes rough edges or burning, especially in hardwoods.
Use pilot holes to guide the large bit. This prevents the bit from wandering and reduces wood stress.
Clamp the wood firmly to minimize vibration. Stability is key to producing professional results.
Rotate the bit carefully in stages if drilling deep holes. Gradual depth prevents tear-out and improves finish.
Use a file or sandpaper for smoothing the edges afterward. Round off any sharp fibers to prevent cracking or injury.
Blow out dust and chips with compressed air or a brush. A clean hole improves accuracy for inserts and finishing.
Seal or finish the edges with varnish, stain, or paint to protect the wood from moisture and wear.
Maintenance of Drill and Bits for Large Holes
Clean your bits after each use to remove sawdust and debris. Buildup increases friction and wear.
Sharpen or replace dull bits to maintain cutting efficiency. Large bits require more force when dull, increasing risk of splitting.
Lubricate bits when drilling hardwood to reduce heat and friction. This also prolongs bit life.
Inspect the drill for worn parts, loose chucks, or frayed cords. A secure drill ensures stable and safe operation.
Store bits in a case or rack to prevent damage. Proper storage avoids nicks, rust, or bending.
Check the wood for knots or embedded objects before drilling. Hidden obstacles can damage bits and drills.
Perform a periodic full inspection of all equipment to ensure safety and reliability.
Tips and Tricks for Efficiency and Accuracy
Use backing boards for clean exit edges. This prevents splintering and enhances precision.
Mark the center accurately with templates or rulers. This avoids off-center holes and alignment issues.
Use the correct drill speed for the material. Hardwoods require slower speeds to prevent burning; softwoods can handle faster rotation.
Drill in short, controlled bursts rather than forcing continuously. This prevents overheating and improves hole quality.
Regularly check bit sharpness mid-session for consistent cuts.
Keep your workspace clean and well-lit to maintain focus.
Safety Precautions While Drilling a 3 Inch Hole
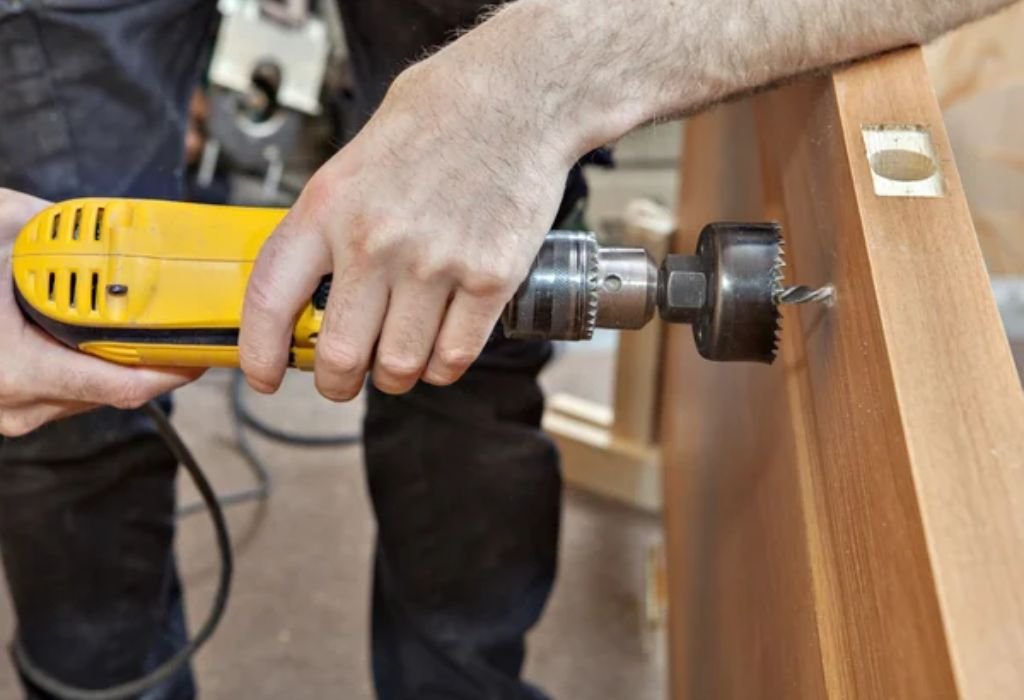
Always wear eye protection and gloves. Wood chips and rotating bits can cause serious injury.
Secure the wood with clamps or a vise to prevent spinning or wobbling.
Maintain stable footing and balanced posture. Avoid leaning over the drill or awkward angles.
Remove loose clothing or jewelry to prevent entanglement.
Ensure drill power is disconnected before changing bits or adjusting equipment.
Avoid drilling wet wood to reduce slippage and splintering.
Take breaks during long sessions to prevent fatigue and maintain precision.
Woodworking Guide: 3 Inch Hole Drilling FAQs
What is the best bit for a 3 inch hole in wood?
Hole saws, Forstner bits, or spade bits, depending on finish and wood type.
Can I drill without a pilot hole?
Yes, but a pilot hole improves accuracy and prevents splitting.
How do I prevent splintering?
Use a backing board, drill slowly, and keep the bit sharp.
What speed should I use?
Moderate speed for hardwood, higher for softwood.
Should I clamp the wood?
Always, especially for large holes to prevent movement.
Do I need a drill guide?
Optional, but helps maintain perpendicular alignment.
Can I use a cordless drill?
Yes, ensure battery power and torque are sufficient.
How do I clean rough edges?
Sandpaper or a round file works best.
How do I drill deep holes?
Use a long Forstner bit or drill in stages.
Can I drill at an angle?
Yes, but use a guide for accuracy.
How do I find the center?
Mark precisely with a ruler, compass, or template.
Is a spade bit better than a hole saw?
Spade bits are faster; hole saws produce cleaner edges.
Should I wear safety gear?
Yes — gloves, goggles, dust mask.
Can I use a hand drill?
Yes, but it’s slow; a power drill is recommended.
How do I avoid overheating the bit?
Pause occasionally and use light lubrication if needed.
Conclusion
Drilling a 3 inch hole in wood may seem intimidating, but with the right preparation and technique, it becomes straightforward and precise.
Following step-by-step procedures, using proper tools, and maintaining steady control ensures clean, accurate results every time. Proper planning not only prevents splintering but also saves time and effort on each project.
Securing the wood, using pilot holes, and applying a backing board significantly reduce the risk of mistakes. Keeping drill bits sharp and performing regular maintenance ensures smooth operation and extends tool life.
By paying attention to these details, even complex projects become manageable and professional-looking.
Finishing the hole with sanding, filing, or sealing protects the wood and enhances durability. Combining careful drilling with thoughtful finishing creates holes that are functional, safe, and visually appealing.
With consistent practice and proper technique, drilling large holes becomes a skill you can perform confidently and efficiently.

I’m John F. Nicholas, the founder, lead writer, and drill enthusiast behind 101drill.com. With years of hands-on experience in power tools and DIY projects, I created this platform to share practical knowledge, expert tips, and real-world insights to help others master the art of drilling.