
Drilling large holes in wood can look intimidating at first glance. A 2.5 inch hole isn’t something you can achieve with an ordinary drill bit. It requires specific tools, correct speed, and a steady approach to avoid burning or splintering the wood.
Imagine you’re working on a woodworking project that requires fitting a pipe, vent, or cable pass-through. You mark your spot, start drilling, and suddenly the drill jerks or the wood starts smoking. It’s a common mistake that happens when the wrong bit or speed is used.
The good news is, anyone can drill a perfect 2.5 inch hole with just a few simple steps. Once you understand the right tools and technique, it becomes one of the easiest woodworking tasks. The key lies in preparation, stability, and control.
Whether you’re a beginner or an experienced builder, learning this skill saves time and delivers professional-looking results. In this guide, you’ll discover how to choose the right hole saw or Forstner bit, control drill speed, and prevent tear-out.
By the end, you’ll have all the knowledge needed to make clean, precise 2.5 inch holes in wood safely and confidently for any project.
Understanding Large Hole Drilling
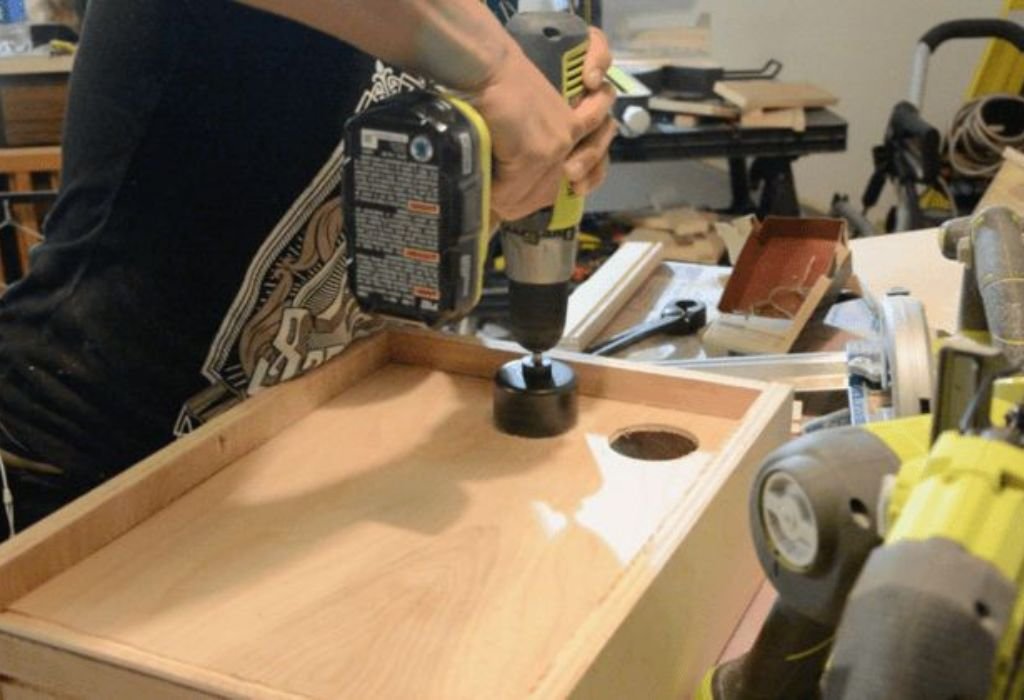
Drilling large holes like 2.5 inches requires more power and precision than smaller cuts. Standard drill bits can’t handle the size or maintain control. Specialized tools ensure safety and cleaner finishes.
The most common tools for drilling this size are hole saws, spade bits, and Forstner bits. Each serves a slightly different purpose, and your choice depends on the type of wood and hole depth. Understanding these differences helps you plan your project better.
Hole saws work best for through-holes and produce neat circular cuts. They remove a ring of wood instead of grinding away the full surface. This makes them efficient and reduces strain on your drill.
Forstner bits, on the other hand, are ideal for partial holes or clean flat bottoms. They leave smooth edges and precise sides, making them perfect for joinery or fitting large hardware.
Spade bits are budget friendly but require more control. They cut quickly but can cause splintering if not handled carefully. Always use slower speeds with large spade bits to avoid kickback.
Knowing which bit suits your goal ensures perfect results without damaging your wood or your tools.
Tools and Materials Required
Gathering the right tools before you start saves time and frustration. Large-hole drilling requires stability, strength, and clean cutting power. Preparation ensures a safer and more controlled experience.
You’ll need a power drill or drill press with adjustable speed settings. For the 2.5 inch hole, a hole saw or Forstner bit is ideal. Make sure your drill has enough torque to handle the load.
Use clamps or a vise to hold your wood securely in place. Movement during drilling can cause uneven edges or dangerous slips. A stable work surface gives you better precision and safety.
Keep a tape measure, pencil, and square for marking. Accurate layout helps prevent off-center holes. Measuring twice and drilling once avoids costly errors.
A scrap backing board is also important. It prevents splintering as the bit exits the wood. This simple trick ensures a clean underside and protects your workbench.
Finally, wear safety goggles, hearing protection, and a dust mask. Large-hole drilling produces flying chips and fine dust that can irritate eyes and lungs. Always prioritize safety.
Marking and Measuring the Hole Position
Marking the correct location is just as important as drilling itself. Even a small error can throw your entire project off balance. Precision ensures a clean, centered result every time.
Use a ruler or tape measure to locate the center of the intended hole. Mark it clearly with a pencil or awl for easy alignment. If the hole must align with another component, measure carefully from both directions.
For perfect circles, you can use a compass or hole saw guide to outline the hole’s size. Visual confirmation before drilling prevents misplaced cuts. Double-check the diameter to ensure your bit matches your plan.
If you’re drilling multiple holes, create a paper or cardboard template. Templates ensure uniformity and save time on repetitive measurements. Professionals often use them for cabinetry or large wood panels.
Mark the back of the wood as well if you plan to drill from both sides. This helps ensure your holes meet cleanly in the middle without breakout. Proper marking gives you full confidence before you even touch the drill.
Selecting the Right Drill Bit Size and Type
For a 2.5 inch hole, bit selection is critical. Not all drill bits can handle that size safely or efficiently. Choosing the right type ensures cleaner edges and less stress on your drill.
A hole saw is the most common choice for drilling large circular holes. It’s affordable and attaches easily to a standard drill. Hole saws cut through wood quickly, leaving a smooth, round perimeter.
For shallower or more precise holes, use a Forstner bit. It’s perfect for furniture work, recessed fittings, or decorative cuts. The flat-bottom design gives a clean, professional finish.
Spade bits can also cut 2.5 inch holes, but they demand slow speed and steady pressure. They tend to splinter more easily, especially near the exit. Backing wood is essential for smooth results.
Check your drill’s power rating before starting. Lower-powered cordless drills may struggle with large hole saws. If possible, use a corded drill or drill press for better control.
Always keep your bits sharp and clean. Dull bits overheat, smoke, and cause tear-out. Sharp edges make drilling faster and safer.
Setting Up the Workpiece
Proper setup ensures stability and precision while drilling. Large holes require more torque, so the wood must stay firmly in place. A shifting board can cause jagged edges or even injury.
Start by placing your workpiece on a flat, stable surface. Use clamps or a vise to secure it from both sides. The tighter the hold, the smoother the drilling process.
Position a scrap backing board directly underneath. This prevents tear-out as the bit exits and provides support for clean edges. It’s especially important when drilling through thin boards.
Double-check your markings and alignment. Ensure the drill is perpendicular to the surface unless you’re drilling at an intentional angle. Slight tilts can cause uneven cuts.
Make sure your drill bit or hole saw is tightly attached to the chuck. Loose attachments lead to wobbling and damage. A firm connection ensures precision and safety.
Lastly, inspect your workspace for clearance. Large bits throw more sawdust and debris, so having space to move freely keeps the process safe and efficient.
Drilling the Hole Safely
Drilling a 2.5 inch hole requires patience and proper technique. Rushing the process often leads to chipping, binding, or damaged tools. Focus on stability and control throughout.
Begin drilling at a low speed to create a shallow guide groove. This groove helps stabilize the bit and keeps it from wandering. Once established, gradually increase speed for smoother cutting.
Apply light, consistent pressure rather than forcing the drill. Let the bit do the work. Excessive force increases friction and risks burning the wood.
Stop occasionally to clear sawdust from the hole. Overheating dulls bits quickly, especially with large diameters. Blowing or vacuuming out the chips keeps visibility clear and tools sharp.
If drilling all the way through, slow down before reaching the exit side. Reducing speed at the end prevents breakout or splintering. The backing board underneath will protect the surface.
Once finished, inspect the edges and surface for cleanliness. A proper cut should have even walls and no char marks.
Why does my drill smoke while drilling?
Overheating from high speed or dull bits causes friction and smoke; reduce speed and clean your bit.
What is the safest speed for drilling a 2.5 inch hole?
Use a slow to medium speed, around 500–800 RPM depending on wood hardness.
Do I need a pilot hole before using a hole saw?
Yes, the pilot bit in the center stabilizes the hole saw and prevents wandering.
Can I drill large holes with a cordless drill?
Yes, but use a high-torque model and keep speed low to avoid motor strain.
Should I lubricate the bit while drilling?
Not for wood. Drilling dry gives better control and avoids stains or glue issues.
Preventing Tear-Out and Splintering
Tear-out happens when wood fibers break at the exit of a drilled hole. It leaves a rough, chipped edge that looks unprofessional. Preventing this requires a few simple adjustments.
Always use a backing board beneath your workpiece. It supports the fibers as the bit exits, preventing splinters. A scrap piece of wood works perfectly for this.
Reduce drill speed when nearing the end of the cut. Gentle, controlled drilling gives cleaner edges. Fast exits are the main cause of tear-out.
Keep your bits sharp and clean at all times. Dull bits tear rather than slice through fibers. Sharp tools are essential for smooth holes.
Drill halfway from one side, then flip the board and finish from the other side for extra clean results. This method works especially well for thin or decorative pieces.
After drilling, lightly sand the edges with fine-grit sandpaper to smooth out minor imperfections. A polished finish makes the hole look factory-cut.
Using a Hole Saw Attachment
A hole saw is one of the easiest and most common ways to make a 2.5 inch hole. It’s efficient, affordable, and works with most power drills. Understanding how to use it properly ensures clean results.
Attach the hole saw to an arbor that includes a pilot drill bit in the center. This keeps the saw steady during cutting. Tighten everything securely before starting.
Position the pilot bit on your mark and begin drilling at a low speed. Once the saw teeth make full contact, increase speed gradually. Keep your drill steady and perpendicular to the surface.
Stop occasionally to clear sawdust buildup. This prevents overheating and reduces resistance. A quick clean between cuts makes the process smoother.
If drilling deep or thick wood, pause to remove the core from inside the hole saw. The trapped plug can jam and damage the bit. Prying it out with a screwdriver between passes keeps the tool clear.
Once finished, inspect the hole for smoothness. A properly used hole saw leaves clean circular edges with minimal sanding required.
Using a Forstner Bit for Clean Precision
Forstner bits are ideal when precision and surface quality matter most. They create flat-bottom holes with crisp edges, perfect for woodworking and furniture projects.
Clamp the wood securely before drilling. Forstner bits have wide cutting edges and can grab if the material shifts. Stability ensures accuracy and safety.
Align the tip over your mark and drill slowly at medium speed. The outer rim cuts first, guiding the bit into the surface. Avoid high speeds to prevent burning.
Keep light pressure and allow the bit to remove wood smoothly. Pull the bit out occasionally to clear chips and cool down. This reduces friction and ensures sharp cutting action.
For deeper holes, drill in small increments rather than all at once. Removing material gradually prevents overheating and improves finish quality.
Once complete, you’ll notice smooth walls and a flat bottom. The hole will look clean enough for visible applications or hardware installations.
Can I use a Forstner bit with a handheld drill?
Yes, but maintain firm control and slow speed to prevent wobbling.
Why does my Forstner bit burn the wood?
Too much pressure or high speed causes friction; drill slowly and clear chips often.
How deep can Forstner bits cut?
Most can drill up to 2 inches deep, though some long-shank models go further.
Do I need to use a pilot hole first?
No, Forstner bits center themselves automatically due to their design.
What’s the best speed setting for Forstner bits?
Use 700–900 RPM for softwoods and 500–700 RPM for hardwoods.
Drilling Through Thick Wood
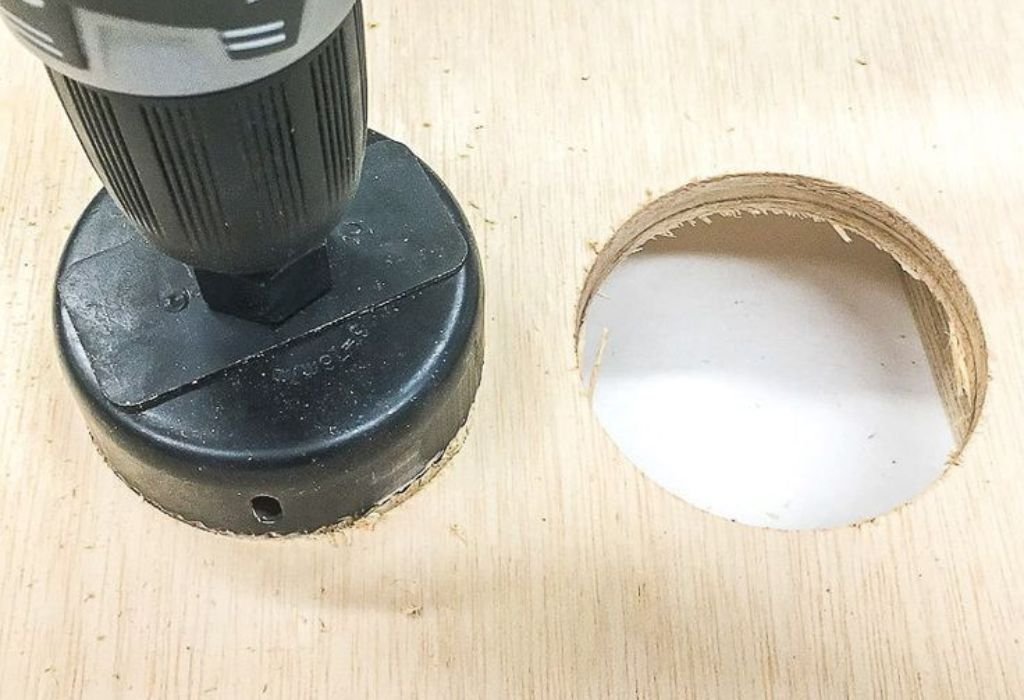
Drilling a 2.5 inch hole through thick wood requires patience and technique. The deeper the cut, the more friction and heat build up. Proper planning keeps the hole smooth and accurate.
If your drill bit isn’t long enough, drill from both sides. Align the entry and exit points using exact center markings. This creates a perfect hole without splintering.
Pause frequently to let the bit cool down. Overheating can burn the wood or dull the edges. Cooling between passes extends tool life.
Keep the drill straight and stable. Even slight tilts cause misalignment and uneven walls. Using a drill guide or press ensures perfect vertical drilling.
When cutting deep, clear chips regularly using compressed air or a vacuum. Clogged bits struggle to cut and may jam. Consistent cleaning prevents strain on your drill motor.
For a clean final finish, sand both edges gently once the hole is complete. Smooth edges prevent snagging and give a polished appearance.
Fixing Common Large-Hole Drilling Problems
Large holes sometimes come with unique challenges. Learning how to fix these issues ensures professional results every time.
If your drill binds or jerks, reduce speed immediately. Excess torque or fast cutting causes grabbing. Adjusting speed restores smooth operation.
Burn marks appear when the bit overheats. Clean the bit and lower RPMs for cooler cutting. Avoid pressing too hard into the wood.
Uneven holes happen if the drill tilts during entry. Start with a light pilot groove to keep alignment. Use both hands for steady pressure.
If the hole edges splinter, sand gently or trim with a sharp knife. Prevention works best through slow drilling and backing boards.
Finally, remove all chips and debris before finishing. Clean holes always look better and fit components perfectly.
Sanding and Finishing the Hole Edges
The final step in drilling is refining your hole’s appearance. Sanding and finishing smooth out any small imperfections. It also enhances the overall look of your project.
Use fine-grit sandpaper to polish the edges. Wrap it around a dowel or cylinder to maintain the circular shape. Light, even strokes work best.
If the wood surface is rough, sand both faces lightly to remove tool marks. Smooth surfaces prevent splinters and make paint or stain look uniform.
After sanding, wipe away dust with a dry cloth or tack rag. Clean wood allows paint, stain, or sealant to adhere properly. Always finish on a clean surface.
Apply a thin coat of stain, varnish, or sealant if needed. It protects the exposed edges and prevents moisture absorption. Let it dry completely before assembly.
Polished holes not only look professional but also extend the life of your work. A clean edge shows craftsmanship and attention to detail.
Conclusion
Drilling a 2.5 inch hole in wood might sound challenging, but with the right tools and technique, it’s simple and rewarding. Precision, patience, and preparation are the keys to success. Every smooth cut begins with careful setup and ends with confident finishing.
Choosing the correct bit, controlling drill speed, and preventing tear-out guarantee professional-quality results. Whether you’re building furniture or installing fixtures, these steps ensure strength and beauty.
Always remember to clamp securely, drill steadily, and clear debris often. These habits keep your work safe and accurate. The more you practice, the cleaner and faster your cuts will become.
With this guide, you can drill large, perfect holes in any wood type confidently. Every project will reflect precision, craftsmanship, and care from start to finish.

I’m John F. Nicholas, the founder, lead writer, and drill enthusiast behind 101drill.com. With years of hands-on experience in power tools and DIY projects, I created this platform to share practical knowledge, expert tips, and real-world insights to help others master the art of drilling.