
I stared at the pristine red brick wall, my new shelf and its brackets laid out neatly on the drop cloth. I was ready.
I’d even bought a set of expensive, high-performance cobalt drill bits for this very moment, believing they were the ultimate solution for any tough drilling task. I carefully marked my spots, donned my safety glasses, and fitted the shiniest bit into my drill.
The whirring sound was promising as I pressed the bit against the brick. But instead of a smooth entry, I was met with a harsh, grinding screech.
A small, dusty scar appeared on the brick’s surface, but the bit refused to bite deeper. A wisp of smoke and the smell of hot metal filled the air.
My heart sank. I was left with a ruined bit, a damaged wall, and one burning question: why did my best drill bit fail so spectacularly?
The answer lies in a fundamental misunderstanding of tools and materials. This isn’t just a story about a failed DIY project; it’s a crucial lesson in the specialized world of drill bits.
By the end of this guide, you’ll never make this mistake again. We will delve into the science of drill bits and uncover the right tool for masonry.
We will equip you with the knowledge to tackle any project with confidence. The frustration I felt was palpable, a mix of confusion and financial annoyance.
How could a bit marketed as “industrial strength” and “hardened” not be able to handle simple brick? I had assumed that “tough” was a universal quality.
This assumption was my first and biggest mistake. The world of drill bits is not about a single champion that can defeat all foes.
It’s a specialized army, where each soldier has a specific role and enemy they are trained to combat. My cobalt bit was a special forces operative trained for surgical strikes on metal.
It was not a sledgehammer for pulverizing stone. I put down the drill, looked at the sad, blue-tipped bit, and decided to become a student of the craft.
What followed was a deep dive into metallurgy, tool design, and the very nature of materials like brick and concrete. This article is the culmination of that research.
It is a guide designed to save you from the same headache. We will explore the unique design of cobalt bits and the specialized anatomy of masonry bits.
We will walk through the precise steps to drilling into stone-like materials perfectly. Your future projects deserve the right tools. By the end of this, you will know exactly how to choose them.
What Are Cobalt Drill Bits Actually Designed For?
Cobalt drill bits are the undisputed champions of the metalworking world. They are not simply “better” versions of standard HSS (High-Speed Steel) bits.
They are a different class of tool entirely. The key to their prowess lies in the composition of the steel.
It is alloyed with 5% to 8% cobalt. This addition isn’t a minor tweak; it’s a game-changer.
It significantly increases the bit’s ability to retain its hardness and cutting edge at very high temperatures. When drilling into tough metals like stainless steel, titanium, or cast iron, immense friction is generated.
This creates heat that would cause a standard bit to soften, dull, and fail. The primary action of a cobalt bit is cutting.
Its sharp, precisely angled edges are designed to slice through the long, fibrous grain of metals. This action shears off small, curled chips of material.
This is a fundamentally different process from what is needed for masonry. Think of it like using a sharp chef’s knife.
You use a smooth, slicing motion to cut through a tomato. You would not use a hammering action to smash through it.
The knife is the cobalt bit, and the tomato is the piece of metal. This cutting action requires constant, sharp contact and high rotational speed.
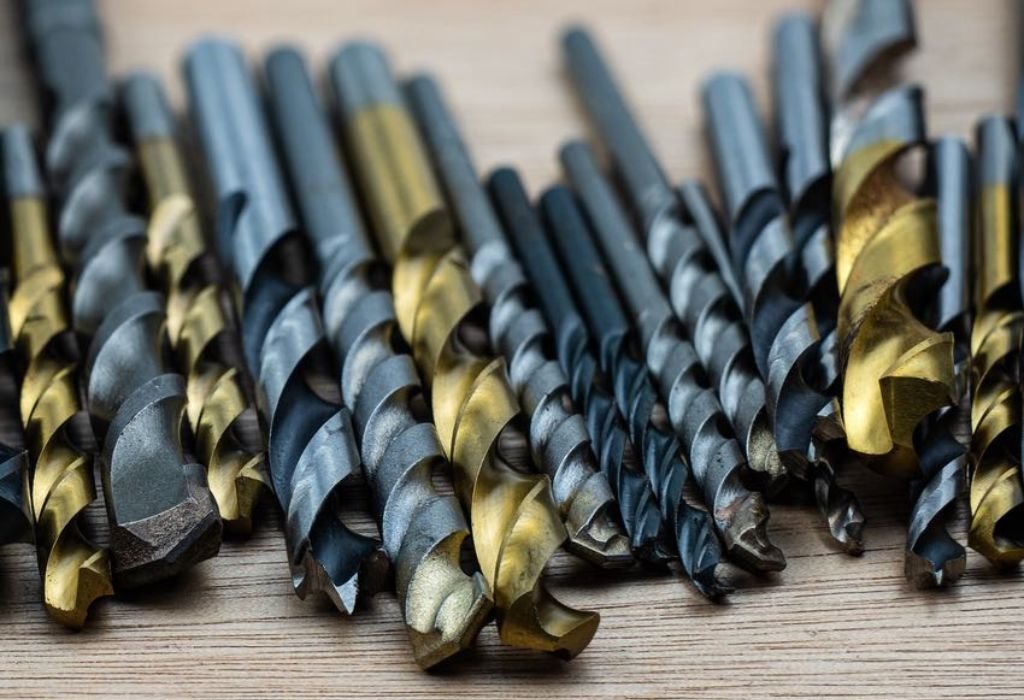
It works perfectly on materials that can be sheared. The bits also have a distinct appearance, often a straw-gold or silver colour.
This helps in identifying them in a toolbox. They are essential for any workshop that frequently works with hard metals.
However, their specialization is also their limitation. Using them outside their intended purpose leads to immediate failure.
The Anatomy of a Proper Masonry Drill Bit
A masonry drill bit is engineered for a completely different kind of battle. Where a cobalt bit slices, a masonry bit crushes and grinds.
Its entire design is a response to the abrasive, granular nature of materials like brick, concrete, and stone. The most critical part of a masonry bit is its tip.
This is not a sharp, pointed tip designed for cutting. Instead, it is a broad, chisel-like tip made of super-hard tungsten carbide.
This carbide tip is brazed onto the steel body of the bit. It is significantly harder than the cobalt alloy itself.
Its job is not to cut, but to pulverize. As the bit rotates, this flat, hard tip smashes the aggregate in the concrete into dust.
It works like a miniature jackhammer. This is why a hammer drill is almost always used with these bits.
The hammer drill provides a rapid, percussive force along with the rotation. This hammering action drives the carbide tip into the material.
It micro-fractures the masonry with each impact. The rotation then clears the debris away.
The flute of a masonry bit is also specially designed. It is a deep, wide groove that spirals up the bit’s shaft.
Its primary purpose is dust evacuation. As the bit grinds the concrete, it creates a fine, abrasive powder.
If this powder is not removed, it will clog the hole. A clogged hole creates immense friction and heat.
It can quickly trap and snap the bit. The wide flutes efficiently channel this dust out of the hole.
This keeps the bit cool and the process moving. The body of the bit behind the tip is made of a tough, but more flexible, steel.
This allows it to withstand the violent hammering without shattering. Visually, masonry bits are easy to spot.
They have a wide, paddle-like tip and often a dark grey colour. They are tools of brute force, not finesse. They are the sledgehammers of the drill bit world.
What Happens When You Force a Cobalt Bit into Brick?
The moment a cobalt drill bit meets a brick wall, a destructive chain reaction begins. The first point of failure is the cutting edge.
The sharp, acute angle of the cobalt bit’s tip is designed to bite into metal. When pressed against hard, abrasive brick, it cannot get a purchase.
Instead of slicing, it skates and scrapes across the surface. This creates a huge amount of friction instantly.
Friction is the enemy of all tools. It generates intense, localized heat at the very tip of the bit.
A cobalt bit is heat-resistant, but this is beyond its design limits. The temperature can easily exceed the point where the steel loses its “temper.”
Tempering is the heat treatment that gives the steel its hardness. When you overheat it, you effectively “untemper” it.
This causes the cutting edge to soften and anneal. You will see physical evidence of this failure.
The very tip of the bit will turn a dark blue or purple colour. This is a sure sign that the steel has been ruined.
The bit is now permanently dulled. Even if you could re-sharpen it, the metallurgy is compromised.
Meanwhile, the abrasive nature of the brick acts like sandpaper on the bit’s flutes. It wears down the edges and increases resistance.
The bit, now soft and dull, grinds to a complete halt. It might spin, but it will not progress.
All it does is create a shallow, scorched divot in the brick. The user often applies more pressure, worsening the situation.
This can lead to the bit snapping under the torsional stress. A broken bit stuck in a wall is a much bigger problem.
At best, you have a ruined and expensive drill bit. At worst, you have a safety hazard and a damaged workpiece.
The project is now stalled until the right tool is acquired.
A Step-by-Step Guide to Drilling into Masonry Correctly
Drilling into masonry successfully requires the right tools and the right technique. Following these steps will ensure a clean, safe, and effective result every time.
First, you must correctly identify your masonry material. Is it relatively soft brick, medium-hard concrete block, or hard, aggregate-filled poured concrete?
The hardness will influence your bit choice and power tool. For soft brick, a good carbide bit in a hammer drill will suffice.
For poured concrete, you will need a high-quality bit and possibly a rotary hammer. Next, select the correct masonry bit for the job.
Ensure it is the right diameter and length for the anchor you plan to use. A bit that is too small will not fit the anchor.
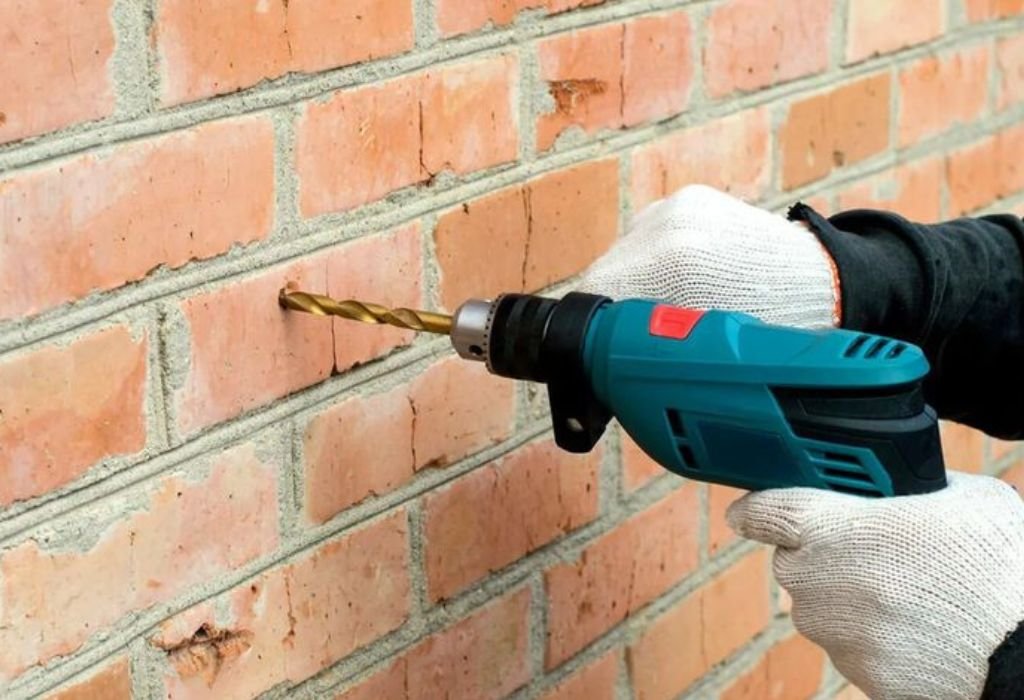
A bit that is too large will create a loose, weak hold. The most essential tool for the job is a hammer drill.
A standard drill simply does not provide the impacting force needed. The hammering action is non-negotiable for efficient drilling.
Set your drill to the “hammer” mode, which is usually represented by a hammer icon. Before you start drilling, mark your spot clearly.
Use a center punch and a hammer to create a small indentation at the mark. This will prevent the drill bit from “walking” or skidding off the spot when you start.
This initial guide is crucial for accuracy. When you begin drilling, hold the drill steady and perpendicular to the wall.
Apply firm, consistent pressure, but let the tool do the work. Do not force it or lean into it with all your weight.
This can strain the drill motor and increase the risk of breaking the bit. Periodically, pull the bit partially out of the hole.
This helps to clear the accumulated concrete dust from the hole and the bit’s flutes. A clean hole drills faster and keeps the bit cooler.
If you are drilling a deep hole, you may need to do this several times. You will know you are drilling correctly by the sound and feel.
It should be a rhythmic, crunching sound, not a high-pitched screech. Once the hole is drilled to the desired depth, stop the drill.
While the bit is still spinning, slowly withdraw it from the hole. This helps to finalize the cleaning of the hole.
Before inserting your anchor, use a can of compressed air or a vacuum to blow out any remaining dust from the hole. A clean hole ensures your anchor can expand fully and achieve maximum holding power.
Now your wall is ready for a secure and lasting fixture.
Your Ultimate Drill Bit Selection Guide (With Charts)
Navigating the world of drill bits can be confusing, but it becomes simple when you match the bit to the material. This guide will help you build the perfect toolkit for your projects.
Let’s start with the star of our article: the Cobalt Drill Bit. Its primary domain is hard metals.
Use it for stainless steel, titanium, cast iron, and hardened steel. It requires high rotational speed and cutting oil for best results.
It is the wrong choice for wood, masonry, and soft plastics. Next, we have the Masonry Drill Bit.
This is your go-to for all brittle, abrasive materials. It is designed for concrete, brick, stone, and mortar.
It is absolutely dependent on being used in a hammer drill for effective performance. Never use it for metal or precise woodworking.
For general-purpose drilling, consider the Titanium-Coated HSS Bit. This is an excellent all-rounder for DIYers.
The titanium nitride coating reduces friction and increases wear resistance. It works very well on soft steel, wood, and plastic.
It is not for masonry or hardened metals. The coating can wear off over time.
Then there is the Black Oxide HSS Bit. It is a cost-effective general-purpose bit.
The black oxide finish provides some heat resistance and protection against corrosion. It is suitable for soft metals, wood, and plastic.
It is less durable than titanium or cobalt bits. For woodworking specifically, a Brad-Point Bit is superior.
It has a sharp, centered point that prevents wandering and ensures a clean, precise hole in wood. It is not suitable for metal or masonry.
For large holes in wood, Spade Bits or Hole Saws are the appropriate choice. For the toughest industrial applications, Solid Carbide Bits are used.
These are extremely hard and brittle, designed for abrasive composites and hard tile. They are expensive and can snap under lateral pressure.
They are highly specialized tools. A simple rule of thumb: if the material is fibrous (wood, metal), use a cutting bit.
If the material is granular (concrete, brick), use a grinding bit. Investing in a small set of each primary type is better than one large set of mediocre bits.
Frequently Asked Questions About can you use cobalt drill bits for masonry
I used a cobalt bit on concrete and it got ruined. Can I sharpen it?
While technically possible, sharpening a cobalt drill bit is not a practical task for most DIY users. It requires a specialized bench grinder with a diamond wheel to accurately re-establish the complex geometry of the cutting edges and the 135-degree split point, all while carefully managing heat to avoid further damaging the steel’s temper. Given the time, cost of equipment, and skill required, it is almost always more economical to simply replace the bit. Consider the ruined bit a relatively inexpensive lesson in using the correct tool for the material, and invest in a proper masonry bit for your next project.
What is the absolute best drill bit for hard, aggregate-filled concrete?
For the most challenging concrete jobs, the undisputed best drill bit is a high-quality carbide-tipped bit designed specifically for a rotary hammer drill (often an SDS-Plus or SDS-Max shank type). These bits feature a higher grade of tungsten carbide that can effectively crush and grind through the tough sand, gravel, and stone particles within the concrete. Standard masonry bits used in a regular hammer drill will wear out extremely quickly and make for slow, frustrating progress. For professional results or frequent use, the combination of a rotary hammer and a dedicated carbide bit is a night-and-day difference in speed and efficiency.
Can I use a masonry bit to drill into metal or wood in a pinch?
You should avoid using a masonry bit for metal or wood, as it will perform poorly and can be dangerous. Its design is for a grinding, hammering action, which will tear and splinter wood fibres instead of cutting them cleanly, resulting in a rough, inaccurate hole. On metal, the carbide tip is too brittle for the shearing forces and the flute design is inefficient for chip removal, leading to immediate dulling, extreme heat buildup, and a high risk of the bit snapping. Always match the bit to the material: use twist bits for metal and brad-point or spade bits for wood to achieve clean, precise, and safe results.
Conclusion
I eventually returned to that brick wall, but this time I was armed with knowledge and the correct tool. A simple, inexpensive carbide-tipped masonry bit and the hammer setting on my drill made all the difference.
The process was smooth, efficient, and almost effortless. The rhythmic thump-thump-thump of the hammer drill and the steady progress of the bit were deeply satisfying.
My shelf went up securely, and the lesson was learned for a lifetime. The core principle is simple yet profound: Cobalt for hard metals, Masonry bits for brick and concrete.
Trying to interchange them is a recipe for frustration, wasted money, and failed projects. Understanding the “why” behind tool specialization is what separates a struggling beginner from a confident DIYer.
It empowers you to look at a project, assess the materials, and select the perfect tool from your kit. You don’t need a garage full of every tool imaginable.
You just need a small, curated collection of the right ones. Build your toolkit with purpose, choosing quality over quantity for the tasks you actually perform.
Let this experience be a guide for all your future projects. Embrace the specialization of tools.
Respect the science behind their design. The empowering feeling of using the right tool and doing the job correctly, safely, and efficiently is the ultimate reward for any craftsman.

I’m John F. Nicholas, the founder, lead writer, and drill enthusiast behind 101drill.com. With years of hands-on experience in power tools and DIY projects, I created this platform to share practical knowledge, expert tips, and real-world insights to help others master the art of drilling.