
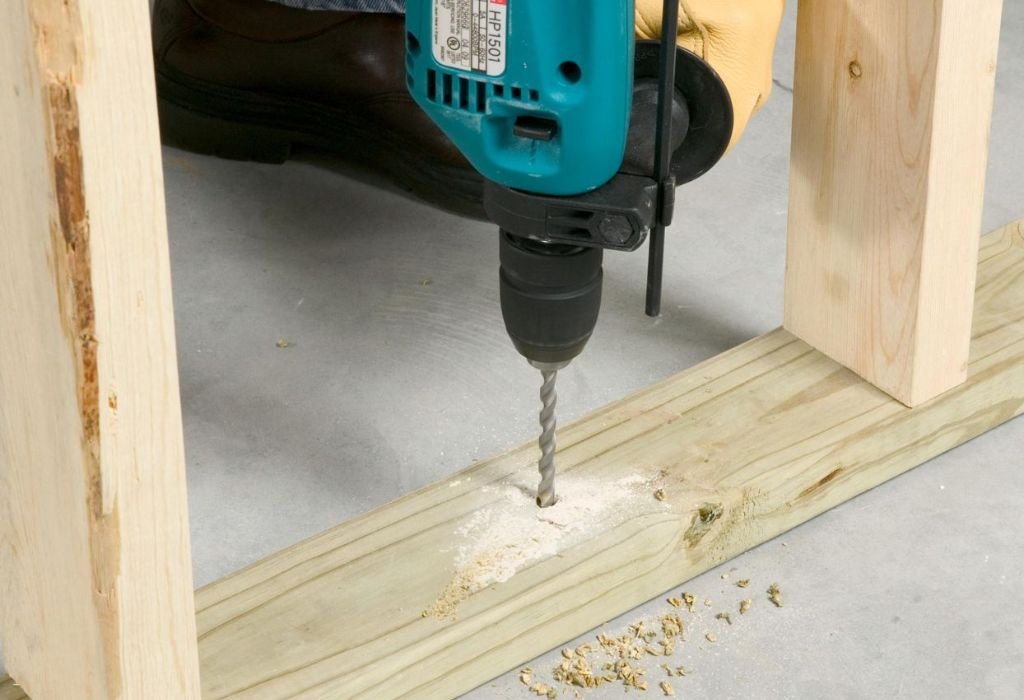
You pick up your drill, mark a hole, and press against the concrete wall. The sound is harsh, the dust flies, and the bit begins to glow red from heat. Within seconds, you realize you have barely made a dent, and your patience starts to fade.
Drilling concrete is not for the faint of heart. It’s time-consuming, noisy, and physically demanding. Even the most powerful drills struggle against the dense surface, while the vibration rattles your arms and nerves.
For renters or homeowners, the problem becomes even more serious. Drilling can cause cracks, break plaster, or leave permanent holes in a surface that might not even be yours. Repairing those damages later costs more than the effort was worth.
That’s why finding a method to attach wood to concrete without drilling is so valuable. It saves time, energy, and potential damage while still achieving a secure bond. Whether you’re mounting trim, framing a wall, or installing shelves, there are cleaner, safer solutions available.
The best part is that modern technology has made it easier than ever. Adhesives, tapes, and bonding foams can handle incredible weight without mechanical fasteners. Once you understand how they work, you’ll never reach for your drill again.
Why Avoiding Drilling Can Be a Smart Choice
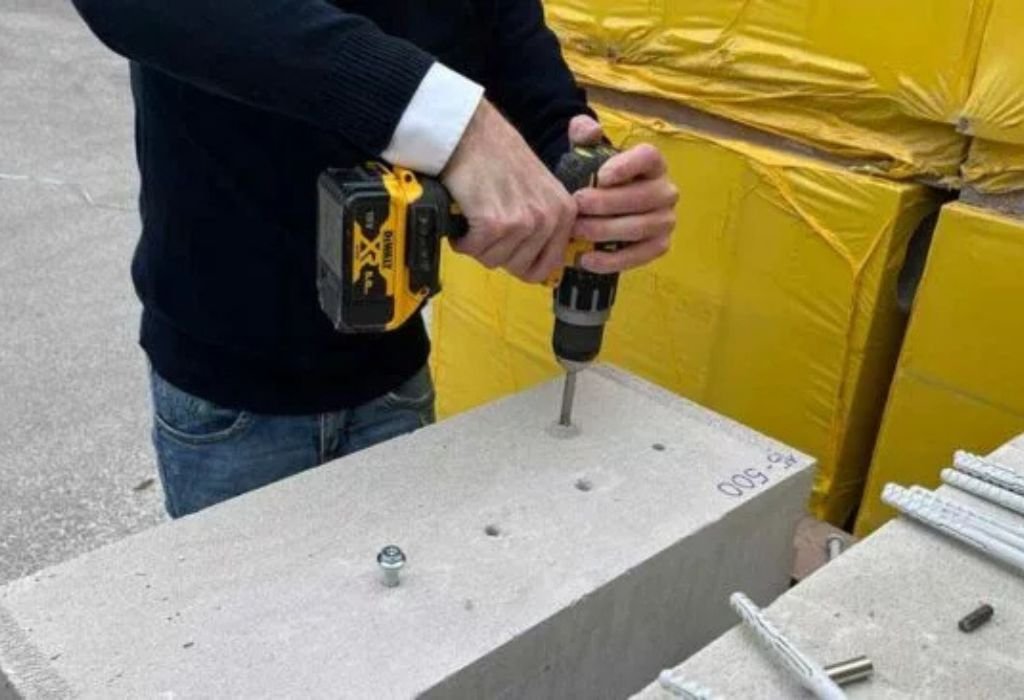
Concrete is one of the hardest materials to drill into because it’s made of cement, stone, and sand bound under high compression. Each component contributes to its strength but also to its resistance. Even professional masons struggle when tools are not properly matched to the job.
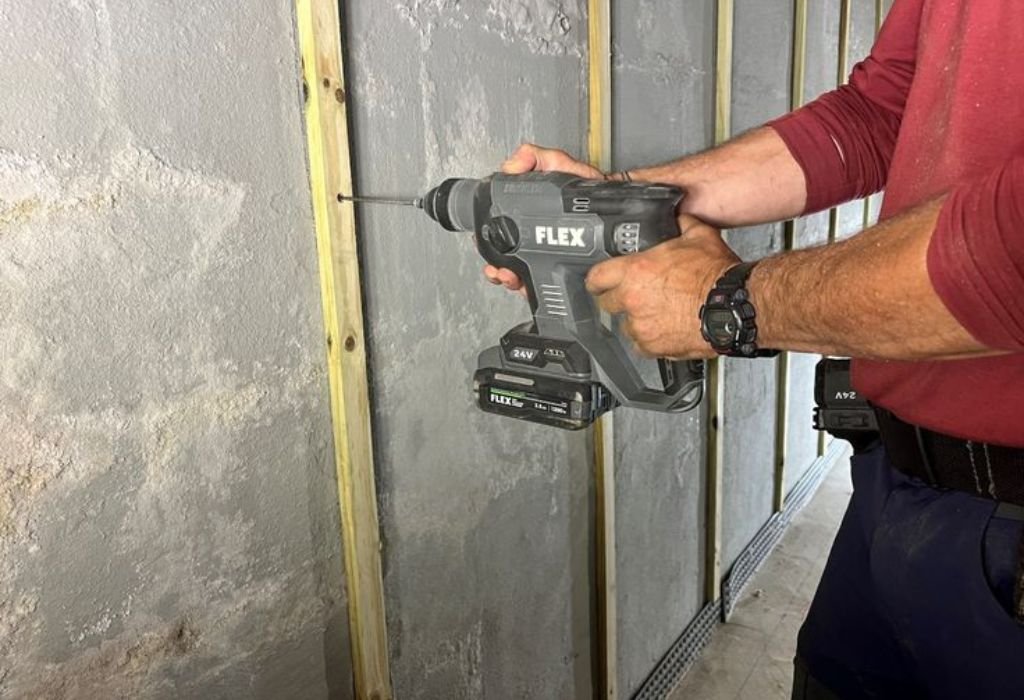
Drilling creates dust that fills the air and lungs. The cleanup afterward can take longer than the drilling itself. In indoor spaces, fine particles settle into cracks, furniture, and electronics.
Over time, drilling also weakens concrete surfaces if done repeatedly. Each hole slightly disrupts the internal structure and creates micro-cracks that can expand with temperature changes. That makes non-drilling solutions far safer for long-term durability.
In commercial or rental settings, there’s also a legal concern. Many property owners prohibit modifications that alter the structure. Even a single hole can violate lease terms or warranties.
Then there’s the cost factor. Quality masonry bits wear out quickly, and hammer drills consume a lot of power. Using adhesive or tape instead eliminates both the wear and energy waste while still providing strong, lasting results.
Avoiding drilling doesn’t just prevent damage; it also opens up more creative options. You can mount decorative panels, wood planks, or baseboards without worrying about structural impact.
The Role of Modern Adhesives in Wood-to-Concrete Bonding
Adhesives have come a long way from simple glues used for crafts. Today’s construction adhesives are chemical marvels designed to handle extreme stress, moisture, and vibration. When used correctly, they can hold wood to concrete for years without a single screw.
These adhesives work by forming molecular bonds with both surfaces. As they cure, they expand slightly, filling micro gaps that traditional fasteners can’t reach. This results in a uniform distribution of force that actually strengthens the attachment over time.
For wood-to-concrete applications, polyurethane-based adhesives are the top choice. They’re flexible, waterproof, and resist temperature changes. Once applied, they remain strong even under weight or environmental stress.
To use them effectively, both surfaces must be properly prepared. Dust, grease, or moisture can interfere with adhesion. A quick cleaning with alcohol or a damp cloth ensures the glue penetrates deeply.
Once pressed together, the bond starts forming immediately, though full curing can take up to 24 hours. After that, the wood feels as though it’s been bolted in place. This makes adhesives an ideal solution for both permanent and semi-permanent installations.
Can construction adhesives hold heavy loads like bolts?
Yes, premium-grade adhesives can rival bolts when bonding wood to concrete. When surfaces are clean and clamped properly, the resulting bond can support hundreds of pounds. The secret lies in even pressure and complete curing time.
What if I need to remove the wood later?
Removing adhesive-bonded wood is possible using gentle heat or a solvent. Softening the adhesive allows the wood to detach with minimal damage. However, always test in a small area first to ensure the concrete finish remains intact.
Are construction adhesives safe for indoor use?
Most modern brands are low-odor and non-toxic once cured. Choose solvent-free or low-VOC formulas for interior spaces to maintain air quality. Adequate ventilation during curing ensures a safe environment.
Can adhesives be applied on painted concrete?
They can, but the paint must be secure. If the paint is flaking or glossy, sanding lightly will help the adhesive grip better. A solid base ensures long-term strength.
What is the difference between polyurethane and silicone adhesives?
Polyurethane adhesives are stronger and more rigid once cured, ideal for heavy attachments. Silicone is flexible and better for sealing joints but not for structural bonding. For wood-to-concrete, polyurethane remains the superior choice.
Understanding Epoxy Bonding for Maximum Strength
Epoxy is often referred to as the “industrial solution” for wood-to-concrete connections. Unlike standard adhesives, epoxy creates a chemical bond that penetrates the pores of both materials. When it hardens, it forms a rock-like joint that can last decades.
The process starts by mixing two components — resin and hardener — in equal parts. Once combined, they start reacting instantly, so timing is crucial. Apply the mixture evenly and press the materials together before it thickens.
Epoxy excels in extreme conditions. It’s waterproof, heat-resistant, and can endure both outdoor weather and indoor humidity. That’s why it’s commonly used in marine construction, garage floors, and industrial framing.
To ensure a perfect bond, roughen the surfaces slightly before application. A little texture helps the epoxy grip firmly. Avoid applying in very cold or hot environments, as temperature affects curing time.
Once cured, epoxy creates a bond that is nearly impossible to break without damaging the materials. This makes it ideal for permanent installations like wall panels or heavy beams.
Can epoxy replace nails or screws entirely?
In many cases, yes. A properly applied epoxy joint can outperform traditional fasteners. For extra security, it can also be combined with braces or supports during curing.
How long does epoxy take to set completely?
Depending on the brand, initial bonding happens within an hour, but full curing can take up to 48 hours. Always follow the manufacturer’s instructions to ensure strength.
Can epoxy be used on damp concrete?
Epoxy requires a dry surface to cure correctly. Moisture can interfere with bonding and create weak spots. If working in humid environments, use moisture-tolerant epoxy designed for such conditions.
What happens if I mix too much epoxy at once?
The chemical reaction generates heat, so large batches harden faster. Mix small portions and use them immediately to avoid waste. This ensures consistent performance.
Is epoxy safe for indoor use?
Yes, but ventilation is important during application. Once cured, epoxy is inert and safe, but always wear gloves and avoid inhaling fumes during mixing.
Using Heavy-Duty Construction Adhesives Like Liquid Nails
Liquid Nails and similar high-strength adhesives have become the go-to choice for home projects. They bond wood, concrete, and many other materials easily without the need for power tools. For those who want a clean, simple method, it’s a near-perfect solution.
These adhesives are applied using a caulking gun. The bead should be thick enough to fill gaps but not so heavy that it oozes out. Once pressed together, the adhesive begins gripping immediately.
For larger wood surfaces like planks or studs, it’s best to brace them temporarily while the adhesive cures. This prevents movement that could weaken the bond. After curing, the wood feels as if it were nailed directly to the wall.
Liquid Nails formulations come in multiple variants for different materials. Always choose the “wood and concrete” or “multi-surface” version for best results. The wrong type may not adhere properly to porous concrete.
Cleanup is simple — any uncured adhesive can be wiped with a damp cloth. Once dry, it’s waterproof and resistant to vibration. It’s ideal for attaching decorative panels, framing, and light structural applications.
Can Liquid Nails be used outdoors?
Yes, as long as you choose a weather-resistant formula. Outdoor variants can handle rain, heat, and UV rays without weakening. Always check the label before use.
How much weight can Liquid Nails hold?
When properly applied, it can support hundreds of pounds per square foot. However, real performance depends on surface preparation, curing time, and contact area. For heavier loads, add mechanical bracing until cured.
Does Liquid Nails work on rough or uneven concrete?
It can, but applying more adhesive in low spots helps fill gaps. For extremely uneven surfaces, combine with foam adhesive or sand the area flat. Full contact is essential for strength.
Is it removable later without damage?
Partially, yes. Heat or a solvent can soften the cured adhesive for removal. However, small traces may remain on both surfaces. If long-term removability is important, use a less permanent mounting method.
Can Liquid Nails resist moisture and humidity indoors?
Absolutely. It’s commonly used in bathrooms and basements. Just ensure proper curing before exposure to constant dampness.
Mounting Wood with Advanced Construction Tapes
Sometimes, the simplest tools deliver the most elegant results. Modern double-sided construction tapes are engineered to handle surprising weight loads while maintaining a clean look. For small or medium-sized wood fixtures, they offer a no-mess solution.
High-bond tapes like 3M VHB and Gorilla Mounting Tape use acrylic foam cores that conform to uneven surfaces. They create instant adhesion and distribute pressure evenly across the contact area. Once applied, the bond strengthens over 24 hours.
To use, clean both surfaces thoroughly with isopropyl alcohol. Cut pieces of tape and press them along the wood’s back in vertical strips. Firmly apply the wood to the concrete, maintaining pressure for several seconds.
Within minutes, the attachment becomes strong enough for lightweight shelves, trims, and baseboards. These tapes can handle weight loads up to 10–15 pounds per strip, depending on size and brand.
One of the biggest advantages is removability. You can detach the wood later using gentle heat or a thin wire without leaving residue. For temporary or decorative projects, this flexibility is unmatched.
Can construction tapes hold heavy wood panels?
Only up to a limit. For large or heavy boards, combine tape with light adhesive for added strength. This hybrid method provides both instant grip and long-term security.
Are these tapes weather-resistant?
Yes, many variants are designed for outdoor use. UV and water-resistant versions can withstand rain and sunlight. Always read product specifications before application.
Do temperature changes affect tape bonding?
Extreme cold can reduce tackiness, while heat softens the adhesive. Apply in moderate temperatures for optimal results. Once cured, the bond stabilizes even in fluctuating climates.
Can I reuse mounting tape?
No, once removed, its adhesive properties are lost. Always use fresh strips for new installations. Reusing tape leads to weaker adhesion.
What surfaces should I avoid?
Avoid dusty, oily, or flaky surfaces. The tape needs direct contact with solid material to work. Painted concrete is fine as long as the paint layer is secure.
Using Magnetic or Mechanical Clamps for Temporary Attachment
When you think of attaching wood to concrete, magnets might not be the first solution that comes to mind.
Yet, in spaces where steel reinforcement exists beneath or inside concrete, magnetic attachments can be a clever option. Strong neodymium magnets paired with thin steel plates create a surprisingly durable connection.
This method works best for garages, workshops, or industrial spaces where some structural metal is accessible. The magnetic pull can hold lightweight wooden fixtures such as racks, boards, or tool holders.
Since no drilling or adhesive is required, you can reposition items anytime without leaving marks.
Mechanical clamping systems also provide a practical, reusable approach. By using braces or support frames that press wood against concrete, you achieve stability through force rather than penetration.
Construction-grade clamps can hold large beams securely during framing or adhesive curing.
These solutions excel in temporary projects. Builders often use them while adhesives are drying or to test layout positions before permanent installation. They’re also ideal for tenants who can’t modify walls but want to mount temporary wooden panels or fixtures.
Magnets and clamps are completely reversible. They don’t leave residue or dust, and removal takes seconds. For those who frequently change room layouts or displays, they offer flexibility that permanent methods lack.
Can magnetic systems support heavy wood structures?
They can, but within reasonable limits. Strong neodymium magnets can handle around 10–20 pounds each, depending on surface contact. For larger pieces, distribute magnets evenly across the board to balance the load.
Do magnets work on plain concrete walls?
Only if the concrete contains steel reinforcement or embedded plates. Otherwise, you can attach a thin sheet of metal to the surface first, then use magnets on top of it. This creates a strong and reusable magnetic base.
Are mechanical clamps suitable for outdoor use?
Yes, but use rust-resistant clamps made from stainless steel or coated alloys. Outdoor moisture can corrode standard metal clamps over time, weakening grip strength. Always inspect them regularly for wear.
Can magnets damage electrical wiring inside walls?
No, household magnets are safe. However, avoid placing them near sensitive electronic devices like hard drives or speakers. For normal household use, they pose no danger to wiring.
Is it safe to use magnets with adhesives together?
Yes, in fact, magnets are often used to hold materials in position while adhesives cure. Once the glue sets, magnets can be removed, leaving a perfectly aligned joint.
Attaching Wood to Concrete Using a Friction Fit
A friction-fit method relies purely on physical pressure to hold materials in place. By cutting wood pieces slightly larger than the available space, you can wedge them tightly between surfaces. This approach works beautifully for indoor trim, moldings, or partitions.
The trick is precision. Measure the gap carefully and use fine adjustments to ensure snug contact. Too much force can crack wood fibers, while too little pressure results in looseness.
Friction fitting is particularly useful for projects like baseboards or corner framing. In these cases, the wood stays put simply through tight spacing and strategic cuts. For added grip, thin layers of foam or rubber padding can increase friction and reduce vibration.
This technique avoids adhesives and is entirely removable. You can take apart or reposition the wood without residue or mess. It’s also ideal for testing layouts before applying permanent methods like glue or foam adhesive.
Friction fits may not support very heavy loads, but they provide excellent temporary stability. Combined with slight surface texturing or silicone pads, they can handle most decorative or light framing tasks.
Can a friction fit hold during temperature changes?
It depends on material expansion. Both concrete and wood expand at different rates, so gaps might form in extreme heat or cold. Using flexible spacers helps maintain consistent pressure.
What can improve a weak friction fit?
A small amount of removable adhesive or double-sided tape adds extra holding power. Silicone-based products work best for non-permanent reinforcement. This hybrid approach maintains flexibility while improving grip.
Is a friction fit suitable for ceilings or overhead applications?
No, it’s not recommended for overhead use. Gravity can pull the wood loose over time. Instead, combine friction fit with lightweight adhesive or brackets for better safety.
Can friction fits damage walls or floors?
Not if done properly. Smooth surfaces and gentle tapping with a rubber mallet minimize risk. Avoid excessive force that might chip the edges of concrete or wood.
What’s the advantage of friction fit over adhesives?
It’s fully reversible and doesn’t alter the material surface. Perfect for testing placements or in rented properties, friction fitting offers flexibility that glues cannot.
Using Expanding Foam Adhesive for Uneven Surfaces
Expanding polyurethane foam adhesive is a remarkable solution for bonding wood to irregular concrete surfaces.
It fills gaps, adjusts to uneven textures, and forms a secure, weather-resistant hold. Once cured, it becomes firm yet slightly flexible — perfect for vibration-prone structures.
To apply, clean both surfaces and shake the can thoroughly. Apply a thin bead along the wood’s edge, then press it against the concrete. The foam will expand slightly to fill spaces and create uniform pressure.
The expansion process is what gives this adhesive its power. As it grows, it grips even the smallest crevices of the concrete. After curing, it hardens into a dense, structural layer that resists moisture and temperature changes.
Foam adhesives are widely used for exterior framing, subflooring, and wall panels. They can bond dissimilar materials without the need for nails or anchors. Once dry, trimming any excess with a knife ensures a neat finish.
This method works particularly well in basements, garages, or outdoor structures. The foam’s water resistance prevents bond degradation caused by humidity or leaks. It’s a dependable long-term solution.
Is expansion foam safe to use on painted surfaces?
Yes, as long as the paint is stable and not peeling. Sand lightly to increase grip if the paint layer is glossy. Always test a small area before full application.
Does the foam expand too much and push materials apart?
If applied correctly, no. Using small, controlled beads prevents excessive expansion. The key is patience — apply less, and let the foam do the rest.
Can expansion foam be used in vertical applications?
Yes, but it’s best to support the wood while the foam sets. Clamps or temporary braces prevent slippage during the first hour of curing.
Is it resistant to outdoor elements?
Absolutely. Most polyurethane foams are UV-resistant and waterproof. Once cured, they withstand rain, sunlight, and seasonal temperature changes with ease.
What safety precautions should I take?
Wear gloves and safety glasses. The foam is sticky and difficult to remove from skin or clothing. Work in a ventilated area to avoid inhaling fumes.
Combining Multiple Techniques for Superior Strength
Sometimes one method isn’t enough. Combining adhesives, tapes, or clamps can dramatically increase holding power and ensure long-term reliability. This multi-layered approach is common in professional carpentry and construction.
For example, you can use mounting tape to hold the wood in place while construction adhesive cures. The tape provides immediate support, while the glue forms a permanent bond over time. This combination eliminates the need for drilling or screws.
Foam adhesive and epoxy can also be used together. The foam fills voids, while epoxy strengthens the surface contact. Together, they create an incredibly durable, moisture-resistant seal.
By testing combinations on a small section first, you can tailor the method to your environment. Variables like humidity, weight, and material texture influence the best pairing. Some setups might favor flexibility, while others need absolute rigidity.
Hybrid bonding methods also make removal easier. If you use a weaker adhesive layer near the surface, you can detach it later without damaging the concrete. Professionals often rely on this strategy when installing temporary panels or fixtures.
Can you apply two adhesives directly over each other?
Only if they are chemically compatible. Mixing solvent-based and water-based glues can weaken both. Check product labels to ensure they can safely be layered.
How long should I wait between applying two products?
Allow the first to partially cure — tacky but not dry — before adding the second. This creates interlocking bonds that maximize grip. Immediate layering can trap air and reduce strength.
Can tape lose adhesion over time in a combo setup?
Yes, particularly in humid areas. However, since the adhesive beneath takes over as it cures, performance remains consistent. Replace tape if re-adjustment becomes necessary.
Does combining adhesives make removal harder later?
It depends on which layer is stronger. Always plan ahead by using a removable product for surface contact and a permanent one deeper inside. This allows safe dismantling later.
Can I use both foam and tape together?
Yes, but sequence matters. Apply tape for initial hold, then inject foam in gaps for reinforcement. This prevents expansion pressure from misaligning the wood.
Maintaining and Extending Bond Longevity
No matter which method you choose, maintenance determines how long the bond lasts. Environmental factors like humidity, vibration, and temperature can slowly weaken adhesives if not monitored. Regular inspection ensures reliability.
Every few months, check for signs of separation, discoloration, or residue buildup. These are early indicators that the adhesive may be losing strength. Cleaning the joint area prevents dust and grease from undermining the bond.
For outdoor projects, resealing exposed edges every season can add years of durability. UV rays and rain degrade even the toughest adhesives over time. Applying a protective coating or sealant prevents this damage.
If removal or repositioning is ever required, heat softens most adhesives for safer detachment. Use a heat gun at low settings to loosen the bond before gently prying the wood away. Solvents can help dissolve leftover residue.
Maintaining temperature stability during installation also extends lifespan. Rapid changes between hot and cold can cause expansion and contraction that breaks the bond. Keeping indoor areas ventilated helps adhesives cure uniformly.
Professional Tips for Achieving a Flawless Finish
Getting a perfect finish requires patience and attention to detail. Start by aligning your materials properly before applying any adhesive or tape. Once contact occurs, adjustments become difficult or impossible.
For aesthetic projects, masking edges with painter’s tape before applying adhesive keeps lines clean. After pressing the wood in place, remove the tape immediately to prevent smudging or pulling. This trick is common among carpenters for crisp, professional edges.
Always pre-fit the wood before applying any product. Testing ensures that every curve and edge aligns perfectly. Small imperfections in shape can lead to uneven bonding or weak spots.
In multi-step projects, plan the order of assembly carefully. For example, apply adhesives first on hidden surfaces, then reinforce visible joints with tapes or brackets. This creates a balance between beauty and strength.
Finishing touches like sealants or paint add protection and polish. Wait until full curing before adding them, so trapped vapors don’t cause bubbles or discoloration. A well-timed finishing step completes a durable, elegant attachment.
Can I use wood filler over adhesive seams?
Yes, after the adhesive fully hardens. The filler covers gaps and improves appearance. Sand gently afterward for a seamless look before painting or staining.
Is sanding necessary before applying adhesive?
Light sanding improves grip by creating texture. It’s especially useful on glossy or sealed wood. Wipe away dust immediately after sanding to maintain clean contact.
Can adhesives replace nails in decorative trim?
Absolutely. Many professionals now use construction adhesive exclusively for trim and molding. It saves time and eliminates nail holes for a smoother finish.
How can I ensure perfect alignment for large panels?
Use temporary guides like wooden spacers or chalk lines. These help maintain straight positioning before bonding. Once adhesive sets, you’ll have a flawless layout.
What should I do if the adhesive dries too quickly during large projects?
Work in sections instead of applying all at once. This keeps the adhesive fresh for each portion. Divide the surface logically to prevent premature curing before placement.
Future Innovations in Non-Drilling Bonding Technology
As construction materials evolve, adhesives and tapes are getting stronger and smarter. Manufacturers are integrating nanotechnology and advanced polymers to increase bonding strength at a microscopic level. These innovations make non-drilling solutions even more reliable for structural applications.
Self-healing adhesives are one of the most exciting developments. When minor cracks or separations occur, they automatically reseal under moderate heat or pressure. This extends the lifespan of bonds without additional maintenance.
Another innovation is hybrid adhesives combining chemical and mechanical grip. These products use micro-hooks within the adhesive layer that interlock with surface pores, improving both shear and peel resistance.
Smart adhesives embedded with thermal or humidity sensors are also in development. These systems alert users if environmental conditions threaten bond integrity. In high-stakes projects like bridges or buildings, such technology can prevent failures before they occur.
Biodegradable and eco-friendly adhesives are growing rapidly as well. These new formulas offer strength similar to synthetic glues while reducing environmental impact. Builders aiming for sustainability certifications often prefer them for green projects.
Conclusion
Attaching wood to concrete without drilling is no longer a challenge. With modern adhesives, tapes, foams, and hybrid bonding systems, anyone can create strong, professional connections easily. Each method brings unique benefits, from clean aesthetics to incredible durability.
Gone are the days of cracked surfaces, loud tools, and clouds of dust. Instead, precision and innovation allow seamless installations that respect both material and structure. These techniques turn complex construction tasks into simple, controlled processes.
Whether you’re a DIY enthusiast hanging décor or a contractor framing walls, understanding how these methods work gives you confidence. Proper preparation, compatible materials, and patience ensure long-lasting bonds that rival traditional fasteners.
The future of construction lies in smarter, cleaner solutions. By mastering these no-drill methods, you embrace efficiency without sacrificing strength. Wood and concrete can now coexist beautifully — bonded securely, silently, and sustainably.
When you look at the result — smooth, stable, and flawless — you realize the best attachment doesn’t always require brute force. Sometimes, it just needs the right chemistry.

I’m John F. Nicholas, the founder, lead writer, and drill enthusiast behind 101drill.com. With years of hands-on experience in power tools and DIY projects, I created this platform to share practical knowledge, expert tips, and real-world insights to help others master the art of drilling.