
Most people don’t think about the size of a drill chuck key until the original one disappears. The moment a replacement is needed the challenge begins—different keys look similar but only one fits correctly.
Choosing the wrong size leads to slipping teeth, damaged gear rings, and a drill that cannot tighten a bit safely.
A drill chuck key works by engaging the gear teeth around the chuck and applying torque to tighten or loosen the jaws.
For this to happen correctly, the pilot post and gear teeth must match the chuck perfectly. Even a small mismatch prevents full engagement and stops the key from turning smoothly.
Understanding how to size a drill chuck key prevents frustration and saves time when replacing a lost or worn key.
With the right measurements and identification steps, anyone can find the proper fit without trial and error. A correctly sized key ensures safe tightening and keeps the drill operating reliably for years.
Why Sizing a Drill Chuck Key Matters
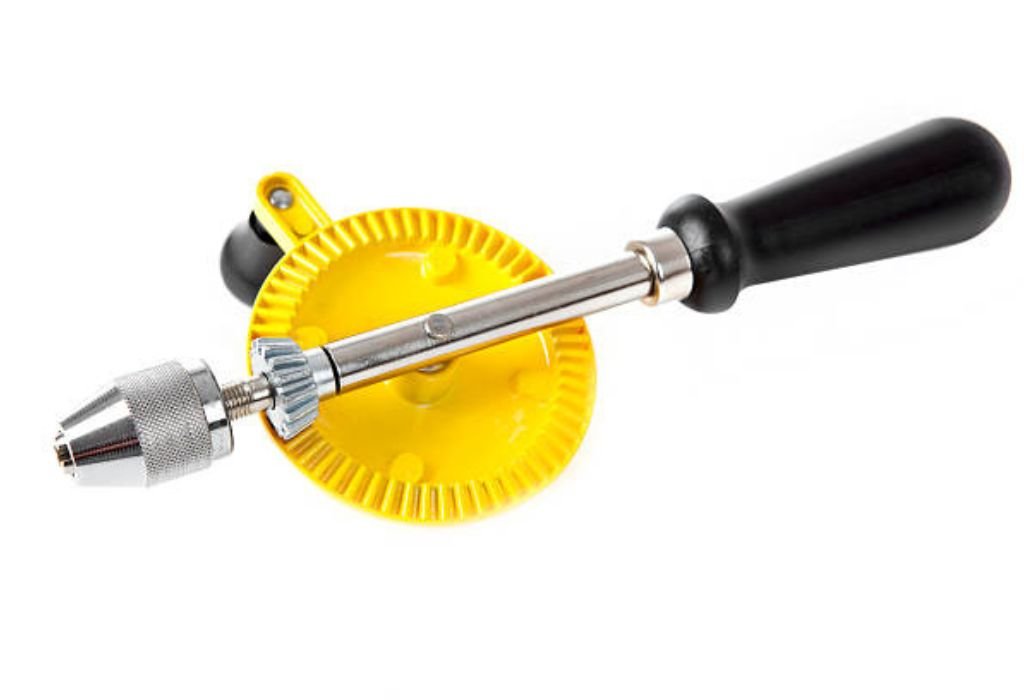
Sizing a drill chuck key correctly ensures that the gear teeth engage fully with the chuck. When the key fits properly it allows smooth tightening and secure jaw movement. An incorrect size slips and prevents the chuck from gripping the drill bit tightly.
Safety is another major reason sizing matters since a loose key can jump out during tightening. Slipping increases the risk of hand injury especially when applying force. A correct fit keeps the key stable and predictable during use.
Using the wrong key size can damage the chuck’s gear teeth over time. Mismatched teeth grind unevenly and wear down the ring. Eventually the chuck may fail to tighten at all and require expensive replacement.
Different drills use different chuck sizes depending on model and capacity. Assuming keys are universal leads to repeated mismatching. Proper sizing eliminates guesswork and ensures compatibility on the first attempt.
Replacing a lost chuck key becomes easier when sizing is understood. Instead of testing random keys the user can measure and match accurately. This saves time and avoids purchasing incorrect replacements.
Correct sizing extends the lifespan of both the chuck and the key. A well-fitted key distributes force evenly and prevents unnecessary strain. Understanding its importance improves both safety and performance.
Understanding the Parts of a Drill Chuck Key
A drill chuck key has three main components that determine sizing accuracy. The first is the pilot post which inserts into the matching hole on the chuck. Its diameter must match exactly to prevent wobbling or jamming during tightening.
The second part is the geared section that meshes with the teeth around the chuck collar. The tooth size spacing and shape must align perfectly with the chuck’s gear ring. Even slight differences stop the key from turning or cause skipping under force.
The handle provides leverage for applying torque to tighten the jaws. While handle length does not affect sizing it influences comfort and control during use. Longer handles offer more force but may not be necessary for smaller chucks.
Understanding how these parts work together makes sizing easier. Each component must match the chuck not just the overall key appearance. Measuring only one part can still lead to incorrect selection.
Different manufacturers use slightly different tooth profiles even within similar sizes. This is why identifying the right key involves more than guessing based on drill brand. Knowing the parts prevents costly mistakes when replacing keys.
What is the pilot post on a chuck key?
It is the round pin that fits into the matching hole on the chuck to stabilize the key during tightening.
Do all chuck keys have the same gear tooth shape?
No different manufacturers use different tooth profiles which must match the chuck to work correctly.
Does handle length affect sizing?
No sizing depends on the pilot post and gear teeth not the handle length.
Can a key fit the post but still not work?
Yes the teeth may not match which prevents proper engagement and causes slipping.
Why is it important to understand key components?
Knowing each part helps match replacements accurately and prevents damage to the chuck.
How to Measure the Pilot Post for Proper Fit
Measuring the pilot post diameter is the first step in sizing a chuck key correctly. A caliper provides the most accurate reading but a drill bit gauge or ruler may work when precision tools are unavailable. The measurement must match the diameter of the chuck’s pilot hole exactly.
A post that is too small will wiggle inside the hole during tightening. This movement prevents the gear teeth from engaging fully and leads to slipping. A key that fits loosely can also damage both the teeth and the pilot opening.
A post that is too large will not fit into the hole at all. Forcing it may scratch the chuck or bend the key. Proper sizing ensures smooth insertion without resistance.
Most pilot posts fall within standardized diameter ranges depending on chuck capacity. Common measurements include sizes for one-quarter inch, three-eighths inch, and one-half inch chucks. Matching size categories helps narrow down selection.
After measuring the post compare the reading with replacement charts or manufacturer listings. This prevents trial-and-error purchasing. Correct matching ensures the key stabilizes properly during tightening.
What tool is best for measuring a chuck key post?
A caliper provides the most accurate measurement for matching pilot diameter.
Can the post be slightly smaller than the hole?
No even slight looseness causes wobbling and prevents proper tooth engagement.
What if the post is too large to insert?
It should never be forced and a different key size must be selected.
Are pilot post sizes standardized?
Yes most fall within common ranges based on chuck capacity and manufacturer charts.
Do I measure the post or the hole?
Measure the post and match it to the hole size to ensure a perfect fit.
How to Match Gear Teeth Size and Pitch to the Chuck
The gear teeth on a chuck key must match the teeth on the drill chuck. Tooth pitch refers to the spacing between each tooth and determines how smoothly the key engages. Even a small mismatch prevents proper rotation and causes skipping.
Counting the number of teeth is not enough because spacing and depth also matter. Two keys may have the same number of teeth but different pitch patterns. Correct engagement requires identical shaping and alignment.
Visual comparison helps but precise matching requires measurement. Using calipers to measure tooth width and spacing improves accuracy. Replacement charts from manufacturers also list compatible tooth profiles.
Mismatched teeth wear down the chuck collar over time. Skipping under force grinds metal and reduces tooth strength. Eventually the chuck may require replacement instead of just a new key.
Matching the teeth ensures smooth and stable tightening. When correctly aligned the key turns without slipping or grinding. Proper matching prevents expensive damage and improves long-term performance.
Using Chuck Model Numbers to Identify Correct Key Size
Many drill chucks have stamped model numbers that help identify the correct key. These markings are usually located near the collar or around the gear ring. Finding the number makes matching much easier than measuring manually.
Manufacturers publish size charts that list compatible keys for each model. These charts eliminate guesswork and ensure accurate replacement. Using an OEM key provides the most reliable fit and performance.
Some chucks also include size classifications such as one-quarter or one-half inch. These refer to drill capacity rather than key size directly. Cross-referencing capacity with model charts helps narrow options.
If the model number is worn or missing additional steps may be required. Measuring the pilot post and comparing tooth pitch remains the best backup method. Universal keys may work temporarily but not for tight tolerances.
Using model information prevents incorrect purchases and wasted time. Identifying the chuck correctly ensures the new key will fit securely. This makes replacement faster and more reliable.
Where can I find the chuck model number?
It is usually stamped near the collar or around the gear ring on the chuck body.
Do manufacturers provide size charts for keys?
Yes most brands publish compatibility charts that list the exact key required.
Does chuck capacity indicate key size?
Not directly but it helps narrow choices when cross-referenced with model charts.
What if the model number is unreadable?
Measuring the pilot post and matching tooth pitch becomes the next best method.
Are OEM keys better than universal keys?
Yes OEM keys match the chuck precisely and offer the most reliable fit and performance.
Differences Between Jacobs Taper and SDS Chuck Keys
Jacobs taper chucks use a standard keyed mechanism that requires a matching chuck key for tightening. The pilot post and gear teeth must align correctly to engage the collar. These chucks are common on drill presses and corded hand drills for precision control.
SDS chucks do not use a traditional key because they are designed for quick bit insertion. The bit locks into place using grooves and spring-loaded mechanisms rather than jaws. SDS systems are usually found on rotary hammers for masonry drilling.
Sizing a key applies only to Jacobs-style chucks and not to SDS systems. Attempting to use a chuck key on an SDS drill is unnecessary and will not operate the mechanism. Understanding the difference prevents confusion when replacing parts.
Jacobs keys are available in multiple sizes depending on post diameter and tooth pitch. SDS designs are size-specific to the drill but do not require external tightening tools. Each system serves different drilling purposes and material types.
Choosing the correct chuck style ensures proper performance for the intended task. Jacobs chucks offer precision gripping while SDS systems deliver impact and fast bit changes. Knowing the difference helps users select the right accessories.
Signs You Are Using the Wrong Chuck Key Size
A key that slips while turning is a clear sign of incorrect sizing. The teeth may skip across the gear ring instead of engaging smoothly. This prevents proper tightening and increases the chance of damaging the chuck.
If the pilot post wiggles inside the hole the key is too small. The loose fit reduces stability and causes uneven pressure during tightening. Continued use may wear the post opening and weaken the chuck.
A key that will not insert fully indicates the post is too large. Forcing it may scratch the metal or bend the key. Choosing a smaller size prevents unnecessary damage.
Difficulty turning the key even with correct insertion suggests mismatched tooth pitch. The teeth cannot mesh and create resistance instead of smooth rotation. Matching the pattern resolves this issue immediately.
Repeated slipping during tightening signals improper sizing or worn components. Replacing with the correct key restores secure and predictable operation. Early recognition prevents long-term chuck failure.
How to Size a Chuck Key Without the Original Key
Start by measuring the pilot hole on the chuck using calipers for accuracy. This measurement identifies the correct post diameter for a replacement key. Matching the post ensures stability during tightening.
Next inspect the gear ring and measure tooth spacing carefully. Comparing pitch and depth helps find a compatible key. Visual matching alone may lead to errors when shapes are similar.
Check for any stamped markings around the chuck collar. Even partial numbers can help identify the correct replacement. Cross-referencing with manufacturer charts speeds up selection.
If no markings are available bring the chuck to a hardware supplier. Technicians can test-fit keys and match tooth patterns precisely. This prevents purchasing multiple incorrect sizes.
Can I size a chuck key without having the original?
Yes measuring the pilot hole and matching tooth pitch allows accurate replacement even without the original key.
What if I cannot measure the teeth accurately?
A hardware store can test-fit keys to ensure correct engagement with the gear ring.
Are visual comparisons reliable for sizing?
Not always because similar keys may still have different pitch and cause slipping.
Should I measure the chuck or the replacement key?
Always measure the chuck first then match the key to those dimensions.
Can I use trial and error to find the right key?
It is possible but measuring first prevents buying incorrect sizes and wasting time.
Can Universal Chuck Keys Replace Size-Specific Keys
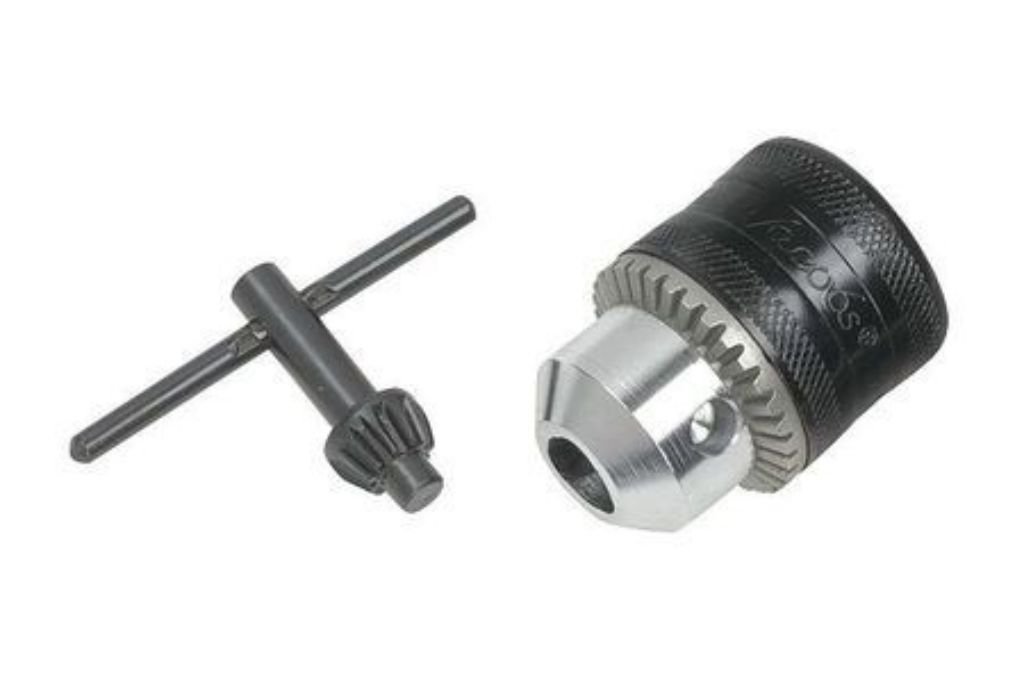
Universal chuck keys include multiple pilot post sizes and interchangeable heads. They are designed to fit several common chuck types without requiring exact matching. This makes them useful as temporary or backup tools.
However universal keys may not align perfectly with every tooth pattern. Even small mismatches can cause skipping under force. Precision chucks require exact sizing to avoid long-term damage.
Universal keys are best suited for occasional use rather than daily operation. Heavy tightening may wear the teeth faster due to imperfect engagement. Dedicated OEM keys provide smoother and safer performance.
For workshops with multiple drills a universal key offers convenience. It reduces the need to track individual keys for each tool. Still it should not replace the correct key permanently.
Choosing between universal and size-specific keys depends on usage frequency. Regular drilling benefits from a properly sized key while universal keys serve emergency needs. Understanding limitations prevents improper tool selection.
Maintenance Tips for Chuck Keys and Chucks
Keeping the chuck clean prevents metal shavings and dust from interfering with the teeth. Regular brushing or compressed air removes buildup around the collar. Clean surfaces improve smooth engagement with the key.
Light lubrication on the gear ring reduces wear and prevents corrosion. Only a small amount of oil is needed to maintain movement. Excess lubricant attracts debris and should be wiped away.
Avoid using excessive force when tightening with a chuck key. Over-torquing can strip the teeth and weaken the chuck permanently. Smooth steady pressure ensures safe and controlled tightening.
Inspect both the key and chuck regularly for signs of wear. Rounded teeth or worn posts reduce gripping efficiency. Replacing worn parts prevents sudden failure during drilling.
Proper storage helps extend the lifespan of the key. Keeping it attached to the tool or in a dedicated holder prevents misplacement. Consistent organization saves time and avoids searching during projects.
Should a chuck gear ring be lubricated?
Yes light lubrication prevents rust and keeps the teeth engaging smoothly but excess oil must be removed.
Can a worn chuck key damage the chuck?
Yes rounded teeth can slip and grind against the collar causing permanent wear.
How often should the chuck be cleaned?
Regular cleaning after heavy use prevents debris buildup and maintains smooth operation.
Is it safe to tighten the chuck as hard as possible?
No over-tightening can strip teeth and reduce long-term durability.
How can I avoid losing the chuck key?
Using a key holder or attaching it to the power cord keeps it accessible and prevents misplacement.
Conclusion
Sizing a drill chuck key correctly ensures safe tightening, smooth engagement, and long-term chuck performance.
Matching the pilot post diameter and gear tooth pitch prevents slipping and damage during use. Measuring accurately or using model numbers eliminates guesswork when replacing a lost key.
Using the wrong size leads to inefficient tightening, worn components, and potential safety risks. Understanding the difference between universal and size-specific keys helps users choose the right option for their needs. Regular inspection and maintenance keep both the chuck and key functioning reliably.
With proper sizing and care, a drill chuck key remains a dependable tool for secure bit tightening.
Knowing how to match and maintain it ensures better drilling control and extends the lifespan of the equipment. Accurate sizing turns a small accessory into an essential part of safe tool operation.

I’m John F. Nicholas, the founder, lead writer, and drill enthusiast behind 101drill.com. With years of hands-on experience in power tools and DIY projects, I created this platform to share practical knowledge, expert tips, and real-world insights to help others master the art of drilling.