
Most people discover a stuck drill bit at the worst possible moment when the project is halfway done and the bit refuses to come out. At first it feels like the chuck just needs a stronger twist but the more force you apply the tighter it seems to lock in place.
A keyless chuck is designed to make bit changes quick and tool free. However dirt heat vibration or over tightening can cause the internal jaws to clamp down so firmly that the bit becomes jammed and impossible to remove by hand.
Many beginners panic and start using pliers or hammering the chuck which often leads to even more damage. The bit may bend the chuck may seize completely or in the worst case the drill motor can be ruined from forced spinning.
The good news is that most stuck drill bits can be removed safely with the right method. The problem usually has a simple cause and does not require replacing the chuck or visiting a repair shop if handled correctly.
Understanding why bits get stuck helps prevent future problems and makes removal easier. With the right steps you can free the bit without damaging the drill and get back to work confidently and safely.
What a Keyless Chuck Is and How It Works
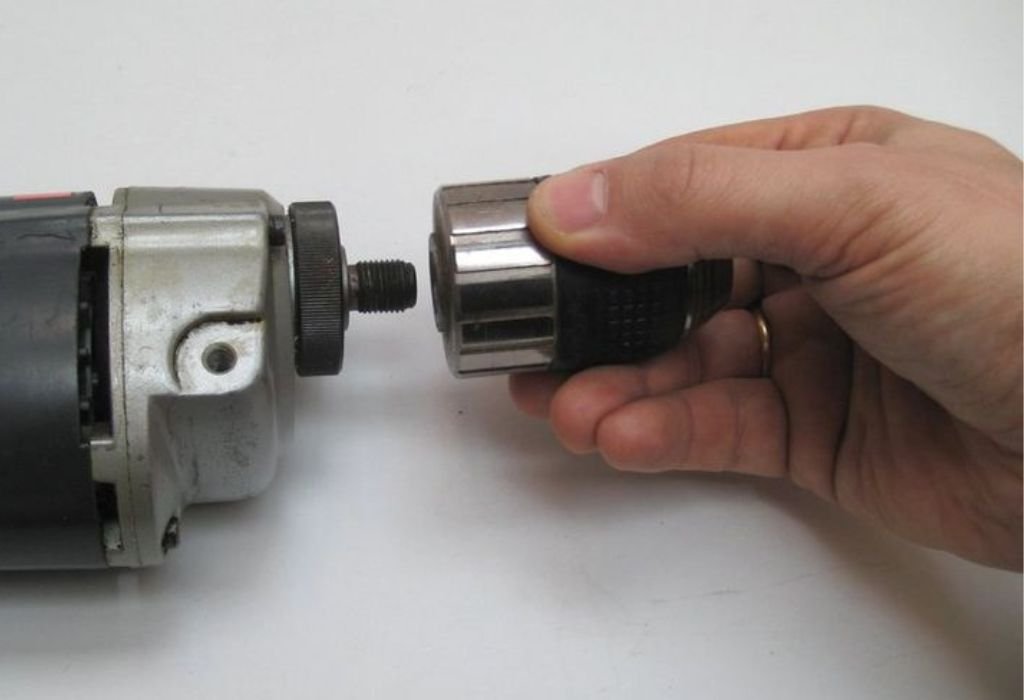
A keyless chuck is a drill attachment designed to hold bits without using a separate tightening key. It works by rotating the outer sleeve by hand which tightens internal jaws around the drill bit. This allows fast bit changes and makes the drill more convenient for everyday use.
Inside the keyless chuck are three metal jaws that move inward or outward when the outer body rotates. When tightening the jaws clamp the bit evenly to prevent slipping during drilling. When loosening the jaws retract and release the bit without requiring extra tools.
Most modern cordless drills use a keyless chuck because it saves time during frequent bit swaps.
DIY users benefit from its simple design while professionals appreciate the efficiency during continuous work. The mechanism relies on friction and alignment rather than mechanical gears found in keyed chucks.
Keyless chucks come in single sleeve and double sleeve designs. Single sleeve versions require one hand to tighten while double sleeve versions need both hands for secure grip. Both types work the same way but offer different stability depending on the drill model.
The internal components can wear down over time especially with heavy usage. Dirt metal shavings and debris may build up inside and make the jaws harder to move. This buildup increases the chance of the bit getting stuck during tightening.
Understanding how a keyless chuck operates helps explain why bits sometimes jam. When the jaws fail to release properly the bit remains locked even when the sleeve is rotated. Knowing the mechanism makes troubleshooting easier and prevents accidental damage.
Why Drill Bits Get Stuck in a Keyless Chuck
Over tightening is the most common cause of a stuck drill bit in a keyless chuck. When too much force is applied the jaws grip the bit tighter than necessary. This makes loosening difficult especially without strong hand leverage.
Heat buildup can also cause the chuck to lock tightly. Drilling through metal generates friction that expands the bit and tightens the jaws around it. Once the bit cools it may still remain wedged inside the chuck.
Dirt and debris inside the chuck prevent smooth jaw movement. Metal dust and wood particles can pack into the jaw tracks and reduce their ability to release. Over time this buildup causes the chuck to seize more frequently.
Using the wrong size or damaged drill bit can lead to jamming. A bent bit may sit unevenly and wedge against the jaws during tightening. Dull or worn bits can also slip and create uneven gripping pressure.
Rapid direction changes may tighten the chuck unintentionally. When the drill stops suddenly inertia can twist the sleeve and lock the jaws harder. This happens often with high torque cordless drills.
Understanding the causes of stuck bits helps prevent future problems. Avoiding excessive tightening and keeping the chuck clean reduces the chance of jamming. Proper maintenance ensures smoother operation and longer tool life.
Common Mistakes That Make Bits Jam Tightly
Many users twist the chuck too aggressively when securing the bit. Extra force does not improve grip but instead increases jaw pressure. This makes the bit extremely difficult to remove later.
Some people try to loosen the chuck while the drill is still in reverse. This can cause the jaws to tighten even more instead of releasing. Always stop the drill completely before attempting to loosen the bit.
Using pliers directly on the chuck body is another common mistake. This damages the outer sleeve and prevents smooth rotation. Scratches and dents can permanently affect the chuck’s performance.
Allowing debris to build up inside the jaws leads to jamming. Drilling into masonry or metal produces fine particles that settle into moving parts. Without cleaning these particles restrict movement and increase friction.
Continuing to drill with a loose bit can also cause problems. The bit may shift and wedge itself sideways inside the jaws. This makes removal more complicated and increases the risk of breakage.
Avoiding these mistakes reduces tool damage and makes removal easier in the future. Proper technique ensures the chuck remains functional and reliable. Learning correct handling prevents unnecessary frustration during projects.
Safety Precautions Before Attempting Removal
Always disconnect the drill from power before touching the chuck. For corded drills unplug the cable completely and for cordless models remove the battery pack. This prevents accidental activation while working on the stuck bit.
Wear protective gloves to improve grip and prevent hand injuries. A stuck chuck requires additional force which increases the risk of slipping. Gloves also protect skin from sharp edges on damaged bits.
Ensure the drill is secured before applying pressure. Holding the drill in mid air can cause sudden twisting movements. Placing it on a stable surface allows controlled handling during removal.
Avoid striking the chuck with a hammer unless instructed in specific steps. Excessive impact can damage internal components and misalign the jaws. This may turn a simple jam into permanent failure.
Do not attempt to force the bit out with pliers or metal tools. Pulling aggressively can bend the bit or crack the chuck housing. Always loosen the jaws first before attempting extraction.
Following safety precautions prevents injury and tool damage. Taking time to prepare ensures smoother removal and reduces stress on components. Safe handling is always the first step before any repair attempt.
Tools That Help Loosen a Stuck Drill Bit
A rubber strap wrench provides strong grip without damaging the chuck surface. It allows controlled rotation when the sleeve is too tight for hand twisting. This tool is especially useful for stubborn single sleeve chucks.
Penetrating oil can help release stuck internal parts. A small amount applied at the jaw opening reduces friction and loosens debris. Allowing the oil to sit for several minutes improves effectiveness.
A bench vise can secure the drill body safely while freeing both hands for twisting. The drill should be clamped gently with protective padding to avoid damage. This setup increases leverage and makes rotation easier.
Heat from a hair dryer or heat gun can expand the outer chuck slightly. Gentle warming helps loosen components without harming internal parts. Avoid excessive heat to prevent plastic damage on cordless models.
Soft mallet tapping can help release binding inside the chuck. Light taps around the sleeve free stuck grit and improve jaw movement. This technique should be gentle to avoid cracking the housing.
Having the right tools makes removal safer and more effective. Using proper support prevents frustration and unnecessary force. These tools reduce the risk of damaging both the bit and the drill.
Step by Step Methods for Freeing a Stuck Bit
Begin by gripping the chuck firmly and rotating it counterclockwise with both hands. Apply steady pressure rather than sudden force to avoid tightening the jaws further. Sometimes a slow controlled twist is enough to release the bit.
If the bit remains stuck apply penetrating oil to the jaw opening. Allow the oil to soak in for several minutes before trying again. The lubrication helps reduce friction and frees internal movement.
Secure the drill in a vise if additional leverage is needed. Use a strap wrench to rotate the chuck while keeping the drill stationary. This provides more torque without damaging external surfaces.
Apply gentle heat to the chuck using a hair dryer. Warmth causes slight expansion of the outer body and helps loosen internal components. Avoid overheating to protect plastic parts and bearings.
If the bit still will not release tap the chuck lightly with a rubber mallet. Tapping helps dislodge debris and reduce binding pressure. Try loosening the chuck again immediately after tapping.
Following these steps increases the success rate without damaging the drill. Patience and controlled force are key when freeing a stuck bit. Most jams can be resolved using these simple removal techniques.
How to Remove a Stuck Bit When the Chuck Is Damaged
A damaged keyless chuck makes removal more challenging because the jaws may no longer move smoothly.
The sleeve can slip when twisted or fail to engage the internal mechanism properly. In this situation forcing rotation often worsens the problem and locks the bit even tighter.
Begin by inspecting the chuck for visible cracks dents or misshapen areas. If the outer body is deformed it may prevent the jaws from opening fully. Minor damage sometimes allows removal but severe damage usually requires replacement.
If the sleeve slips while turning wrap a rubber strap wrench around it for added grip. This increases friction without scratching the surface or causing further distortion. Avoid using metal tools because they can crush or score the housing.
Apply penetrating oil directly into the jaw opening and allow several minutes of soaking. Damaged chucks often collect debris and old lubrication which restricts movement. The oil helps dissolve buildup and frees internal components temporarily.
Securing the drill body in a vise provides better leverage for controlled twisting. Always protect the casing with a cloth or soft jaws before tightening the vise. Increased stability reduces the risk of sudden slipping during removal.
If the jaws remain frozen after multiple attempts do not force the tool. Excessive pressure may break the chuck or snap the bit inside. At this point professional service or full chuck replacement is the safest option.
Heat Lubrication and Tapping Techniques Explained
Heat can be used carefully to expand components inside the chuck. A hair dryer or low heat gun warms the metal gradually and loosens tight internal parts. Never apply open flame because extreme temperature damages plastic and bearings.
Lubrication reduces friction between the jaws and bit. Penetrating oils work best because they seep into narrow gaps and dissolve stubborn debris. Allowing time for the oil to settle improves effectiveness and prevents wasted effort.
Tapping the chuck gently can help break internal binding. Use a rubber mallet or wooden handle to avoid cracking the housing. Light tapping around the sleeve distributes vibration evenly and frees stuck jaw sections.
Combining heat and lubrication often produces better results than using one method alone. Warmth expands the outer body while oil reduces internal resistance. After preparation twisting the sleeve becomes easier and less forceful.
Avoid striking the bit directly because impact can bend the shaft. A bent bit wedges tighter and becomes much harder to remove safely. Always target the chuck body instead of the cutting end.
These techniques work best when performed slowly and patiently. Rushing increases the chance of damage to both the drill and bit. Careful application results in safer removal and better long term tool performance.
What to Do If the Bit Snaps Inside the Chuck
A broken drill bit inside a keyless chuck creates a more complicated situation. The remaining section may sit below the jaw surface and be difficult to grip. Attempting removal without preparation increases the risk of damaging the chuck.
Begin by applying penetrating oil to the jaw opening and allowing time for absorption. Lubrication helps loosen internal debris and reduces friction around the broken bit. This step improves the chances of removal without excessive force.
Use needle nose pliers or locking pliers only if enough of the bit remains exposed. Grip gently and pull straight to avoid wedging the metal sideways. Twisting the broken piece may cause further binding inside the jaws.
If there is no exposed section disassembling the chuck may be required. Some models allow removal of the front cap to access internal components. This process should only be attempted by experienced users or professionals.
Do not drill into the broken bit because heat and vibration can damage the jaws. Drilling also risks sending metal fragments into the chuck mechanism. These fragments cause long term performance issues and increase seizure risk.
If removal attempts fail the safest solution is replacing the chuck entirely. New chucks restore proper clamping and ensure safe drilling. Replacement prevents future jams and protects drill motor performance.
When to Disassemble or Replace the Chuck
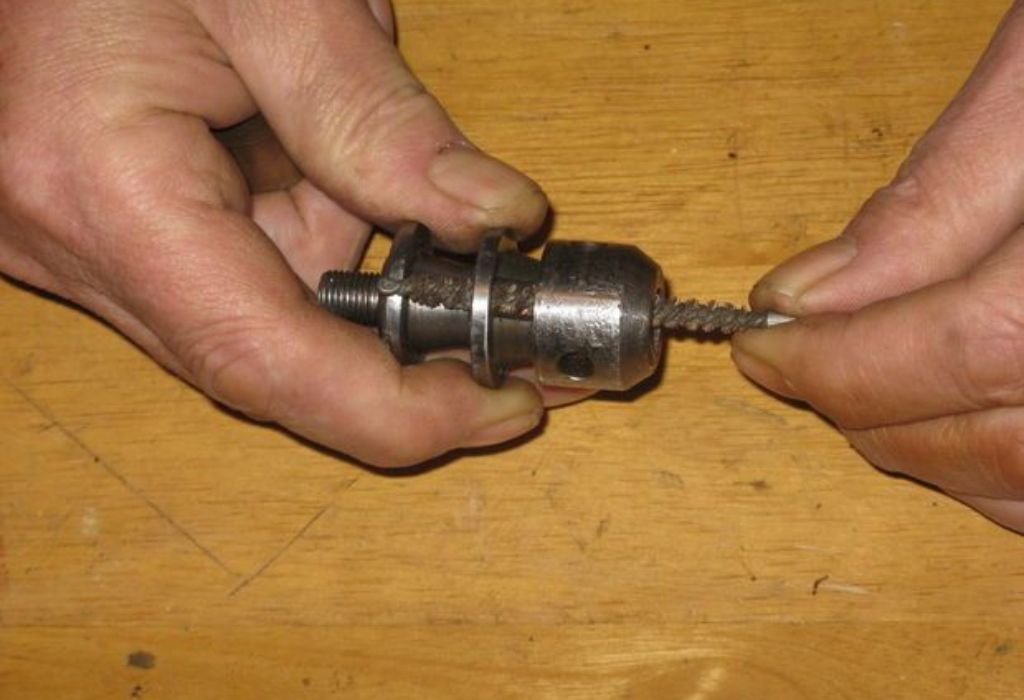
Disassembly is only recommended when all external removal attempts fail. Opening the chuck exposes internal components and requires careful handling. Incorrect reassembly can permanently damage the mechanism and reduce gripping strength.
Some chucks include removable front collars that allow access to jaws and bearings. If the chuck is serviceable debris can be cleaned and worn parts inspected. Light lubrication during reassembly restores movement in functional components.
Replacement becomes necessary when the chuck shows structural failure. Cracks dents or warped sleeves prevent proper rotation and gripping pressure. Continuing to use a damaged chuck increases safety risks during drilling.
If the jaws no longer align correctly the bit may wobble even when tightened. This indicates internal wear that cannot be repaired without new components. Persistent wobble affects drilling accuracy and increases breakage risk.
Cost and effort should also guide the decision. Replacement chucks are often affordable and easier to install than attempting full disassembly. Most cordless drills allow simple screw-on chuck replacements using basic tools.
Knowing when to replace prevents repeated frustration and unsafe operation. A new chuck ensures smooth bit changes and consistent holding strength. Proper maintenance keeps the new chuck functioning reliably for years.
Common Questions About Removing Stuck Drill Bits
Why do drill bits get stuck in a keyless chuck?
Over tightening heat buildup and debris cause the jaws to clamp tightly. These factors prevent smooth release during loosening. Proper technique reduces the chance of jamming.
Can I loosen a stuck chuck by running the drill?
No running the drill can tighten the jaws further. It also increases risk of injury. Always remove power before attempting removal.
Is it safe to use pliers on the chuck?
No pliers can damage the sleeve and distort the surface. This makes rotation harder in the future. Use a rubber strap wrench instead.
Will penetrating oil damage the drill?
No when used correctly it will not harm components. Avoid spraying into motor vents. Apply only at the jaw opening.
Can heat help release a stuck bit?
Yes gentle warming expands the outer body slightly. Excessive heat should be avoided. Controlled temperature improves loosening safely.
What if the bit snaps off inside the chuck?
Try removal only if part of the bit is exposed. Otherwise seek professional assistance. Replacement may be required if removal fails.
How can I prevent bits from getting stuck again?
Avoid over tightening and clean the chuck regularly. Use proper drill speed and pressure. Allow bits to cool before removal.
Should I replace a worn keyless chuck?
Yes if jaws no longer grip or release properly. Cracks or heavy wear indicate failure. Replacement restores safe performance.
Can I disassemble a keyless chuck at home?
Only if the model allows safe access. Incorrect disassembly can cause permanent damage. Professional service is recommended for complex chucks.
Why does the chuck tighten itself during drilling?
Sudden stops and vibration create rotational force on the sleeve. This increases jaw pressure unintentionally. Smooth operation reduces self tightening.
Conclusion
Removing a stuck drill bit from a keyless chuck is usually possible with the right methods and patience.
Most jams occur due to over tightening debris or heat expansion rather than permanent failure. Understanding the cause makes removal safer and prevents unnecessary force.
Using controlled techniques such as lubrication heat and gentle tapping helps release the jaws without damaging components. If the bit snaps or the chuck is damaged removal becomes more complicated and may require replacement. Proper assessment ensures the safest solution.
Avoiding common mistakes like using pliers or excessive impact protects both the drill and bit. Regular cleaning and proper tightening prevent future jams and extend chuck lifespan. Maintaining good habits ensures smooth bit changes during every project.
Knowing when to replace the chuck is just as important as knowing how to free a stuck bit. A worn or cracked mechanism cannot function safely and should be replaced promptly. With the right care a keyless chuck remains reliable and efficient for years of use.

I’m John F. Nicholas, the founder, lead writer, and drill enthusiast behind 101drill.com. With years of hands-on experience in power tools and DIY projects, I created this platform to share practical knowledge, expert tips, and real-world insights to help others master the art of drilling.