
Sonia wanted to turn a simple glass vase into a decorative lamp and assumed drilling a hole near the base would be quick. She used a regular drill bit and pressed too hard, and within seconds the vase cracked from the bottom up.
What should have been a fun project ended with shattered glass and frustration that could have been avoided.
Glass vases look sturdy because of their thickness, but they react instantly to heat and pressure. Unlike flat glass, curved surfaces create uneven stress that makes drilling more challenging. Without the right method and tools, even a tiny mistake can ruin the entire vase.
Most people do not realize that drilling glass is more about patience than force. A diamond coated bit, slow rotation, and constant lubrication allow the drill to grind gently instead of cutting. Small adjustments make the difference between a clean hole and a costly accident.
Whether you are creating a planter, lamp, fountain, or decorative craft, learning the correct approach protects both the vase and the person using the drill. Understanding how to drill safely builds confidence before starting any glass project.
Tools and Materials You Will Need

A diamond coated drill bit is essential because standard steel or masonry bits cannot cut glass safely. Diamond particles grind through the surface without pressure and reduce the risk of cracking.
A variable speed drill allows slow controlled rotation, which is important for delicate surfaces. High speed creates friction that expands the glass and causes fractures almost instantly. Hammer mode should never be used when drilling a vase.
Masking tape helps stabilize the drilling point and prevents the bit from slipping on the curved surface. Covering the area with two layers keeps the drill steady during the first few seconds.
Water acts as lubrication and cooling throughout the process. A wet sponge, spray bottle, or putty ring filled with water prevents heat buildup under the bit. Drilling without lubrication should never be attempted.
A padded stable surface supports the vase evenly. Placing it inside a towel or rubber mat reduces vibration and prevents rolling. Securing the vase is critical to avoid sudden movement while drilling.
Safety gear includes gloves and protective eyewear. Tiny shards can fly unexpectedly, and handling glass edges without gloves increases the risk of cuts. Proper protection keeps the process safe.
How to Prepare the Glass Vase Before Drilling
Start by cleaning the vase to remove dirt, fingerprints, and residue. A clean surface allows the drill bit to grind smoothly and prevents slipping during the first contact. Wiping with a microfiber cloth is usually enough.
Choose the drilling location carefully based on the project purpose. Avoid seams, thick ridges, and uneven surfaces because they create stress points. Mark the spot using a non-permanent marker for accuracy.
Apply two layers of masking tape over the marked area. Press the tape flat to create a stable surface for the bit. The tape helps reduce chipping and improves control at the starting point.
Support the vase securely to prevent movement. Placing it inside a folded towel or deep bowl stabilizes the curved shape. Never attempt to drill a vase while holding it in one hand.
Prepare your cooling method before starting. A sponge pressed against the drilling spot works well to maintain moisture. Keeping everything ready prevents rushing during the drilling process.
Double check that the drill is set to the lowest speed with no hammer function. Proper preparation prevents mistakes and increases the chance of a clean successful hole.
Step by Step Process to Drill a Hole in a Glass Vase
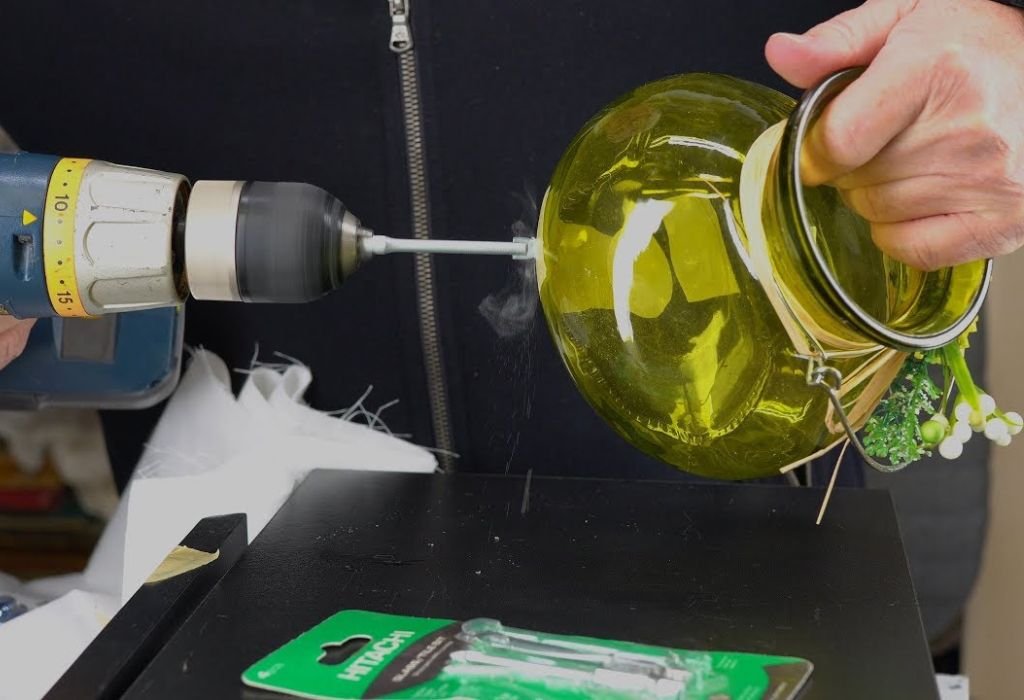
Position the drill bit gently on the marked spot without applying pressure. Begin drilling at the slowest speed and allow the diamond coating to grind into the glass. Forcing the drill can create cracks within seconds.
Hold the drill at a slight angle for the first few seconds to prevent slipping. Once a small notch forms, gradually bring the drill upright. This method stabilizes the bit on curved surfaces like vases.
Keep the area continuously wet to control heat. Spray water frequently or press a wet sponge against the drilling point. If the surface becomes dry, pause immediately to reapply moisture before continuing.
Drill in short intervals rather than continuously. Five to seven seconds at a time prevents temperature buildup. Letting the glass cool between pauses reduces internal stress and keeps the surface stable.
As the bit begins to break through, reduce pressure even further. The final stage is the most delicate because glass becomes thinner and weaker. Allow the drill to finish slowly under its own weight.
Remove the tape and clean the hole after drilling. Inspect the edges for sharp fragments and smooth them with fine sandpaper if necessary. Finishing carefully ensures a clean professional result.
Common Mistakes to Avoid While Drilling
Using the wrong drill bit is the most common cause of vase breakage. Regular metal or wood bits apply pressure instead of grinding and can shatter the glass instantly. Diamond coated bits are the only safe option.
Drilling too fast generates heat that expands the glass. Curved surfaces cannot tolerate temperature changes and will crack even with small mistakes. Slow speed is essential from beginning to end.
Applying pressure when progress feels slow often leads to sudden fractures. The bit needs time to wear through the glass gently. Forcing the drill increases stress and causes instant damage.
Skipping lubrication allows friction to build rapidly under the bit. Water must be used throughout the process to prevent heat and reduce stress. Dry drilling should never be attempted on any type of glass.
Failing to stabilize the vase creates uneven tension. A loose or rolling vase increases the risk of slipping and cracking. Supporting the vase properly is just as important as the drilling technique.
Ignoring safety gear increases the chance of injury from sharp fragments. Protective eyewear and gloves should always be used. Avoiding these mistakes ensures a smooth and safe experience.
Safety Tips and Final Precautions
Never drill a tempered glass vase because it will shatter instantly. Tempered glass cannot be modified safely with standard tools. Always check product labeling if unsure about the glass type.
Work slowly and avoid rushing the process. Glass reacts quickly to mistakes, and patience leads to cleaner results. Preparing tools and workspace ahead of time keeps the process controlled.
Do not use hammer mode or impact settings at any point. Vibration causes micro-fractures that spread across the vase. Only smooth grinding at low speed is safe for delicate surfaces.
Keep children and pets away from the work area. Broken glass pieces are sharp and difficult to see. Limiting movement around the workspace prevents accidents.
Dispose of leftover glass fragments carefully. Use a broom and vacuum instead of wiping with bare hands. Proper cleanup protects everyone in the environment.
Following these precautions ensures a safe and successful drilling experience. A careful approach protects both the vase and the person handling the drill.
Frequently Asked Questions
What Type of Drill Bit Should Be Used for a Glass Vase?
Diamond coated drill bits are the safest option because they grind through the glass slowly without applying force.
Can You Drill a Vase Without Breaking It?
Yes, using slow speed, lubrication, and proper support helps create a clean hole without cracking the vase.
Do You Need to Keep the Vase Wet While Drilling?
Continuous water cooling prevents heat buildup and reduces stress, making drilling much safer.
Can You Drill a Hole Near the Bottom of a Vase?
Yes, but avoid edges and thick seams. Choose a flat stable area and support the vase securely.
Should You Drill from the Inside or Outside of the Vase?
Drilling from the outside is easier and safer because the surface is more accessible and stable.
How Long Does It Take to Drill Through a Glass Vase?
Depending on thickness, it may take one to three minutes using slow intervals and cooling pauses.
Can You Use a Regular Drill for a Glass Vase?
A regular drill works as long as it has variable speed and is set to the lowest rotation with no hammer mode.
What Happens if the Vase Starts to Crack?
Stop drilling immediately. Continuing increases damage and can cause the vase to shatter unexpectedly.
Is Masking Tape Necessary When Drilling a Vase?
Yes, tape helps prevent slipping and reduces chipping during initial contact with the glass.
Can You Drill Colored or Coated Glass Vases?
Yes, but avoid scratching decorative coatings. Drill slowly and support the surface to protect the finish.
Conclusion
Drilling a hole in a glass vase requires patience, preparation, and the right tools. Using a diamond coated drill bit, slow speed, and constant lubrication prevents cracking during the process.
Supporting the vase securely and marking the drilling spot reduces slipping and improves accuracy.
Most mistakes happen when people rush or apply pressure to speed things up. Glass cannot absorb sudden stress and reacts quickly to heat and vibration. Drilling in short intervals and cooling the surface helps maintain stability throughout the process.
Safety should always be the top priority before beginning any glass project. Wearing protective gloves and eyewear prevents injuries from unexpected fragments. Confirming the type of glass ensures you are not attempting to drill tempered or treated materials.
With careful steps and the correct method, you can successfully drill a clean hole without damaging the vase. Understanding the process saves time and prevents costly replacements. A patient approach leads to smooth results and confidence in future glass projects.

I’m John F. Nicholas, the founder, lead writer, and drill enthusiast behind 101drill.com. With years of hands-on experience in power tools and DIY projects, I created this platform to share practical knowledge, expert tips, and real-world insights to help others master the art of drilling.