
Drilling a hole in aquarium glass feels simple until the first crack appears out of nowhere. Many people start with confidence and end up watching the panel split with a sharp sound. What was supposed to be a small upgrade suddenly turns into fear of losing the whole tank.
The biggest challenge is that aquariums are not like regular glass panels. They hold water pressure which makes the glass strong but extremely sensitive to drilling. One tiny mistake with speed or pressure is enough to damage the entire structure.
Some aquarium owners give up after the first attempt because the risk feels too high. Others keep trying without understanding why the glass keeps cracking. In reality the problem is almost always technique not skill.
There are also success stories where drilling feels surprisingly easy. The person moves slowly keeps the glass cool and lets the bit grind instead of push. The hole comes out clean and smooth without a single chip or stress line.
This guide is for anyone who wants that safe and successful result. You will learn how to confirm glass type prepare the tank and drill with proper cooling. Every step is explained clearly so you know exactly what to do before starting.
Understanding Aquarium Glass and Why It Breaks
Aquarium glass is designed to hold water pressure which makes the surface strong but sensitive. When drilling begins the pressure becomes focused on one small point instead of spreading evenly. This creates stress that can lead to sudden cracking if handled incorrectly.
Most aquariums use tempered or non tempered glass. Tempered glass shatters instantly when drilled because it is heat treated for strength. Knowing which type you have is the most important first step before drilling.
The thickness of the glass affects how it reacts. Thicker panels may handle drilling better but require more time for the bit to grind through. Thin panels are more fragile and need lighter pressure throughout the process.
Temperature also changes stress levels inside the glass. Heat from drilling builds faster on vertical surfaces like aquarium walls. Without proper cooling the stress spreads and causes star cracks before the hole is complete.
Understanding these factors prevents accidental tank damage. With the correct method drilling becomes controlled and predictable. This guide helps you avoid breaking the aquarium during the process.
Tools and Supplies Needed to Drill Aquarium Glass
A variable speed drill is required for safe drilling. Slow rotation allows the bit to grind instead of cutting aggressively. This reduces heat and prevents sudden stress on the glass panel.
Diamond coated hole saw bits are best for aquarium drilling. The circular shape removes glass evenly and creates smooth openings. These bits are used specifically for bulkhead and plumbing installations.
Masking tape helps prevent slipping at the drilling point. The smooth glass surface offers no grip for the drill bit. Tape reduces early chipping and keeps the bit centered.
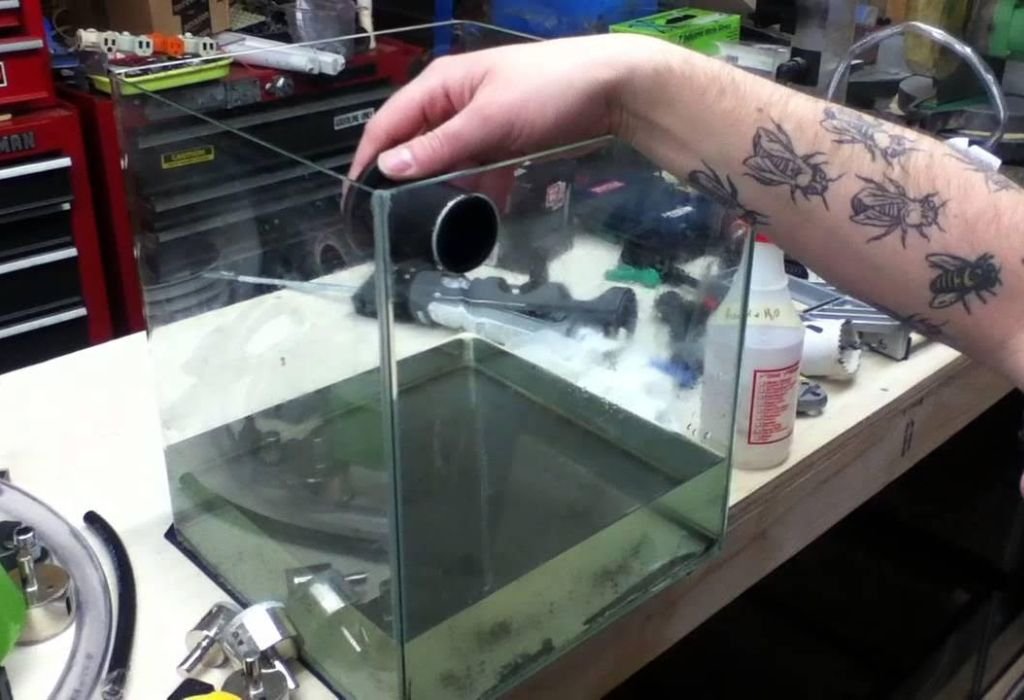
A water delivery method is essential for cooling. Some people use a putty dam to hold water while others use a slow running stream. Cooling protects the glass from thermal stress during drilling.
Safety gear should never be skipped. Wear gloves and eye protection to prevent injury from tiny glass particles. Preparation keeps the process safe and controlled.
Confirming Glass Type Before Drilling the Aquarium
Never drill tempered glass because it will shatter instantly. Tempered panels are often used for the bottom of large tanks. Checking before drilling prevents total tank failure.
Look for a small corner stamp that says tempered or safety. Some manufacturers label only one panel so markings are not always visible. When unsure contact the manufacturer for confirmation.
Non tempered or annealed glass is safe to drill. This type of glass breaks in controlled patterns instead of exploding. It is commonly used for the side and back panels of aquariums.
Do not assume all panels are the same. Some tanks have tempered bottoms but non tempered sides. Always test each drilling location individually before starting.
If the tank is old be extra careful. Older glass may have internal stress or hidden micro cracks. Drilling weak panels increases risk of failure during installation.
Preparing the Aquarium for Drilling
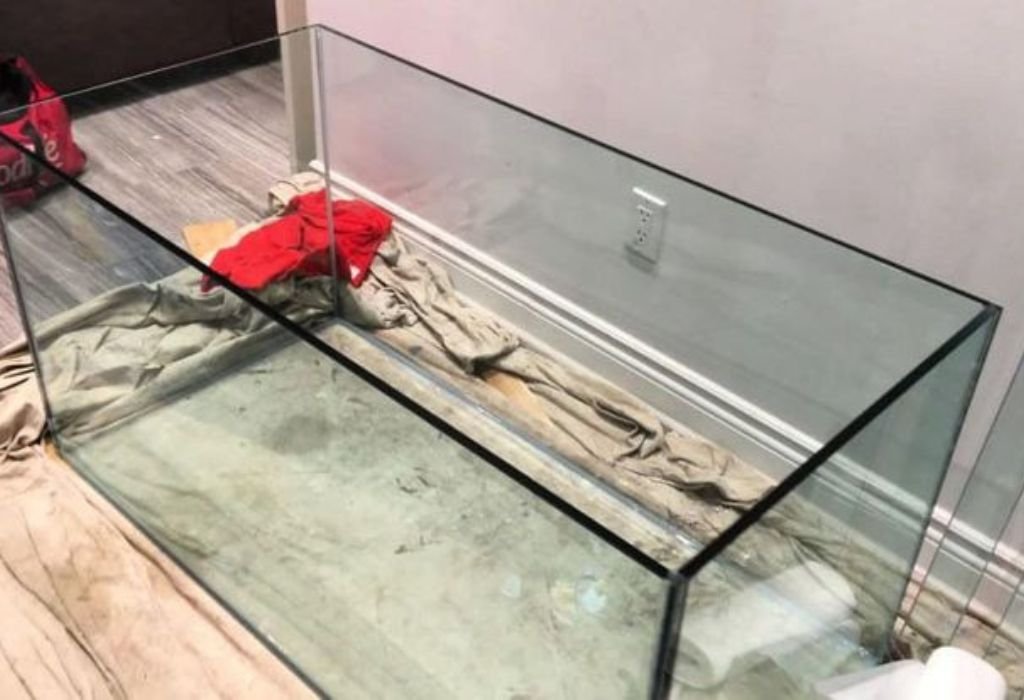
Empty the tank completely before drilling. Water pressure inside the aquarium changes how the glass responds. Drilling a full tank is extremely dangerous and should never be attempted.
Clean the drilling area to remove algae residue and dust. Dirt reduces tape adhesion and causes the drill bit to slip. A clean surface improves accuracy and safety.
Apply masking tape on both sides of the panel. This helps control chipping during entry and exit. Mark the center point using a waterproof marker for precision.
Support the glass from behind if drilling on a removed panel. A foam pad or towel prevents vibration during drilling. Never press or lean on the tank while working.
Keep all pets and children away from the area. Broken glass can spread quickly if something goes wrong. Safety always comes before speed.
Can I drill the aquarium while it still has water?
No drilling a full tank is dangerous because pressure changes can crack the glass instantly.
Should I remove fish before drilling the tank wall?
Yes the aquarium must be completely empty and dry before any drilling begins.
Does the tank need to be removed from the stand?
It is safer to drill with the tank secured and supported instead of balancing loose.
Can I drill near the edge of the aquarium glass?
Avoid drilling close to edges because those areas are weaker and more likely to crack.
Do I need to clean off old silicone before drilling?
Only if the silicone covers the drilling area otherwise it does not affect the process.
Choosing the Right Drill Bit for Aquarium Glass
Diamond hole saw bits create smooth round openings. They remove glass gradually instead of cutting sharply. This prevents sudden stress inside the panel.
Choose the exact size required for your bulkhead. Bulkheads must fit snugly without forcing the opening. Planning prevents widening later which is risky for aquarium glass.
Core bits with continuous rim design work best. Segmented rims create vibration and uneven grinding. Smooth rims reduce chipping around the drilled area.
Cheap bits wear out quickly on thick aquarium glass. When the diamond coating fades friction increases. This generates heat and raises the risk of cracking.
Keeping the bit clean improves performance. Glass dust clogs the cutting edge during drilling. Cleaning allows the bit to grind smoothly from start to finish.
How to Start Drilling Without Slipping
Starting is the most delicate part of drilling aquarium glass. The bit must not slide across the smooth surface. Masking tape gives initial grip for controlled contact.
Begin at the lowest possible speed. High speed causes the bit to skate across the panel. Slow grinding helps form a shallow guide ring.
Hold the drill at a slight angle for the first few seconds. This lets the edge of the bit catch the surface gently. Once the guide ring forms straighten the drill slowly.
Do not apply heavy pressure at the start. The bit must grind into the glass instead of forcing it. Pushing creates fractures that may not appear until later.
Use both hands for stability. One hand controls speed while the other maintains direction. A steady grip prevents vibration and wandering.
Stop immediately if the bit slips. Reposition and restart slowly once the guide ring is clearly formed. Slipping weakens the panel and increases cracking risk.
Drilling Speed Cooling and Pressure Explained
Drill speed controls heat buildup during drilling. Keep rotation between 400 and 600 RPM. Faster speed overheats aquarium glass within seconds.
Pressure must remain light throughout the process. Let the bit grind slowly instead of pushing down. Heavy force increases vibration and internal stress.
Water cooling is required to prevent thermal shock. Use a putty dam to hold water around the drilling point. Cooling keeps temperature stable across the panel.
Take short breaks during drilling. Pausing allows the glass to cool naturally. This prevents heat from spreading and causing star cracks.
Keep the bit level from start to finish. Angle changes create uneven grinding and chip formation. Consistent alignment produces a cleaner opening.
Why does the drill bit stop cutting during drilling?
The bit may be overheating or clogged with glass dust so stopping and cooling restores efficiency.
How much pressure should I apply while drilling aquarium glass?
Only light pressure should be used and the bit must grind not push through the surface.
Can I drill faster if I keep pouring water?
No speed must stay low because water protects the glass but does not prevent cracking from force.
Why is a grinding sound getting louder during drilling?
The bit may be dry or dull so adding water and cleaning improves performance.
What if the panel becomes warm while drilling?
Stop immediately allow cooling and resume slowly to prevent stress cracks.
Preventing Cracks and Leaks in Aquarium Glass
Do not drill near the bottom corner of the tank. Corners carry the highest structural tension. Drilling there increases the chance of tank failure.
Always drill on non tempered panels. Tempered glass breaks instantly when drilled. Knowing the panel type prevents complete tank loss.
Never drill a tank with existing cracks. Even tiny hairlines spread under drilling pressure. Damaged tanks should not be modified for safety.
Support the glass before and during drilling. Sudden shifting creates uneven stress across the panel. A stable tank prevents vibration and unexpected cracking.
Drill slowly through the final layer. The breakthrough point carries the highest stress. Reducing pressure protects the exit edge from chipping.
Finishing the Hole and Preparing for Bulkhead Installation
Once the hole is complete lift the drill gently. Pulling quickly creates chips around the edge. Controlled movement keeps the opening clean and smooth.
Rinse the area to remove glass particles. Dust can interfere with bulkhead sealing. A clean surface improves watertight installation.
Inspect both sides of the hole closely. Sometimes tiny cracks appear inside the panel. Early detection prevents leaks after filling the tank.
Use fine grit sandpaper only if needed. Light sanding removes small sharp edges. Never over sand because it weakens the surrounding glass.
Dry the panel completely before installing hardware. Moisture prevents silicone from bonding correctly. Dry surfaces ensure a reliable seal.
Should I polish the hole before adding a bulkhead?
Yes polishing removes micro chips and helps the gasket seal more effectively.
How long should I wait before filling the tank with water?
Wait until silicone cures fully according to product instructions for safe sealing.
What if the hole looks slightly uneven after drilling?
Small imperfections can be smoothed gently but deep flaws may require a new location.
Can I widen the hole after finishing?
Widening is risky and should not be attempted because it stresses the glass.
Should I clean both sides of the panel after drilling?
Yes glass dust settles on the inside and must be washed away before installation.
Common Mistakes to Avoid When Drilling Aquarium Glass
Using high speed is the fastest way to crack the tank. Speed must remain low from beginning to end. Rushing increases heat and pressure instantly.
Pushing on the drill instead of letting it grind creates stress. Light pressure protects the panel from cracking. Patience always gives better results.
Skipping cooling leads to thermal shock. Water prevents rapid temperature changes during drilling. Cooling is the most important safety factor.
Switching angles while drilling causes vibration. Keeping the drill straight ensures smooth grinding. Angle changes weaken the drilling point.
Finishing too fast causes chipping at exit. Slow movement protects both the inside and outside edges. Clean edges prevent leaks after installation.
Conclusion
Drilling a hole in aquarium glass becomes much safer when the correct technique is used. Slow speed cooling and light pressure prevent cracking during the process. Confirming glass type before drilling protects the tank from sudden failure.
Diamond bits grind through the panel gradually instead of forcing it. Water cooling keeps temperature balanced and prevents stress buildup. Finishing carefully and inspecting both sides ensures the edges remain smooth and clean.
Avoiding common mistakes such as rushing applying pressure or drilling tempered panels prevents costly damage.
Patience and preparation make the process easier even for beginners. With the right approach you can drill aquarium glass safely without cracks leaks or tank replacement.

I’m John F. Nicholas, the founder, lead writer, and drill enthusiast behind 101drill.com. With years of hands-on experience in power tools and DIY projects, I created this platform to share practical knowledge, expert tips, and real-world insights to help others master the art of drilling.