
Drilling into glass tile seems simple until the first tile cracks without warning. Many homeowners start with confidence only to notice tiny star fractures spreading across the surface. What looks like a small mistake quickly turns into an expensive replacement that nobody expects.
The challenge begins with how delicate glass tile truly is. Unlike ceramic it cannot flex or absorb pressure when the drill makes contact. One wrong speed or angle is enough to break the tile before the bit even enters properly.
People often try drilling the same way they would handle a wall or metal surface. The drill slips and scratches the glossy finish because the tile is too smooth to grip. In a moment the excitement of a new project turns into frustration and confusion.
Then there are stories of successful attempts where the process feels surprisingly easy. The person works slowly and keeps the tile cool while the bit grinds instead of cutting. With the right technique the drill moves through cleanly without a single chip forming.
This guide is designed for anyone who wants that second outcome instead of the first. You will learn how to prepare the surface and choose the correct drill bit before starting. Each step is explained clearly so you know exactly what to do and what to avoid.
Understanding Glass Tile Material and Why It Cracks
Glass tile looks beautiful in kitchens and bathrooms, but the material is brittle by nature. When pressure is applied unevenly, it can fracture because the internal structure does not flex like ceramic.
Many people make the mistake of drilling fast, which increases heat and causes sudden cracks.
Unlike standard tiles, glass has a dense and smooth surface that does not allow the drill bit to bite immediately. This makes the bit slip at first contact and creates scratches or star cracks.
The hardness also varies across brands, so one tile may drill differently from another. That is why testing on a spare piece is always recommended.
Moisture trapped during installation can also weaken the tile if drilling is attempted later. Small air pockets behind the tile make the pressure uneven and increase the chance of breakage. Understanding these factors helps you approach drilling slowly and with more control.
Temperature changes also affect glass tiles in a unique way. If the tile is already cold and the drilling generates heat, the expansion creates stress.
Using cooling methods helps maintain balance and prevents stress fractures. Knowing what causes cracks makes the drilling process safer.
Tools Required to Drill Glass Tile Safely
A standard drill is not enough when working with glass tile because the wrong tool will damage the surface immediately. You need a variable speed drill that allows very slow rotation and steady control. High speed creates heat that spreads quickly and increases cracking risk.
A diamond tipped drill bit is essential because the abrasive surface grinds through glass instead of cutting it sharply. Carbide bits work on ceramic but are not ideal for glass because they can chatter and chip. Using the correct bit reduces vibration and keeps the hole clean.
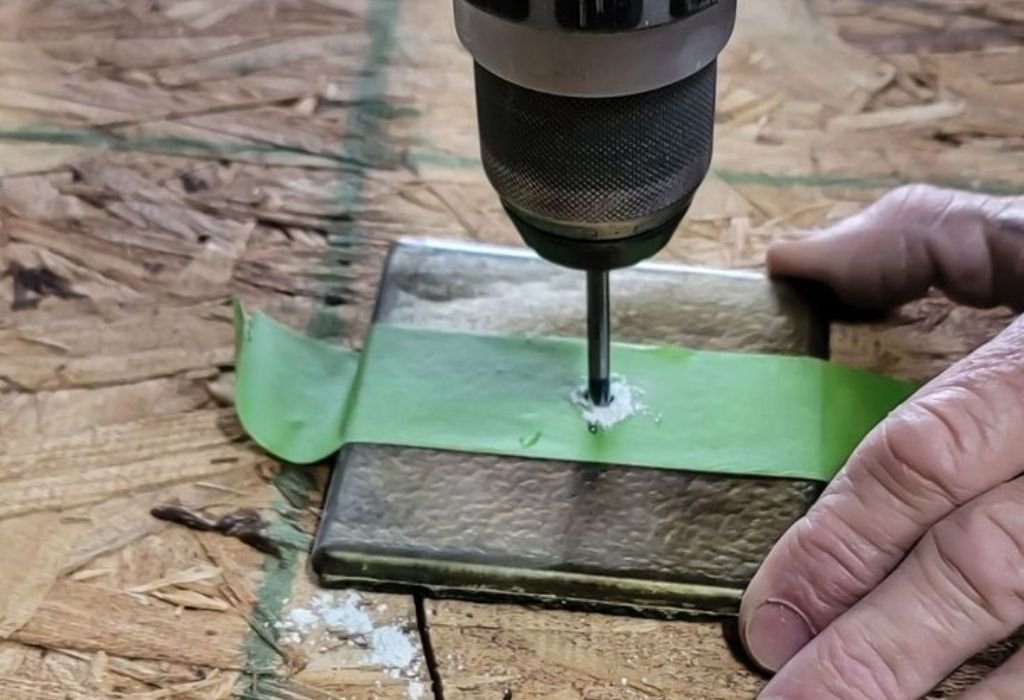
Masking tape or painter’s tape helps create friction on the smooth tile surface. It prevents the drill bit from slipping when starting the hole and makes marking more accurate. A spray bottle with clean water is also needed to cool the drilling area continuously.
Safety glasses are important because tiny shards can fly when the surface chips. Gloves provide grip and reduce vibration in your hands. Having all tools prepared before starting helps avoid rushing and makes the process more controlled.
Choosing the Right Drill Bit for Glass Tile
Diamond coated bits are the best option because they grind slowly through the tile. These bits are designed to last longer and produce clean round holes without sudden chipping. They come in core style and spear point style depending on the hole size needed.
Spear point diamond bits are ideal for small holes such as mounting hooks or shower accessories. They start easily and stay centered even on smooth surfaces. Core bits are hollow and used for larger openings like plumbing or fixture installations.
The quality of the bit matters because cheaper versions wear out quickly. When the diamond coating becomes smooth, drilling takes longer and generates more friction. This extra heat increases the chance of cracking and slows down the progress.
Always choose the exact diameter needed because widening a hole later puts stress on the tile. Buying a set with multiple sizes is useful when working through several sections. Keeping the bit clean after every use also improves performance and lifespan.
Preparing the Surface Before Drilling Glass Tile
Cleaning the tile surface helps remove dust, soap residue, or oil from fingerprints. A clean surface allows the tape to stick properly and prevents the drill bit from sliding. If the tile is textured, lightly brushing it improves the contact area.
Applying two layers of masking tape over the drilling spot gives additional grip. The tape also reduces the chance of small chips forming around the hole edge. Mark the center using a fine tip marker so the positioning remains precise.
If the tile is already installed, checking what is behind it is extremely important. Drilling into metal or hitting a pipe can cause serious damage. Use a stud finder or verify through installation plans before proceeding further.
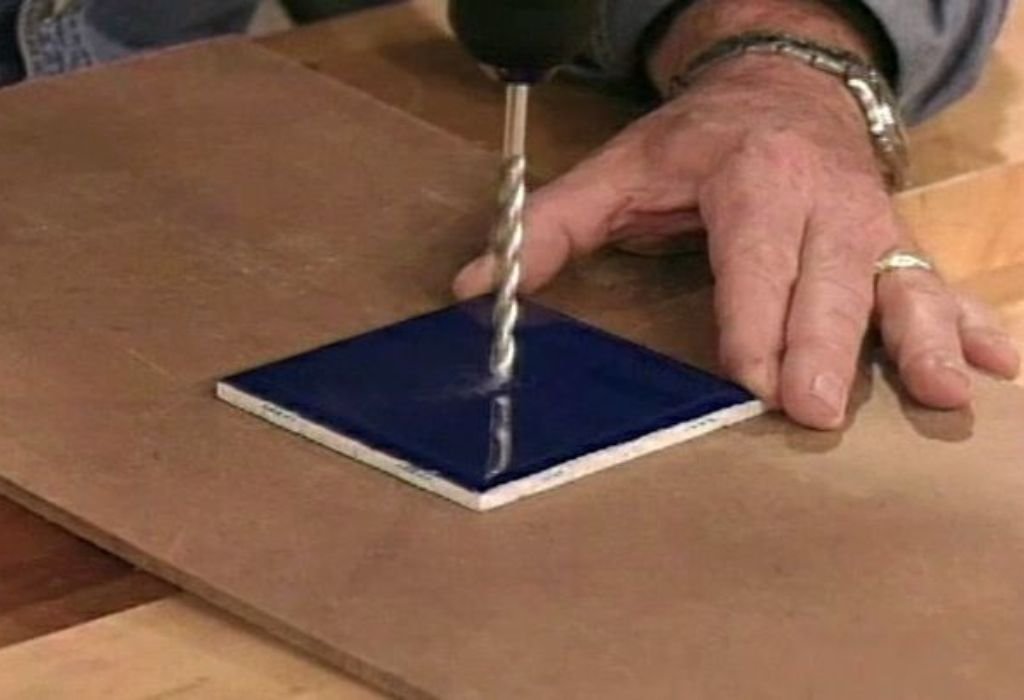
Supporting the tile from beneath helps distribute force evenly. When drilling loose tiles, placing them on a dense rubber pad or plywood prevents vibration. Preparing properly makes the actual drilling smoother and reduces unexpected problems.
How to Mark and Secure the Drilling Point Correctly
Marking the exact drilling spot ensures that the hardware aligns perfectly. Small measurement errors become noticeable once accessories are installed on the wall. Using a level helps keep holes straight when drilling multiple points.
A guide block or drill guide can hold the bit steady if you want extra precision. Some people prefer using a small clay ring around the spot to hold water while drilling. This keeps the area cool and prevents drying during longer drilling sessions.
Applying gentle pressure helps the bit create a small indentation before drilling deeper. For beginners, starting at a slight angle and straightening slowly improves control. Once the bit bites into the surface, continue at a vertical position for best results.
How much water should I use while drilling glass tile?
Keep a slow steady flow so the surface stays cool without flooding. Continuous cooling prevents heat buildup and reduces cracking.
Why does the drill bit keep slipping on the tile surface?
The tile is too smooth and needs masking tape for grip. Starting at low speed also helps the bit bite before drilling deeper.
Can I start drilling without creating a starter dent?
It is risky because the bit may slide and scratch the surface. Always let the bit rotate gently until a small indentation forms.
Should I use a center punch on glass tile?
No metal punches can shatter the tile instantly. Only create a dent using the drill bit itself with light controlled pressure.
How do I drill multiple holes in a straight line?
Measure carefully and mark using a level for alignment. Drilling slowly keeps spacing accurate without the bit drifting off position.
Drilling Speed Angle and Pressure Explained
Starting with the correct speed is the most important part of drilling glass tile. A low rotation between 400 and 600 RPM keeps heat under control and prevents sudden stress on the surface. High speed creates friction that spreads quickly and leads to cracking.
Maintaining a straight angle ensures the drill bit enters the tile evenly. Tilting the drill too early creates pressure on one side and increases the chance of chipping. Begin gently until the bit forms a shallow guide and then continue with steady movement.
Applying too much force is a common mistake among beginners. Glass tile needs the drill to work slowly while the bit grinds through the surface layer. Letting the tool do the cutting keeps the internal structure stable and reduces vibration.
If the drill stops moving forward do not push harder. Slow down and allow more cooling water to reach the drilling point. Forcing progress creates internal stress that may not be visible until the tile suddenly breaks.
Keeping your hand steady reduces shaking and prevents the bit from wandering. Using both hands helps maintain balance and control throughout the process. A slow and patient approach makes the final result smoother and safer.
Practicing on a spare tile builds confidence before drilling an installed surface. This allows you to understand how the material reacts at different speeds and pressures. Testing helps you avoid unexpected problems during the real installation.
Techniques to Prevent Cracking and Chipping
Creating a small starter divot helps the drill bit lock into position before drilling deeper. This can be done by gently rotating the bit without pressure until a slight indentation appears. Once the bit bites into the surface the risk of slipping reduces immediately.
Keeping the tile surface lubricated provides constant cooling. Water removes dust and reduces heat that builds up around the drilling area. Without cooling the tile becomes stressed and more sensitive to cracking.
Using a drill guide or a piece of plywood with a pre drilled hole helps maintain stability. The guide supports the bit and prevents it from wandering across the smooth tile surface. This method is especially useful for beginners or tight spaces.
Avoid lifting the drill suddenly while drilling the hole. Sudden direction changes create internal tension and small chips form around the edges. Continue at a steady depth until the bit passes through the tile completely.
How do I stop the edges from chipping while drilling?
Use slow speed and constant water to cool the area. Let the bit grind gradually instead of applying heavy pressure.
Why does the tile crack at the end of drilling?
Too much force is applied when the bit exits the tile. Reducing pressure and supporting the back prevents sudden breakage.
Can I drill glass tile without using water?
No dry drilling creates heat that stresses the surface. Continuous lubrication is required to avoid thermal shock and cracking.
Is it safe to drill close to the tile edge?
It increases the risk because edges are weaker and less supported. Maintain at least one inch distance for safer drilling.
Why does the tile chip even with slow drilling?
The drill bit may be worn out or not designed for glass. Switching to a sharp diamond bit improves results immediately.
Placing a wooden board behind loose tiles helps distribute pressure evenly. The board absorbs force and prevents the tile from flexing while drilling. This technique is effective for both small and large holes.
How to Keep the Tile Cool During Drilling
Glass tile reacts quickly to temperature changes so keeping it cool is essential. Water acts as a lubricant and prevents overheating in the drilling area. Spraying continuously helps maintain an even temperature and avoids thermal stress.
A small clay ring or putty circle can hold water around the drilling point. This keeps the area cool without needing constant spraying during longer drilling sessions. It also minimizes water spreading across the workspace.
Do not allow the drilling spot to dry at any time. Heat builds immediately when friction increases and the tile may crack without warning. Cooling ensures a slow and controlled cutting process.
Using a variable speed drill is helpful for maintaining low RPM. Slower speed produces less heat and gives more control throughout drilling. Rushing only increases the risk of tile damage.
Take breaks during drilling if needed to let the tile cool naturally. Short pauses prevent heat buildup and allow water to reach the bit again. Patience creates better results and reduces unnecessary stress.
Keeping the drill bit clean improves cooling efficiency. Dust buildup blocks water flow and increases friction on the surface. Cleaning the bit regularly helps maintain smooth drilling performance.
Finishing the Hole Smoothly and Safely
Once the drill passes through the tile continue moving slowly to avoid edge damage. Pulling the drill out too quickly creates chips around the exit point. Keeping steady pressure prevents sudden vibration and maintains a clean finish.
Smoothing the edges makes the hole safer and more professional. A diamond polishing pad or fine grit sandpaper can remove tiny sharp spots. Light circular motion keeps the tile free from scratches and uneven marks.
Clean the area with water to remove glass dust and debris. Dust can settle into the drilled opening and make installation more difficult. A clean surface ensures mounting hardware fits correctly.
Should I polish the hole after drilling?
Yes polishing removes micro chips and smooths sharp edges. It also makes the surface safer for installing hardware.
What if the drilled hole looks uneven?
The bit may have shifted or become dull during drilling. Light polishing and using a fresh bit improve the final finish.
Should I clean the hole before inserting anchors?
Yes debris prevents anchors from fitting securely. Cleaning ensures proper grip and long term stability.
Can polishing remove small surface chips?
Light polishing can smooth minor imperfections only. Deep chips cannot be repaired and may require replacing the tile.
How long should I wait before mounting hardware?
Wait until the hole is completely dry. Moisture weakens adhesives and reduces durability over time.
Check the back side of the tile to confirm there is no hidden cracking. Sometimes fractures appear behind the surface even when the front looks intact. Identifying issues early prevents further damage when mounting accessories.
Dry the tile completely before installing hardware or anchors. Moisture trapped inside the hole weakens adhesive and reduces durability. A dry and clean surface ensures long lasting results.
Common Mistakes to Avoid When Drilling Glass Tile
Using high speed is one of the biggest causes of tile cracking. Fast rotation creates heat and stress that the material cannot handle. Staying at low speed keeps the drilling process controlled and safe.
Skipping surface preparation increases the risk of drill bit slipping. Without masking tape the bit cannot grip the smooth tile surface properly. Marking the point accurately prevents misaligned holes and wasted effort.
Forgetting to cool the area leads to rapid temperature change. Heat expands the tile while the surrounding area stays cooler which creates internal stress. Constant water flow keeps the tile stable and prevents fractures.
Why does the drill bit burn out quickly?
High speed or lack of cooling overheats the bit. Using low RPM and water extends its lifespan and performance.
Can I use a regular masonry bit for glass tile?
No masonry bits are not suitable and will cause chipping. Only diamond coated bits are safe for drilling glass tile.
Is it okay to drill from both sides of the tile?
No drilling from both sides creates uneven pressure. Always drill from one direction with slow and steady progress.
Why does the bit vibrate while drilling?
Incorrect angle or loose grip causes shaking. Holding the drill firmly with both hands reduces vibration.
Can I stop and restart drilling in the same hole?
Yes but only if the bit stays aligned. Restarting at a different angle increases the risk of cracking.
Applying too much pressure forces the bit to push instead of grind. Pressure should remain light to moderate throughout the process. Allowing the tool to work slowly gives the best results.
Trying to widen a hole after drilling creates stress on the tile. Enlarging openings requires a core bit with the exact size needed. Planning ahead prevents unnecessary damage and extra work.
Conclusion
Drilling glass tile becomes much easier when you understand how the material reacts to heat pressure and speed.
Using the correct tools and techniques reduces the chance of cracks and creates smooth clean holes. Preparing the surface ahead of time ensures better accuracy and control throughout the process.
Working slowly helps maintain stability while the diamond bit grinds through the tile surface. Cooling the drilling point with water prevents friction buildup and protects against thermal stress.
Supporting loose tiles and checking what lies behind the wall increases safety and prevents unexpected damage.
Finishing the hole carefully keeps the edges smooth and ready for hardware installation. Polishing the opening and cleaning away dust improves durability and appearance. Avoiding common mistakes like high speed and excessive pressure makes the process more reliable.
With patience and proper technique anyone can drill glass tile successfully. Taking time to practice on a spare tile builds confidence before working on an installed surface. The right approach ensures long lasting results without costly breakage.

I’m John F. Nicholas, the founder, lead writer, and drill enthusiast behind 101drill.com. With years of hands-on experience in power tools and DIY projects, I created this platform to share practical knowledge, expert tips, and real-world insights to help others master the art of drilling.