
Drilling holes in a metal planter may look simple until the drill bit touches the smooth curved surface and begins to slip out of position.
Many beginners try to start drilling only to hear a loud scraping sound as the bit skates across the metal instead of digging in. This makes the task feel more difficult than it truly is.
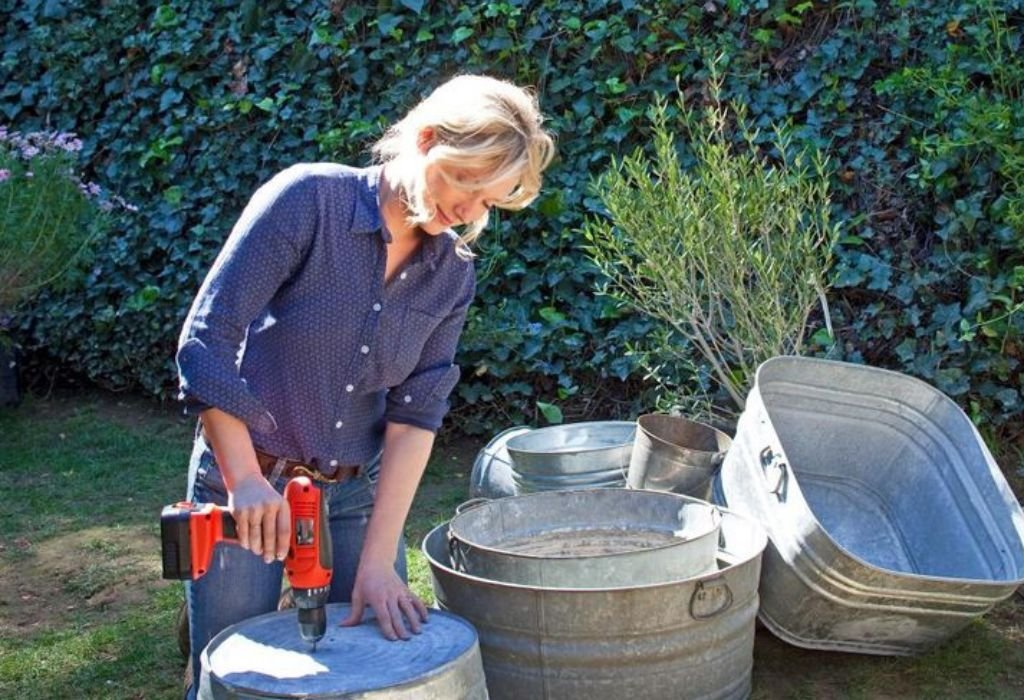
Imagine you buy a shiny metal planter for your plants, and you need drainage holes before adding soil.
You mark the spots perfectly, place the drill against the metal and the bit slips sideways immediately, leaving a scratch. Even a small mistake like this can ruin the planter’s appearance and alignment.
Metal planters are lightweight but still strong, which means they can flex when pressure is applied. This flexing makes drilling slightly unpredictable for someone unfamiliar with the process. Without proper preparation, the bit cannot properly grip the surface.
Once the bit creates a small starting groove, drilling becomes much easier and fully controlled. The challenge is successfully securing the first few seconds without slipping. Professionals follow specific steps to make the drill sit firmly on metal right from the start.
Metal planters also need support from the inside because thin metal can bend or dent with too much force. A stable backing prevents the planter from warping as the drill cuts through. Stability is the key to maintaining the planter’s shape.
With the right method, drilling drainage holes in any metal planter becomes simple and safe. Whether the planter is galvanized steel, aluminum or stainless metal, the same steps always work. This guide explains every technique you need to achieve smooth, clean and professional results.
Why Metal Planters Need Proper Drilling Technique
Metal planters have curved edges that give the drill bit very little contact when starting a hole. The curved shape makes the bit slip away from the marked spot. This slipping creates uneven scratches that damage the planter’s finish.
Metal planters are usually thin, so they can bend under too much pressure. Thin metal reacts quickly to force and loses shape easily. Using gentle drilling control prevents damage.
Some planters have protective coatings or paints. These coatings can make the surface slick until the drill reaches the bare metal. Removing coatings at the drilling spot can help.
Planters often vibrate when drilling begins. Vibration makes the bit harder to control and causes misalignment. Reducing vibration improves accuracy.
Some planters have welded seams around the sides or bottom. Seams are thicker and harder to drill through. Avoiding seams ensures easier drilling.
Metal planters can dent from the inside if not supported. A block placed inside keeps the planter from bending inward. Proper support helps maintain shape.
Using the wrong drill bit type can tear thin metal. Thin metal needs sharp bits designed for clean cutting. Proper drill bit choice ensures smoother results.
Tools You Need to Drill Holes in a Metal Planter
A variable speed drill gives you full control while drilling thin metal. Low speed helps the bit grip the surface without slipping. High speed is not suitable for starting on metal.
High speed steel or cobalt bits are the best choices. They cut through metal without requiring too much pressure. Sharp bits create smoother holes.
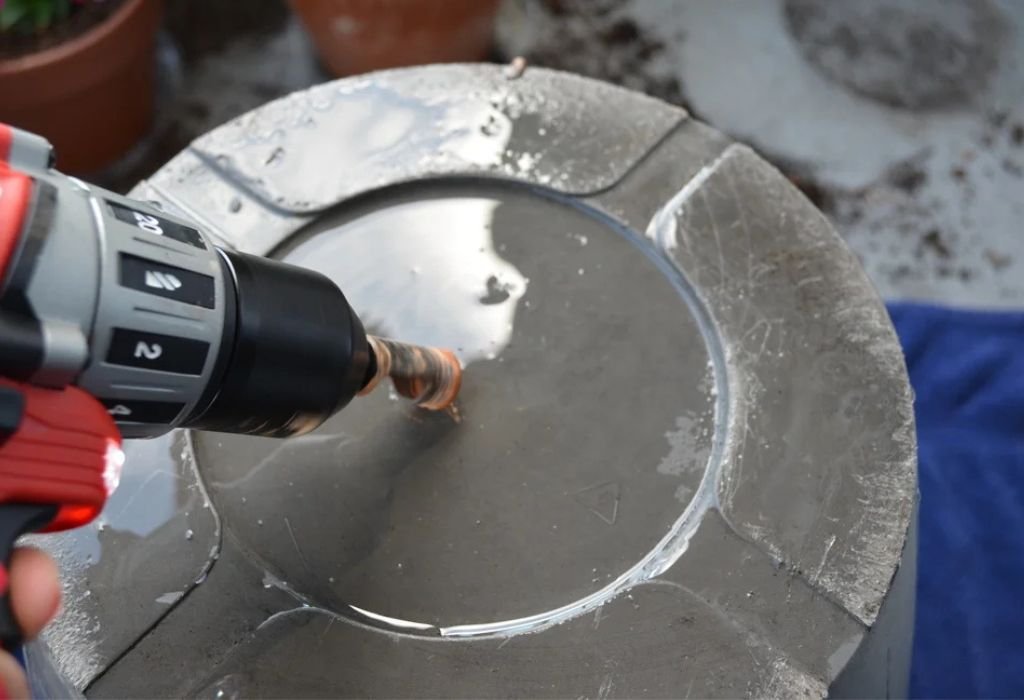
A center punch creates a small dent for the drill bit to rest in. This dent prevents wandering on the curved surface. The deeper the dent, the better the stability.
Clamps or a planter holder help prevent shifting. Metal planters are light and move easily. Proper clamping ensures accuracy.
Cutting oil keeps the drill bit cool. Metal drilling generates heat quickly. Lubrication prevents overheating and damage.
A marker helps identify drilling locations. Clear markings prevent misalignment. Accurate marks ensure neat results.
Safety gear must always be used. Safety glasses and gloves protect against metal shavings. Thin metal produces sharp flakes that can fly quickly.
How to Prepare a Metal Planter Before Drilling
Marking the hole location is the first important step. Using a bright marker helps keep the mark visible on metal surfaces. Precision prevents drilling in the wrong area.
A center punch creates a strong starting point. This dent gives the drill bit something to grip. Without it, the bit will always slip.
Cleaning the planter surface improves drilling results. Dust, oil or coating flakes increase slipping. Clean metal provides better contact.
Placing a wooden block inside the planter provides support. This prevents bending and flexing while drilling. Thin planters especially need internal support.
Clamping the planter prevents movement. Planters tend to roll or slide quickly when drilling starts. Clamping ensures stability.
Lighting must be bright enough to see the punch mark. Shadows reduce precision. Proper lighting improves accuracy.
Setting the drill to a low speed prepares for a better start. High speed creates slipping and overheating. Slow speed provides full control.
How to Start a Clean Hole on a Curved Planter Surface
Starting the hole is always the most challenging part. The bit slips because the curved surface has no flat area for initial contact. A deep punch mark solves this problem.
Hold the drill at a slight angle during the first few seconds. This allows one cutting edge to grab the metal. Once a small groove forms, straighten the drill.
Use very low speed when beginning the cut. Slow rotation helps the edges engage. This reduces wandering.
Apply gentle pressure instead of pushing hard. Too much pressure can dent the planter. Let the bit cut naturally.
Apply cutting oil to reduce friction. Oil helps the bit dig into the metal more easily. Lubrication prevents overheating.
Once the bit enters slightly, control becomes easier. The groove guides the bit automatically. This prevents side movement.
Check the groove to ensure the bit is cutting in the correct direction. Making adjustments early prevents larger mistakes later. Accuracy begins at the start.
Why does the drill bit slip on metal planters?
Because the curved surface provides very little grip for the bit.
Do thin planters dent easily while drilling?
Yes, they require gentle pressure to prevent inward bending.
Should I remove coating before drilling?
Removing coating improves grip and makes drilling easier.
Can I begin with a smaller drill bit?
Yes, smaller bits create easier starting grooves.
Does cutting oil help on thin metal?
Yes, oil reduces friction and prevents overheating.
How to Drill Deeper Holes in a Metal Planter Smoothly
Deeper drilling requires slow and steady motion. Thin metal reacts differently as the bit goes deeper. Consistent technique gives better results.
Reapply cutting oil as needed. Deeper drilling creates more heat. Lubrication keeps the bit sharp and cool.
Pull the drill bit out periodically to remove metal shavings. Shavings clog the bit and create resistance. Clearing them helps maintain smooth drilling.
Use consistent pressure that is gentle. Too much force can twist or dent the planter. Let the bit work naturally.
Maintain a steady speed without sudden changes. Sudden acceleration causes vibration. Vibration increases slipping.
Use sharp bits for deeper holes. Dull bits snag thin metal and tear it. Sharp edges create clean cuts.
Check progress often to ensure the planter has not shifted. Even clamped planters can move slightly. Adjusting early improves accuracy.
Using a Drill Guide or Support for Cleaner Planter Holes
A drill guide provides stability during drilling. Guides hold the bit in a straight line. This helps especially during the starting phase.
Place a wooden block or support inside the planter. The support prevents bending or collapsing. This backing gives the bit something firm to drill against.
Use a simple block of wood under the drill to maintain angle. Angle stability improves the quality of the hole. A stable angle prevents wandering.
Guides are helpful if multiple holes need identical spacing. They ensure consistent hole positioning. This creates a professional appearance.
Guides ease wrist strain. Holding a drill steady on thin metal can be tiring. The guide absorbs some of that pressure.
Cutting oil must still be used. Guides only stabilize but do not reduce friction. Oil ensures clean cutting.
Check all guide positions before drilling. Misaligned guides create crooked holes. Proper setup ensures best results.
Do I need a drill guide for planters?
A guide helps but is not required for small holes.
Can I use wood as inner support?
Yes, a wood block strengthens the drilling area.
Do guides stop the bit from slipping?
They reduce slipping by stabilizing the position.
Are guides useful for thin metal?
Yes, thin metal benefits from added stability.
Should I clamp the guide too?
Clamping improves accuracy and prevents shifting.
Avoiding Common Mistakes When Drilling Metal Planters
Skipping the center punch is the biggest mistake. Without a dent, the bit slips immediately. This ruins alignment.
Using high speed leads to overheating. Thin metal becomes hot quickly. Low speed provides better control.
Applying too much force dents the planter. Pressure must be gentle. Let the drill bit do the cutting.
Using dull bits produces jagged holes. Dull bits snag instead of cutting. Sharp bits produce smooth openings.
Failing to clamp the planter causes rolling. Metal planters move easily when drilling begins. Clamping increases safety.
Skipping lubrication increases friction. This damages the drill bit. Cutting oil improves performance.
Incorrect angle alignment creates uneven holes. Holding the drill straight is essential. Adjusting early prevents errors.
Safety Tips for Drilling Holes in Metal Planters
Safety glasses protect your eyes from sharp metal chips. These chips can fly unpredictably. Glasses prevent injuries.
Wear tight fitting gloves to protect your hands. Loose gloves can get caught in the drill. Proper gloves improve grip and safety.
Clamp the planter to prevent movement. Movement can cause the drill bit to slip. Stability reduces accidents.
Avoid loose clothing near the drill. Clothing can tangle with the tool. Proper attire keeps you safe.
The drill bit becomes hot quickly. Touching it immediately can cause burns. Let it cool naturally.
Cutting oil reduces heat and friction. Lower heat reduces risk. Oil protects both the bit and the metal.
Keep your workspace bright and clean. Good lighting improves accuracy. A clean work area prevents slips.
Do I need safety glasses?
Yes, thin metal creates very sharp chips.
Should I wear gloves?
Wear tight gloves for safety and control.
Is clamping necessary for planters?
Yes, they roll easily without support.
Why is the drill bit so hot?
Metal drilling produces high friction.
Do I need cutting oil?
Yes, oil prevents overheating and bit wear.
Finishing and Cleaning Holes in a Metal Planter
Deburring removes sharp edges around the hole. Sharp edges can cause injury. A deburring tool smooths them.
Cleaning removes metal shavings. Shavings can scratch the planter. A clean hole looks professional.
Testing the hole size ensures proper fit. Screws or bolts should insert smoothly. Testing prevents installation problems.
Polishing the hole entry improves appearance. Smooth edges reduce friction. Polishing enhances the final look.
Checking alignment ensures the hole is centered. Misaligned holes affect planter function. Early checking prevents issues.
Removing leftover burrs protects your hands. Burrs can snag gloves or skin. Smoothing them increases safety.
Preparing the planter for use completes the job. Clean and smooth holes support proper drainage. A well prepared planter performs better.
Conclusion
Drilling holes in a metal planter becomes simple once you follow the right steps. A deep punch mark, slow speed and support block help prevent slipping. These small steps make drilling cleaner and safer.
Cutting oil, sharp bits and proper alignment ensure smooth drilling. Avoiding common mistakes helps protect both the planter and the drill. Careful technique always leads to better results.
Metal planters require gentle handling because of their thin walls. With patience and the correct method, anyone can drill perfect holes confidently. A well prepared hole supports better drainage and helps your plants thrive.

I’m John F. Nicholas, the founder, lead writer, and drill enthusiast behind 101drill.com. With years of hands-on experience in power tools and DIY projects, I created this platform to share practical knowledge, expert tips, and real-world insights to help others master the art of drilling.