
Drilling a blind hole in wood might sound complicated at first, but it’s one of the most practical techniques in woodworking. A blind hole doesn’t go all the way through the material, which means precision and control are key.
Whether you’re adding dowels, screws, or hidden joints, learning this skill opens up new project possibilities.
Picture this: you’re assembling a wooden shelf or furniture leg where screws must stay hidden. A through-hole would ruin the design, but a blind hole keeps everything strong and invisible. With the right approach, even beginners can achieve flawless results.
The challenge lies in stopping the drill at the perfect depth. Go too far, and you’ll break through the surface; too shallow, and the hardware won’t fit correctly. This guide will show you exactly how to avoid both mistakes.
From measuring depth accurately to selecting the right drill bit and preventing tear-out, you’ll learn everything needed to drill like a pro. Each step is simple, safe, and beginner friendly.
By the end, you’ll understand not just how to drill a blind hole but how to do it cleanly, safely, and with confidence on any type of wood.
Understanding What a Blind Hole Is
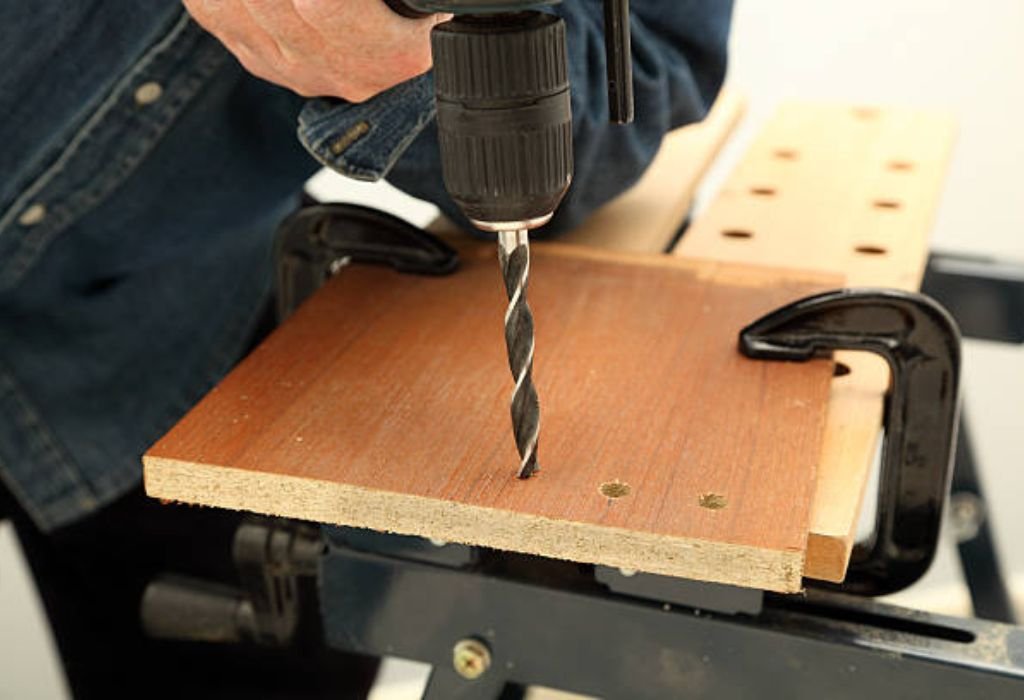
A blind hole is a hole drilled into wood that does not pass all the way through. Instead, it stops at a specific depth, leaving the bottom sealed. These holes are commonly used for concealed screws, dowel joints, and furniture hardware.
Unlike through-holes, blind holes require precise depth control. Too much drilling pressure can cause accidental breakout. Learning to control the drill’s speed and depth ensures a clean finish.
Blind holes also create a stronger joint because the fastener remains surrounded by solid wood. This makes them ideal for structural or decorative applications. You’ll often find them in cabinetry, joinery, and furniture frames.
Because the hole doesn’t exit the opposite side, depth measurement is crucial. Marking and controlling the drill bit are essential steps. Even experienced woodworkers use visual guides to maintain consistency.
In most cases, you’ll use brad-point or Forstner bits for clean, flat-bottom holes. Both create sharp edges and prevent wandering. Understanding these basics helps you start with confidence.
Tools and Materials You Will Need
Every successful blind hole starts with the right tools. Preparation saves time, ensures safety, and improves accuracy. Organizing everything beforehand keeps your workflow efficient.
You’ll need a power drill or drill press, drill bits, masking tape, and a measuring gauge. Forstner or brad-point bits are the best for flat-bottomed blind holes. Clamps, a ruler, and a pencil help you mark and hold your workpiece securely.
A depth stop or collar attachment is extremely useful. It prevents drilling too deep and protects your wood from accidental breakout. Most hardware stores sell universal depth stops that fit common drill bits.
A scrap piece of wood is also handy for practice and testing. This lets you verify depth settings before working on your main project. It’s a simple step that prevents costly mistakes.
You may also need sandpaper, a small brush, and wood glue if dowels are involved. Sanding smooths rough fibers, while glue strengthens the joint.
Lastly, don’t forget safety gear such as goggles and hearing protection. Drilling produces fine dust and noise that can irritate your eyes and ears.
Choosing the Right Drill Bit for Blind Holes
Drill bit choice determines how clean and precise your hole will be. Not all bits are designed for blind holes, so knowing the differences helps you select the right one. Clean edges and flat bottoms depend on your bit’s shape and sharpness.
Forstner bits are the top choice for most blind hole applications. They produce smooth-sided holes with flat bottoms, ideal for hardware and dowels. These bits also prevent tear-out even near the edge of the board.
Brad-point bits are another great option for shallower blind holes. Their sharp tip stays centered and gives excellent accuracy. They’re especially useful when starting holes without a pilot point.
Avoid spade bits unless you’re working on rough construction. They remove material quickly but leave uneven bottoms. For furniture or visible joints, precision bits give better results.
Check your bit size carefully before drilling. Measure the diameter of your dowel, screw, or insert to ensure a snug fit. Using the wrong size creates weak joints or loose fittings.
Finally, always sharpen your bits or inspect them before use. Dull edges produce rough holes and require more pressure. A sharp bit cuts cleanly and keeps your work safe and efficient.
Marking and Measuring the Hole Depth Accurately
Depth measurement is one of the most important steps in blind hole drilling. Without control, you risk drilling through the wood completely. The best results come from careful planning and marking.
Begin by marking the center of your intended hole using a pencil or awl. Use a ruler or square to ensure it’s correctly placed. Clear and accurate marks eliminate guesswork later.
Next, determine how deep your hole should be. Use calipers or a ruler to measure the required depth for your hardware. Add a few millimeters of extra space for glue if necessary.
Wrap a small piece of masking tape around your drill bit at the desired depth. This simple trick acts as a visual stop when drilling. When the tape touches the surface, stop immediately.
Alternatively, attach a depth-stop collar to your bit. These adjustable collars clamp securely and stop the bit automatically. They’re ideal for multiple holes requiring consistent depth.
Always double-check the depth using a test piece before drilling the final workpiece. Testing avoids surprises and ensures perfect fitting.
Precision in this stage sets the foundation for a perfect blind hole.
Drilling the Blind Hole
Now comes the most satisfying part: drilling the hole itself. With accurate markings and the correct bit, you’re ready to begin. This stage requires steady hands and focus.
Secure your wood piece firmly with clamps on a flat surface. Stability ensures the drill stays aligned and prevents movement. A shifting workpiece can cause uneven or angled holes.
Align the drill bit tip exactly over your center mark. Start drilling slowly to let the bit create its own guide. Once it’s set, increase speed slightly for smoother cutting.
Keep your eyes on the tape or depth stop as you drill. Stop as soon as it reaches the wood’s surface. Going deeper can ruin your project instantly.
Periodically lift the bit to clear away wood chips. This prevents clogging and heat buildup. Clean drilling ensures smoother walls and a cleaner finish.
After reaching your desired depth, remove the drill and inspect the hole. The bottom should look flat and clean. If rough edges remain, we’ll fix that in the next step.
What drill bit gives the flattest blind hole bottom?
A Forstner bit creates the flattest and cleanest bottoms for blind holes in wood.
Can I drill blind holes with a hand drill?
Yes, but use a depth stop or masking tape to control the depth accurately.
How deep should blind holes be for dowels?
Half the dowel’s length in each piece is ideal for a strong joint.
What causes burn marks while drilling?
Excessive speed, dull bits, or lack of chip clearance can overheat the wood surface.
Should I use oil or lubricant for wood drilling?
No, dry drilling is better for wood; lubrication can affect glue adhesion later.
Cleaning and Finishing the Hole Interior
Even after drilling carefully, blind holes often have rough surfaces. Cleaning and finishing them improves both function and appearance. Smooth holes hold dowels and screws more securely.
Use a small brush or vacuum to remove all wood dust from the cavity. Leaving debris behind can affect fit or glue bonding. Always start with a clean surface.
Lightly sand the inside of the hole with rolled-up fine-grit sandpaper. This removes small burrs and evens out the surface. Avoid over-sanding, which can widen the hole.
If needed, apply a thin coat of wood glue for dowel joints. Spread it evenly with a brush or cotton swab. Proper glue coverage ensures maximum strength once dried.
For hardware installations, test-fit your parts before final assembly. This confirms correct depth and alignment. Making adjustments now prevents damage later.
Lastly, wipe the surface clean and let everything dry completely. Smooth, dry holes are easier to assemble and look more professional.
Using a Drill Press for Perfect Depth Control
When precision is essential, a drill press offers unbeatable consistency. Unlike handheld drills, it maintains perfect alignment and depth every time. It’s especially useful for multiple holes of the same depth.
Set up the drill press with your selected bit and adjust the depth stop. Clamp your wood piece securely to the table. Proper setup prevents slipping or over-drilling.
Lower the bit slowly until it touches your mark. Drill steadily and stop when the bit reaches the set limit. The machine’s built-in stop ensures consistent results.
Use the press’s slowest speed for hardwood and medium speed for softwood. This prevents burning or tearing. Smooth operation produces cleaner edges.
Always check the first hole before continuing. Measure its depth and surface finish carefully. Adjust your settings slightly if necessary for perfect control.
A drill press isn’t mandatory but it’s worth using when accuracy and repeatability matter most.
Using Dowels or Screws in Blind Holes
Blind holes are perfect for hiding screws or inserting dowels. They give furniture a neat appearance without visible hardware. The process requires careful fitting and alignment.
For dowels, ensure both holes align perfectly between the two wooden pieces. Apply glue inside the holes and on the dowel surface. Insert and press firmly until seated.
For screws, select lengths shorter than the total wood thickness. Screws that are too long can break through the opposite side. Always test one first on scrap wood.
Pilot holes help prevent wood from splitting during screw insertion. Use a smaller bit before inserting the screw. This keeps threads clean and aligned.
If using pocket-hole screws, blind holes provide a flush finish. Hidden screws strengthen joints while maintaining clean aesthetics. Many furniture designs rely on this technique.
Allow glued dowels to dry fully before applying pressure or assembly. Patience ensures long-lasting joints.
Avoiding Common Mistakes When Drilling Blind Holes
Blind holes may look simple, but several mistakes can cause problems. Avoiding them helps you achieve cleaner and safer results. Awareness is the key to mastery.
Drilling too deep is the most common error. Always double-check your depth markings before you start. Tape or collars are essential safety measures.
Using dull bits is another frequent mistake. Dull bits burn wood and leave rough edges. Keep them sharp and clean for efficient cutting.
Skipping clamping can lead to dangerous slips. A moving piece ruins alignment and risks injury. Always clamp securely before drilling.
Applying too much pressure may cause cracks or chipping. Gentle, consistent drilling is safer and produces better surfaces.
Finally, forgetting to test on scrap wood can lead to costly mistakes. Practice ensures accuracy before you work on your final project.
Safety Tips for Drilling Blind Holes
Safety is crucial no matter how small the project. A few precautions make drilling cleaner and worry free. Focus, patience, and proper setup prevent most accidents.
Always wear eye protection when drilling. Flying chips can easily irritate or injure your eyes. A simple pair of goggles is your first line of defense.
Secure your wood piece with clamps. Stability prevents sudden movement and helps keep depth consistent. Never hold the workpiece with your hand while drilling.
Keep your fingers away from the rotating bit. Even light contact can cause serious injury. Maintain control by holding the drill handle firmly.
Use proper lighting to see your depth marks clearly. Poor visibility leads to over-drilling or off-center holes. A bright workspace improves accuracy.
Turn off the drill before adjusting bits or depth stops. Unplugging the tool ensures full safety. Always double-check before resuming work.
Can I use a cordless drill for blind holes?
Yes, but ensure it has variable speed and enough torque for your wood type.
What PPE is essential while drilling?
Safety goggles, ear protection, and dust masks are always recommended.
Why does my drill bit slip on the wood?
You may need to mark a small starter dent with an awl to prevent wandering.
Can I drill blind holes on curved surfaces?
Yes, but use clamps and go slowly to prevent slipping.
Is clamping really necessary for small holes?
Yes, even light movement can cause depth errors or damage to the wood surface.
Troubleshooting Depth or Alignment Issues
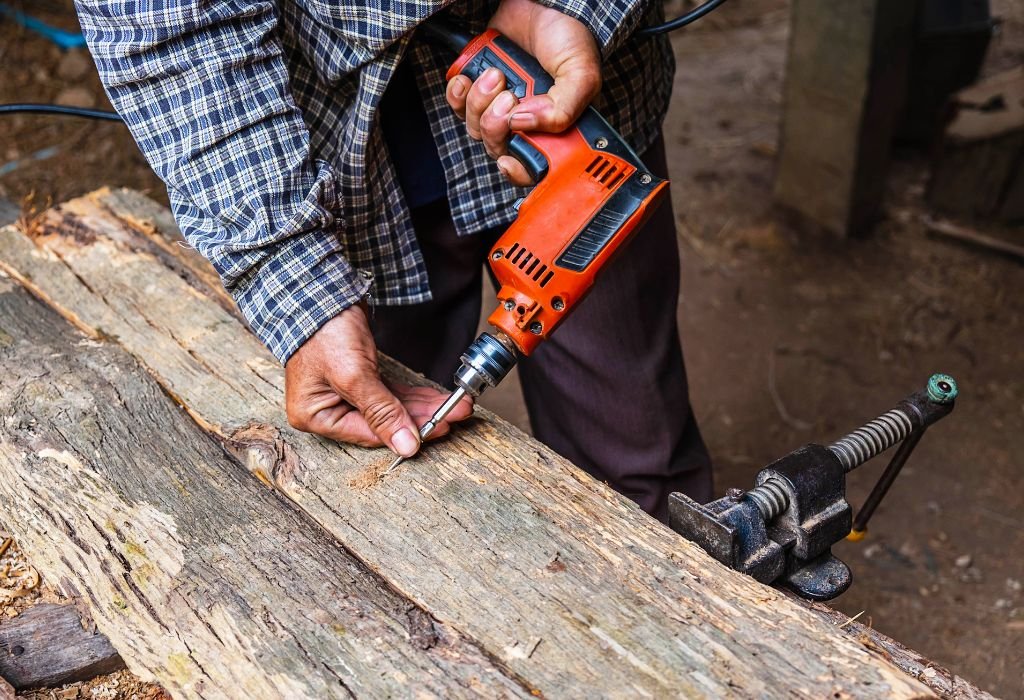
Even with careful planning, issues sometimes appear. Misaligned or shallow holes can weaken joints or ruin aesthetics. Fortunately, most problems are easy to fix.
If the hole is too shallow, redrill gently while checking your tape mark. Move slowly to avoid going too deep. Small adjustments usually correct the problem.
If the hole is too deep, fill the bottom with a bit of wood glue and sawdust mix. Let it dry before reinserting dowels or screws. This restores grip and stability.
Misaligned holes occur when your drill tilts during operation. Use a guide block or drill press to maintain vertical alignment. Precision increases dramatically with these aids.
For rough or chipped edges, sand gently around the rim using fine grit. Avoid applying too much pressure that widens the hole. Smooth, even sanding restores a clean appearance.
Learning from each mistake helps refine your technique. Every adjustment brings you closer to perfection.
Maintaining Drill Bits and Tools
Well-maintained tools produce cleaner results and last longer. Regular care improves safety and accuracy. A few minutes of upkeep after each use makes a big difference.
Clean drill bits after every project using a dry cloth or small brush. Remove sawdust and resin buildup. Stored moisture leads to rust, so keep tools dry.
Sharpen bits with a fine file or sharpening guide as needed. Dull edges require more pressure and risk splintering. Sharp bits cut faster and cleaner.
Lubricate moving parts on your drill occasionally. Light machine oil prevents corrosion and smooths operation. Always wipe off excess oil before storage.
Inspect the power cord, battery, and chuck for wear. Replace damaged parts immediately. Preventative care avoids accidents and tool failure.
Store all tools in a dry, dust-free environment. Proper storage protects your investment and keeps them ready for the next project.
Conclusion
Drilling a blind hole in wood is one of the most essential skills for clean, professional woodworking. With the right tools, measurements, and patience, anyone can achieve perfect depth and precision. Practice and preparation turn a tricky task into an easy routine.
From choosing the correct bit to setting accurate depth stops, every step builds confidence and control. Clean, even holes strengthen your joints and enhance your craftsmanship. Simple methods like using tape, guides, and steady drilling make all the difference.
Always prioritize safety and accuracy over speed. A few extra seconds of care prevent hours of rework later. Woodworking is about precision, not pressure.
By following these techniques, you’ll create flawless blind holes every time. Each project becomes smoother, cleaner, and more rewarding when you master this skill.

I’m John F. Nicholas, the founder, lead writer, and drill enthusiast behind 101drill.com. With years of hands-on experience in power tools and DIY projects, I created this platform to share practical knowledge, expert tips, and real-world insights to help others master the art of drilling.