
Imagine trying to build a wooden frame, shelf, or chair leg that needs a precise angled joint. You measure carefully, mark the spot, start drilling — and the bit skids off or the angle turns out too shallow. Anyone who has attempted to drill at an angle knows how challenging it can be.
Drilling a 45 degree hole is about accuracy and control, not force. The bit must enter the wood at the correct angle and stay aligned throughout the cut. Even a small shift changes the fit of a joint or the alignment of a fixture.
This technique is essential for projects like mitered frames, angled dowels, pipe entries, and hidden joinery. Getting the angle right ensures strength and professional finish in your work.
In this guide, you’ll learn step-by-step how to drill a 45 degree hole in wood with precision. We’ll cover tools, jigs, drill guides, safety tips, and finishing methods to achieve clean, smooth, accurate results every time.
Understanding 45 Degree Drilling in Wood
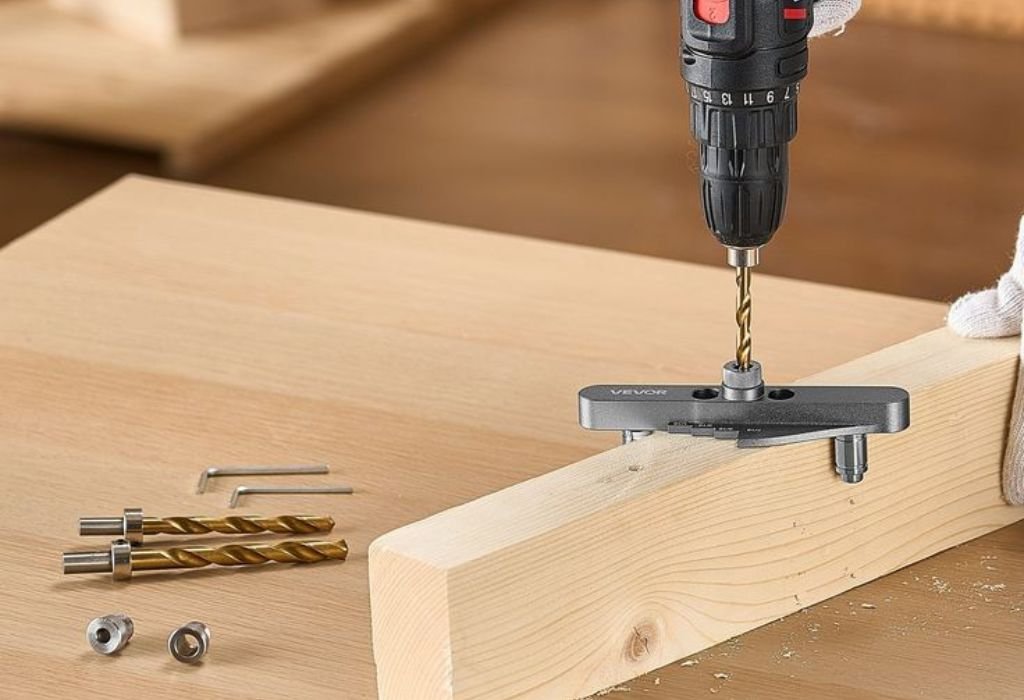
A 45 degree hole is a diagonal cut that passes through the wood at half a right angle. It’s used to join two pieces of wood in an L-shape or to run screws and dowels through angled frames.
Unlike straight holes, angled drilling requires controlling the bit’s path to avoid wandering. The entry angle must stay constant from start to finish. A slight tilt can ruin alignment and joint fit.
The challenge is that a drill’s base is designed to sit flat. Tilting it creates instability, especially on smooth surfaces. That’s why a drilling guide or jig is so important for this task.
A 45 degree hole is often used in pocket holes, pipe fittings, wood shelves, and angled supports. Carpenters use it to attach panels or legs at precise angles for strong, hidden joins.
Drilling at an angle also affects the way wood grains react. When the bit cuts diagonally across fibers, splintering can occur if you press too hard or use a dull bit. Proper speed and support help prevent that.
Once you understand how the angle works with your material, the process becomes predictable and smooth. Mastering this skill improves accuracy in every project you build.
Tools and Equipment You Need
The first step toward accuracy is choosing the right tools. A standard power drill is fine, but you need a stable way to maintain the angle.
A drill guide is the most useful accessory. It holds your drill at a fixed 45° angle so you can drill consistently without guessing. Some guides are adjustable for multiple angles.
Pocket-hole jigs (such as Kreg Jig) are excellent for 45° holes meant for screws. They ensure both the entry and exit points align perfectly for tight wood joins.
You’ll also need sharp twist bits or brad-point bits. Brad-point bits reduce wandering when starting at an angle. For larger holes, use a Forstner bit with slow speed and firm control.
Clamps are critical. A clamped workpiece prevents movement and vibration. A workbench vise or C-clamp keeps the wood secure as you tilt the drill.
A protractor or angle finder helps set the exact 45°. Mark the angle clearly before you start. A sliding bevel gauge is handy for quick marking.
Finally, prepare a backing board underneath the wood to prevent tear-out when the bit exits the surface. Safety glasses and ear protection complete your setup.
Marking and Positioning the Angle
Before you drill, accurate marking determines the success of your hole. Use a pencil and protractor to draw a 45° line across your wood piece. This serves as your visual guide for drilling.
If you are joining two boards, measure where the screw or dowel needs to exit the other side. Mark both entry and exit points carefully.
Place your clamp so that the wood stays firm but accessible to the bit. Ensure that your drill guide or jig sits flush against the surface. Misalignment by just a few degrees can affect fit.
If you don’t have a guide, you can create a temporary wedge block cut at 45°. Hold or tape this to the surface to guide your drill angle manually.
Check the angle twice before drilling. Wood fibers can pull the bit off course if you start incorrectly. Use light pressure to let the bit bite gradually into the surface.
Good positioning reduces stress on both your tool and the wood, producing a smooth, straight angled path.
Can I eyeball a 45° hole without a guide?
You can, but accuracy will suffer. Using a simple wedge block or angle jig ensures a cleaner result.
How do I measure a 45° angle accurately?
Use a protractor or bevel gauge to mark and align your guide precisely.
What if I need multiple identical angled holes?
Build a custom wooden jig to repeat the same 45° alignment each time.
Can I drill through thick wood at 45°?
Yes, but drill in stages and use a longer bit to maintain angle stability.
Is masking tape helpful for marking?
Yes, it protects the surface and makes your angle lines easier to see.
Step-by-Step Process for Drilling a 45° Hole
Start by setting up your clamp and backing board. Ensure the wood is secure to avoid movement. Attach your drill guide at the desired 45° angle.
Align the bit tip exactly where your mark intersects the surface. Hold the drill steady and start at low speed to establish a small groove. This groove keeps the bit from slipping.
Gradually increase speed and pressure once the bit has set its path. Do not force it — the bit should cut naturally through the grain. Apply steady forward pressure as you drill.
If your hole needs to pass entirely through the wood, stop halfway and finish from the other side. This reduces tear-out and keeps edges clean.
After drilling, remove the bit slowly while it’s still spinning lightly. This clears debris and prevents chipping around the edges.
Blow away dust or use a vacuum to inspect the angle. If the hole looks rough, smooth it using fine-grit sandpaper wrapped around a small dowel.
Repeat the process for additional holes, checking your angle each time to ensure consistency across the project.
Using a Drill Guide or Angle Jig
A drill guide simplifies angled drilling by holding your bit steady through the entire cut. It locks the angle and keeps the entry point accurate.
Set your guide to 45° using its adjustable base or preset slots. Align the hole mark under the bit and secure the guide to the wood using clamps.
If you’re using a pocket hole jig, simply insert the bit into its sleeve and drill until the stop collar contacts the guide. This produces uniform, precise angles for screws or dowels.
Angle jigs can be bought or made from scrap wood. A simple triangular block cut at 45° serves as a steady guide for handheld drills.
Always test your setup on a scrap piece before the final cut. Minor adjustments in alignment can make a major difference in final fit.
Clean and inspect your guide regularly for dust or resin buildup that may affect accuracy.
Are drill guides expensive?
No, basic guides cost $10–$30 and provide excellent accuracy for angle drilling.
Can I make my own guide?
Yes, cut a wood block at 45° and use it as a support to rest your drill against.
Do pocket-hole jigs work for angles other than 45°?
Yes, many adjust between 15° and 60°, ideal for joinery and fixtures.
Should I use a stop collar?
Yes, it controls depth and prevents over-drilling through the wood.
Can guides be used on curved surfaces?
Only specialized flex guides — flat ones work best on planar wood.
Preventing Tear-Out and Bit Wobble
Tear-out occurs when fibers splinter as the bit exits. To avoid it, use a backing board and steady pressure. Never yank the drill out suddenly.
Bit wobble happens if your angle isn’t secure or your bit is loose in the chuck. Tighten the bit firmly and maintain a consistent grip on the drill.
For hardwoods, reduce speed and let the bit cool between passes. Heat buildup softens fibers and causes rough edges.
Masking tape helps control splinters at the surface. Drill through the tape and peel it off after finishing the hole.
Using brad-point bits reduces skidding since their center tip anchors securely before cutting the outer edges.
Check your drill’s alignment often — even a slight twist can change the exit point of the hole. Maintain pressure in a straight line through the angle.
When done, lightly sand the edges to remove micro-splinters and enhance the smooth finish.
Why does my bit wobble?
The chuck may be loose or the bit bent; tighten securely or replace damaged bits.
How do I stop tear-out?
Use a backing board, masking tape, and sharp bits to support fibers while drilling.
Can I drill fast in softwood?
Yes, but control speed around 1,200–1,500 RPM to avoid burning edges.
What causes uneven holes?
Incorrect angle or pressure shifts during drilling; stabilize your hands and guide.
Do I need to cool the bit?
For thick wood, pause between passes to prevent overheating.
Finishing and Smoothing the Angled Hole
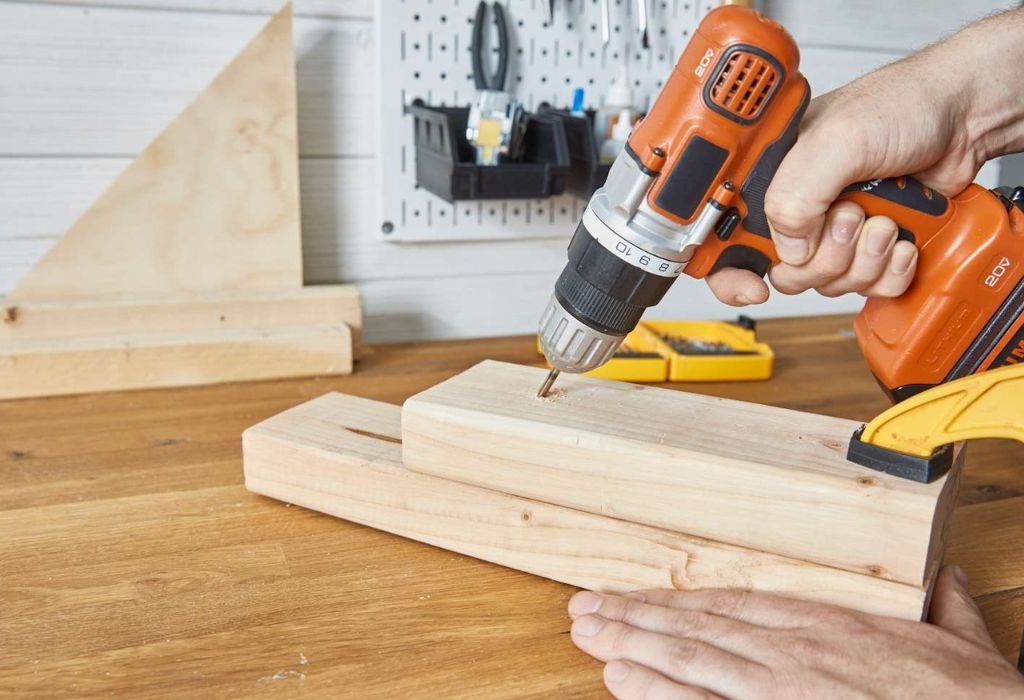
After drilling, clean the hole using compressed air or a small brush. Remove all wood dust for a clear view of the angle.
Smooth the interior walls with fine-grit sandpaper. Wrap the sandpaper around a tapered dowel that fits the hole angle for better control.
Apply wood filler if you notice chips or small splinters around the rim. Once dry, sand gently to blend the repair with surrounding wood.
For decorative projects, staining or sealing enhances appearance. Apply stain evenly inside the hole using a small brush or cotton swab.
A clear wood finish or polyurethane coat protects edges from moisture and wear. Allow it to dry completely before inserting screws or fittings.
For joinery applications, test-fit your hardware or dowel first to ensure proper alignment and depth before final assembly.
Finally, wipe the surface clean with a lint-free cloth to remove dust or residue from sanding and finishing.
Common Mistakes to Avoid
The most common error is drilling without support or angle control. Holding the drill by hand alone leads to uneven or wandering holes.
Drilling too fast can burn wood, while drilling too slow causes chatter marks. Maintain a balanced, medium speed suited to your bit size.
Skipping clamps often results in shifting or vibration. Always secure your wood and guide before drilling.
Not using a pilot mark is another mistake. Starting without one increases bit wandering and off-center holes.
Avoid forcing the bit. Applying too much pressure dulls edges and damages the drill. Let the tool’s rotation do most of the cutting work.
Forgetting a backing board leads to blowout when the bit exits. This ruins your clean finish at the hole’s bottom edge.
Lastly, neglecting angle verification can ruin symmetry. Double-check your jig or guide before each drilling session.
Why is my 45° hole off-center?
You may have misaligned the guide or marked the wrong entry point. Recheck your layout before drilling again.
How do I avoid overheating?
Drill slowly, take breaks, and clear wood chips regularly to improve airflow.
Can I use a hand drill instead of a drill press?
Yes, as long as you stabilize it using jigs or guides to hold the angle.
Why does my hole look rough?
A dull or cheap bit, or drilling too fast, often causes chipping and roughness.
Is sanding necessary afterward?
Yes, sanding ensures clean walls and prepares the hole for fitting or finishing.
Conclusion
Drilling a 45 degree hole in wood may look challenging, but it becomes simple with the right technique and patience. The key lies in preparation — marking accurately, stabilizing your work, and using a proper drill guide or jig.
Every detail matters: bit type, drilling speed, and steady pressure. Following these steps prevents tear-out, ensures perfect alignment, and delivers professional-quality angled holes.
Whether you’re building furniture, shelves, or wooden frames, mastering this skill will make your projects stronger and more precise. With a few practice runs, you’ll gain full control over your drill and create clean, perfect 45° holes every single time.

I’m John F. Nicholas, the founder, lead writer, and drill enthusiast behind 101drill.com. With years of hands-on experience in power tools and DIY projects, I created this platform to share practical knowledge, expert tips, and real-world insights to help others master the art of drilling.