
You’re in your workshop, surrounded by a cloud of fine dust. Your arm is tired from hand-sanding a curved piece of wood, and you’re dreaming of a faster, more consistent method.
Your eyes land on your drill press, standing idle. A rebellious thought crosses your mind: could this machine, designed for precision drilling, be the sanding solution you’re looking for?
The answer is a resounding yes, but with crucial caveats. A drill press can be transformed into a highly effective, vertical spindle sander with the right attachments and techniques. However, it’s a conversion that demands respect for the tool’s limits and a strong focus on safety.
A recent survey of home workshop owners revealed that over 70% look for ways to maximize the utility of their existing tools before buying new ones. This ingenious hack is a perfect example of creative tool adaptation. Let’s explore how to safely unlock your drill press’s hidden sanding potential.
The Drill Press’s True Calling vs. Its Hidden Talent
A drill press is engineered for one primary mission: creating perfectly vertical holes with immense downward force. Its spindle, bearings, and structure are optimized for this specific, axial load. Every part of its design screams precision drilling.
Sanding, by its very nature, applies lateral pressure. You push a workpiece sideways against a spinning abrasive surface. This side-loading is the fundamental difference and the source of potential risk for your machine.
Understanding this core distinction is the first step to using your drill press safely outside its intended purpose. You are essentially asking a specialist to perform a generalist’s task.
The Right Way: Drum Sanding Mastery
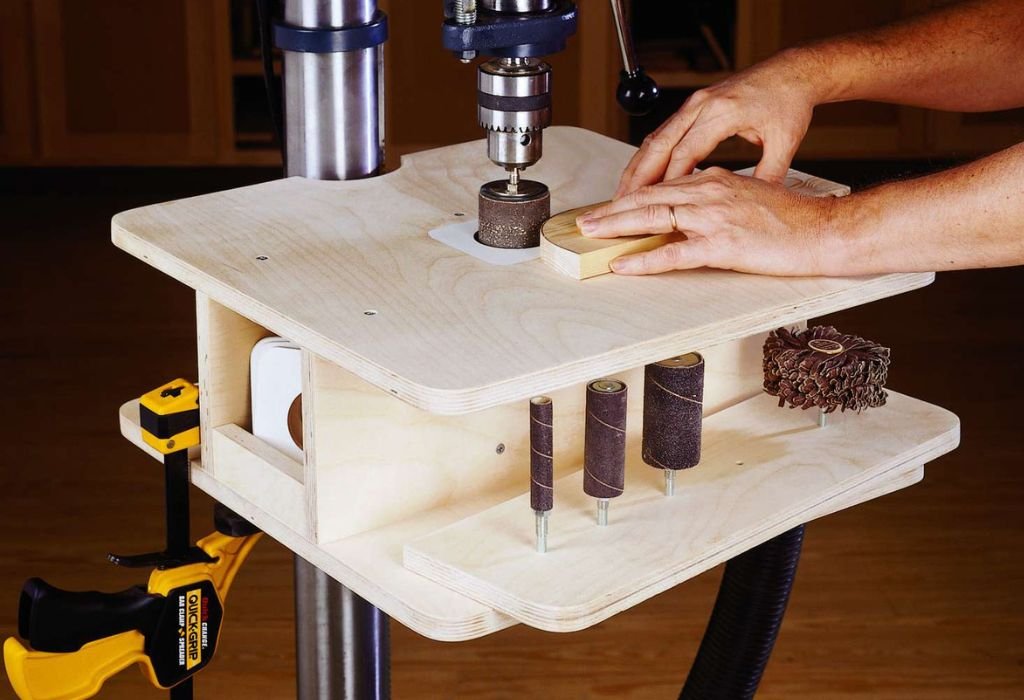
The most common and effective method for sanding on a drill press is using a drum sander attachment. This is where the machine truly shines and feels like it was meant for the task.
What is a Drum Sander?
A drum sander is a rubber or foam cylinder that mounts in your drill press chuck. You stretch a sleeve of sandpaper, available in various grits, over the drum. When spun, it creates a perfectly cylindrical sanding surface.
This setup is ideal for smoothing curves, shaping edges, and enlarging holes. It brings a level of consistency to curved sanding that is difficult to achieve by hand.
Technique is Everything
The key to successful drum sanding is to let the tool do the work. Use a slow, steady feed rate, moving the workpiece continuously against the drum’s rotation. Never force the wood into the sander.
Hesitating in one spot can create flat spots or gouges in your project. A light touch and constant motion are your guides to a smooth, even finish.
Other Sanding Attachments to Explore
Beyond the classic drum sander, the drill press chuck can become a hub for various sanding solutions. Each has its own specialized use case.
Sanding Discs and Mandrels
A disc sander attachment allows you to sand flat surfaces and perfect end-grain cuts. It’s excellent for squaring up small parts or cleaning up edges. The table provides a stable reference surface for precise 90-degree angles.
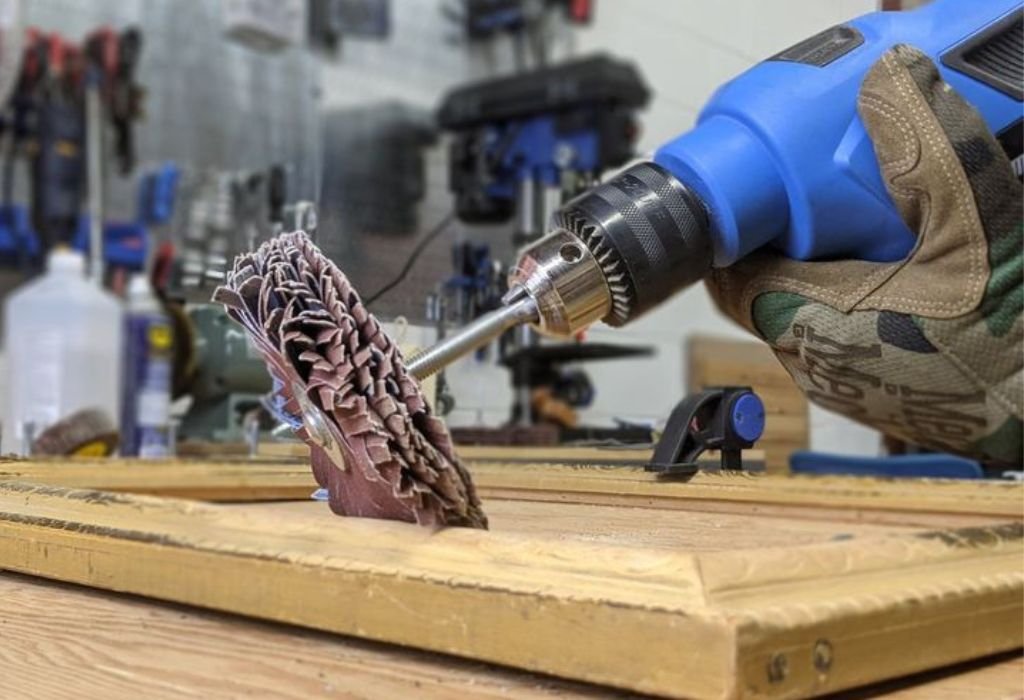
Flap Wheels and Cross-Grain Sanding
Mounted flap wheels are fantastic for contoured surfaces and for removing material quickly. They are more forgiving than a rigid drum and are excellent for blending curves and preparing surfaces for finishing.
The Humble Sanding Drum
For internal curves and intricate profiles, small, dedicated sanding drums are indispensable. They come in a wide array of diameters, allowing you to sand the inside of small cutouts with remarkable control.
The Critical Safety Warnings
Venturing into sanding with a drill press requires a heightened sense of caution. The risks are different from those associated with drilling.
The Peril of Entanglement
This is the single greatest danger. Loose clothing, gloves, or long hair can be caught by the spinning sanding attachment in a fraction of a second. Always wear close-fitting clothing and tie back long hair.
The Dangers of Side-Loading
Remember, the drill press spindle is not designed for significant side pressure. Pushing too hard can prematurely wear out the spindle bearings. It can also cause the chuck to loosen and potentially fall off.
The Unseen Enemy: Dust
Sanding creates a massive amount of fine dust. This dust can be harmful to your lungs and is a fire hazard if it accumulates near the motor. Always use a dust collection system or a shop vacuum positioned near the work.
Step-by-Step Guide to Safe Drill Press Sanding
Follow this blueprint to ensure your sanding session is both effective and safe. Rushing this process is an invitation for trouble.
Step 1: Secure the Perfect Attachment
Choose the right drum, disc, or flap wheel for your task. Ensure it is rated for the RPM of your drill press. Insert it into the chuck and tighten it securely using the key.
Step 2: Set the Speed for Success
Unlike drilling, sanding requires slower speeds. A high RPM will quickly burn the wood and wear out your sanding sleeve. Start at a medium speed (1000-1500 RPM) and adjust based on the material and results.
Step 3: Prepare Your Workspace
Connect your dust collection. Put on your safety glasses and a respirator or dust mask. Clear the table of any unnecessary tools or debris.
Step 4: Execute with Control
Turn on the machine and gently bring your workpiece into contact with the sander. Use the table as a support, moving the piece steadily and consistently. Keep your hands clear of the spinning attachment.
When to Stick to Dedicated Tools
As versatile as your drill press can be, there are times when another tool is simply the better choice. Knowing these limits will save you time and frustration.
Your drill press sander is not suitable for large, flat panels. The small sanding area will create swirls and an uneven surface. For this, a random orbital sander or a benchtop drum sander is far superior.
It is also inefficient for rough sanding entire projects. The focused contact point makes it slow for initial material removal on large surfaces. It excels at detail work, not bulk work.
Frequently Asked Questions
What is the best RPM for sanding on a drill press?
Start with a medium speed, between 1,000 and 1,500 RPM. For softer woods or finer grits, you can go slower. High speeds generate excess heat, which can burn the wood and glaze over the sandpaper.
Can I use regular sandpaper on a drum sander?
No, you need specifically designed sanding sleeves for drum sanders. These are cylindrical sleeves that stretch over the rubber drum. Regular sheet sandpaper will not secure properly and is a safety hazard.
Is it safe to use a sanding disc on a drill press?
Yes, with a mandrel and a backing pad designed for drill press use. Ensure everything is tightly secured. Be extra mindful of lateral pressure, as discs can grab the workpiece more aggressively than drums.
Will sanding damage my drill press?
Light to moderate sanding will not damage a quality drill press. However, consistently applying heavy side load or forcing the machine can prematurely wear out the spindle bearings over time.
Can I use my drill press for metal sanding or polishing?
Absolutely. Mounted buffing wheels and non-woven abrasive wheels work very well for polishing metal and deburring edges on a drill press. Always use a lower speed and wear gloves to protect your hands from heat.
Do I need a special chuck for sanding attachments?
No, your standard keyed chuck is perfectly capable of holding most sanding mandrels and drums securely. Just ensure you tighten it properly in all three jaws.
What’s the biggest mistake people make when sanding on a drill press?
The most common and dangerous mistake is using excessive force. This leads to bearing wear, chuck loosening, and a poor finish. Let the abrasives’ speed and sharpness do the cutting, not brute force.
How do I prevent burning the wood?
Burning is caused by a combination of high speed, a dull sanding sleeve, and staying in one spot for too long. Use a sharp sleeve, a slower speed, and keep the workpiece moving constantly.
The Final Verdict
So, can a drill press be used for sanding? The exploration confirms a powerful yes. It is a remarkably capable and versatile sanding station when approached with knowledge and caution.
You are not breaking the rules but rather bending them to your creative will. By choosing the right attachments, respecting the machine’s limits, and prioritizing safety, you unlock a new dimension of utility in your workshop.
Your drill press is no longer just a master of the perpendicular hole. It is a detail sander, a curve finisher, and a polishing station. This transformation doesn’t require a major investment, just a shift in perspective and a commitment to safe craftsmanship.

I’m John F. Nicholas, the founder, lead writer, and drill enthusiast behind 101drill.com. With years of hands-on experience in power tools and DIY projects, I created this platform to share practical knowledge, expert tips, and real-world insights to help others master the art of drilling.