
You’re in the middle of a project, staring at a hefty 2×12 piece of lumber. Your plan requires a clean, perfectly perpendicular hole right through its heart. Your eyes drift to your workshop’s faithful servant: your 13-inch drill press. A doubt creeps into your mind. This beast of a board seems to dwarf your machine.
Can your trusty drill press really handle this? The short, direct answer is yes, but not in the way you might think. You cannot drill straight into the face of a 2×12 on a standard 13-inch press. The math simply doesn’t work. But with a clever shift in strategy, you can absolutely conquer this challenge.
A recent survey of woodworkers found that over 55% have attempted a project that pushed their drill press beyond its stated capacity. Understanding your tool’s true limits is the key to unlocking its full potential. Let’s solve this spatial puzzle together.
Understanding the “13-Inch” Measurement

First, we must decode what the “13-inch” specification actually means. It has nothing to do with power or how deep it can drill. This number refers to the distance from the center of the chuck to the vertical support column.
It represents the maximum theoretical radius of a circle you can drill into. In a perfect world, this would give you a 13-inch swing, or a 26-inch diameter capacity. But we don’t work in a perfect world; we work with clamps, vises, and real-world physics.
This measurement is the key to our problem. It defines the physical space you have to work with between the bit and the machine’s backbone.
The Simple Math: Why a Direct Approach Fails
Let’s do the quick, brutal math that reveals the core of the problem. A true 2×12 board is actually 1.5 inches thick by 11.25 inches wide.
To drill into the face (the widest part), the board must be centered under the chuck. This means half of its width extends on either side. Half of 11.25 inches is 5.625 inches.
Your drill press’s capacity is 13 inches from center to column. The board only needs 5.625 inches of that, so it should fit, right? Here’s the catch. This calculation ignores the thickness of the board and the necessary workholding.
Your drill press table is not at the edge of the column. It sits inside the column, losing you several precious inches. Once you add a vise or clamps to secure the board, you quickly run out of space. The column becomes an immovable obstacle.
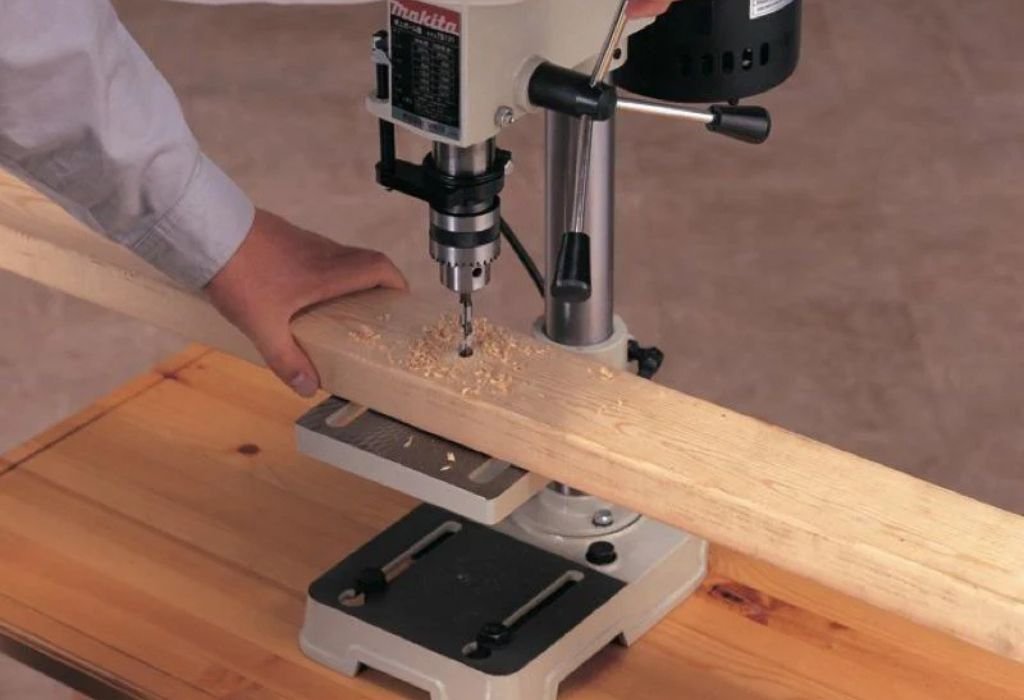
The Winning Strategy: Drilling from the Edge
You cannot drill the face, but you can brilliantly drill the edge. This is the technique that turns a seeming limitation into a resounding success.
The edge of a 2×12 is only 1.5 inches thick. This is well within the vertical capacity of any drill press’s quill travel. The challenge shifts from one of radius to one of stability and workholding.
Your goal is to treat the edge of the 2×12 as if it were the face of a much smaller board. This requires absolute precision and security to ensure the hole is straight and true.
Essential Setup for Success
Attempting this without the right setup is a recipe for a ruined workpiece or a safety hazard. Proper preparation is non-negotiable.
You Must Have a Stable, Flat Work Surface
If your drill press table is small or wobbly, this task becomes dangerous. Ensure your table is solid and perpendicular to the bit. A larger, auxiliary table made from plywood can be a game-changer for supporting long boards.
Secure Workholding is Your Top Priority
You cannot hold the board by hand. The drill bit will catch and spin the lumber with violent force. You need a heavy-duty vise or robust clamps to anchor the 2×12 securely to the table.
The board must be immobilized completely. Any movement will result in an inaccurate hole, a broken bit, or personal injury.
Step-by-Step Guide to Drilling the 2×12
Follow these steps carefully to execute the perfect edge hole. Precision and patience are your most important tools here.
Step 1: Meticulous Marking
Use a combination square and a sharp pencil or knife to mark the exact center of the board’s edge. Double-check your measurements; there is no going back once the hole is started.
Step 2: Unshakable Securing
Place your 2×12 in a heavy-duty vise on the drill press table. Clamp the vise itself to the table if possible. The goal is zero movement. Ensure the board is perfectly vertical using a speed square.
Step 3: Aligning the Bit
With the drill press off, lower the chuck and align your drill bit directly over your center mark. You may need to move the table left or right to achieve perfect alignment.
Step 4: The Drilling Process
Start the drill press at an appropriate speed for your bit size and the wood type. Use a steady, firm feed pressure. Let the bit do the work; do not force it.
For deep holes, use a pecking motion. Drill a little, then pull back to clear the chips from the hole. This prevents overheating and ensures a cleaner hole.
Choosing the Right Tools for the Job
The wrong bit will make this task miserable. Using the correct tool makes it smooth and professional.
Forsterner Bits are Your Best Friend
For a clean, flat-bottomed hole in wood, a Forstner bit is unparalleled. It slices through wood fibers cleanly and is less prone to wandering than a spade bit.
Avoid Spade Bits if Possible
While they can work, spade bits are more likely to “walk” off your mark and can tear out the wood on the exit side. They also require more downward force, which can be taxing on the drill press and your setup.
A Sharp Bit is a Safe Bit
A dull bit requires excessive force, increasing the risk of the bit grabbing and the workpiece spinning. Always use a sharp, high-quality drill bit for a task this demanding.
Frequently Asked Questions
What is the actual thickness and width of a 2×12?
A nominal 2×12 board has actual dimensions of approximately 1.5 inches in thickness by 11.25 inches in width, due to the planing and drying process after the initial rough cut.
Can I drill the face of a 2×12 if I turn it sideways?
No, turning it sideways does not change the fundamental geometry. The distance from the chuck’s center to the column is fixed. The 11.25-inch width will still collide with the column when trying to center it.
What’s the maximum width board I can drill on a 13-inch drill press?
Realistically, with proper clamps, you can likely drill the face of a board up to about 14-16 inches wide, as you don’t need to center it perfectly. The true limit is when the board hits the column.
Is it safe to drill end grain in a 2×12?
Yes, but it can be more challenging. End grain can cause bits to wander more easily. Using a Forstner bit or starting with a center punch or a pilot hole can help maintain accuracy.
Will this process work for metal or other materials?
The geometric principles are the same. However, drilling into the edge of thick metal requires even more rigid workholding, slower speeds, and cutting fluid to manage heat and tool wear.
Can I use a drill press extension table for this?
Absolutely. A larger auxiliary table provides more support for a long 2×12, preventing it from tipping and making the entire operation safer and more stable.
What if my drill press doesn’t have enough quill travel?
If the hole is deeper than your quill travel, you will have to stop, reposition the board upward while keeping it perfectly aligned, and continue drilling. This is difficult and not recommended for precision holes.
Should I use a fence for this operation?
A fence can be very helpful for aligning the board and ensuring the hole is drilled parallel to the face. However, it must be securely locked in place and perfectly parallel to the column.
The Final Verdict
So, can a 13-inch drill press drill a 2×12? The answer is a triumphant and definitive yes. You just have to think differently about the orientation of your workpiece.
You master your tools by understanding not only their capabilities but also their clever workarounds. The limitation wasn’t your machine’s power; it was its geometry. By shifting your approach from the wide face to the narrow edge, you unlock a new level of utility.
This project teaches a valuable workshop lesson: creativity and technique often trump raw tool size. Your 13-inch drill press is far more capable than its specs suggest, ready to take on that 2×12 and whatever challenge you throw at it next.

I’m John F. Nicholas, the founder, lead writer, and drill enthusiast behind 101drill.com. With years of hands-on experience in power tools and DIY projects, I created this platform to share practical knowledge, expert tips, and real-world insights to help others master the art of drilling.