
Precision is everything when it comes to drilling angled holes. Whether you’re building furniture, working with metal brackets, or joining complex frames, even a single degree of error can ruin the final result.
That’s why learning how to drill angled holes with a drill press the smart way is such an important skill for both beginners and experienced craftsmen.
A drill press eliminates many of the inconsistencies found in handheld drilling. It allows you to maintain the same trajectory for each hole, ensuring identical angles and perfectly repeatable results. Unlike a hand drill, which depends on your stability, a press provides mechanical accuracy and consistency throughout every pass.
According to FineWoodworking, poorly aligned holes are one of the top reasons for weak wood joints and inaccurate assembly. By mastering this simple but effective setup, you can ensure every connection in your project lines up flawlessly.
Understanding the Importance of Angled Drilling
Angled drilling is essential whenever two components need to join in anything other than a 90-degree connection. From chair legs and picture frames to pipe brackets and custom mounts, it’s the technique that turns basic craftsmanship into precision engineering.
A perfectly aligned angled hole ensures strength, stability, and aesthetic appeal. Misalignment, even by a small margin, can cause tension and stress, leading to cracks or failure under pressure.
Using a drill press is the best way to maintain this accuracy. The stationary column, adjustable table, and controlled feed mechanism all help to maintain the intended angle during drilling. Unlike freehand drilling, where your grip can shift slightly, a press holds everything steady.
By understanding why angled holes matter, you’ll also understand why shortcuts rarely pay off. Good preparation, sharp bits, and stable setups all work together to deliver professional-grade results in both wood and metal projects.
Tools and Materials You’ll Need
Having the right setup is half the battle. Gather everything before you start so you can focus entirely on precision rather than searching for missing items.
You’ll need a drill press, drill bits (brad-point for wood, HSS or cobalt for metal), angle finder, tilting table or jig, clamps, measuring tape, and safety gear. Keep scrap pieces of wood handy for testing your setup.
Optional accessories like digital inclinometers, depth stops, or laser alignment guides can make a noticeable difference in accuracy.
Good lighting and a clean workspace are equally important. Dust or debris under your workpiece can throw off measurements, even if everything else is perfect. Organize your tools, clear your surface, and ensure the table is stable before you begin.
Preparing Your Drill Press for Angled Drilling
Proper preparation ensures safety and accuracy. Begin by cleaning the drill press table and removing any chips, dust, or oil. Debris trapped under your material can tilt it slightly and create uneven holes.
Next, check the alignment between the drill bit and table. Lower the bit until it almost touches the table surface, then rotate it by hand — the tip should stay centered in one spot. If it doesn’t, you may need to adjust the table or spindle alignment.
Tighten the column lock and inspect the chuck for wobble. A loose chuck can cause the bit to vibrate, widening the hole or changing the entry angle. Finally, set the proper speed — around 700 RPM for metal, 1500–2000 RPM for wood — depending on material hardness.
A well-prepared drill press guarantees smoother operation, longer bit life, and consistent, clean holes.
Choosing the Right Drill Bit for Angled Holes
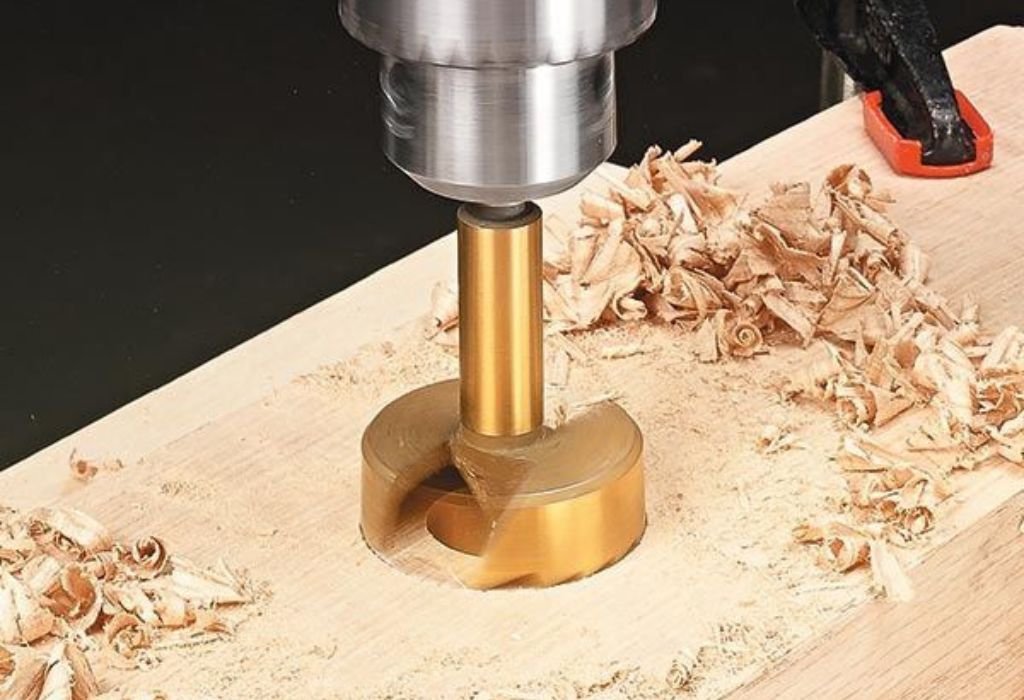
The right bit makes all the difference between a clean, sharp hole and a rough, inaccurate one. For wood, brad-point bits provide the most precise results because their sharp tip centers itself before cutting.
If you need wider, flat-bottomed holes — like for dowels or hardware inserts — Forstner bits work best. They cut clean edges and stay stable even when entering at an angle.
For metal, HSS (high-speed steel) bits are standard, while cobalt bits handle tougher alloys and higher temperatures. Keep all bits sharp and clean; dull ones create excessive friction and wander easily.
Always secure bits properly in the chuck, ensuring they spin without wobble. Even a slight run-out can affect the entry point and ruin accuracy.
Setting the Correct Angle on the Drill Press Table
Most drill presses feature a tilting table designed for angled operations. Loosen the side bolts and tilt the table to your target angle using the engraved scale. However, these factory scales can be off by one or two degrees. For greater accuracy, verify your angle with a digital angle gauge or bevel protractor.
Once the correct angle is set, tighten all locking bolts and recheck alignment by lowering the bit to the table. The bit should touch exactly where intended.
Perform a test hole on scrap material before drilling your actual workpiece. This extra minute of testing saves hours of frustration and wasted materials later on.
How can I double-check my angle before drilling?
Use a digital inclinometer or a protractor to confirm the tilt matches your desired measurement exactly.
Can I drill multiple angles without resetting the table?
Not easily — it’s better to reset for each angle to maintain precision.
What’s a safe range of tilt for most drill presses?
Most models safely tilt up to 45°, though some heavy-duty presses go to 60°.
Does vibration affect the angle?
Yes. Ensure bolts are tight; vibration during drilling can shift the table slightly.
Should I recalibrate my drill press occasionally?
Absolutely. Recalibrate every few months or after heavy use to ensure perfect alignment.
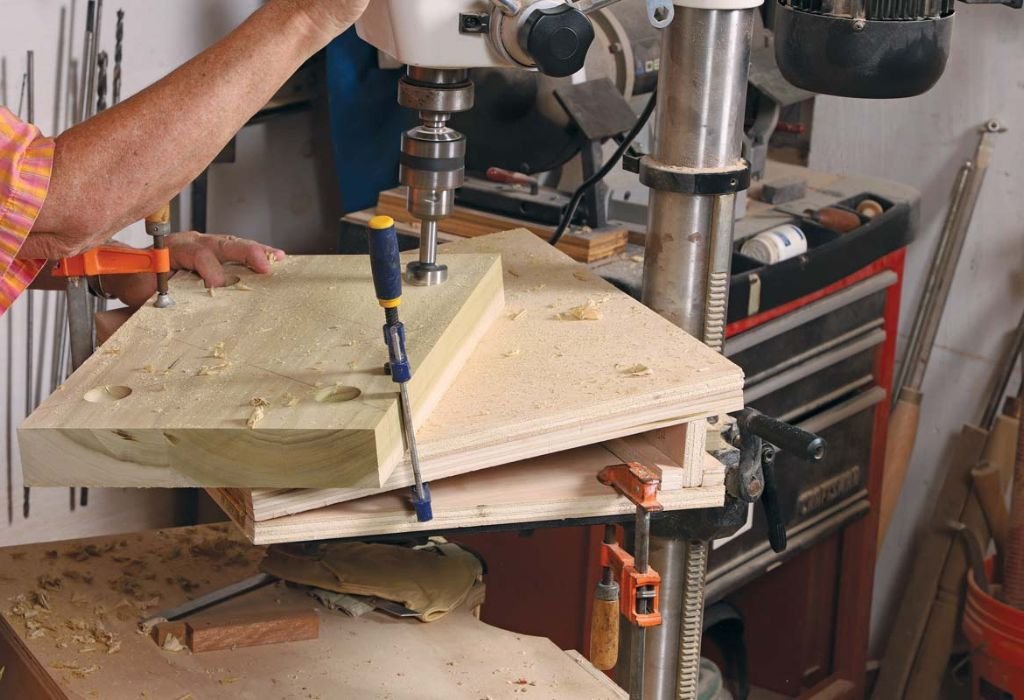
Using a Jig for Better Control
A jig is one of the smartest ways to maintain control and repeatability when drilling at angles. It’s especially useful if your drill press doesn’t have a tilting table or you want to avoid constant adjustments.
You can make a jig from scrap hardwood or MDF. Cut it to your desired angle (for example, 30° or 45°) using a miter saw, and attach it to a flat baseboard. Clamp the jig firmly to your drill press table to keep it from shifting.
Position your workpiece on the angled face, secure it with clamps, and drill slowly. The jig keeps your workpiece steady and maintains a consistent angle through every pass.
Can I make a universal jig for multiple angles?
Adjustable jigs exist, but fixed-angle jigs remain more reliable for precise work.
What’s the best material for a jig?
Hardwood or MDF works best — stable, smooth, and easy to machine.
How do I stop the jig from moving?
Use two C-clamps or screws to hold the jig base tight against the drill press table.
Should I use a fence or stop block?
Yes. It ensures identical spacing for repeated angled holes.
Can I buy ready-made jigs?
Yes, many woodworking stores sell pre-built adjustable jigs for drill presses.
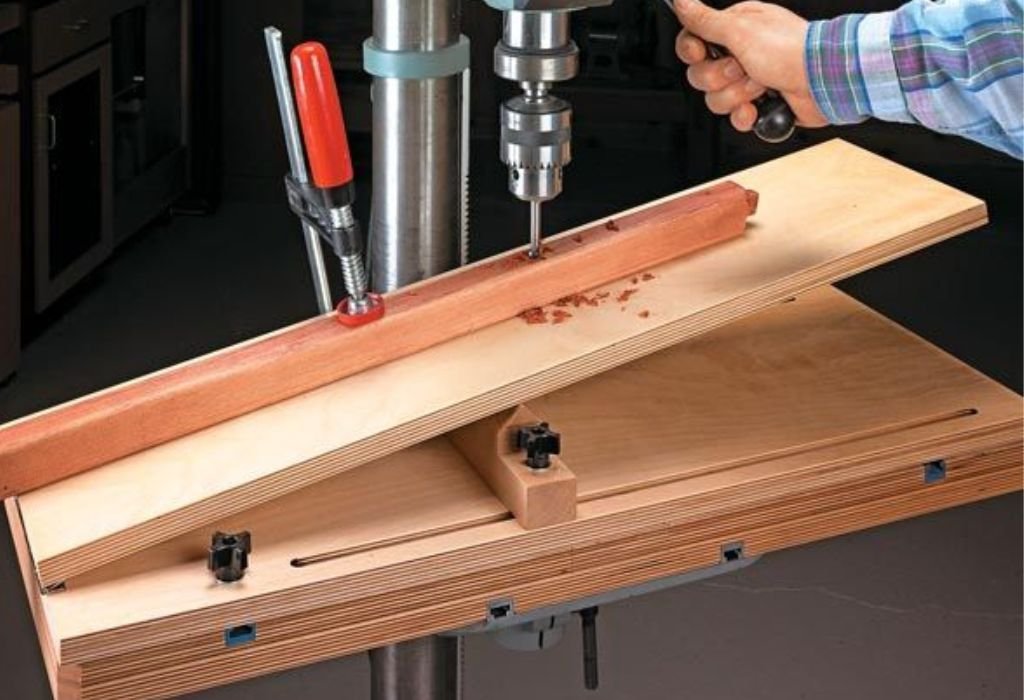
How to Secure Your Workpiece Properly
The most common reason for inaccurate drilling is a moving workpiece. Angled drilling generates sideways pressure that can cause sliding or twisting if the material isn’t firmly secured.
Use C-clamps, toggle clamps, or a drill press vise to hold the piece in place. For long boards, support the overhanging ends with scrap wood or adjustable stands.
Place a sacrificial backing board beneath your workpiece to prevent tear-out and protect the table surface. When drilling metal, apply cutting oil to reduce friction and keep the bit cool.
Always test your clamp setup before drilling. Push gently on the material to ensure it doesn’t shift under pressure.
Step-by-Step: Drilling Angled Holes Accurately
Here’s the smart and systematic way to get perfect angled holes every time:
- Mark the drilling point with a center punch or awl.
- Set the angle using the drill press table or jig.
- Clamp the workpiece securely.
- Install the correct drill bit.
- Start at a low speed to create a pilot dimple.
- Gradually increase pressure and RPM for smooth cutting.
Let the bit do the work — don’t force it down. For deeper holes, retract the bit periodically to clear chips and prevent overheating.
Should I use a pilot hole every time?
Yes, especially on hardwood or metal. It helps the bit stay aligned.
What if the bit starts to wander?
Stop immediately, re-center the punch mark, and restart slowly.
Can I drill halfway from each side?
Yes. It prevents tear-out and ensures cleaner exit holes on thick material.
Is lubrication necessary for wood?
No, but for metal it’s essential to prevent heat damage.
What causes uneven holes?
Usually poor clamping, incorrect bit type, or table misalignment.
Preventing Common Mistakes
Even small errors can ruin precision. One of the most frequent mistakes is drilling too fast. High speeds can overheat bits, burn wood, and cause metal burrs.
Another issue is using dull bits. Dull tools require more force and create irregular entry points. Sharpen or replace bits regularly to maintain quality.
Always check your clamps before every hole. If the workpiece moves, the entire angle changes. Also, remember to periodically re-check your table angle — vibration may loosen bolts slightly during extended use.
According to Popular Mechanics, consistent re-calibration is the secret behind professional accuracy in machine drilling.
Drilling Through Thick Materials
Drilling thick stock demands patience and technique. Always begin with a smaller pilot bit — roughly one-third of the final size — to establish a centered guide path.
Drill slowly and withdraw the bit every few seconds to clear chips. This prevents clogging and overheating, especially in metal. For wood, use a backing board to avoid splintering at the exit.
If your project involves metal thicker than ½ inch, use cutting oil like Tap Magic to reduce friction and extend bit life.
Why does my drill press slow down mid-cut?
It’s likely the feed pressure is too high. Ease up and clear chips more often.
Can I drill all the way through in one go?
Not advisable. Back out occasionally to release heat and maintain a clean cut.
What’s the best speed for thick metal?
Around 500–800 RPM, depending on hardness.
Should I cool the bit with water?
No — use cutting oil. Water can cause rust and thermal shock.
How do I prevent tear-out in thick wood?
Always use a backing board or drill halfway from both sides.
Maintaining Your Drill Press for Longevity
Maintenance is what separates reliable machines from unpredictable ones. After every use, clean sawdust, metal chips, and oil from the table, base, and column.
Lubricate the quill and feed mechanism monthly to ensure smooth motion. Inspect belts for cracks and maintain proper tension for stable speed.
Every few months, recalibrate the table angle using a machinist’s square or digital gauge. Tighten all bolts and check that the chuck holds bits evenly.
Good maintenance not only extends lifespan but also keeps every drilling project as accurate as the first.
Conclusion
Drilling angled holes with a drill press is a skill that transforms basic craftsmanship into true precision. Once you understand how to prepare your tools, set your angles, and secure your materials, you’ll achieve flawless results every time.
The process may seem technical, but it’s simply about consistency — consistent setup, consistent pressure, and consistent attention to detail. With a bit of practice, your holes will line up perfectly and your projects will look cleaner and more professional.
Always take time to double-check your settings, use sharp bits, and let the drill do the work. Whether you’re a woodworker crafting furniture or a metal fabricator designing custom frames, accuracy is your greatest advantage.
By applying the smart methods explained here — jigs for stability, correct speeds, and safety measures — you can confidently handle any angled drilling challenge. That’s how professionals work, and that’s how you’ll master this craft too.

I’m John F. Nicholas, the founder, lead writer, and drill enthusiast behind 101drill.com. With years of hands-on experience in power tools and DIY projects, I created this platform to share practical knowledge, expert tips, and real-world insights to help others master the art of drilling.