
Drilling through metal can feel challenging if you have never attempted it before. Many beginners worry about damaging the drill bit, overheating the metal, or making uneven holes. Without the right tools and technique, drilling metal becomes difficult and unsafe.
Imagine needing to drill a hole in a piece of steel for a project, but your standard drill bit barely scratches the surface. You try pushing harder, but the bit becomes hot and dull. This common situation happens because metal requires specific tools and preparation.
Drilling through metal is easier than most people think when using the correct equipment. The right drill bits, lubrication, and proper speed control make the process smooth. Even tough metals like stainless steel or iron can be drilled cleanly.
This guide explains everything you need to drill through metal successfully. From choosing drill bits to preparing the surface and controlling the drill speed, every detail is covered clearly. These steps help you avoid common mistakes and get perfect results.
By the end of this complete guide, you will know exactly which tools to buy, how to use them, and how to drill clean holes without damaging the metal.
Whether you are working on DIY upgrades, metal fabrication, automotive repairs, or home improvement, this guide gives you complete confidence. Drilling metal becomes straightforward once you understand the essentials.
Why Drilling Through Metal Requires Specific Tools
Metal is much harder than wood or plastic, which makes drilling more demanding. Standard wood drill bits cannot cut metal effectively because they lack strength. Using the wrong bit leads to dull edges and damaged tools.
Metal creates more friction during drilling. This friction generates heat quickly, which affects both the drill bit and the metal surface. Overheating weakens the bit and reduces accuracy.
Metal surfaces are often smooth and slippery. This makes it hard for a drill bit to stay in place at the beginning. Without proper technique, the bit skids and damages the surface.
Drilling through thicker metal requires more pressure and better control. A weak drill or low quality bit cannot handle the force needed. This may cause drill stalling or bit breakage.
Different metals have different hardness levels. Aluminum is easier to drill, while stainless steel needs stronger bits. Knowing the metal type helps choose the right tools.
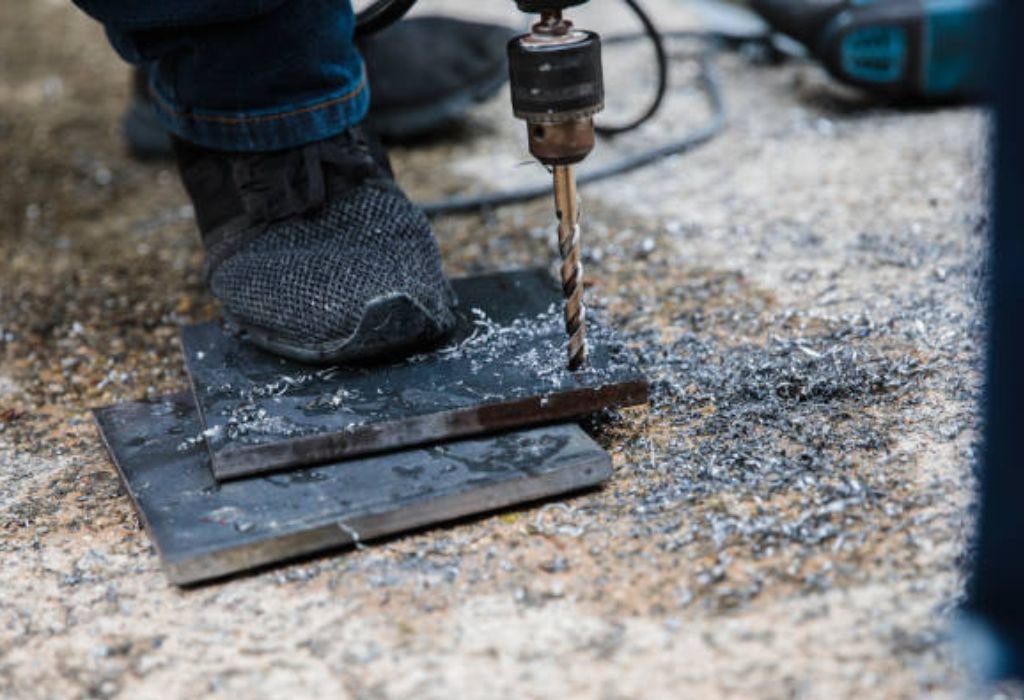
Metal drilling also creates sharp shavings. These shavings can injure your hands or eyes if proper protection is not used. Safety equipment is essential.
Understanding why metal drilling is unique helps you prepare better. Choosing the right tools and technique prevents frustration. Proper knowledge leads to clean and accurate holes.
Essential Tools You Need to Drill Through Metal
A high quality drill is the most important tool for drilling metal. Both corded and cordless drills work, but higher torque is preferred for tougher metals. Choose a drill with speed control for better results.
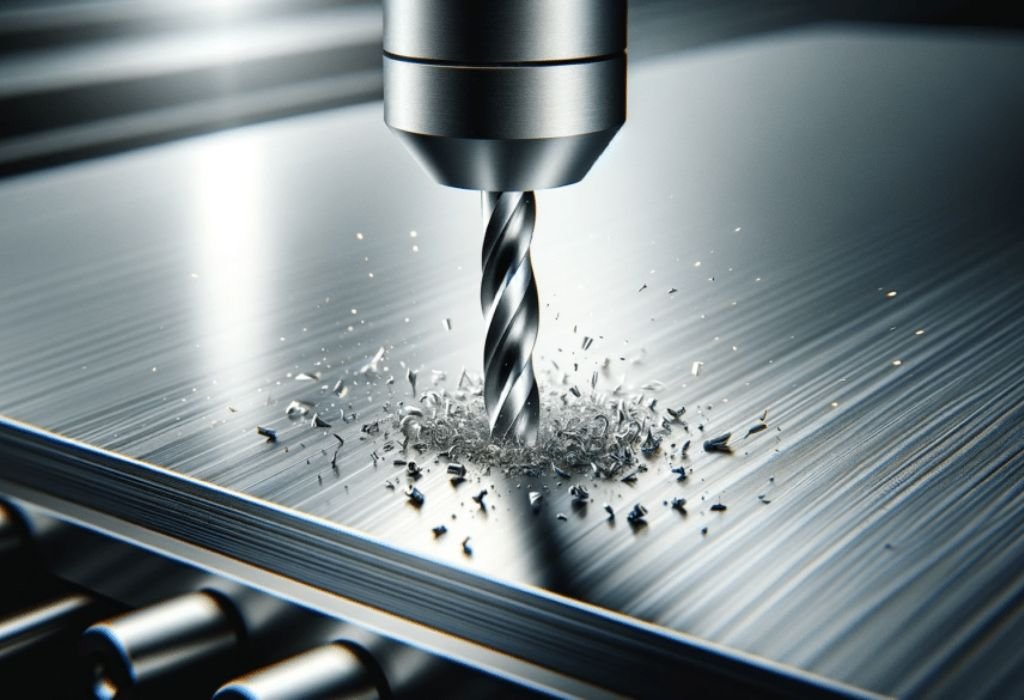
Metal drill bits are the second essential item. Bits made of high speed steel, cobalt, or carbide perform best. These bits stay sharp longer and withstand heat.
Cutting oil is necessary for lubrication. Lubrication reduces friction, keeps the bit cool, and extends tool life. Without oil, bits overheat and dull quickly.
A center punch helps mark the spot where you want to drill. This prevents the bit from wandering across the metal surface. A small indentation guides the bit correctly.
Clamps are useful for stabilizing the metal during drilling. Metal pieces can move or spin if not secured. Proper clamping increases safety and accuracy.
Safety equipment such as gloves and safety glasses protect you from metal shavings. Drilling metal releases sharp pieces that can cause injuries. Protection should never be ignored.
A sturdy workbench or drill stand helps maintain control. Drilling metal requires steady hands. Proper support prevents mistakes and slips.
Types of Drill Bits Needed for Metal Drilling
High speed steel bits are the most common choice for drilling thin metals. They are durable and affordable. HSS bits work well for aluminum, brass, and mild steel.
Cobalt drill bits are stronger and better for drilling stainless steel. The cobalt alloy resists heat buildup. These bits stay sharp under heavy drilling conditions.
Carbide drill bits are the toughest but also the most expensive. They cut through hard metals with ease. These bits are ideal for thick steel and cast iron.
Titanium coated bits improve cutting performance. The coating reduces friction and increases speed. These bits work well for general metal drilling.
Step bits are good for drilling larger holes in thin metal sheets. They create clean holes without tearing. Step bits are ideal for sheet metal projects.
Left hand drill bits are useful for removing broken bolts. They spin in reverse and sometimes pull the broken piece out. These bits are handy in automotive work.
Choosing the right bit depends on the metal thickness and type. Matching the bit to the job ensures good results. Proper bit selection prevents breakage and overheating.
Can I use regular drill bits on metal?
Only if they are high speed steel or better.
Do cobalt bits last longer?
Yes, they resist heat and stay sharp.
Are step bits good for thick metal?
No, they work best on thin metal sheets.
Can metal damage cheap bits?
Yes, soft bits become dull quickly.
Is carbide too strong for beginners?
No, but carbide bits require careful handling.
Preparing the Metal Surface Before Drilling
Begin by marking the drilling location using a permanent marker. Clear markings help guide the process. Accurate marking ensures precise holes.
Use a center punch to create a small dent in the metal. This dent prevents the drill bit from slipping. A light hammer strike is enough to create the indentation.
Clean the metal surface to remove oil, rust, or dirt. Contaminated surfaces cause bit slippage. Clean surfaces improve drilling performance.
Clamp the metal securely to a stable surface. Unsecured metal can spin dangerously during drilling. Clamps ensure both safety and accuracy.
Apply a small amount of cutting oil to the marked spot. Lubrication reduces heat and friction. This makes drilling smoother and extends bit life.
Check the bit size to ensure it matches your project requirements. Using the correct bit diameter results in clean holes. Wrong sizes lead to loose or tight fits.
Ensure the drill is set to the correct speed. Metal requires slower speeds compared to wood. High speeds cause overheating and dull bits.
Choosing the Right Speed and Pressure When Drilling Metal
Drilling speed must be adjusted based on metal thickness. Thicker metals require slower speeds. Thin metals can be drilled slightly faster.
Too much speed creates friction. This friction overheats both the bit and the metal. Overheating reduces cutting performance.
Apply steady pressure while drilling. Too much pressure can break the bit. Too little pressure slows progress.
Let the bit do the cutting instead of forcing it. Controlled speed and pressure result in clean holes. Pushing too hard makes the drill wobble.
Cutting oil helps maintain cool temperatures. Reapply oil if drilling larger holes. Cooling improves efficiency.
Lift the bit occasionally to remove shavings. This clears the hole and reduces heat. Clean holes drill faster and smoother.
Always monitor sound and vibration. A smooth cutting sound indicates proper speed. Screeching noise means the bit is overheating.
What speed should I drill metal at?
Slow to medium speed works best.
Can I drill metal without lubrication?
It is possible but not recommended.
Does pressure affect hole quality?
Yes, balanced pressure creates clean results.
Why does my bit stop cutting?
It may be overheating or dull.
Do drill presses work better on metal?
Yes, they offer more control.
Step by Step Method for Drilling Through Metal
Drill a pilot hole using a small bit first. Pilot holes reduce strain on larger bits. This step improves accuracy.
Next, switch to the final bit size. Move slowly to avoid wobbling. Follow the pilot hole carefully.
Use cutting oil throughout the drilling process. Lubrication keeps temperatures low. It also helps the bit cut more smoothly.
Maintain steady pressure as you drill. Avoid sudden pushes or jerks. Smooth motion produces cleaner holes.
Pause occasionally to remove metal shavings. This prevents clogging. Clean holes ensure better drilling.
Once the bit breaks through the metal, reduce pressure. Allow the bit to exit cleanly. This prevents sharp edges and burrs.
Clean the hole and inspect it. If rough edges remain, sand lightly. A clean hole increases strength and fit.
How to Prevent Overheating and Bit Damage
Overheating is the most common problem in metal drilling. Excess heat weakens the bit. Proper cooling prevents damage.
Use cutting oil regularly. The oil reduces friction and temperature. It also extends bit lifespan.
Avoid high drilling speeds. High speed generates excessive heat. Slow speed is safer.
Pause during drilling to cool the bit. Letting the bit rest protects its sharpness. Short breaks improve performance.
Use sharp bits only. Dull bits overheat quickly. Replace dull bits immediately.
Monitor the color of the metal shavings. Dark or burnt shavings indicate overheating. Light shavings show proper cutting.
Ensure the drill is strong enough for the job. Weak drills struggle and cause friction. Strong drills reduce heat buildup.
Why do my bits turn blue?
They overheated and lost hardness.
Can I cool the bit with water?
Oil works better for metal drilling.
Do dull bits cause overheating?
Yes, dull bits generate excess friction.
Is overheating dangerous?
Yes, it weakens bits and damages metal.
How often should I add oil?
Every few seconds during heavy drilling.
Safety Tips for Drilling Through Metal
Wear safety glasses before drilling. Metal shavings can shoot in unpredictable directions. Proper eye protection prevents injuries.
Use gloves to protect your hands from sharp edges. Metal edges are dangerous. Gloves improve grip and safety.
Secure the metal firmly using clamps. Loose metal can spin and cause injury. Clamped metal drills more accurately.
Keep hair and clothing away from the drill. Rotating tools can catch loose fabric. Stay alert while working.
Do not apply excessive pressure. Too much force breaks the bit. Balanced force provides better control.
Use the appropriate bit for each metal type. Wrong bits slip or break. Proper bits ensure clean drilling.
Always unplug the drill when changing bits. This prevents accidental activation. Safety comes first.
Finishing the Drilled Metal Surface
Once drilling is complete, inspect the hole for burrs. Burrs are sharp edges around the hole. They must be removed for safety.
Use a deburring tool or sandpaper to smooth the hole. This creates clean edges. Smooth edges prevent injury.
Wipe the metal surface to remove oil and shavings. A clean surface helps evaluate the result. Residue can hide imperfections.
If the hole is part of a larger project, test the fit. Proper fit ensures strength and precision. Loose holes may need adjustments.
Apply rust protection to exposed metal edges. Drilling exposes raw metal that can rust. Protective coating increases lifespan.
Polish the metal if needed. Polishing removes scratches. This improves appearance.
Clean the workspace after finishing. Metal shavings can be sharp. A clean area is safer for future tasks.
Should I deburr every hole?
Yes, it ensures safety and smoothness.
Can I use a file for finishing?
Yes, files work well for rough edges.
Do large holes need special tools?
Step bits help enlarge thin metal holes.
Is rust protection important?
Yes, exposed edges rust quickly.
Can I polish the hole edges?
Yes, polishing creates a clean look.
CONCLUSION
Drilling through metal becomes simple when you use the right tools and techniques. With proper drill bits, lubrication, and controlled speed, even tough metals can be drilled cleanly. Preparation and safety make the process efficient and predictable.
Understanding metal hardness helps select the correct bit. Using lubrication and steady pressure prevents overheating and bit damage. With practice, drilling becomes easier and faster.
Whether you are working on home projects, car repairs, or DIY metal fabrication, these steps ensure professional results. Clean drilling improves strength, accuracy, and finish. Following this guide gives you confidence to drill through metal safely and successfully.

I’m John F. Nicholas, the founder, lead writer, and drill enthusiast behind 101drill.com. With years of hands-on experience in power tools and DIY projects, I created this platform to share practical knowledge, expert tips, and real-world insights to help others master the art of drilling.